ERC-721
Overview
This guide provides a step by step walk through on how to create and deploy an ERC-721 compatible token on Kaia. Because of Kaia’s Ethereum Compatibility, creating a fungible token on Kaia follows similar steps to how you would on Ethereum and it uses the ERC721 standard.
To follow the standard, you will deploy a contract that implements the following ERC721 and ERC165 interfaces respectively:
interface ERC721 /* is ERC165 */ { event Transfer(address indexed _from, address indexed _to, uint256 indexed _tokenId);= event Approval(address indexed _owner, address indexed _approved, uint256 indexed _tokenId); event ApprovalForAll(address indexed _owner, address indexed _operator, bool _approved); function balanceOf(address _owner) external view returns (uint256); function ownerOf(uint256 _tokenId) external view returns (address); function safeTransferFrom(address _from, address _to, uint256 _tokenId, bytes data) external payable; function safeTransferFrom(address _from, address _to, uint256 _tokenId) external payable; function transferFrom(address _from, address _to, uint256 _tokenId) external payable; function approve(address _approved, uint256 _tokenId) external payable; function setApprovalForAll(address _operator, bool _approved) external; function getApproved(uint256 _tokenId) external view returns (address); function isApprovedForAll(address _owner, address _operator) external view returns (bool);}interface ERC165 { function supportsInterface(bytes4 interfaceID) external view returns (bool);}
- Transfer event: emitted when the ownership of a token changes from one address to another.
- Approval event: emitted when an address is approved to transfer a specific token.
- ApprovalForAll event: emitted when an owner either approves or revokes the approval for an operator to manage all of their tokens.
- balanceOf: method to return the number of NFTs (Non-Fungible Tokens) owned by a specific address.
- ownerOf: method that returns the address of the owner of a specific token. Each ERC721 token is unique, represented by an ID. This function allows users or applications to determine the owner of the token based on its unique ID.
- safeTransferFrom (without data): method that safely transfers the ownership of a specific token from one address to another. This function checks if the recipient is a smart contract. If it is, it must implement a specific function (onERC721Received) to accept the transfer.
- transferFrom: method to transfer the ownership of a token from one address to another. It is generally used when the sender has been approved to transfer the token.
- approve: method to give approval to an address to transfer a specific token. This allows for delegated transfers, where an owner can allow another party to transfer a token on their behalf.
- getApproved: method used to get the approved address for a specific token.
- setApprovalForAll: method that allows the owner of one or more tokens to approve or revoke approval for an operator to manage all of their tokens.
- isApprovedForAll: method that checks if an operator is approved to manage all of an owner's tokens.
- safeTransferFrom (with data): method is similar to safeTransferFrom (without data) but with an additional data parameter. This extra data can be used to pass additional information during the transfer if the recipient is a smart contract. This function also checks if the recipient is a smart contract and whether it implements the onERC721Received function.
Getting Started
In this section, you'll create and deploy your ERC721 token contract using Remix Online IDE. For ease and security, we’ll use the OpenZeppelin ERC-721 contract to create our token. With OpenZeppelin, we don’t need to write the whole ERC-721 interface. Instead, we can import the library contract and use its functions.
Step 1: Adding Files to Filebase & IPFS
We need to host our NFT art and metadata file; for this, we’ll use IPFS - a peer-to-peer file storing and sharing distributed system. There are multiple methods for engaging with the IPFS protocol. You can either set up and operate IPFS on your own system, or Filebase an easier solution.
Filebase is the bridge to web3 decentralized storage on IPFS. It simplifies your access to IPFS by managing the underlying infrastructure.
For this guide, we will use Filebase to host our NFT art and metadata on IPFS.
Steps:
- Login to your Filebase dashboard.
- Create an IPFS bucket by clicking Create Bucket if you don’t have one.
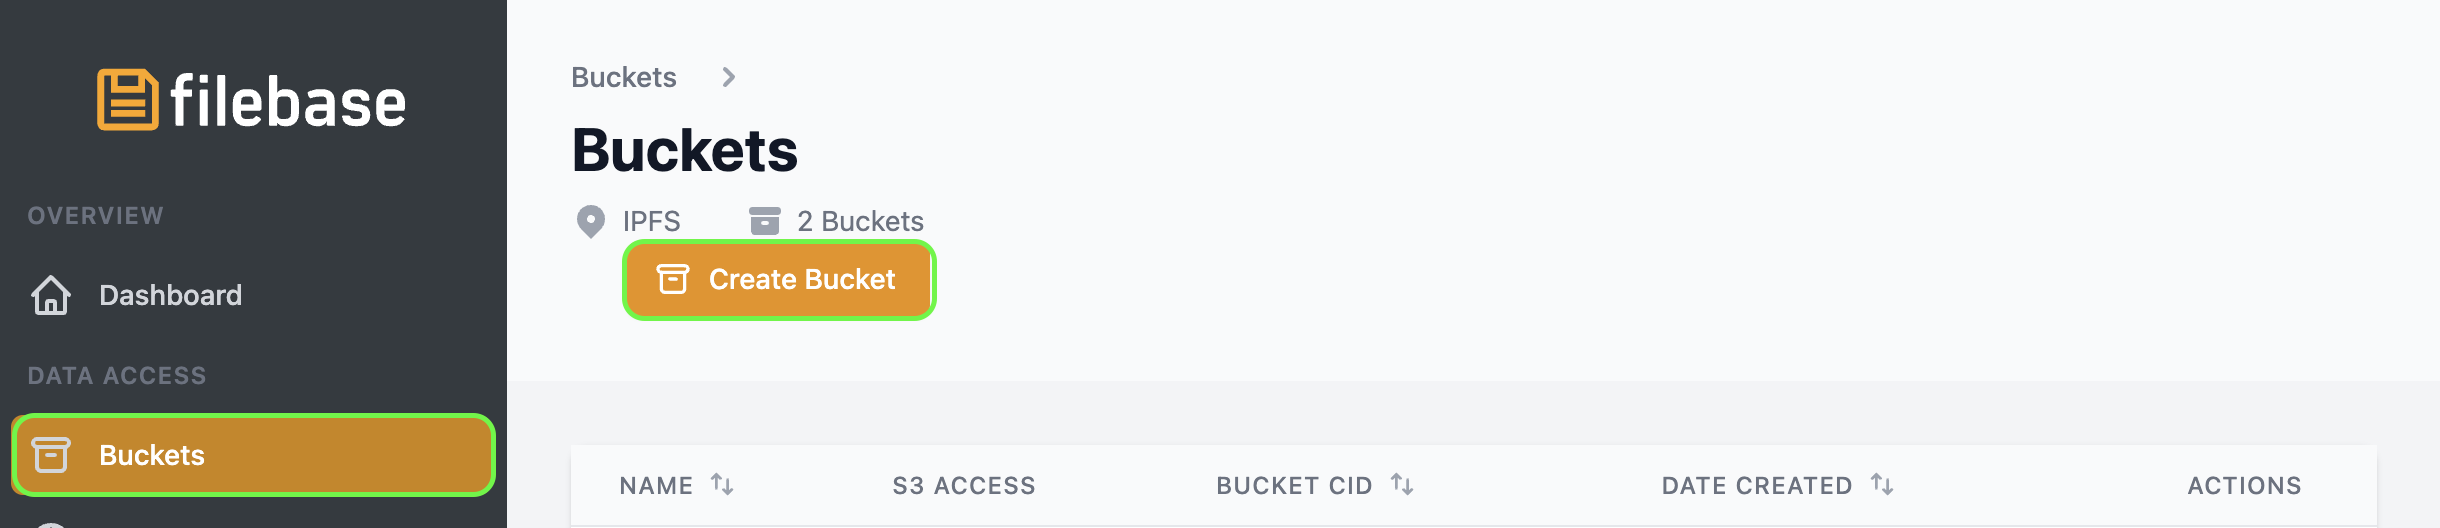
- Select Upload button to upload your NFT art as seen in your bucket dashboard.
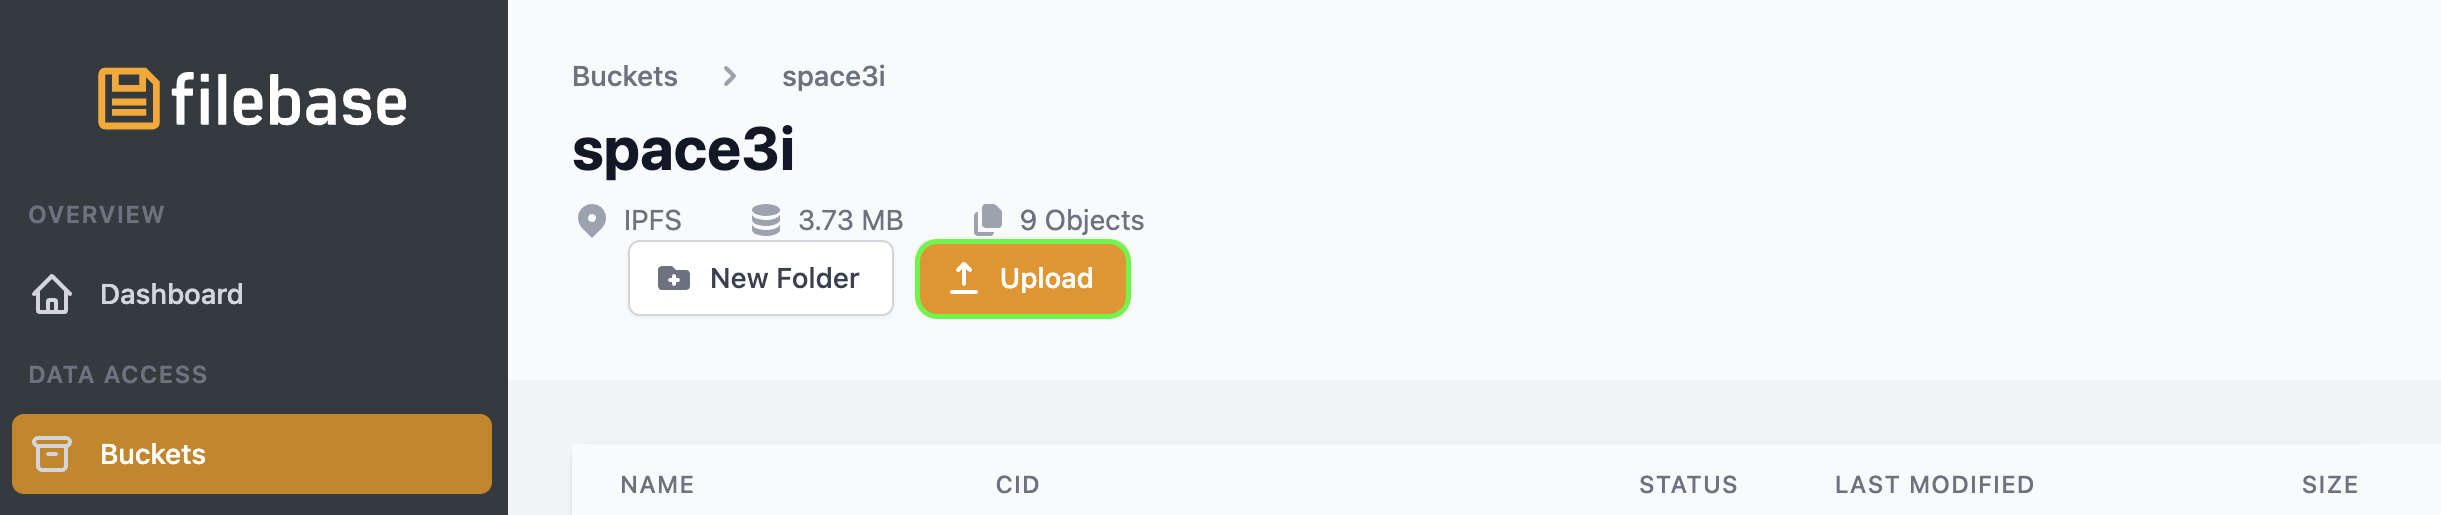
- Click the file name in the Files tab and copy (share button) the IPFS URL for your NFT art.
- Add Metadata JSON file to IPFS with Filebase.
Create a JSON file called kairos.json, replace your IPFS URL in the image field, and save it. After saving, upload your JSON file to IPFS, similar to the previous step.
{ "name": "Kairos NFT", "description": "gkaia frens! gazuaaaaa!!!", "image": "https://disastrous-turquoise-parakeet.myfilebase.com/ipfs/QmRvQc4wZCp6NF7dFL4ywiWTG7FSH3KKGUAkXGgsdYfcKi"}
After uploading, click the file name in the Files tab and copy the IPFS URL. It must look something like the one below:
https://disastrous-turquoise-parakeet.myfilebase.com/ipfs/QmY1LZF8JHo2r3h4X5VzLLXtJujqnBFGTyo2aqR9joXnt8
Save this IPFS URL. We'll need this to mint our NFT in the next section.
Step 2: Create ERC721 token contract
OpenZeppelin Contract Wizard
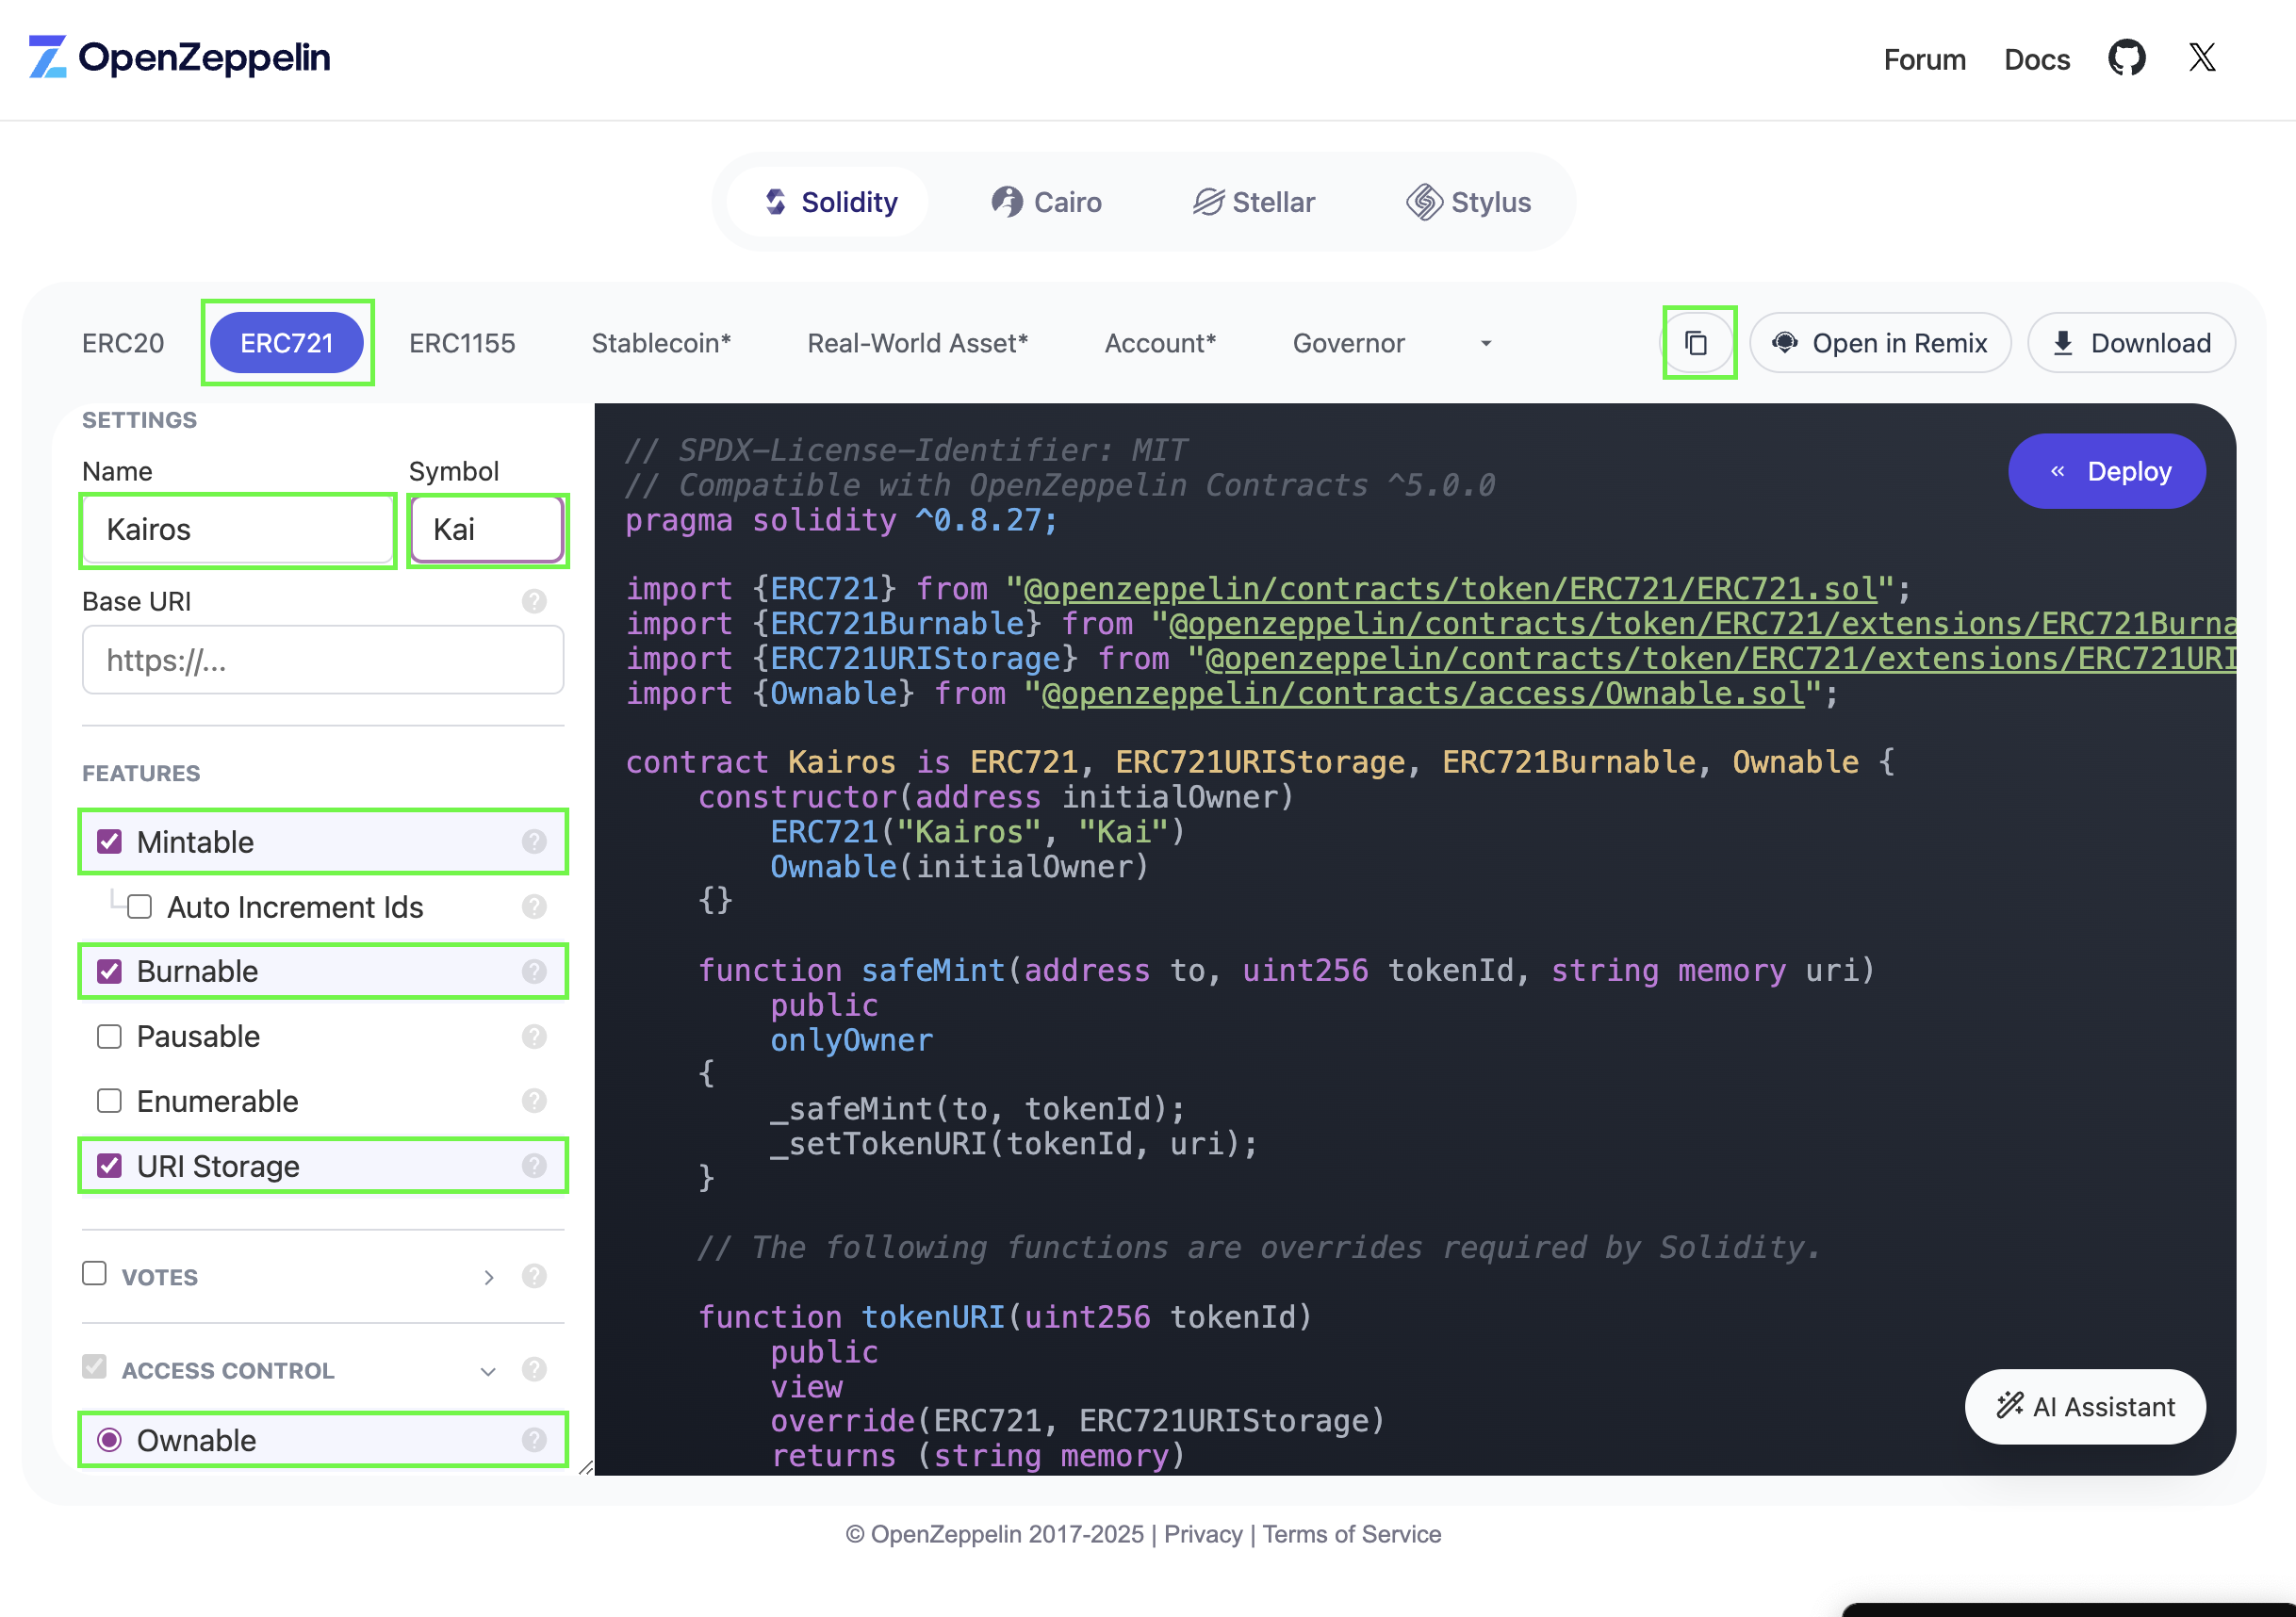
- Open OpenZeppelin Contract Wizard
- Select ER721.
- Provide a name and a symbol for the token. For example: Kairos and KS respectively.
- In the Base URI field, set it to empty
- In the Features section, check the Mintable, Burnable, URIStorage features to allow - privileged accounts (onlyOwner) be able to mint, burn tokens and allow us to update token URIs for individual token IDs.
- Click the Copy icon to copy the code for use on Remix in the next section.
Remix
- In Remix, Navigate to File Explorer and create a new file named
Kairos.solin the contracts folder. - Navigate to the Solidity Compiler tab and click Compile Kairos.sol to compile the token contract.
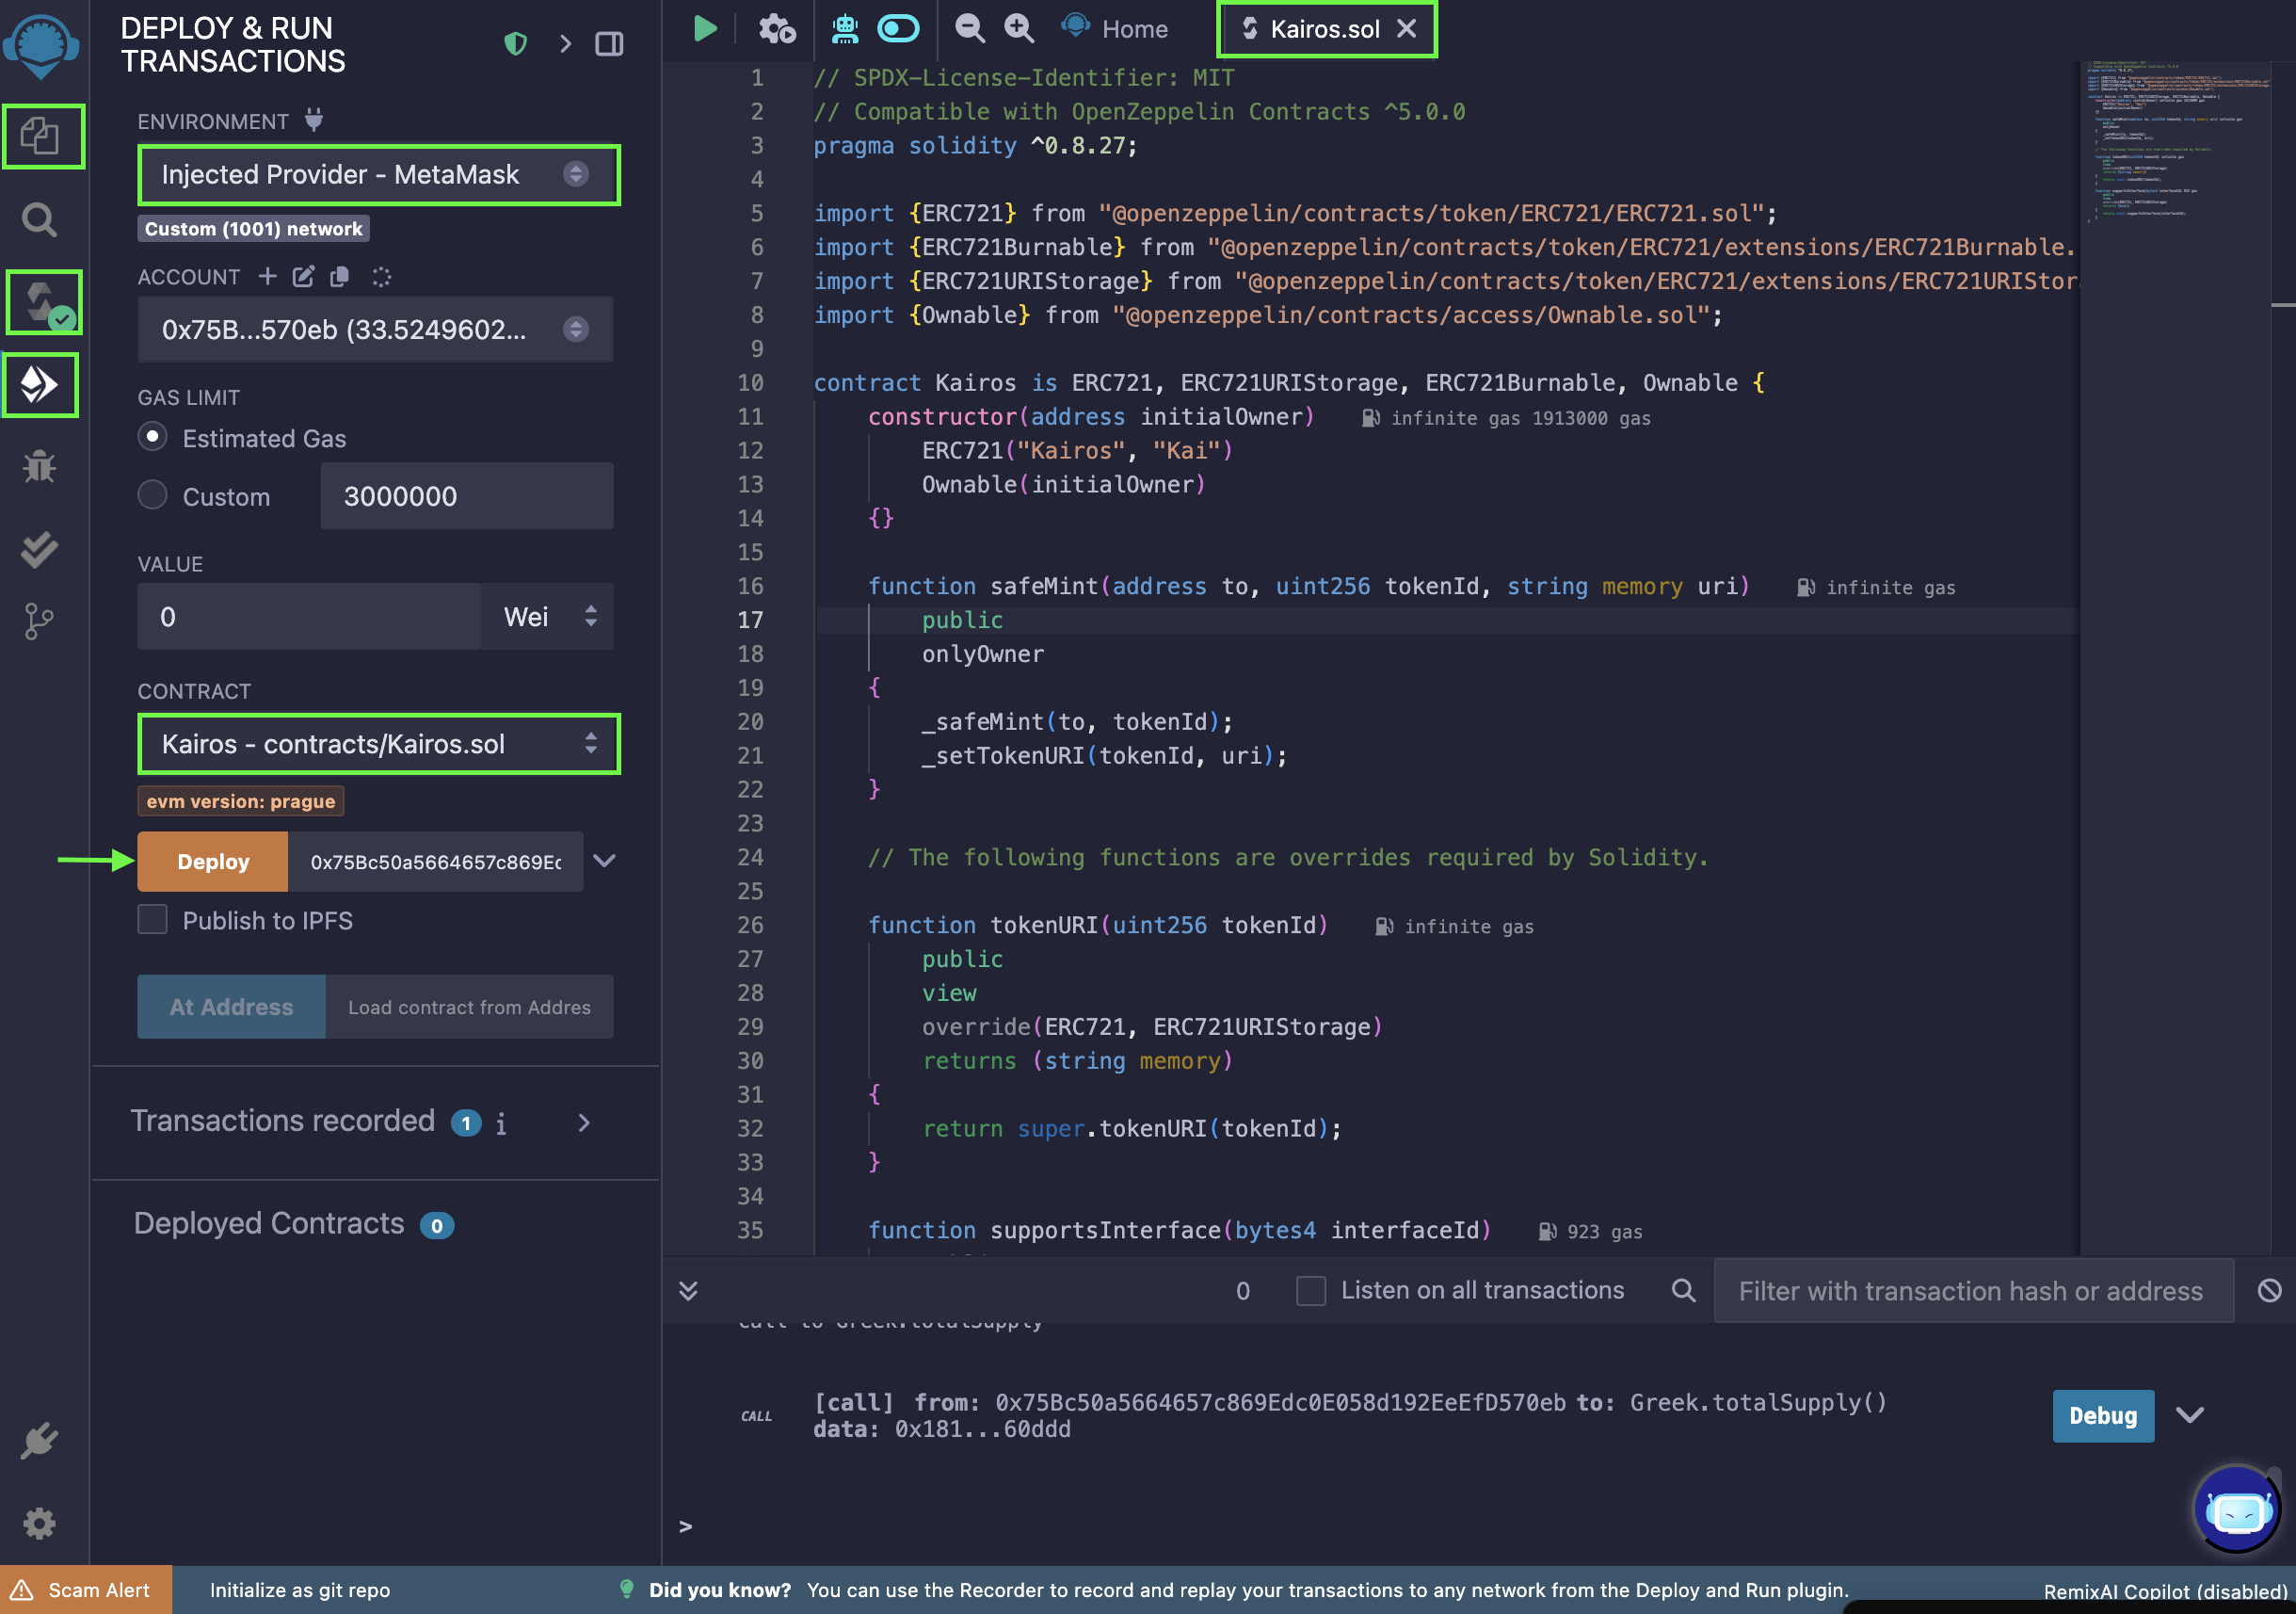
- Navigate to the Deploy & run transactions tab
- Select Environment > Injected Provider > MetaMask.
- In the Contract dropdown, select your contract. For example, Kairos.
- In the Deploy field, provide the constructor argument for the initialOwner.
- Click Deploy
Step 3: Interact with ERC721 token contract
Now go to the Deployed Contracts section in Remix and expand the deployed contract. You’ll see a bunch of functions. Expand the safeMint function and add the following details:
- Add your wallet address in the to the field.
- Enter any Big number value in the tokenId field. We suggest using '1' as it represents the first token being minted.
- For the uri field, input the URI of the JSON file that you generated in Adding files to IPFS section.
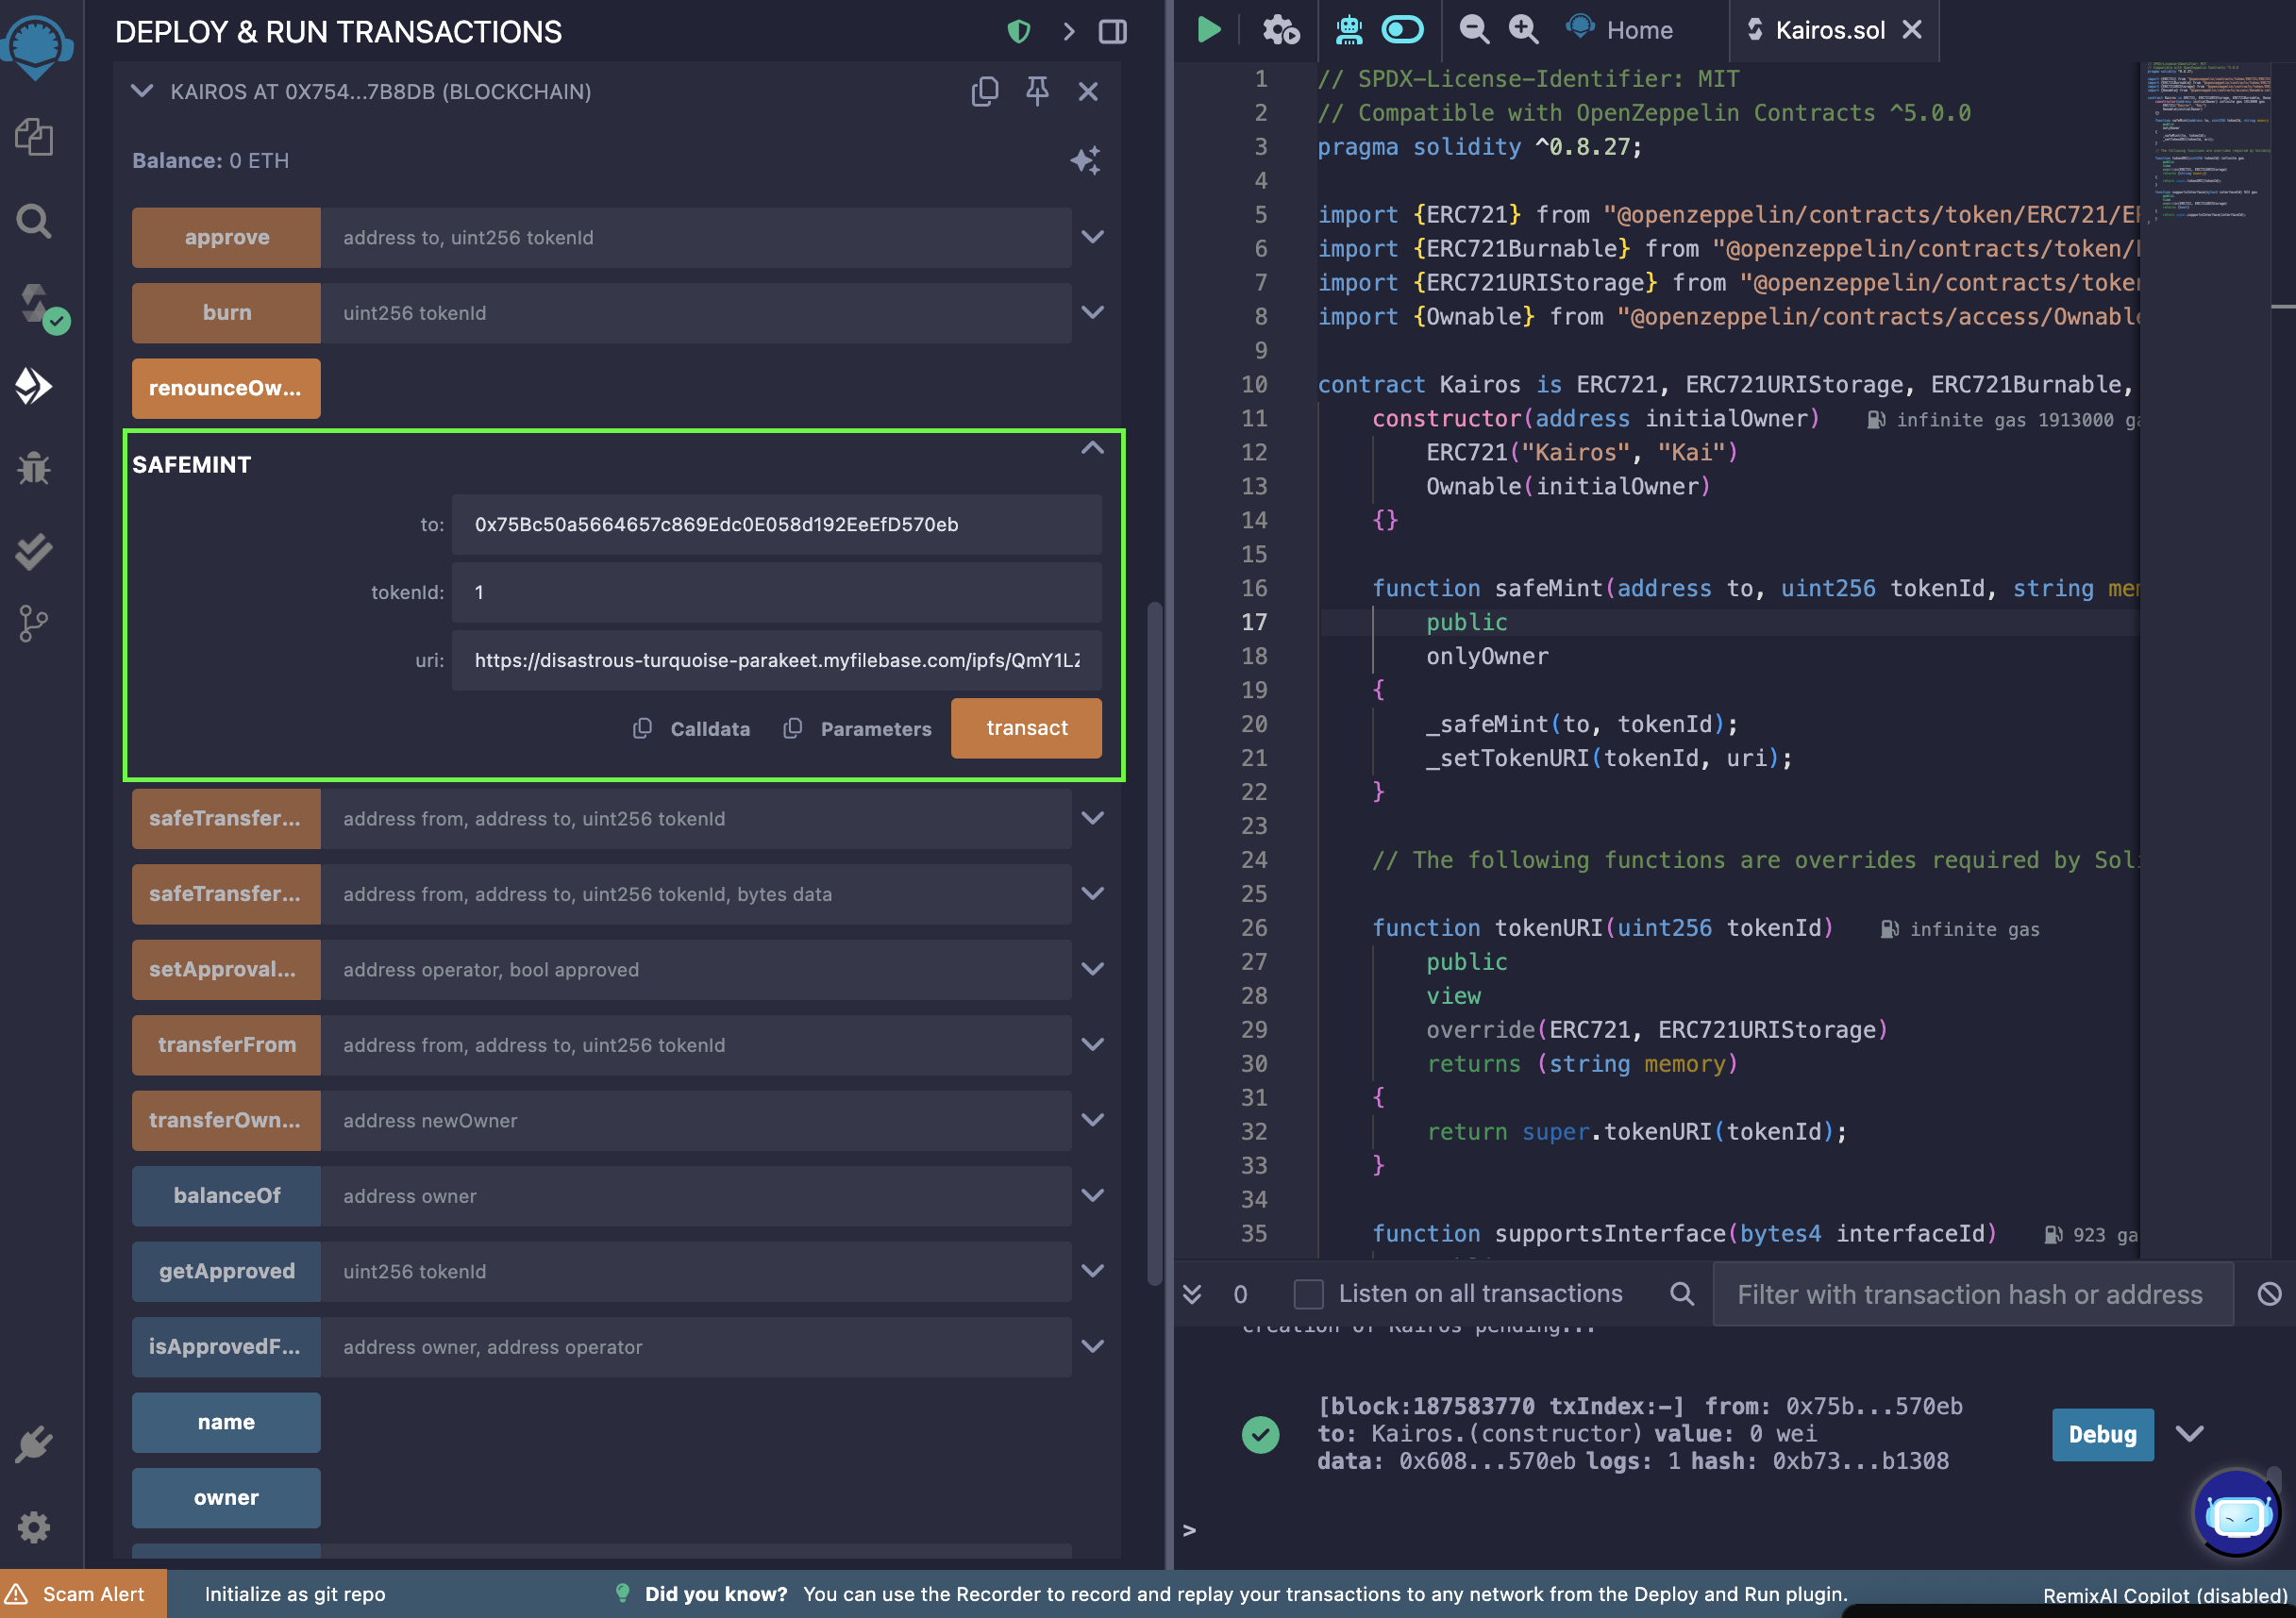
- Click on transact and confirm the transaction from MetaMask. It could take a couple of minutes but you can always confirm the transaction was executed via a block explorer like Kaiascan.
Now you have the NFT on the Kaia Kairos Testnet.
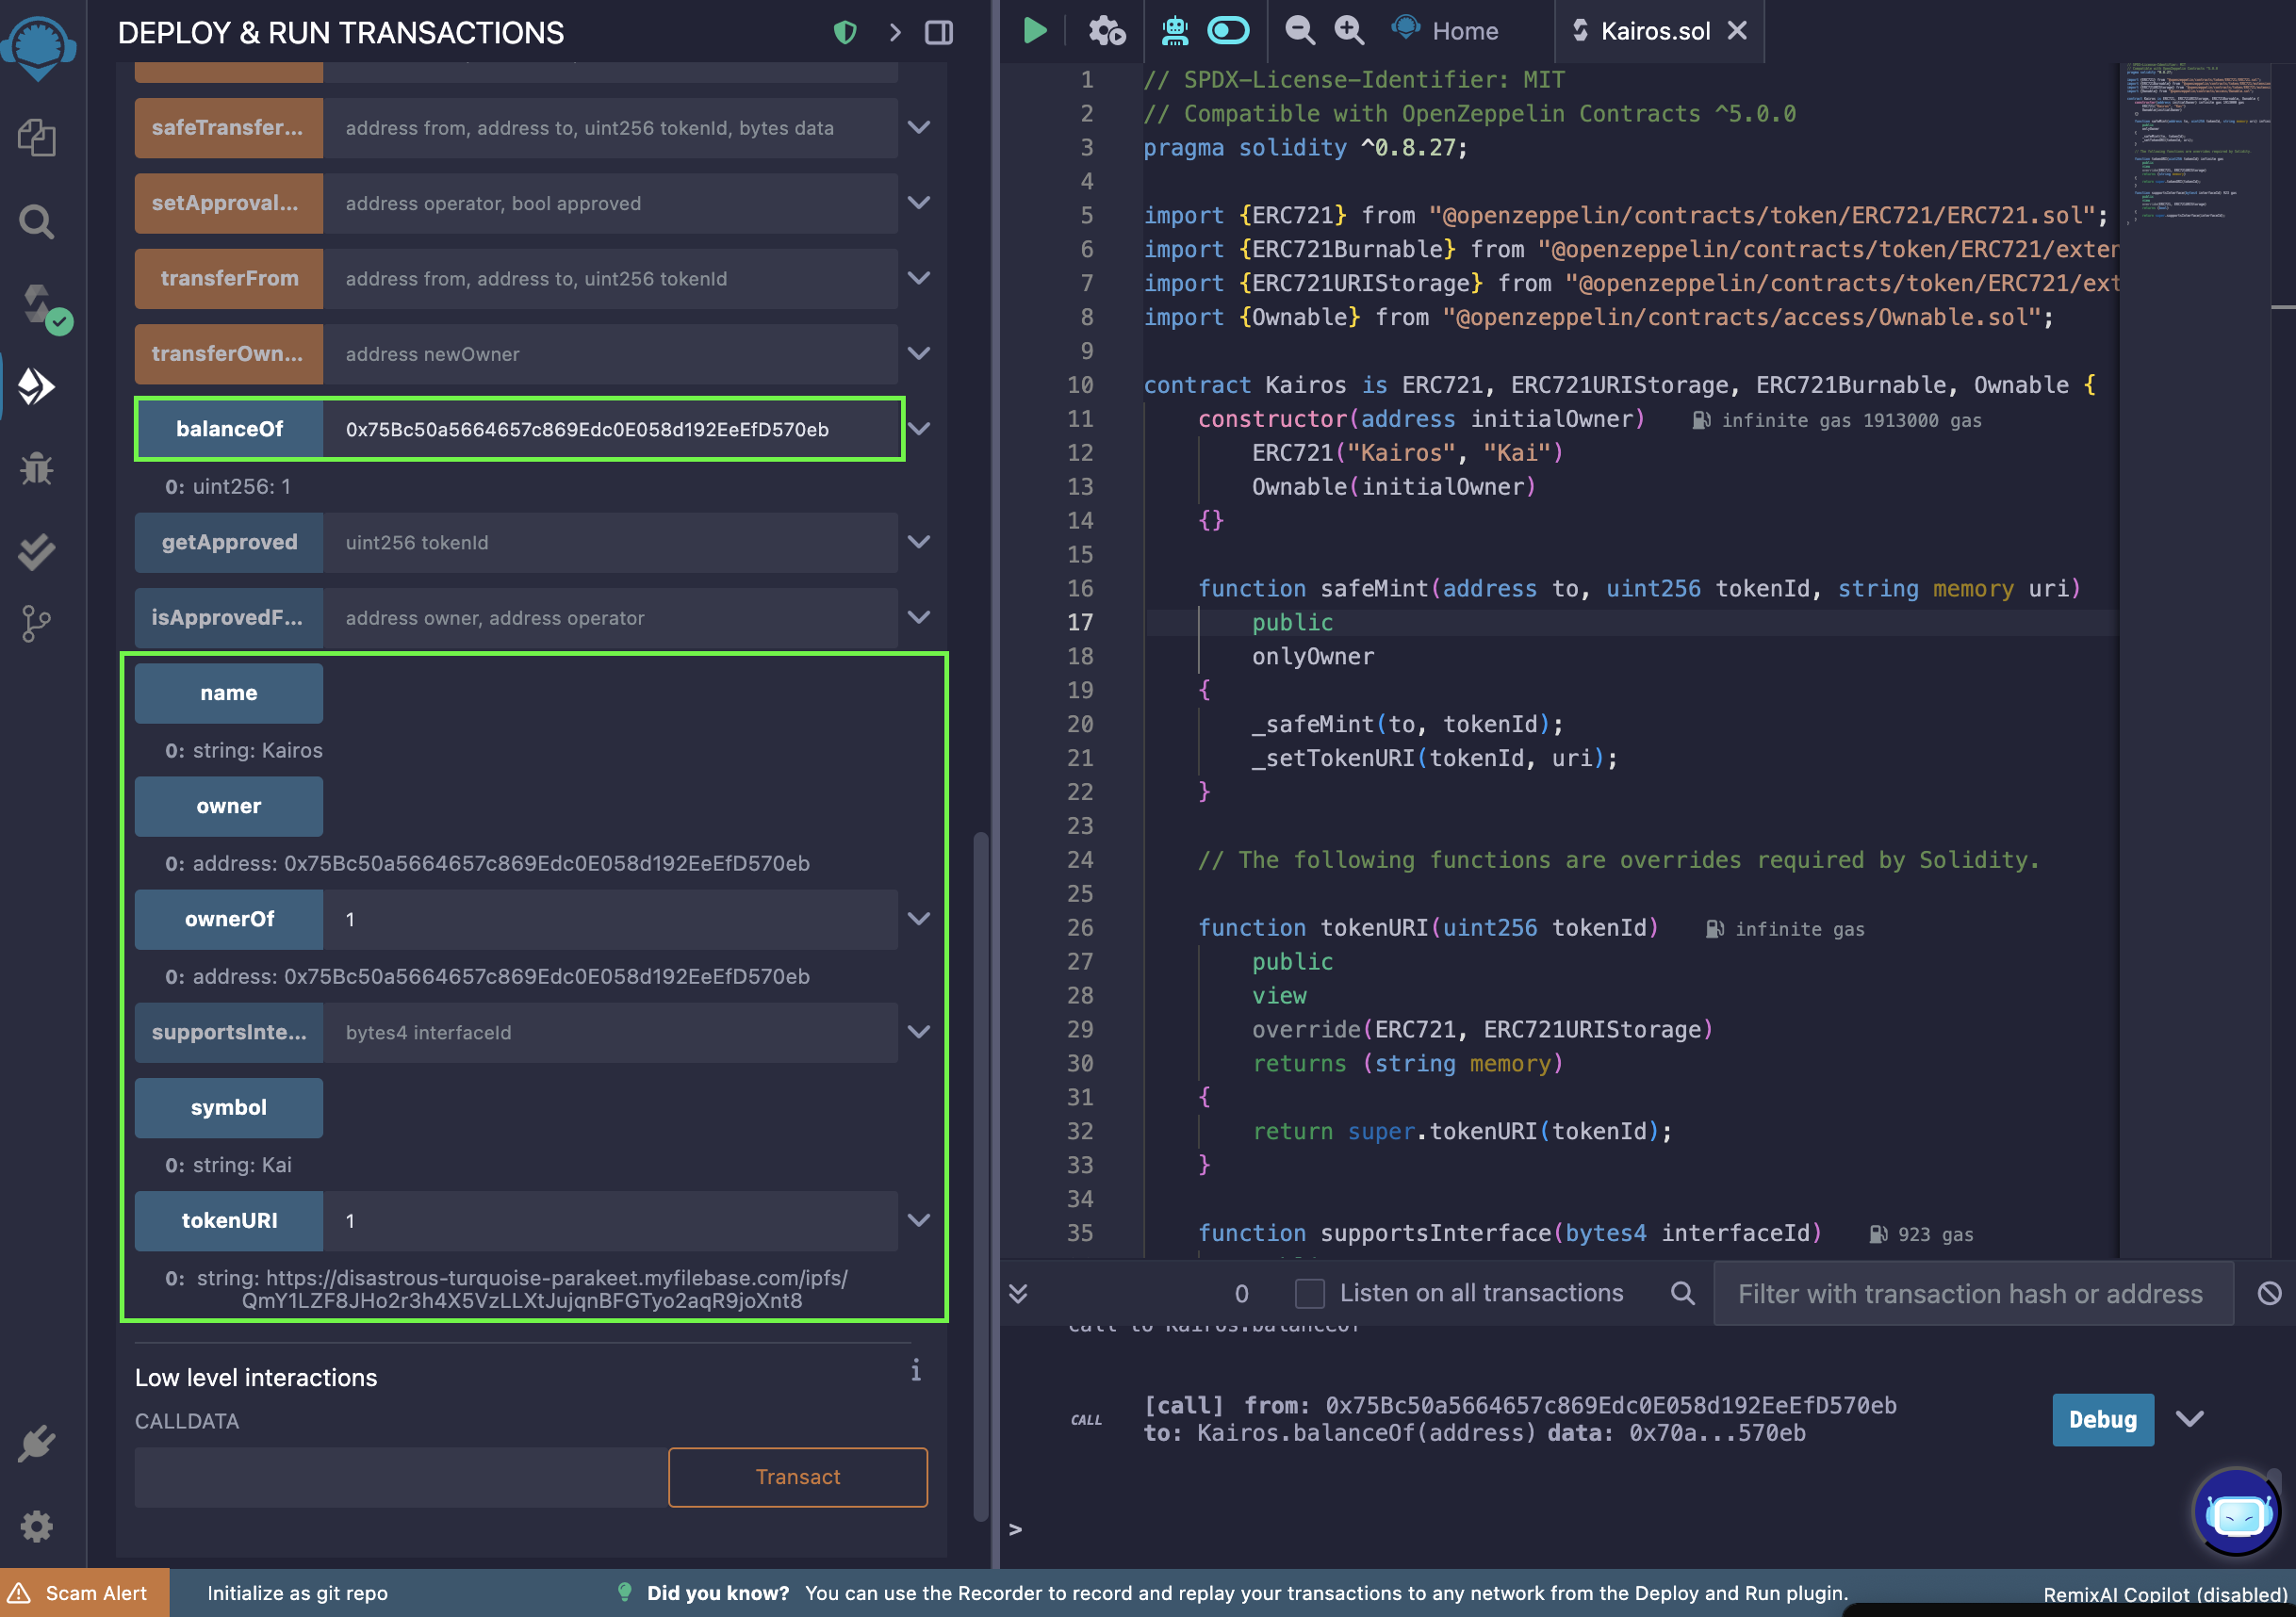
You can check other details like balanceOf, name, symbol, ownerOf, or tokenURI by entering the address or token id used earlier.
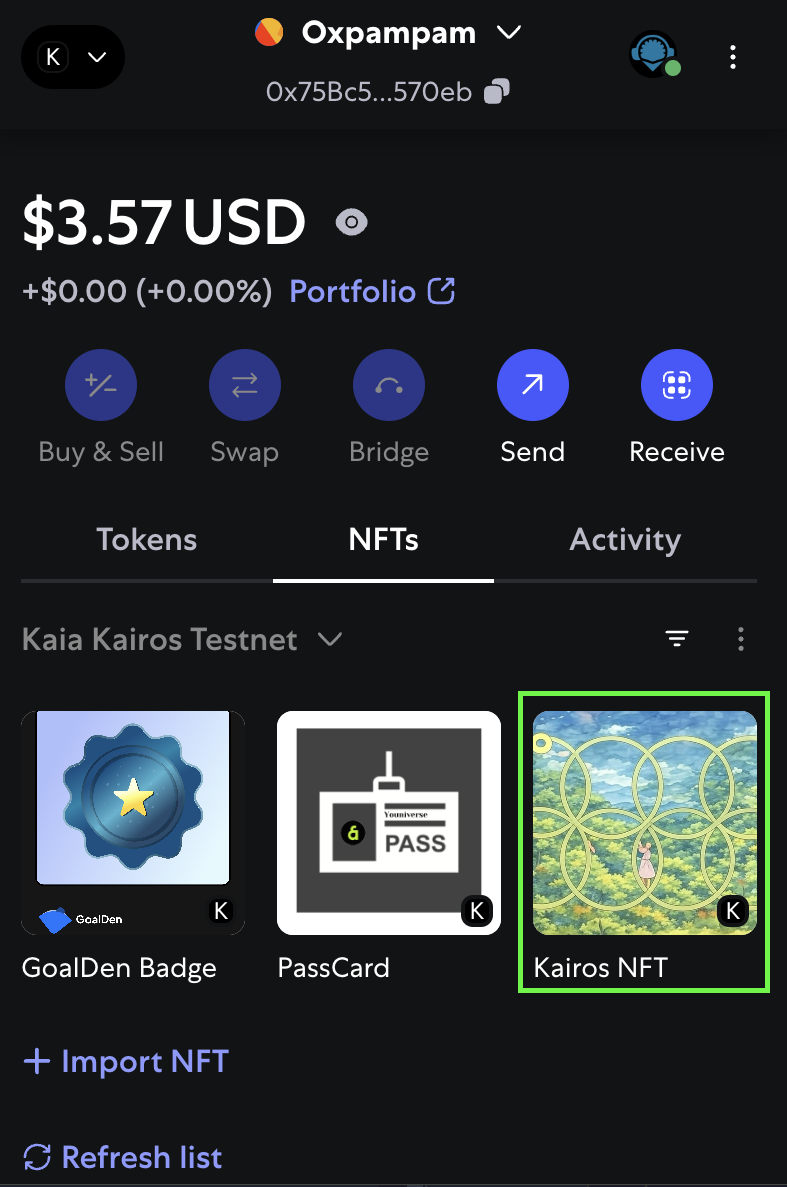
Step 4: View NFT on Metamask
- Open up MetaMask
- Navigate to the NFT tab and on your wallet’s homepage and you should see your NFT autodetected.
The easiest way to display your NFTs is to turn on the NFT autodetect feature, which you can toggle on in "Settings" under “Security & Privacy”.