Web3 Integration
In this section, we will build up pieces to integrate web3 into our Unity project.
Creating and deploying KIP7 smart contract
First, we'll use Kaia Contract Wizard to generate our smart contract.
Step 1: Using Kaia Contract Wizard
- Navigate to Kaia Contract Wizard.
- Select KIP7 (Kaia's token standard, similar to ERC20).
- Configure your token:
- Name: ExampleTestToken (or something else!)
- Symbol: ET (your token's ticker)
- Premint: 100 (initial token supply)
- Features: Check ✅ Mintable
For this guide, we will tweak the mint function not to have onlyOwner modifier. To do this, we have to remove the ownable.sol import, and Ownable inheritance. The tweaked code should now look like this:
// SPDX-License-Identifier: MITpragma solidity ^0.8.4;import "@kaiachain/contracts/KIP/token/KIP7/KIP7.sol";contract ExampleTokens is KIP7 { constructor() KIP7("ExampleTokens", "ET") { _mint(msg.sender, 100 * 10 ** decimals()); } function supportsInterface(bytes4 interfaceId) public view virtual override returns (bool) { return super.supportsInterface(interfaceId); } function mint(uint256 amount) public { _mint(msg.sender, amount); }}
We removed the onlyOwner modifier to allow anyone to call the mint function other than the original deployer or owner of the contract.
Step 2: Deploying via Remix IDE
- Copy and Paste the code above in a newly created file
ET.solon Remix IDE. - In Remix IDE:
- Click the Compile contract button.
- Activate the Kaia plugin in the plugin manager.
- Under Environment in the Kaia Plugin tab, choose Injected Provider - Kaia Wallet.
- Find your contract (ExampleTokens) in the Contract dropdown.
- Click Deploy to launch your token!
- When your Kaia Wallet pops up:
- Review the deployment details.
- Click Confirm to deploy to Kaia Kairos Testnet.
Copy and save the deployed contract address. You'll need it later in the tutorial.
Building the Unity-Web3 Bridge
Now we'll create the vital connection between Unity and Web3 functionality. This is where we bring blockchain capabilities into your Unity application!
Part 1: Creating the Plugin Bridge (kaiaPlugin.jslib)
First, we'll build our JavaScript bridge that lets Unity talk to Web3:
- Create your plugin directory:
Assets/└── Plugins/ └── WebGL/ └── KaiaPlugin.jslib // We'll create this file
-
Why a .jslib? Think of it as a translator between Unity's C# and the browser's JavaScript - essential for Web3 interactions!
-
The plugin will handle three core functions:
- ConnectWallet() - Handles Kaia Wallet connections
- GetTokenBalance() - Checks token balances
- MintTokens() - Manages token minting
Open this file in VS Code and paste the KaiaPlugin.jslib source code in Appendix A:
Part 2: Creating the C# Manager (Web3Manager.cs)
Next, we'll create our C# script to manage all Web3 operations:
- Create your scripts directory:
Assets/└── Scripts/ └── Web3/ └── Web3Manager.cs // We'll create this file
What does Web3Manager do?
- Acts as the main conductor for all Web3 operations.
- Manages communication with our JavaScript plugin.
- Updates UI elements based on blockchain events.
- Handles all wallet and token operations.
- Connects the
Connect WalletandMintbuttons with their respective functions
- Open this file in VS Code and paste the
Web3Manager.cssource code in Appendix B
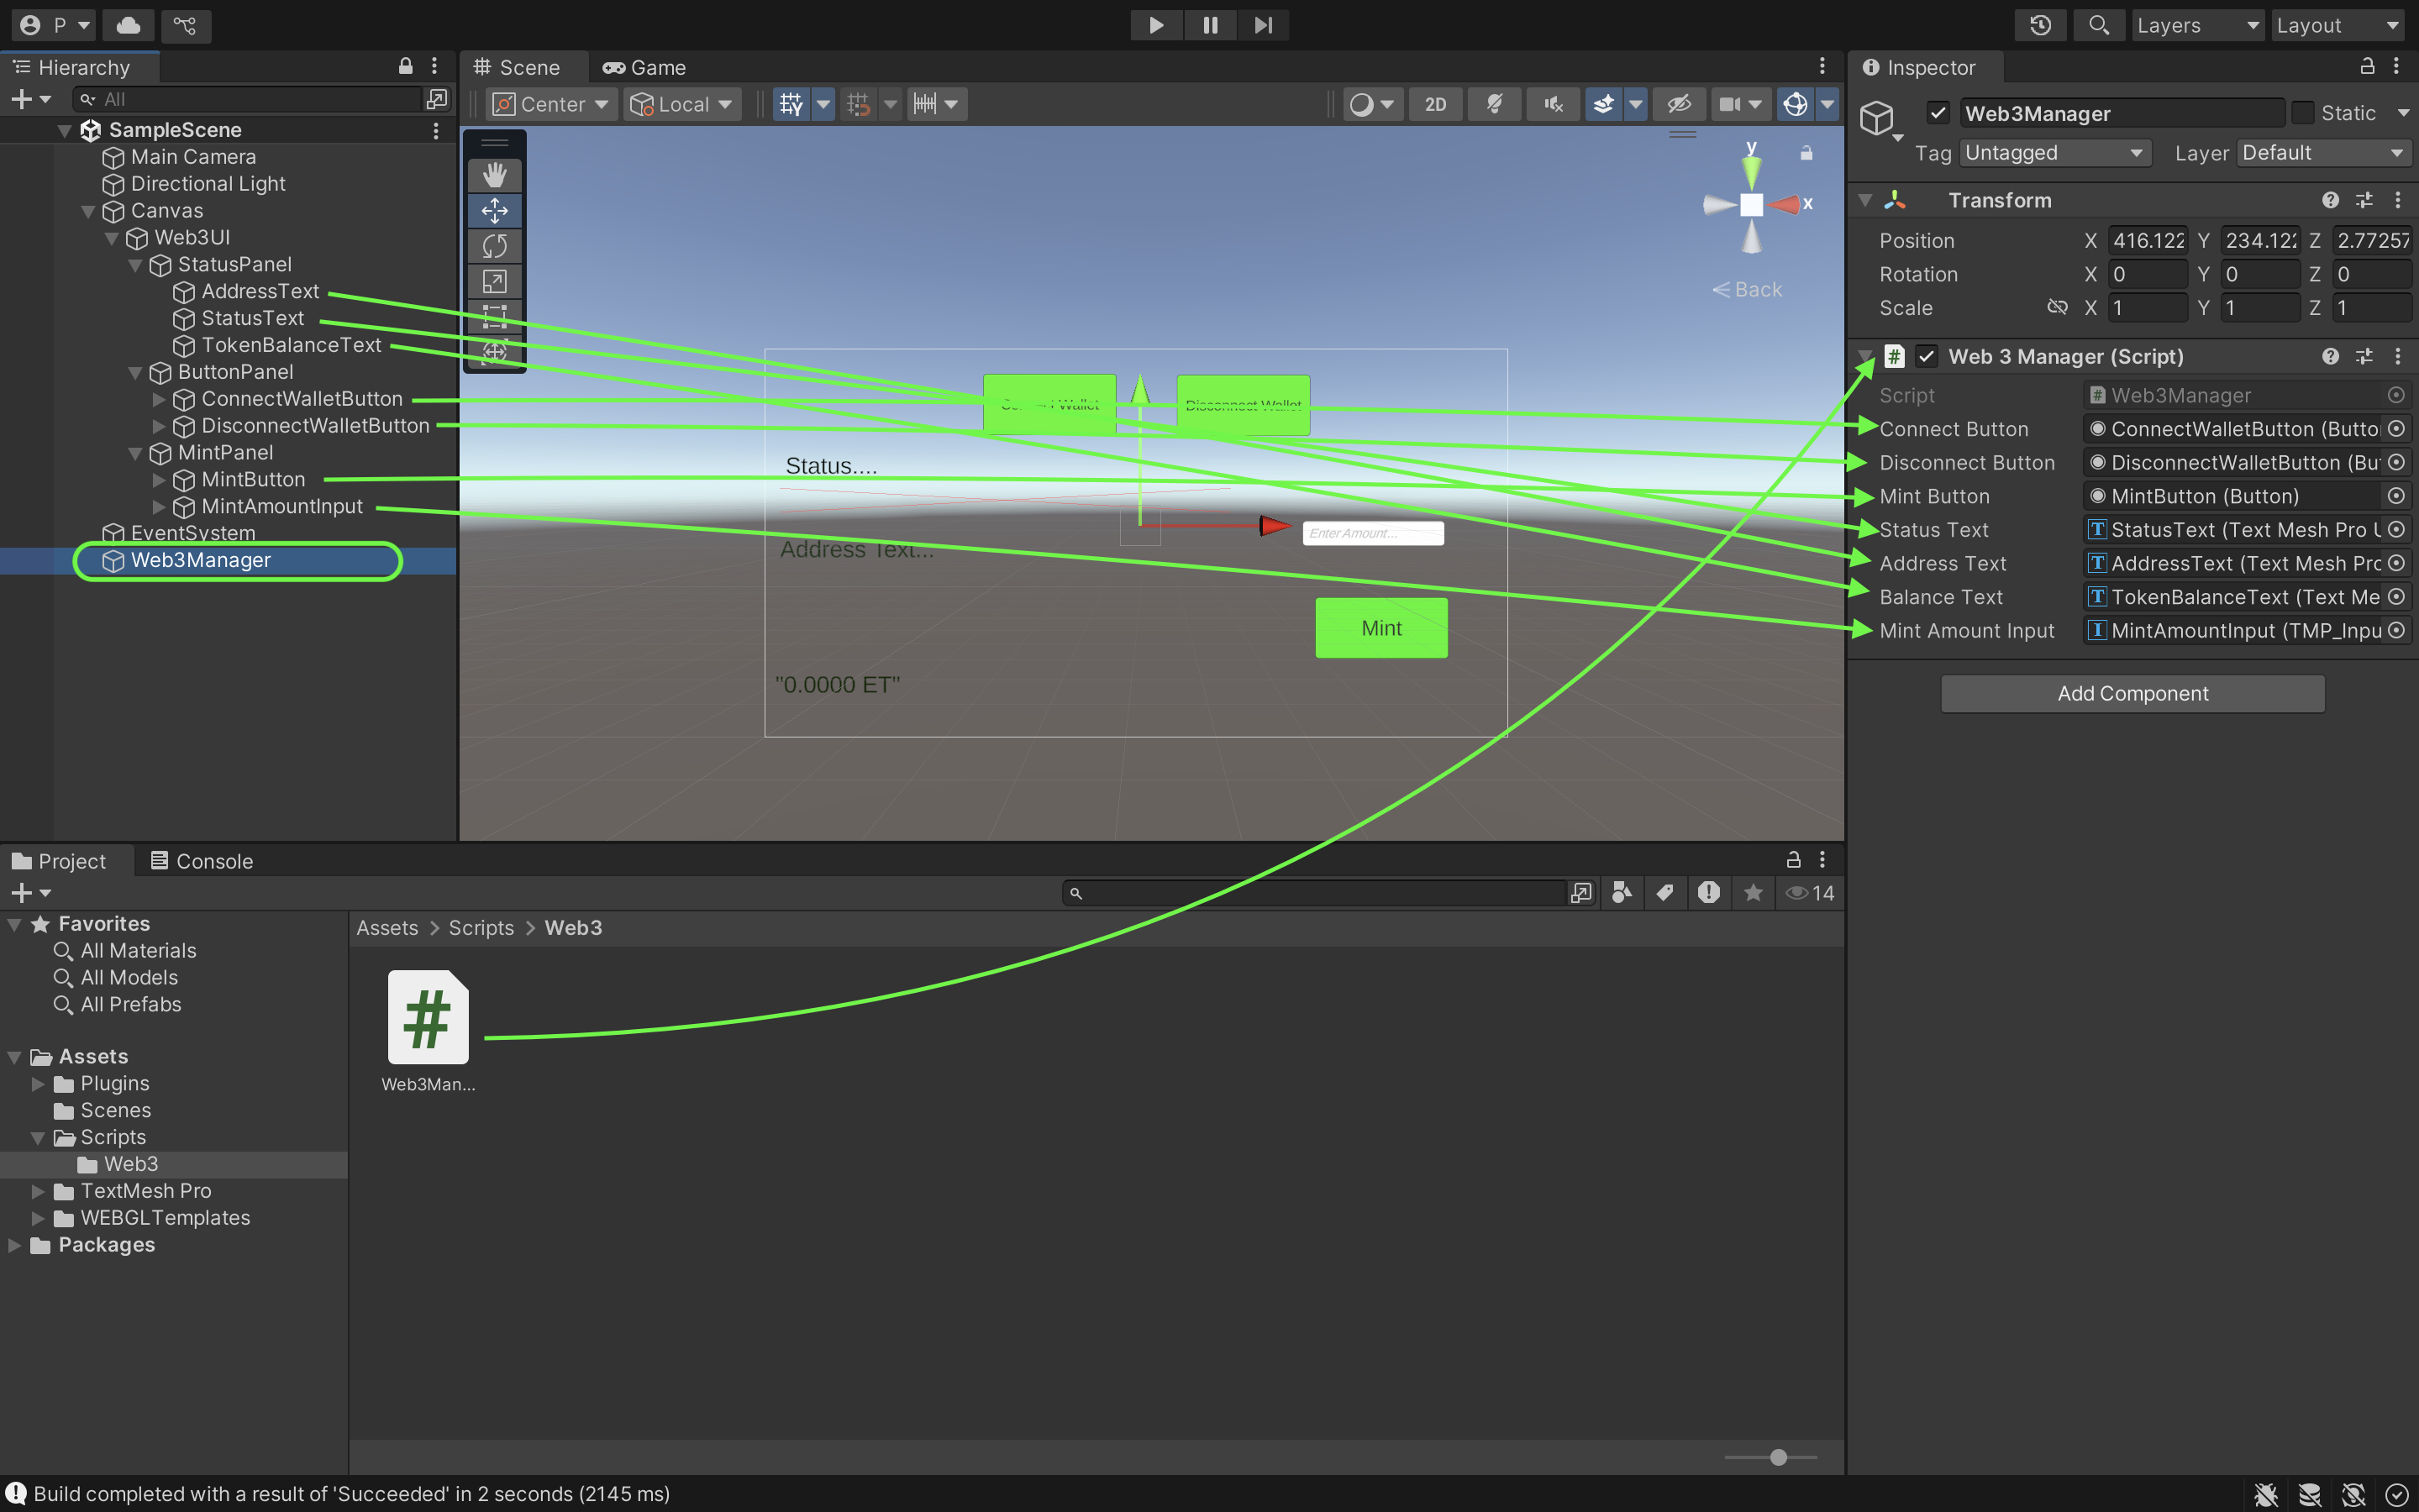
Part 3: Setting Up the Web3Manager GameObject
Finally, let's bring it all together in Unity:
- Create the Manager Object:
- Right-click in the Hierarchy window (root level).
- Select "Create Empty Object".
- Name it "Web3Manager".
- Attach Your Script:
- Select the Web3Manager GameObject.
- In Inspector, click Add Component.
- Search for and select "Web3Manager".
- Connect UI Elements:
- With Web3Manager selected, look in the Inspector.
- Drag and drop your UI elements from the Hierarchy to the corresponding fields:
- StatusText
- AddressText
- TokenBalanceText
- Connect, Disconnect, Mint buttons
- Input fields