使用 Foundry 部署智能合約

導言
Foundry 是一個用 Rust 編寫的智能合約開發框架,開發人員可以通過 solidity 腳本從命令行管理和編譯合約、運行測試、部署合約並與網絡交互。
Foundry 由四個主要 CLI 工具組成,可實現快速、模塊化的智能合約開發,它們是
- Forge: 您可以使用 Forge 部署、測試和編譯智能合約。
- Cast:Cast 使與 EVM 智能合約的交互變得簡單。 這包括獲取鏈數據、發送交易等。
- Anvil:您需要啟動本地節點嗎? Anvil 是 Foundry 提供的本地節點環境。
- Chisel:快速、實用、冗長的 solidity REPL。
在本指南中,您將
- 創建一個簡單的鑄造項目。
- 使用 Foundry 編譯和測試示例智能合約。
- 使用 Foundry 向 Kaia Kairos 網絡部署智能合約。
- 探索使用鑄鐵和鐵砧分叉主網。
先決條件
學習�本教程的前提條件如下:
- 代碼編輯器:源代碼編輯器,如 VS Code。
- MetaMask: 用來部署契約、簽署交易以及與契約互動。
- RPC 端點:您可以從其中一個支援的 端點提供者 取得。
- 從 Faucet測試 KAIA:為賬戶注入足夠的 KAIA。
- 安裝 Rust 和 Foundry。
設置開發環境
要檢查 foundry 安裝是否成功,請運行下面的命令:
forge -V
輸出

成功安裝 Foundry 後,您現在可以使用 Foundry 中的 CLI 工具(鍛造、鑄造、鐵砧、鑿子)。 讓我們按以下步驟建立一個代工廠項目:
步驟 1:要啟動一個新項目,請運行以下命令:
forge init foundry_example
第 2 步:進入項目文件夾。
cd foundry_example
初始化 foundry 項目後,當前目錄應包括
- src:智能合約的默認目錄。
- 測試:測試的默認目錄。
- foundry.toml:默認項目配置文件。
- lib:項目依賴項的默認目錄。
- script:solidity 腳本文件的默認目錄。
設定 foundry.toml
現在我們已經設定好專案,我們必須建立一個 .env 檔案,並加入變數。 Foundry 會自動載入專案目錄中的 .env 檔案。
.env 檔案應遵循此格式:
kairos_rpc_url=paste_rpc_url
接下來是編輯 foundry.toml 檔案。 您應該已經在 Scaffold 之後的專案根目錄中有一個。
在檔案末尾加入以下幾行:
[rpc_endpoints]kairos = "${KAIROS_RPC_URL}"
這會為 Kaia Kairos Testnet 建立 RPC alias。
匯入帳戶
在本指南中,我們將匯入一個已存在於 MetaMask 上的開發者帳號,這樣就可以透過--帳號選項在forge script、cast send或其他需要私密金鑰的方法中存取該帳號。
執行以下指令匯入現有的錢包:
cast wallet import --interactive oxpampam-dev-i
輸入私人密碼匙:輸入密碼:

Sample smart contract
In this section, we will be using the sample counter contract in the initialized foundry project. The counter.sol file in the src/ folder should look like this:
// SPDX-License-Identifier: UNLICENSEDpragma solidity ^0.8.13;contract Counter { uint256 public number; function setNumber(uint256 newNumber) public { number = newNumber; } function increment() public { number++; }}
Code Walkthrough
This is your smart contract. Line 1 shows it uses the Solidity version 0.8.13 or greater. From lines 4-12, a smart contract Counter is created. This contract simply stores a new number using the setNumber function and increments it by calling the increment function.
Testing smart contract
Foundry allows us to write tests in solidity as opposed to writing tests in javascript in other smart contract development frameworks. In our initialized foundry project, the test/Counter.t.sol is an example of a test written in solidity. The code looks like this:
// SPDX-License-Identifier: UNLICENSEDpragma solidity ^0.8.13;import "forge-std/Test.sol";import "../src/Counter.sol";contract CounterTest is Test { Counter public counter; function setUp() public { counter = new Counter(); counter.setNumber(0); } function testIncrement() public { counter.increment(); assertEq(counter.number(), 1); } function testSetNumber(uint256 x) public { counter.setNumber(x); assertEq(counter.number(), x); }}
The code above shows you imported forge standard library and Counter.sol.
The tests above check the following:
- Is the number increasing?
- Is the number equal to the set number?
To check if your test works fine, run the following command:
forge test
Output

To learn more about writing tests, advanced testing, and other features, refer to Foundry's documentation.
Compiling your contracts
Compile your contract with this command:
forge build
Deploying your contracts
To deploy a contract using foundry, you must provide an RPC URL and a private key of the account that will deploy the contract. 看看 Kaia 上 rpc-providers 的清單,找到您的 rpc-url,並使用 MetaMask 建立帳號。
在本指南中,我們將使用 foundry 提供的兩種合約部署方法:
使用 Forge Create
步驟 1:若要使用 forge create 將您的合約部署到 Kaia Kairos 網路,請執行下列指令:
# 在 .env 檔案中載入變數source .env# 部署我們的合約forge create --rpc-url $KAIROS_RPC_URL src/Counter.sol:Counter --broadcast --account oxpampam-dev-i
輸入 keystore 密碼:<KEYSTORE_PASSWORD>
對於開發環境中超出基本測試網路使用範圍的任何部署,強烈建議使用 硬體錢包或密碼保護的 keystore 以增強安全性。

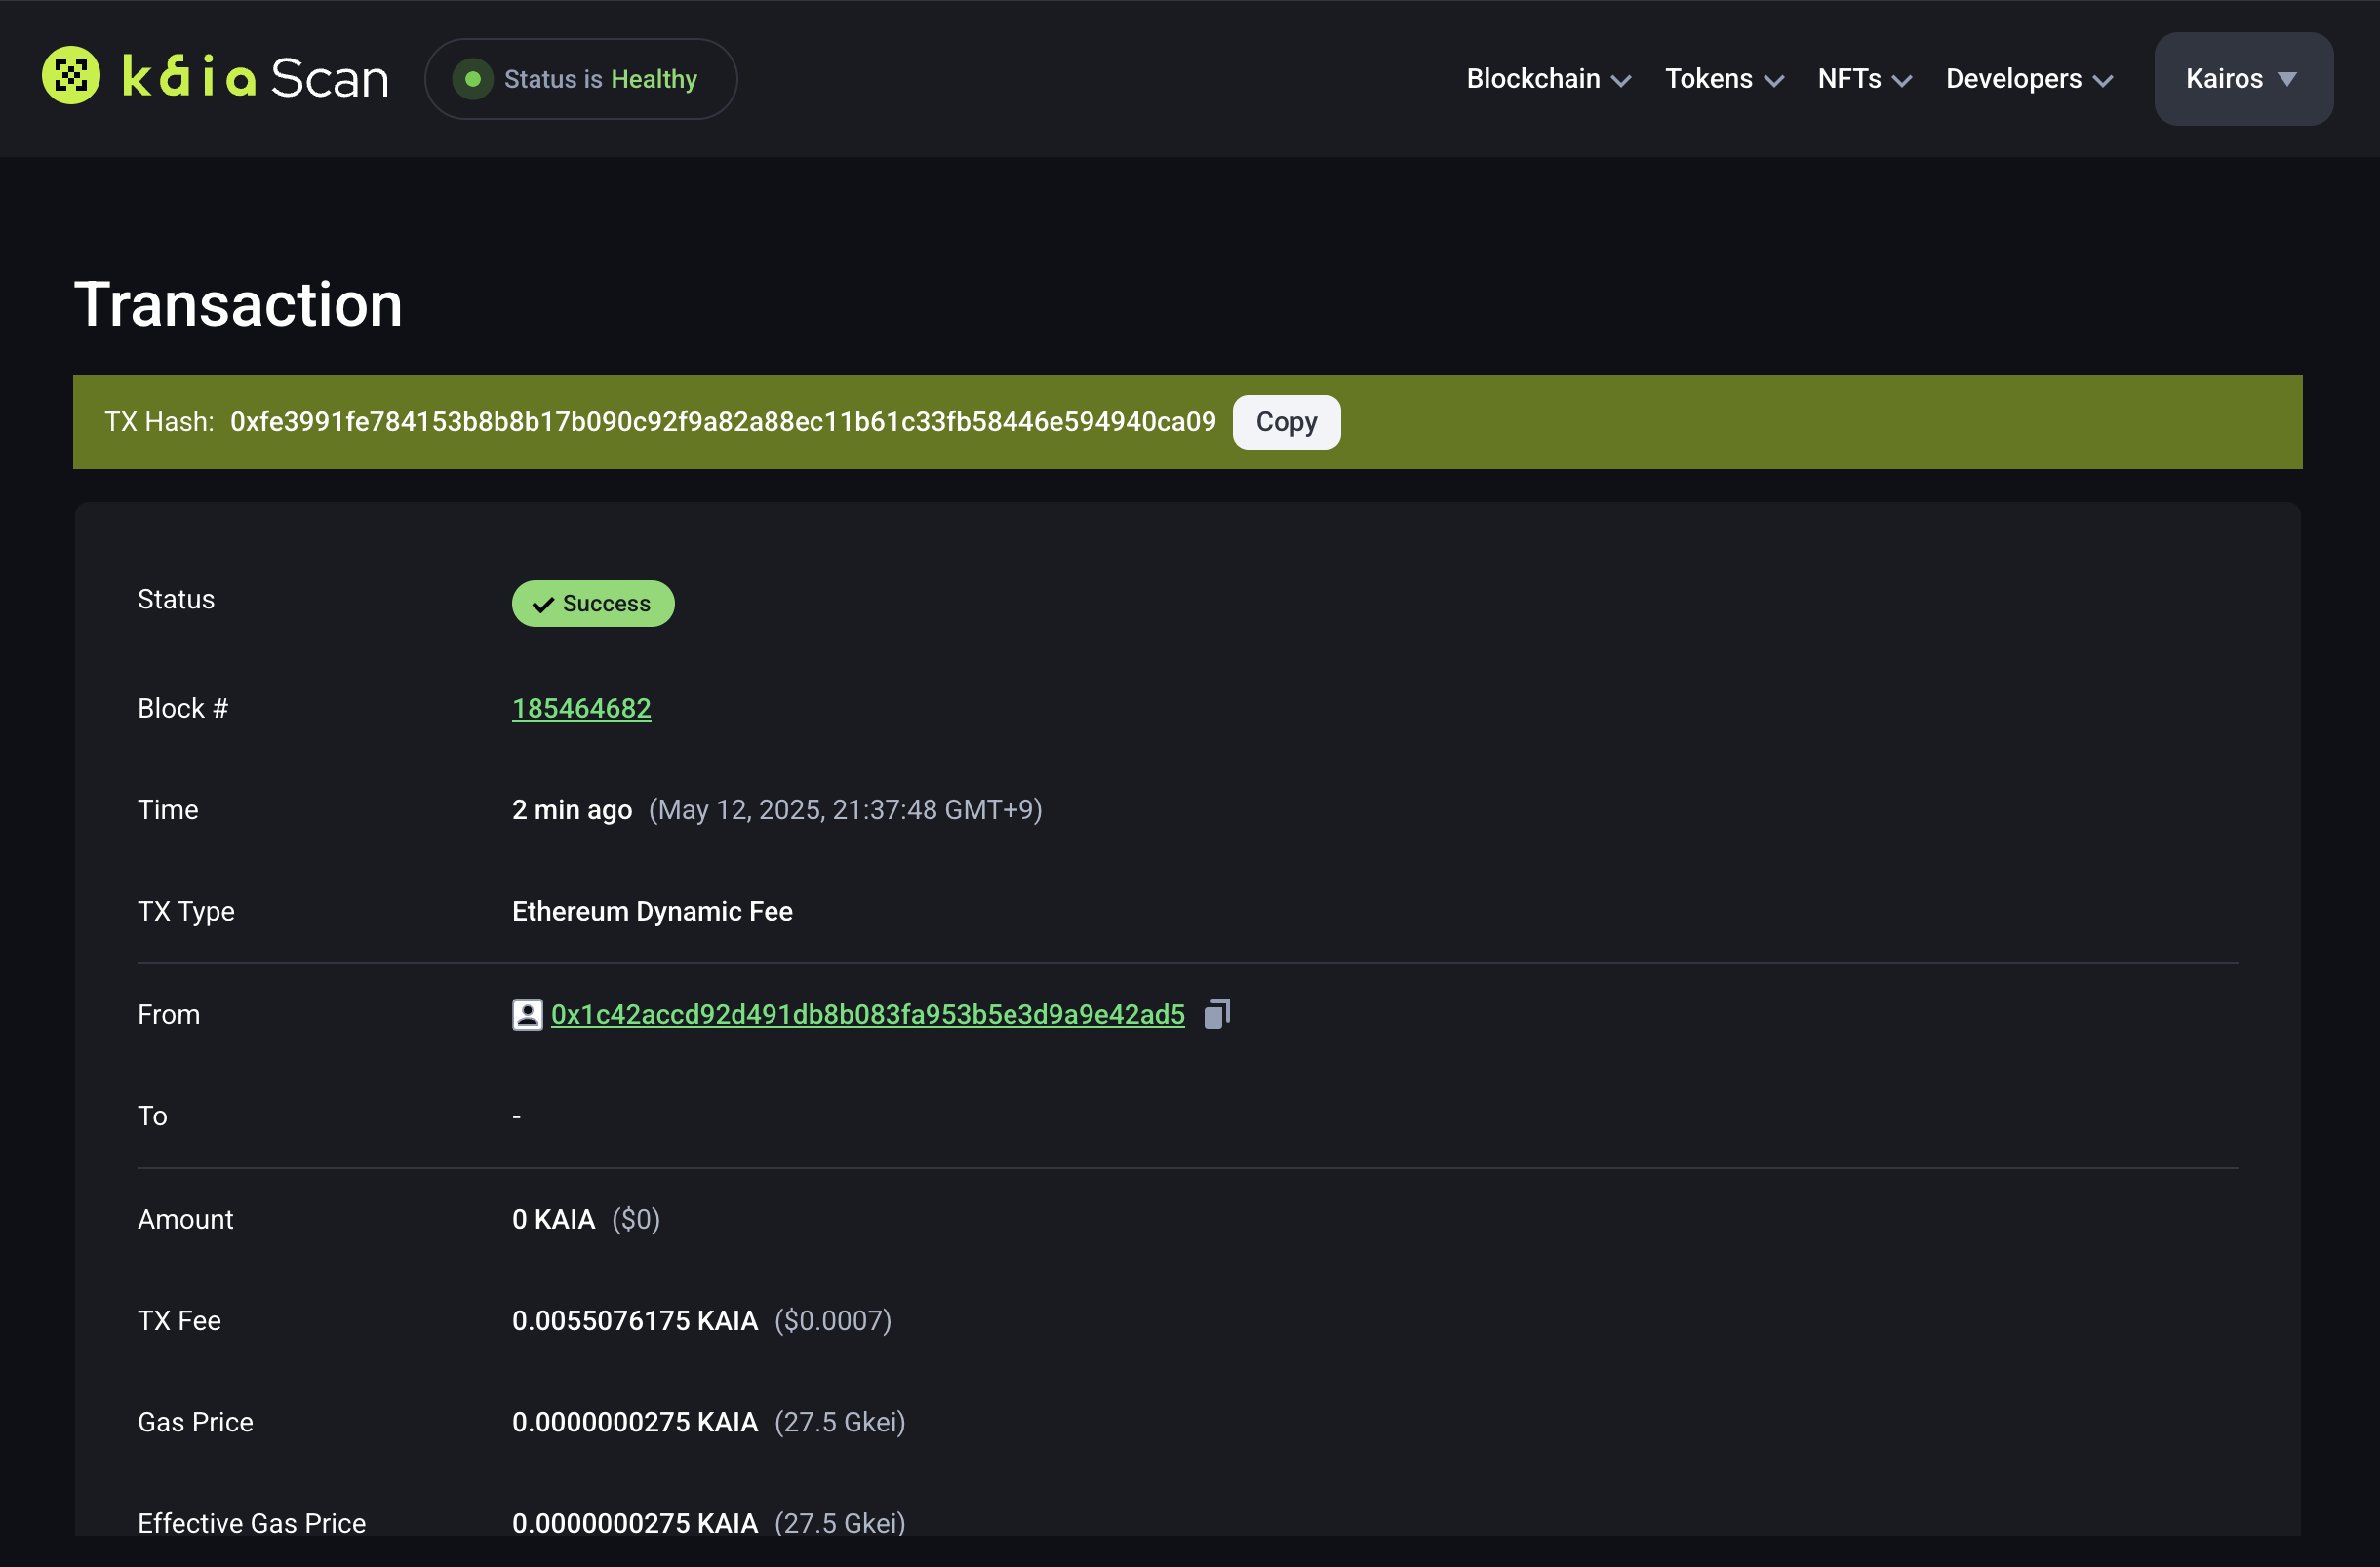
步驟 2:開啟 Kaiascan 檢查計數器合約是否部署成功。
Step 3: Copy and paste the transaction hash in the search field and press Enter. You should see the recently deployed contract.
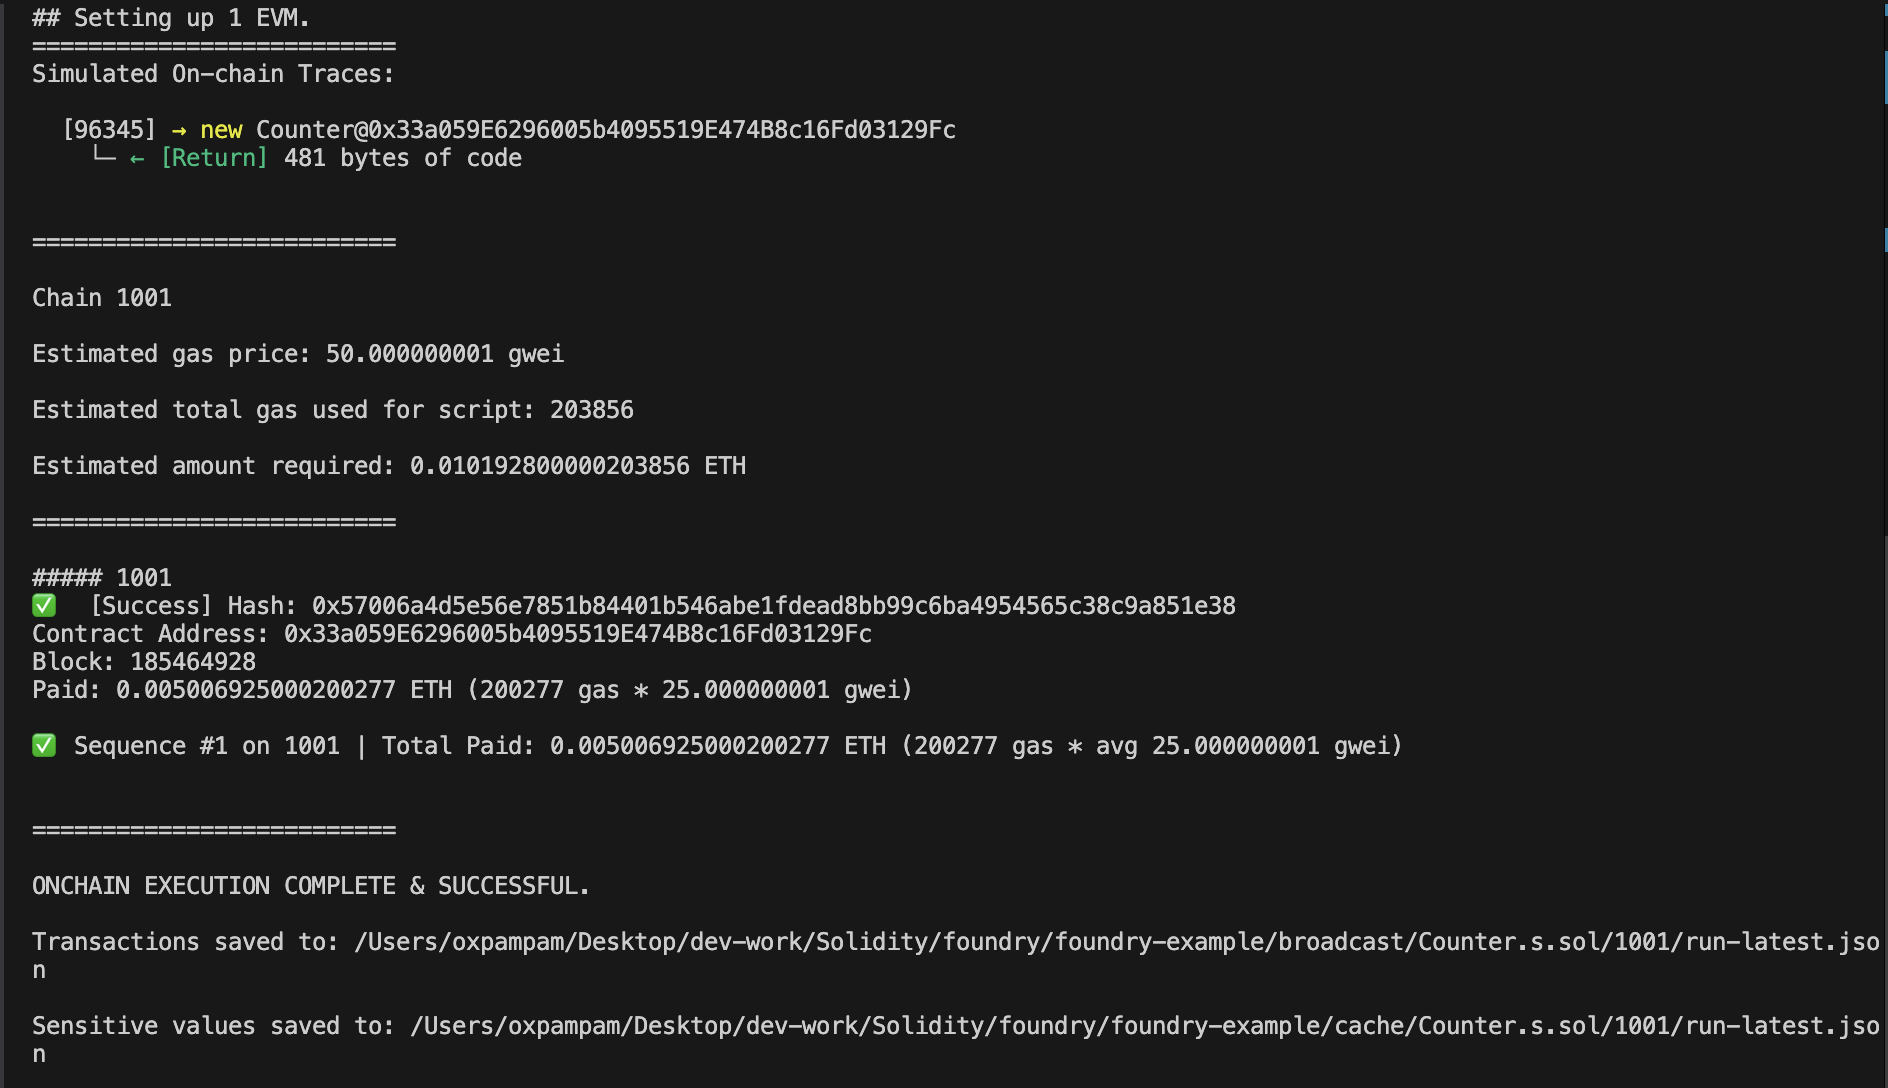
使用 Forge Script
若要使用 forge script 將您的合約部署到 Kaia Kairos 網路,請執行下列指令:
# 在 .env 檔案中載入變數source .env# 部署我們的合約forge script --chain 1001 script/Counter.s.sol:CounterScript --rpc-url $KAIROS_RPC_URL --broadcast -vvvv -account oxpampam-dev-i
Interacting with the contract
成功部署您的智慧型契約後,下一步通常是透過呼叫並執行其功能來與它互動。 讓我們直接使用 Cast 與 Kaia Kairos Network 上已部署的合約互動。
In this section, you will learn how to use the cast call to execute the read-only function and cast send to execute write functions.
A. 演員招募
若要取得儲存於契約中的號碼,您將會呼叫 number 函式。 Run the command below to see this in action.
cast call YOUR_CONTRACT_ADDRESS "number()" --rpc-url $KAIROS_RPC_URL
Example
cast call 0xb00760a445f47F79ea898bCe7F88cD4930060Ca5 "number()" --rpc-url $KAIROS_RPC_URL
Output

You should get this data in hexadecimal format:
0x0000000000000000000000000000000000000000000000000000000000000000
然而要得到您想要的結果,請使用 cast 來轉換上述結果。 In this case, the data is a number, so you can convert it into base 10 to get the result 0:
cast --to-base 0x0000000000000000000000000000000000000000000000000000000000000000 10
Output

B. 傳送
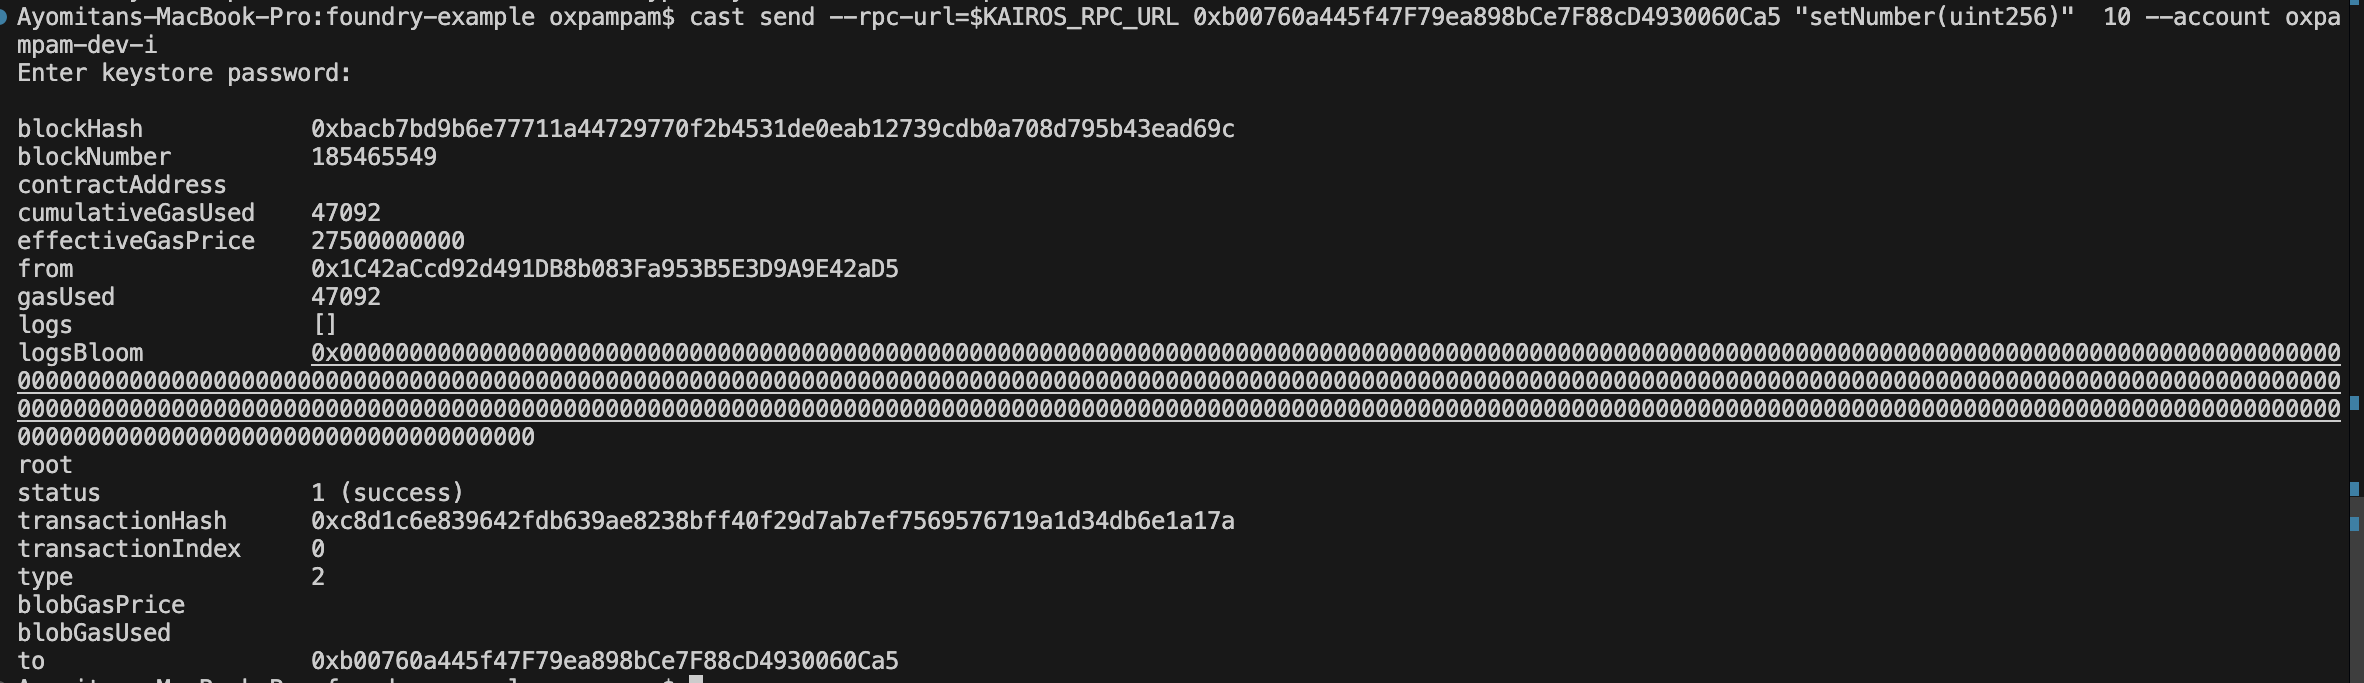
To sign and publish a transaction such as executing a setNumber function in the counter contract, run the command below:
cast send --rpc-url=$KAIROS_RPC_URL <CONTRACT-ADDRESS> "setNumber(uint256)" arg --account<ACCOUNT NAME>
Example
cast send --rpc-url=$KAIROS_RPC_URL 0xb00760a445f47F79ea898bCe7F88cD4930060Ca5 "setNumber(uint256)" 10 --account oxpampam-dev-i
輸出
Crosscheck Number
cast call 0xb00760a445f47F79ea898bCe7F88cD4930060Ca5 "number()" --rpc-url $KAIROS_RPC_URL
Output

You should get this data in hexadecimal format:
0x000000000000000000000000000000000000000000000000000000000000000a
However to get your desired result, use cast to convert the above result. In this case, the data is a number, so you can convert it into base 10 to get the result 10:
cast --to-base 0x000000000000000000000000000000000000000000000000000000000000000a 10
Output

Forking Mainnet with Cast and Anvil
Foundry allows us to fork the mainnet to a local development network (Anvil). Also, you can interact and test with contracts on a real network using Cast.
Getting Started
Now that you have your Foundry project up and running, you can fork the mainnet by running the command below:
anvil --fork-url rpc-url
Example
anvil --fork-url https://archive-en.node.kaia.io
Output
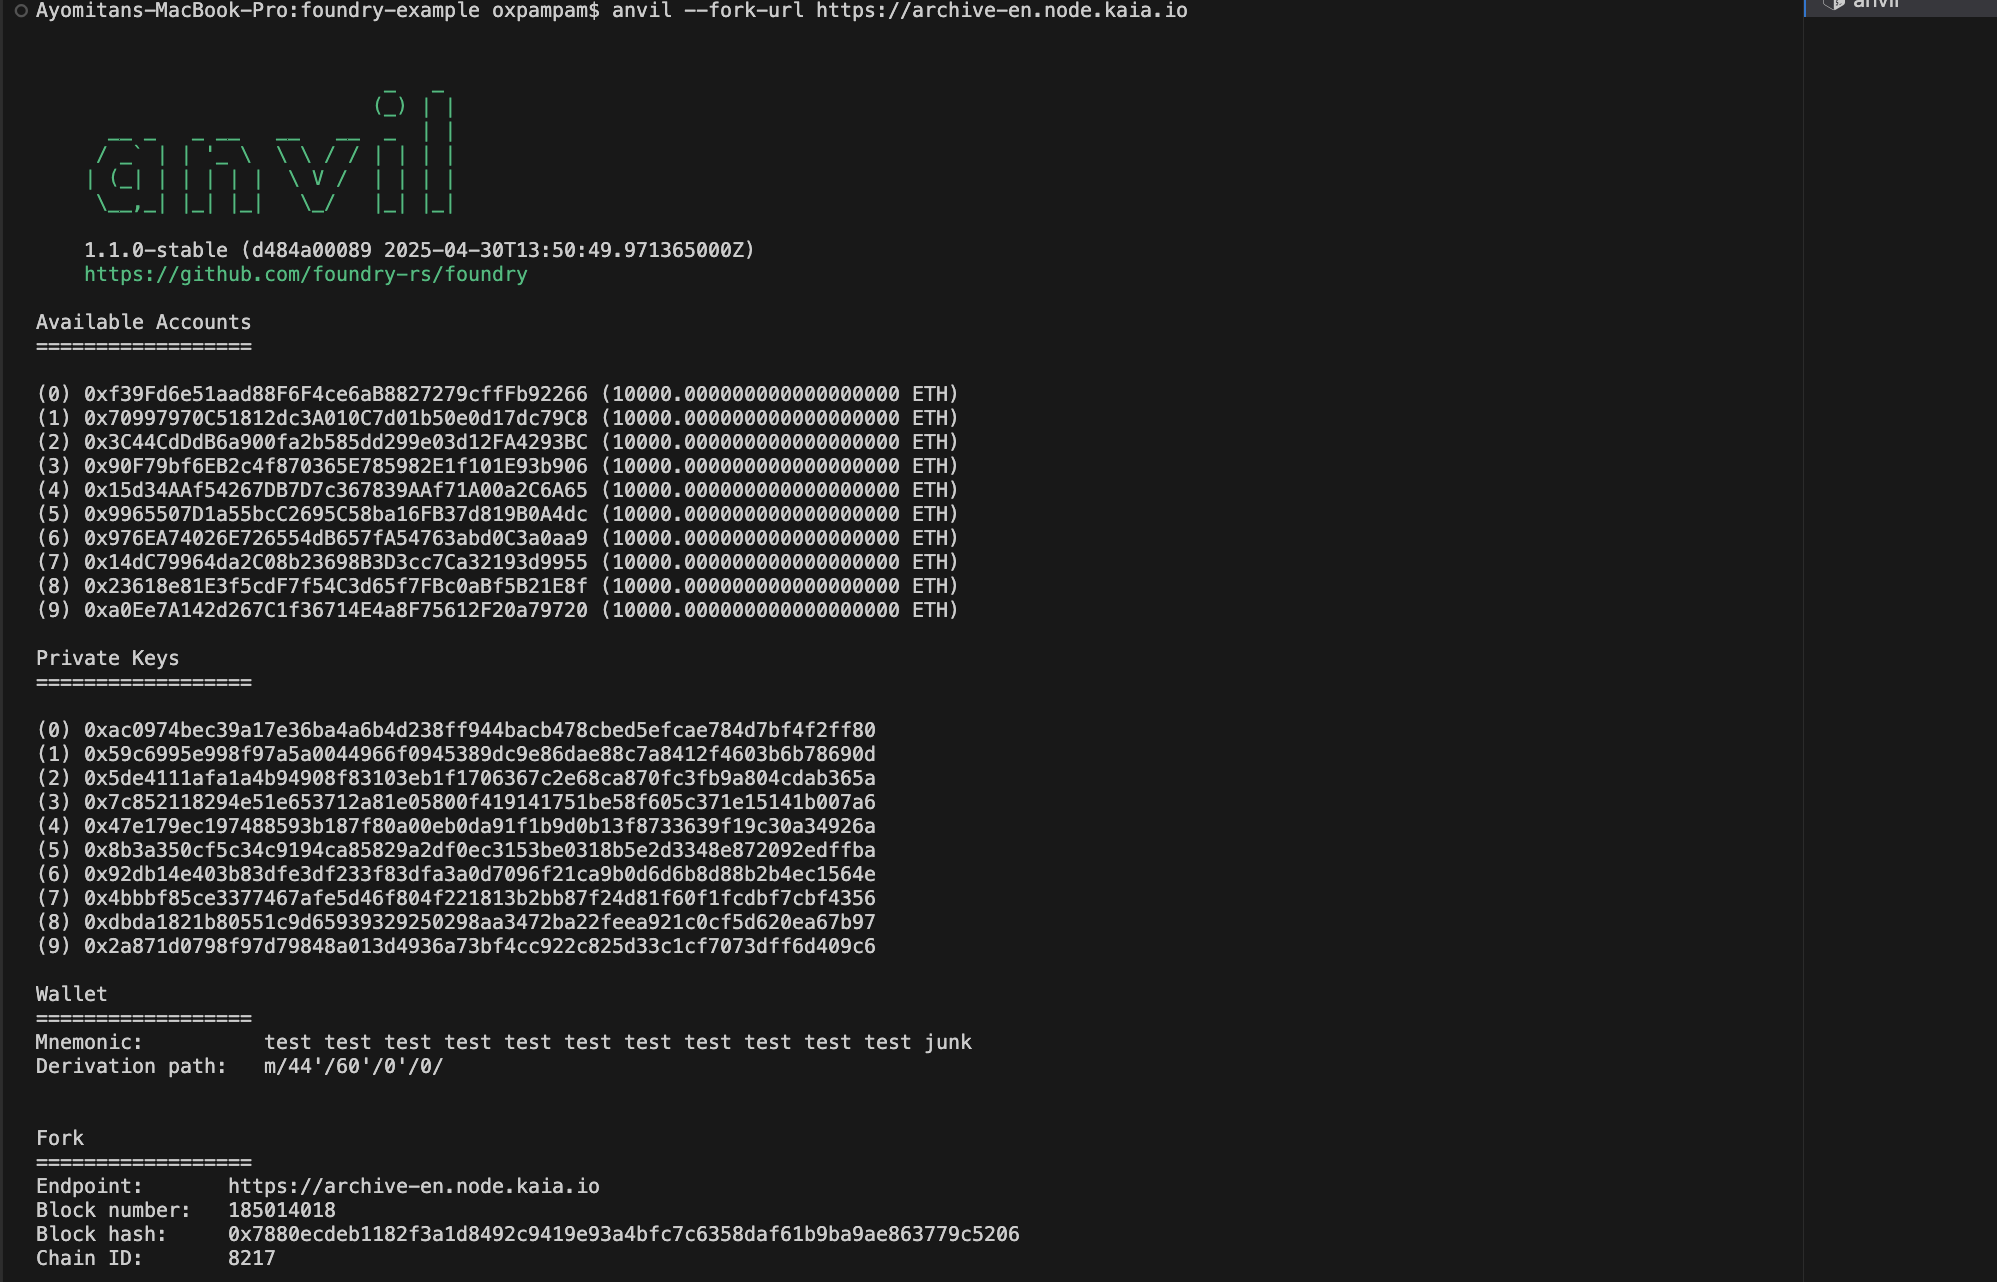
After successfully running this command, your terminal looks like the above image. You'll have 10 accounts created with their public and private keys as well 10,000 prefunded tokens. The forked chain's RPC server is listening at 127.0.0.1:8545.
To verify you have forked the network, you can query the latest block number:
curl --data '{"method":"eth_blockNumber","params":[],"id":1,"jsonrpc":"2.0"}' -H "Content-Type: application/json" -X POST localhost:8545
You can convert the result from the task above using hex to decimal. You should get the latest block number from the time you forked the network. 要驗證這一點,請交叉參考 KaiaScan 上的區塊號碼。
Illustration
在本節中,您將學習如何從持有 USDT 的人轉移 USDT 代幣到 Anvil 所建立的帳戶 (0x70997970C51812dc3A010C7d01b50e0d17dc79C8 - Bob)
Transferring USDT
到 Kaiascan 搜尋 USDT 代幣的持有者 (here)。 Let's pick a random account. 在本範例中,我們將使用 0xb3ff853a137bfe10f3d8965a29013455e1619303。
Let's export our contracts and accounts as environment variables:
export BOB=0x70997970C51812dc3A010C7d01b50e0d17dc79C8export USDT=0xd077a400968890eacc75cdc901f0356c943e4fdbexport USDTHolder=0xb3ff853a137bfe10f3d8965a29013455e1619303
使用 cast call 檢查 Bob 的 USDT 結餘:
cast call $USDT "balanceOf(address)(uint256)" $BOB
Output

同樣地,我們也可以使用 cast call 檢查 USDTHolder 的 USDT 結餘:
cast call $USDT "balanceOf(address)(uint256)" $USDTHolder
Output

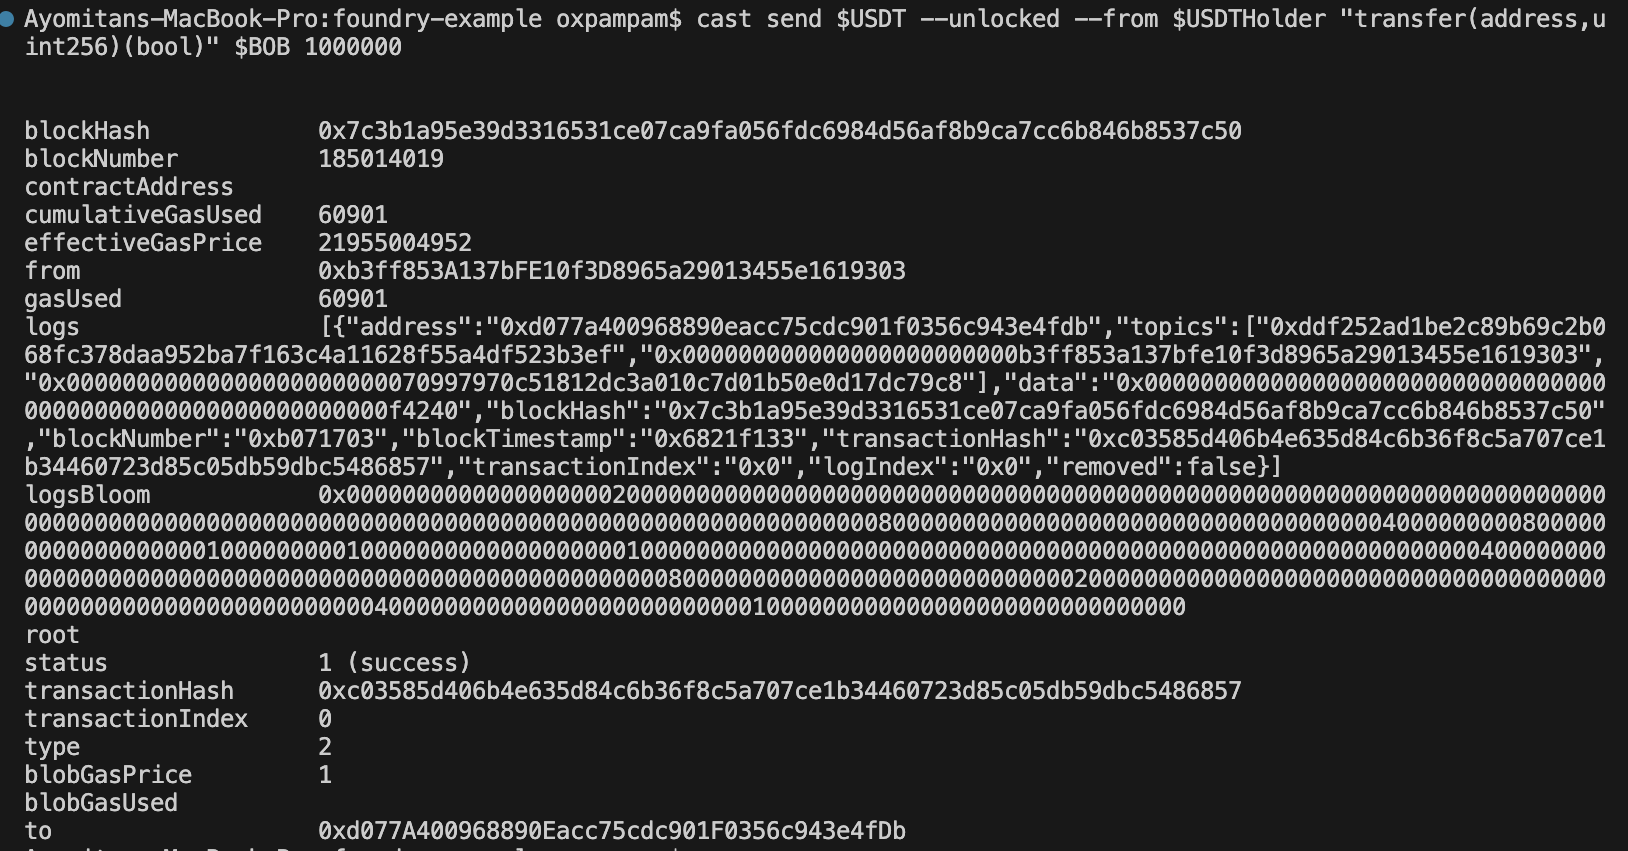
讓我們使用 cast send 從 USDTHolder 傳輸一些代幣給 Bob:
# 假冒 USDTHoldercast rpc anvil_impersonateAccount $USDTHolder # 轉移 USDTcast send $USDT --unlocked --from $USDTHolder "transfer(address,uint256)(bool)" $BOB 1000000
Output
Let's check that the transfer worked:
cast call $USDT "balanceOf(address)(uint256)" $BOB
Output

cast call $USDT "balanceOf(address)(uint256)" $USDTHolder
Output

疑難排解
氣體估計誤差
使用 forge 腳本部署時可能會遇到此錯誤:
# Transaction Failure❌ [Failed] Hash: 0xa0de3dac1dae4d86f2ba8344bc5f7d816714a6abdc4555ae46ca21d126f78cafError:Transaction Failure: 0xa0de3dac1dae4d86f2ba8344bc5f7d816714a6abdc4555ae46ca21d126f78caf# Explorer 上的交易錯誤代碼Error:合約建立程式碼儲存耗盡

這通常是由於部署時氣體估計不準確所致。 Foundry 的預設瓦斯估算演算法 (其預設乘數為 130%),有時在 Kaia 網路上會出現不足,導致部署在完成前就耗盡瓦斯。
當實際需要的瓦斯量超過估計量時,交易會在合約部署期間耗盡瓦斯,導致 Contract creation code storage out of gas 錯誤。
快速修復:手動設定瓦斯倍數
像這樣以增加的 --gas-estimate-multiplier 200 或更高值執行您的指令碼:
# commandforge script script/YourContract.s.sol:YourScript \ --chain<chain-id> \ --rpc-url $RPC_URL \ --broadcast \ --gas-estimate-multiplier 200 \ --account your-account \ -vvvv
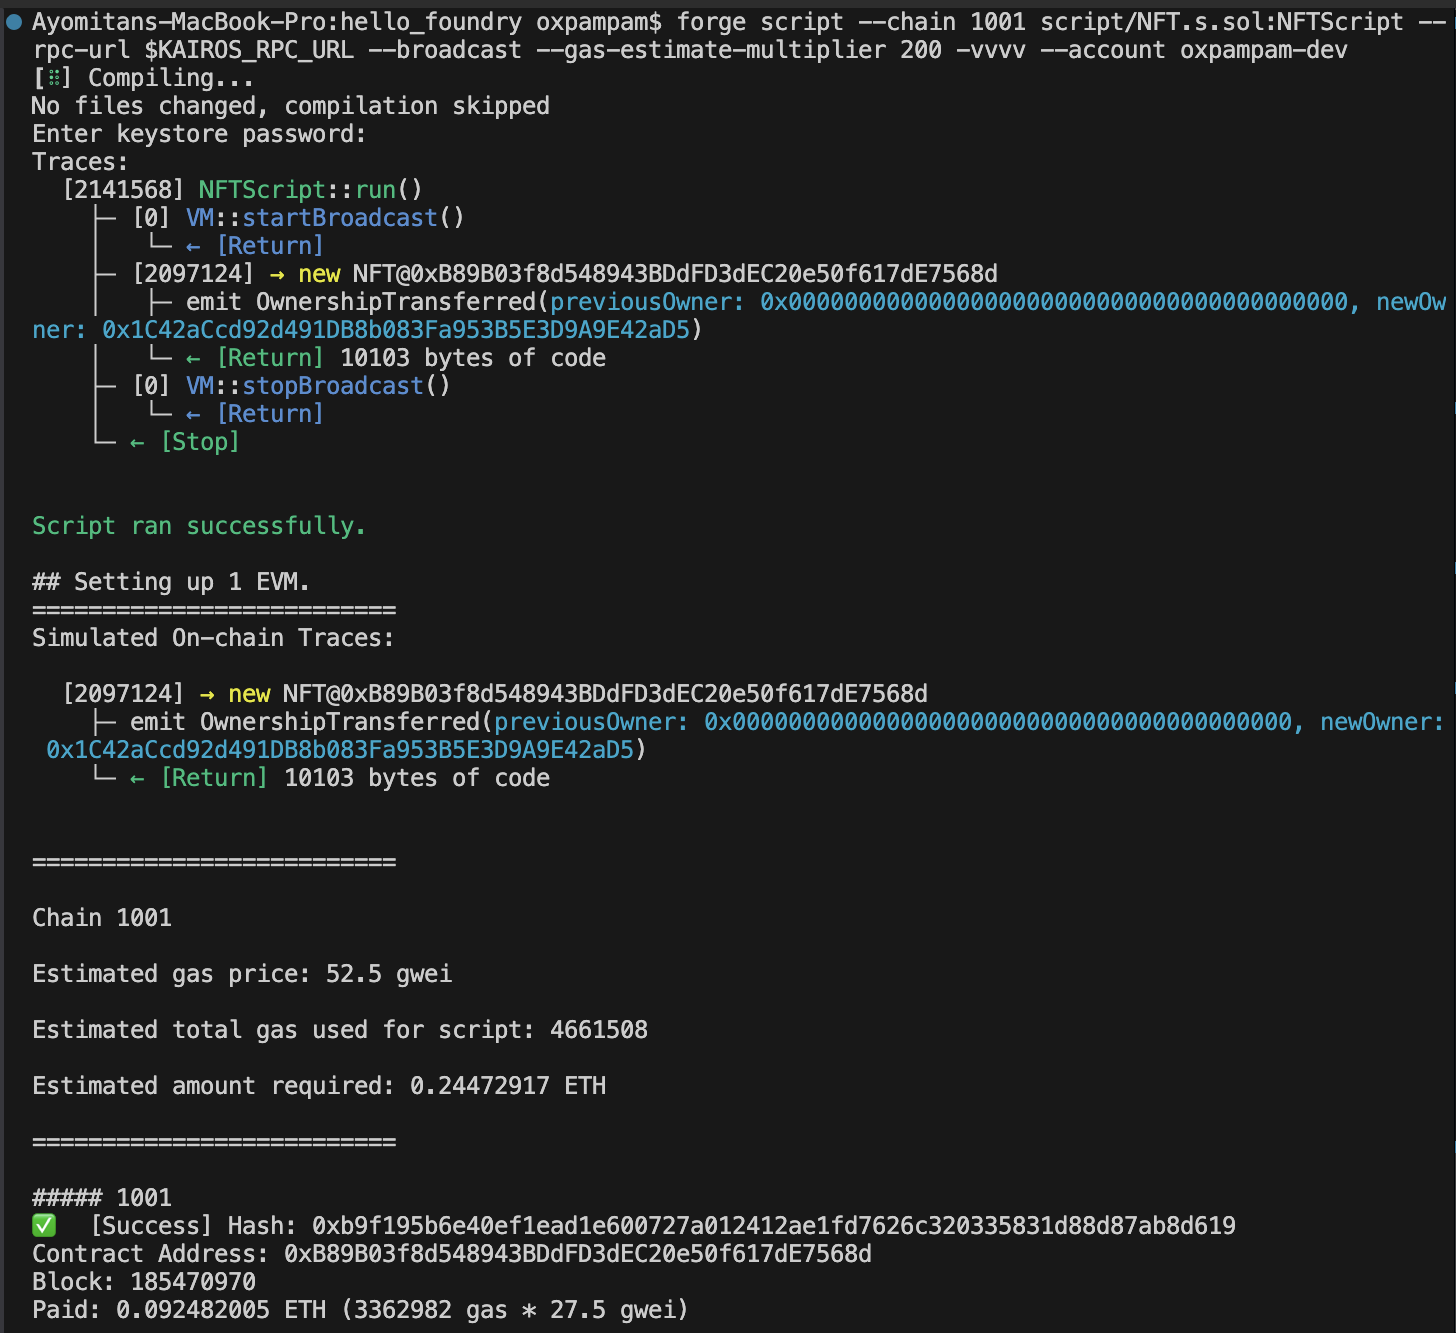
# example forge script --chain 1001 script/NFT.s.sol:NFTScript --rpc-url $KAIROS_RPC_URL --broadcast --gas-estimate-multiplier 200 -vvvv -account oxpampam-dev-i
氣體估計乘數」旗號設定所有氣體估計乘以的相對百分比。 將其設定為 200,就等於將氣體估計值加倍,讓您的合約部署有足夠的空間順利完成。
總結
如果您成功完成本指南,恭喜您。 如果您有任何問題,請造訪 Kaia 論壇。 不過,以下是您在 Kaia 上使用 Foundry 進一步建置時可能需要的有用資源清單。