使用 Foundry 部署智能合约

导言
Foundry 是一个用 Rust 编写的智能合约开发框架,开发人员可以通过 solidity 脚本从命令行管理和编译合约、运行测试、部署合约并与网络交互。
Foundry 由四个主要 CLI 工具组成,可实现快速、模块化的智能合约开发,它们是
- Forge: 您可以使用 Forge 部署、测试和编译智能合约。
- Cast:Cast 使与 EVM 智能合约的交互变得简单。 这包括获取链数据、发送交易等。
- Anvil:您需要启动本地节点吗? Anvil 是 Foundry 提供的本地节点环境。
- Chisel:快速、实用、冗长的 solidity REPL。
在本指南中,您将
- 创建一个简单的铸造项目。
- 使用 Foundry 编译和测试示例智能合约。
- 使用 Foundry 向 Kaia Kairos 网络部署智能合约。
- 探索使用铸铁和铁砧分叉主网。
先决条件
学习�本教程的前提条件如下:
- 代码编辑器:源代码编辑器,如 VS Code。
- MetaMask:用于部署合同、签署交易和与合同交互。
- RPC 端点:可从受支持的 端点提供程序 中获取。
- 从 水龙头测试 KAIA:为账户注入足够的 KAIA。
- 安装 Rust 和 Foundry。
设置开发环境
要检查 foundry 安装是否成功,请运行下面的命令:
forge -V
输出

成功安装 Foundry 后,您现在可以使用 Foundry 中的 CLI 工具(锻造、铸造、铁砧、凿子)。 让我们按以下步骤建立一个代工厂项目:
步骤 1:要启动一个新项目,请运行以下命令:
forge init foundry_example
第 2 步:进入项目文件夹。
cd foundry_example
初始化 foundry 项目后,当前目录应包括
- src:智能合约的默认目录。
- 测试:测试的默认目录。
- foundry.toml:默认项目配置文件。
- lib:项目依赖项的默认目录。
- script:solidity 脚本文件的默认目录。
配置 foundry.toml
现在我们的项目已经建立,我们必须创建一个 .env 文件并添加变量。 Foundry 会自动加载项目目录中的 .env 文件。
.env 文件应遵循以下格式:
kairos_rpc_url=paste_rpc_url
接下来是编辑 foundry.toml 文件。 在脚手架之后的项目根目录中应该已经有一个了。
在文件末尾添加以下几行:
[rpc_endpoints]kairos = "${KAIROS_RPC_URL}"
这将为 Kaia Kairos Testnet 创建一个 RPC 别名。
导入账户
在本指南中,我们将导入一个已存在于 MetaMask 上的开发者账户,这样就可以在 "锻造脚本"、"广播发送 "或其他需要私钥的方法中通过"--账户 "选项访问该账户。
运行以下命令导入现有钱包:
cast wallet import --interactive oxpampam-dev-i
输入私人密钥:输入密码

Sample smart contract
In this section, we will be using the sample counter contract in the initialized foundry project. The counter.sol file in the src/ folder should look like this:
// SPDX-License-Identifier: UNLICENSEDpragma solidity ^0.8.13;contract Counter { uint256 public number; function setNumber(uint256 newNumber) public { number = newNumber; } function increment() public { number++; }}
Code Walkthrough
This is your smart contract. Line 1 shows it uses the Solidity version 0.8.13 or greater. From lines 4-12, a smart contract Counter is created. This contract simply stores a new number using the setNumber function and increments it by calling the increment function.
Testing smart contract
Foundry allows us to write tests in solidity as opposed to writing tests in javascript in other smart contract development frameworks. In our initialized foundry project, the test/Counter.t.sol is an example of a test written in solidity. The code looks like this:
// SPDX-License-Identifier: UNLICENSEDpragma solidity ^0.8.13;import "forge-std/Test.sol";import "../src/Counter.sol";contract CounterTest is Test { Counter public counter; function setUp() public { counter = new Counter(); counter.setNumber(0); } function testIncrement() public { counter.increment(); assertEq(counter.number(), 1); } function testSetNumber(uint256 x) public { counter.setNumber(x); assertEq(counter.number(), x); }}
The code above shows you imported forge standard library and Counter.sol.
The tests above check the following:
- Is the number increasing?
- Is the number equal to the set number?
To check if your test works fine, run the following command:
forge test
Output

To learn more about writing tests, advanced testing, and other features, refer to Foundry's documentation.
Compiling your contracts
Compile your contract with this command:
forge build
Deploying your contracts
To deploy a contract using foundry, you must provide an RPC URL and a private key of the account that will deploy the contract. 请查看 Kaia 上的 rpc-providers 列表,找到您的 rpc-url,并使用 MetaMask 创建一个账户。
在本指南中,我们将使用代工厂提供的两种合同部署方法:
使用 Forge Create
步骤 1:要使用 forge create 将合约部署到 Kaia Kairos 网络,请运行以下命令:
# 在 .env 文件中加载变量source .env# 部署我们的合约forge create --rpc-url $KAIROS_RPC_URL src/Counter.sol:Counter --broadcast --account oxpampam-dev-i
输入密钥库密码:<KEYSTORE_PASSWORD>
对于任何超出开发环境中基本测试网络使用范围的部署,强烈建议使用硬件钱包或受密码保护的密钥库 以增强安全性。

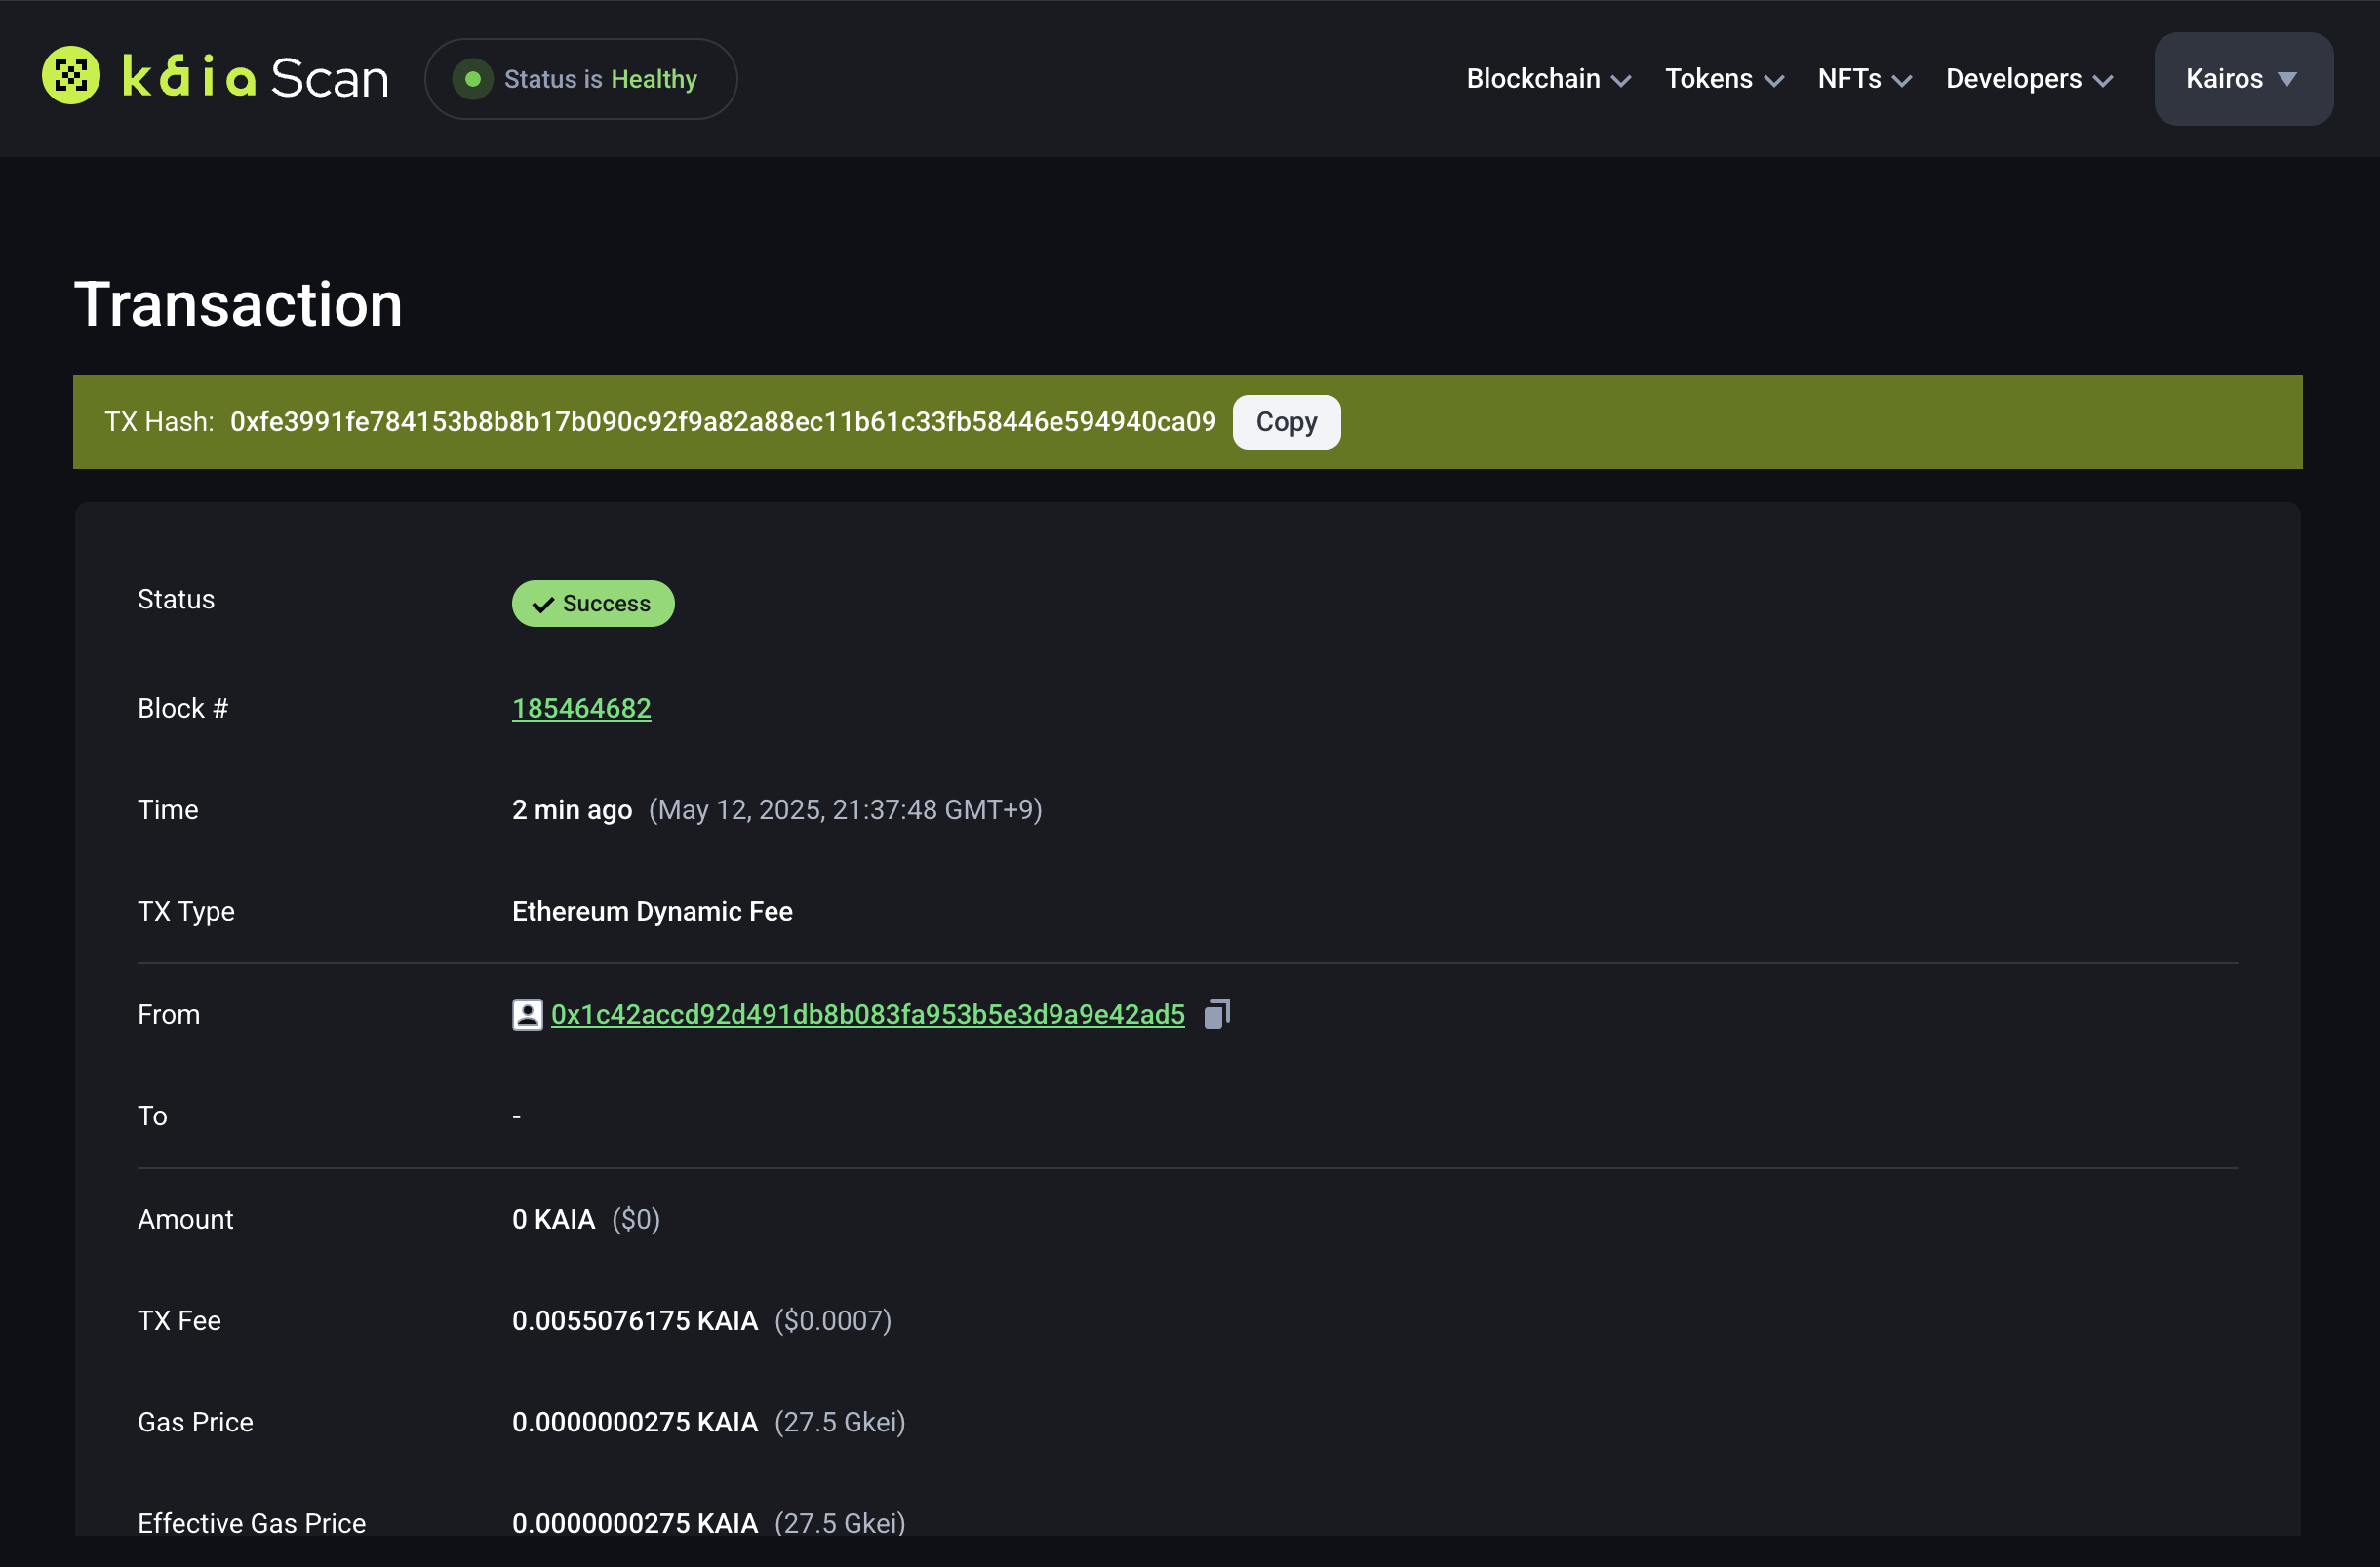
第 2 步:打开 Kaiascan 查看计数器合约是否部署成功。
Step 3: Copy and paste the transaction hash in the search field and press Enter. You should see the recently deployed contract.
��使用锻造脚本
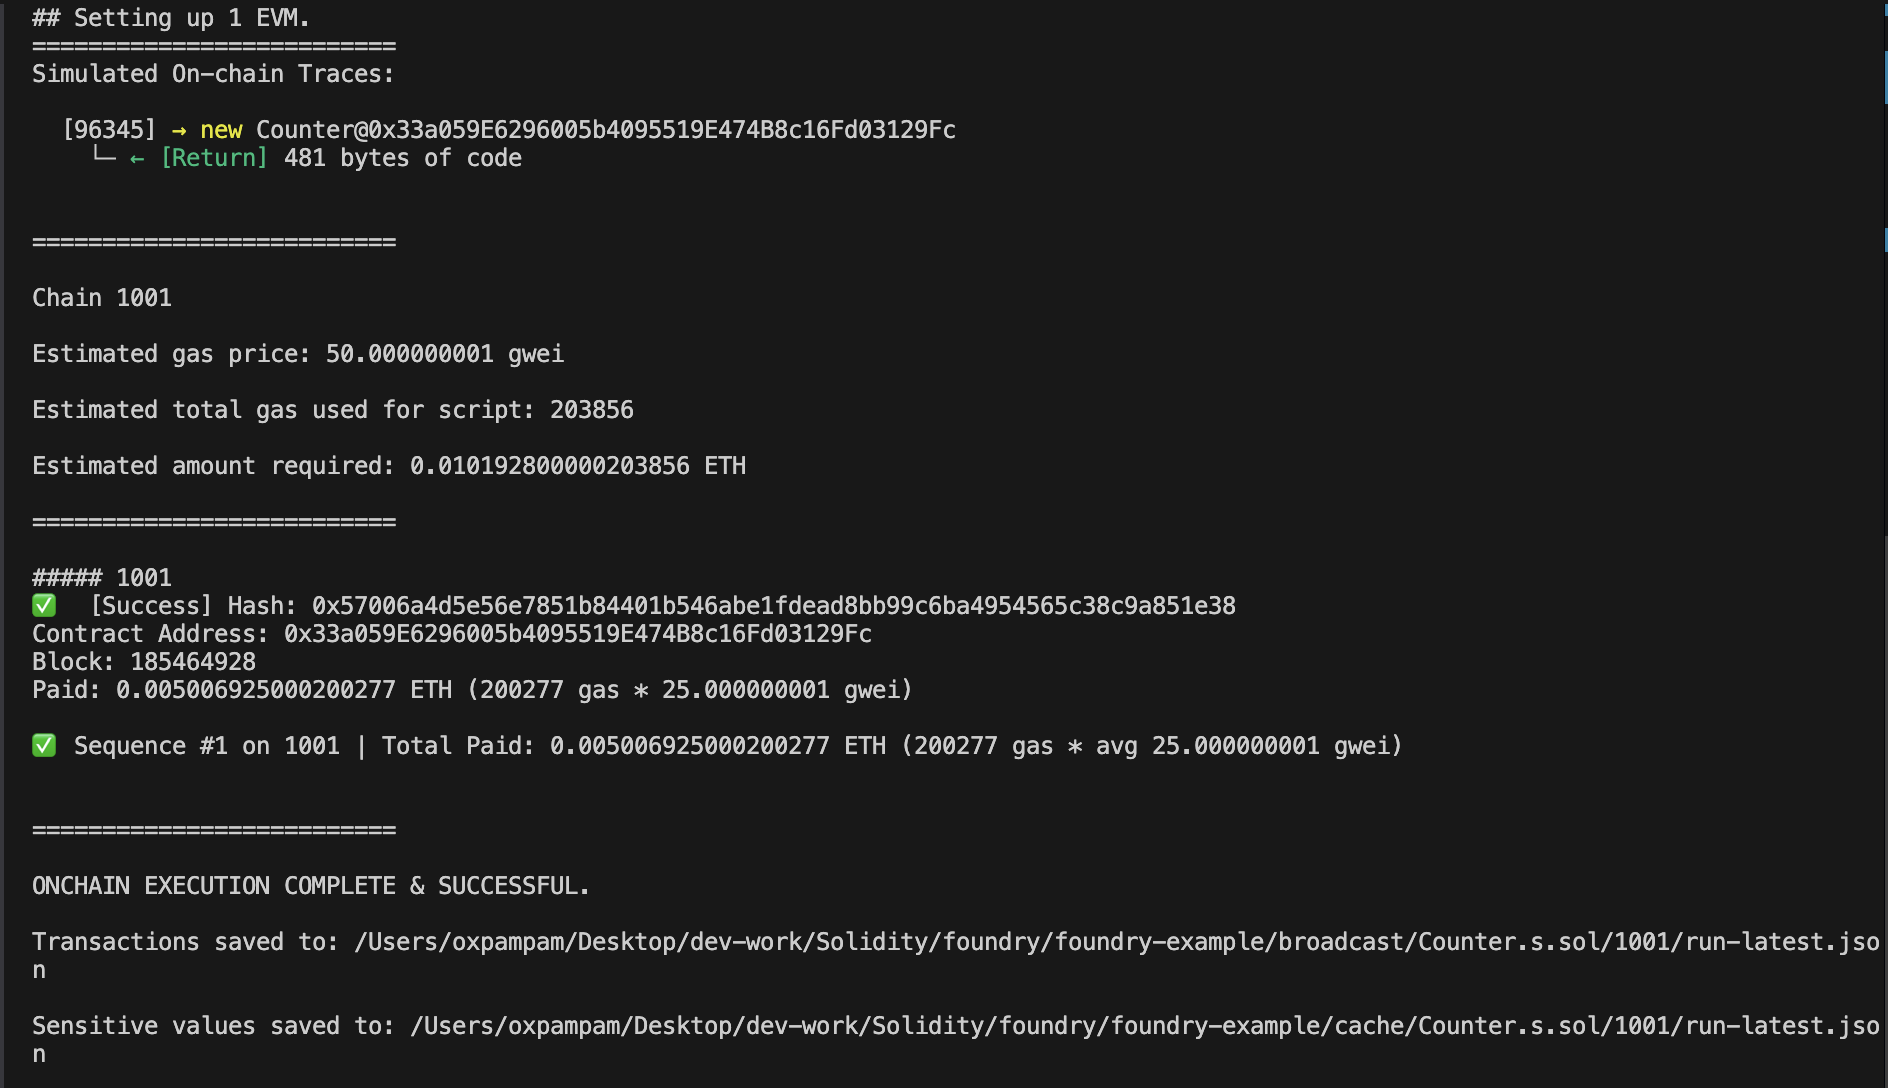
要使用锻造脚本将合同部署到 Kaia Kairos 网络,请运行以下命令:
# 在 .env 文件中加载变量source .env# 部署我们的合约forge script --chain 1001 script/Counter.s.sol:CounterScript --rpc-url $KAIROS_RPC_URL --broadcast -vvvv -account oxpampam-dev-i
Interacting with the contract
成功部署智能合约后,下一步通常是通过调用和执行其功能与之交互。 让我们直接使用 Cast 与 Kaia Kairos Network 上部署的合约进行交互。
In this section, you will learn how to use the cast call to execute the read-only function and cast send to execute write functions.
A. 演员招募
要获取存储在合约中的数字,您需要调用 number 函数。 Run the command below to see this in action.
cast call YOUR_CONTRACT_ADDRESS "number()" --rpc-url $KAIROS_RPC_URL
Example
cast call 0xb00760a445f47F79ea898bCe7F88cD4930060Ca5 "number()" --rpc-url $KAIROS_RPC_URL
Output

You should get this data in hexadecimal format:
0x0000000000000000000000000000000000000000000000000000000000000000
不过,要得到您想要的结果,请使用 cast 转换上述结果。 In this case, the data is a number, so you can convert it into base 10 to get the result 0:
cast --to-base 0x0000000000000000000000000000000000000000000000000000000000000000 10
Output

B. 投送
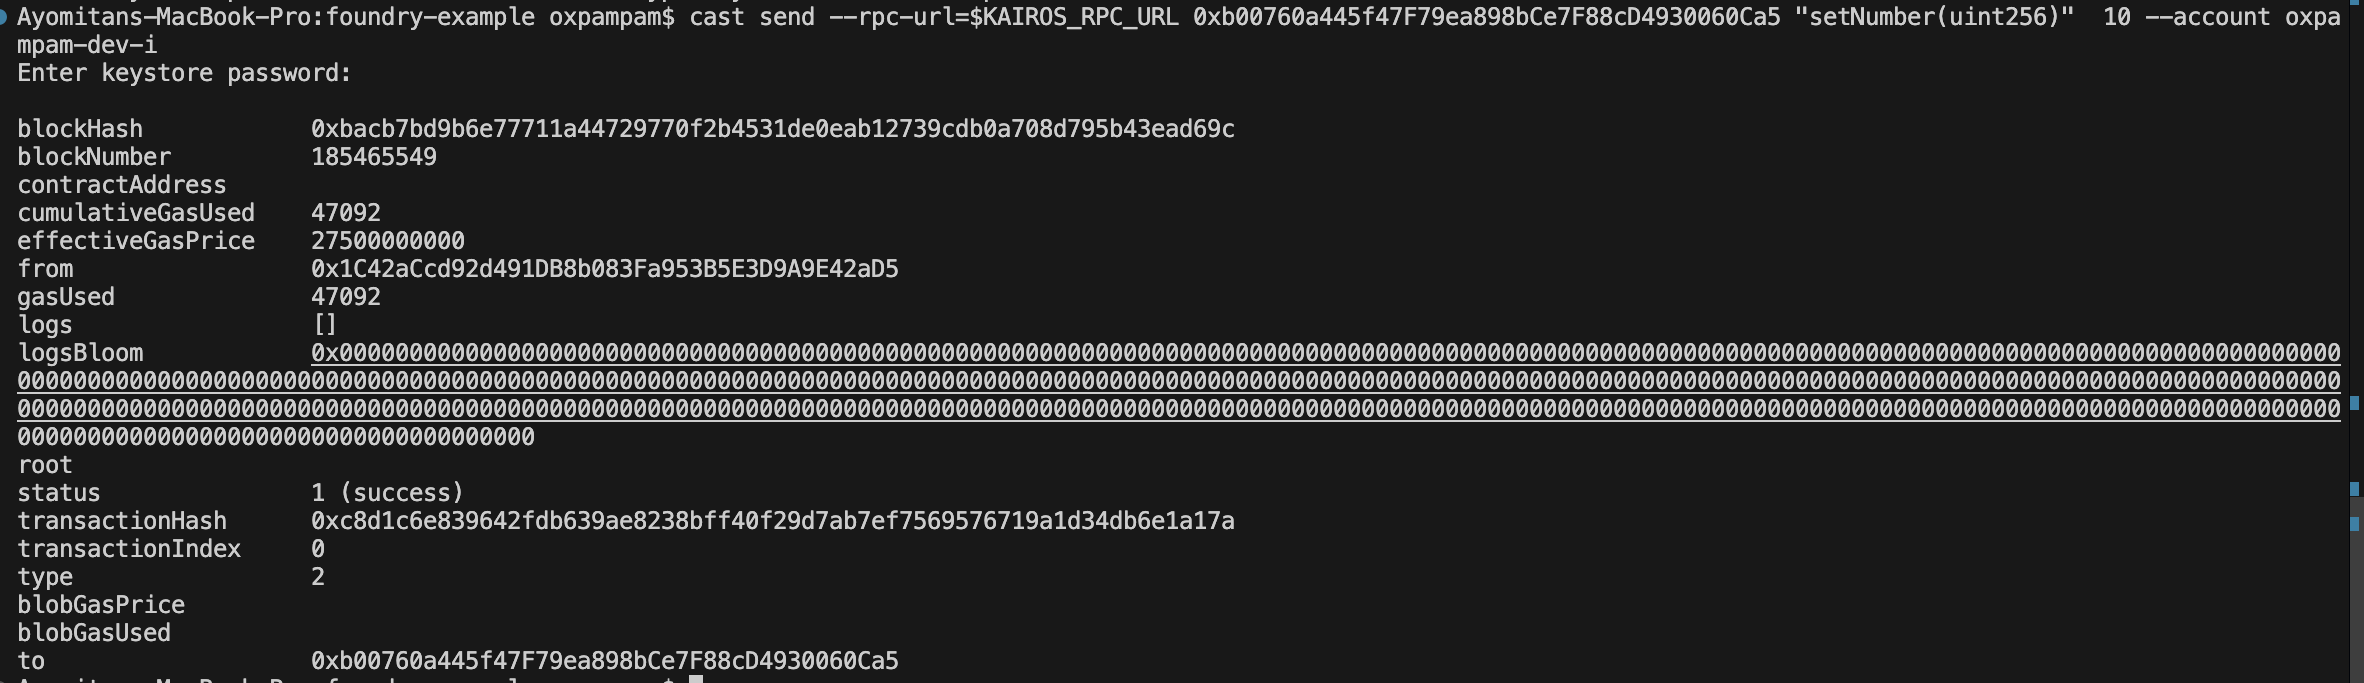
To sign and publish a transaction such as executing a setNumber function in the counter contract, run the command below:
cast send --rpc-url=$KAIROS_RPC_URL <CONTRACT-ADDRESS> "setNumber(uint256)" arg --account<ACCOUNT NAME>
Example
cast send --rpc-url=$KAIROS_RPC_URL 0xb00760a445f47F79ea898bCe7F88cD4930060Ca5 "setNumber(uint256)" 10 --account oxpampam-dev-i
输出
Crosscheck Number
cast call 0xb00760a445f47F79ea898bCe7F88cD4930060Ca5 "number()" --rpc-url $KAIROS_RPC_URL
Output

You should get this data in hexadecimal format:
0x000000000000000000000000000000000000000000000000000000000000000a
However to get your desired result, use cast to convert the above result. In this case, the data is a number, so you can convert it into base 10 to get the result 10:
cast --to-base 0x000000000000000000000000000000000000000000000000000000000000000a 10
Output

Forking Mainnet with Cast and Anvil
Foundry allows us to fork the mainnet to a local development network (Anvil). Also, you can interact and test with contracts on a real network using Cast.
Getting Started
Now that you have your Foundry project up and running, you can fork the mainnet by running the command below:
anvil --fork-url rpc-url
Example
anvil --fork-url https://archive-en.node.kaia.io
Output
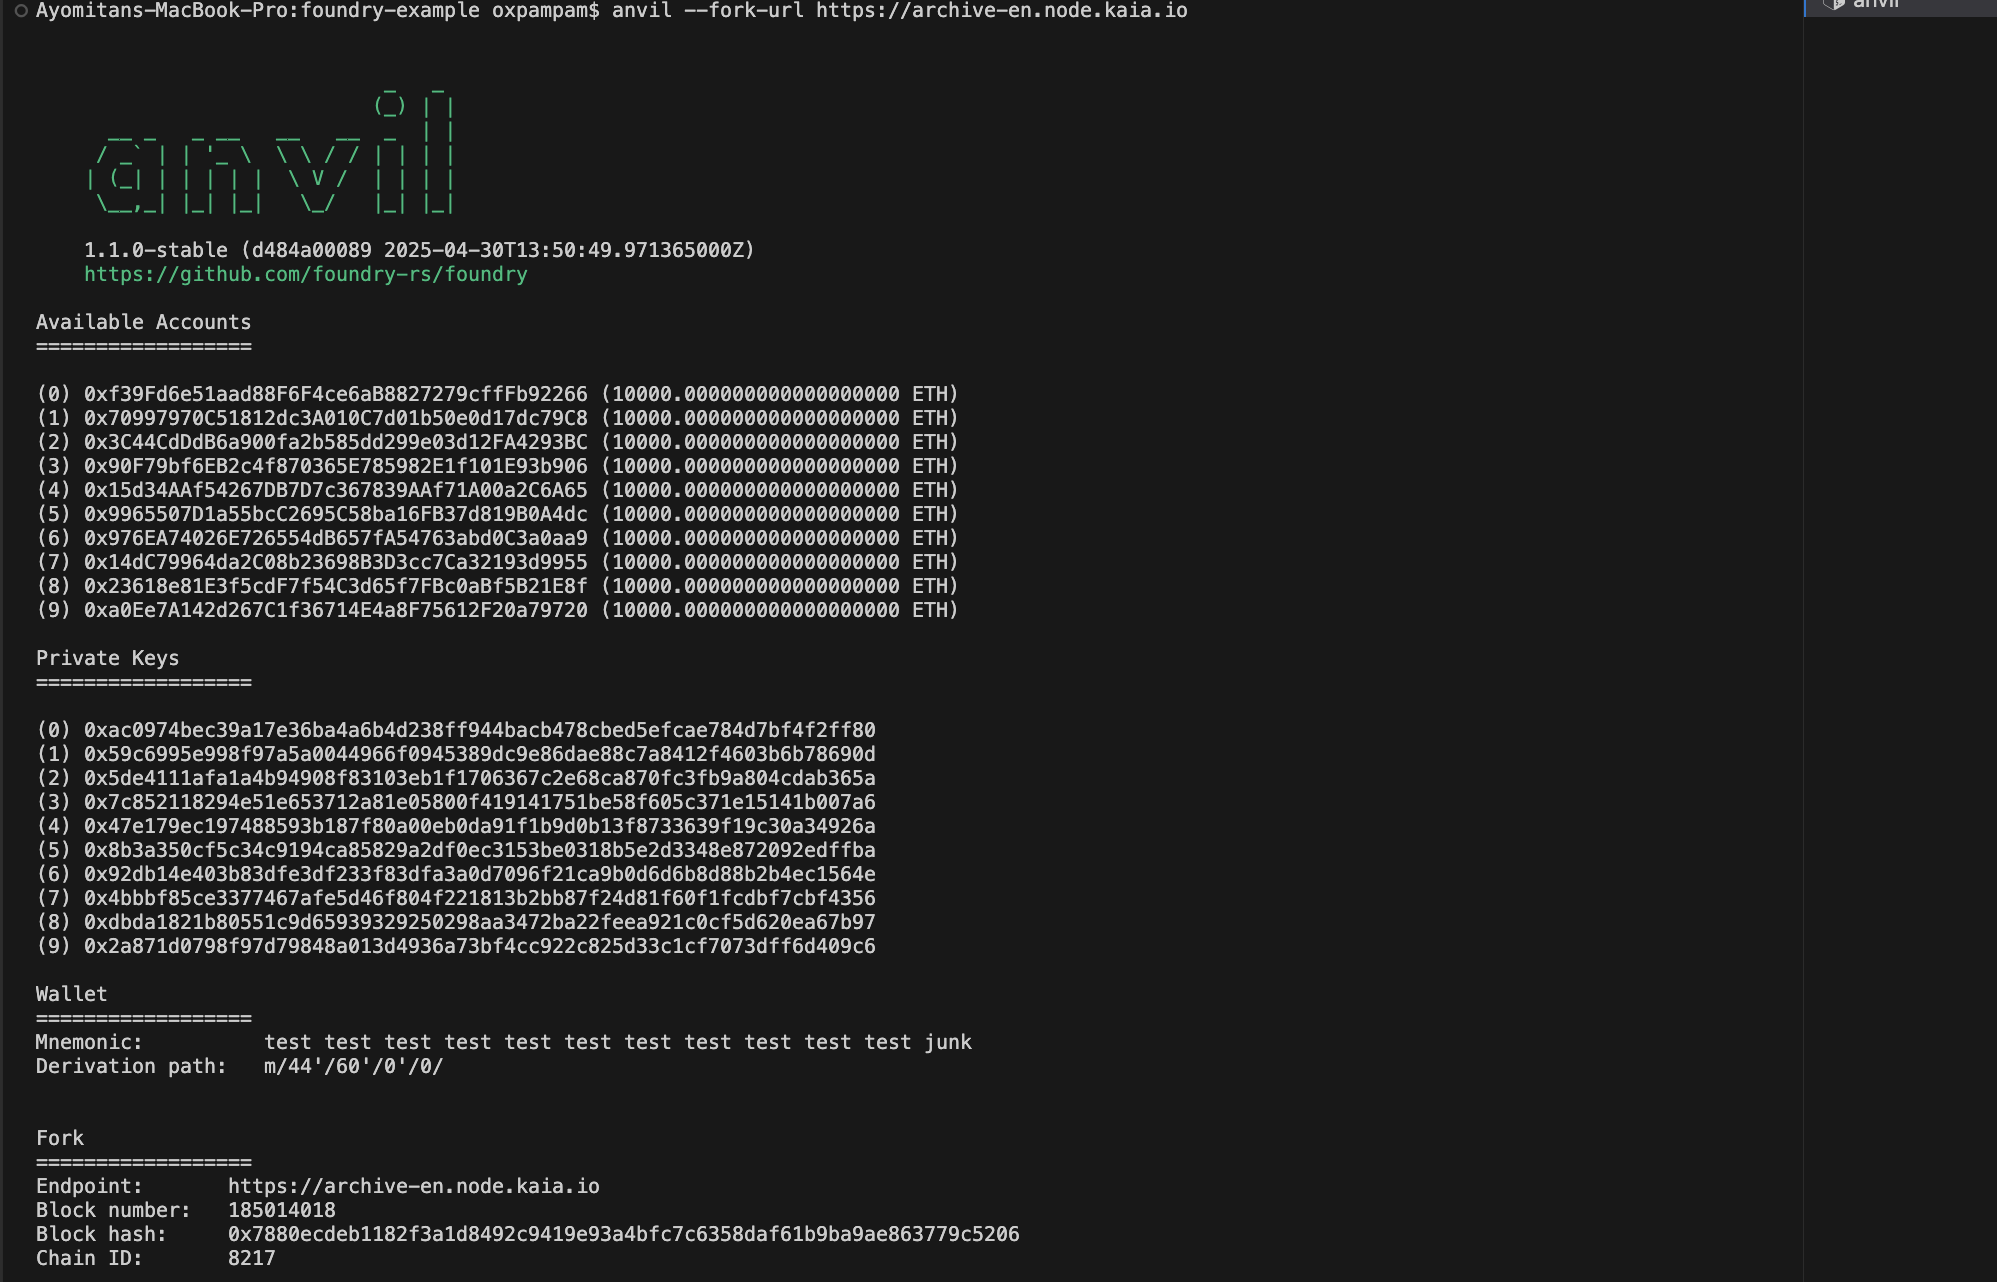
After successfully running this command, your terminal looks like the above image. You'll have 10 accounts created with their public and private keys as well 10,000 prefunded tokens. The forked chain's RPC server is listening at 127.0.0.1:8545.
To verify you have forked the network, you can query the latest block number:
curl --data '{"method":"eth_blockNumber","params":[],"id":1,"jsonrpc":"2.0"}' -H "Content-Type: application/json" -X POST localhost:8545
You can convert the result from the task above using hex to decimal. You should get the latest block number from the time you forked the network. 要验证这一点,请对照 KaiaScan 上的区块编号。
Illustration
在本节中,您将了解如何将 USDT 代币从持有 USDT 的人转入 Anvil 创建的账户 (0x70997970C51812dc3A010C7d01b50e0d17dc79C8 - Bob)
Transferring USDT
访问 Kaiascan 并搜索 USDT 代币持有者(此处)。 Let's pick a random account. 在本例中,我们将使用 0xb3ff853a137bfe10f3d8965a29013455e1619303。
Let's export our contracts and accounts as environment variables:
export BOB=0x70997970C51812dc3A010C7d01b50e0d17dc79C8export USDT=0xd077a400968890eacc75cdc901f0356c943e4fdbexport USDTHolder=0xb3ff853a137bfe10f3d8965a29013455e1619303
使用 "cast call "查看 Bob 的 USDT 余额:
cast call $USDT "balanceOf(address)(uint256)" $BOB
Output

同样,我们也可以使用投币电话查看 USDTHolder 的 USDT 余额:
cast call $USDT "balanceOf(address)(uint256)" $USDTHolder
Output

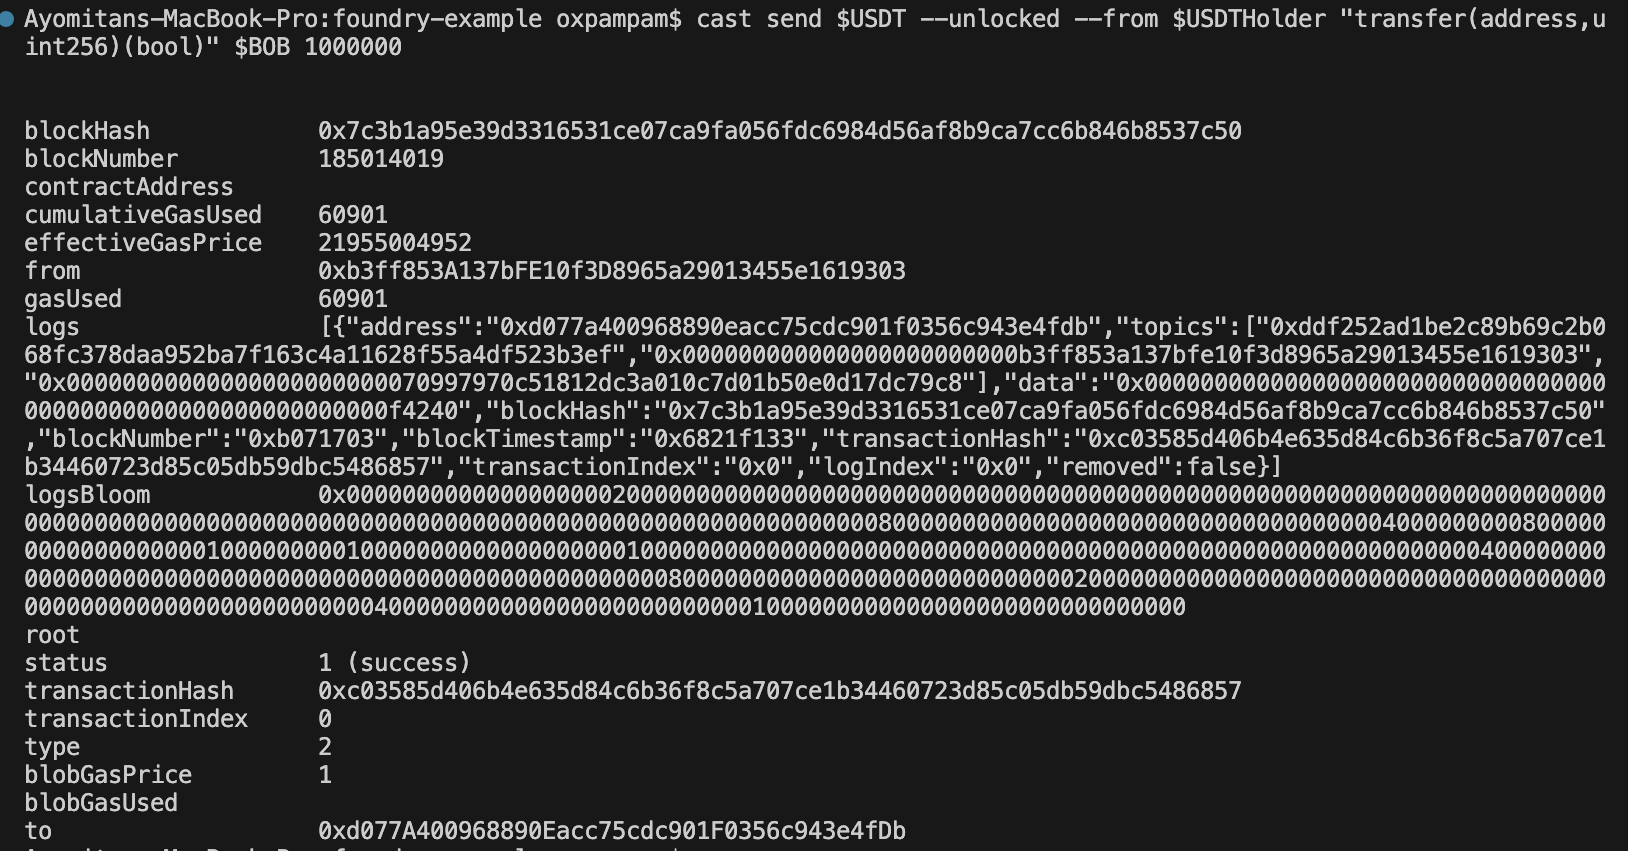
让我们使用投递发送功能,将 USDTHolder 中的一些令牌传输给 Bob:
# 假冒 USDTHoldercast rpc anvil_impersonateAccount $USDTHolder # 传输 USDTcast send $USDT --unlocked --from $USDTHolder "transfer(address,uint256)(bool)" $BOB 1000000
Output
Let's check that the transfer worked:
cast call $USDT "balanceOf(address)(uint256)" $BOB
Output

cast call $USDT "balanceOf(address)(uint256)" $USDTHolder
Output

故障排除
气体估计误差
使用锻造脚本部署时可能会遇到此错误:
# Transaction Failure❌ [Failed] Hash: 0xa0de3dac1dae4d86f2ba8344bc5f7d816714a6abdc4555ae46ca21d126f78cafError:事务失败:0xa0de3dac1dae4d86f2ba8344bc5f7d816714a6abdc4555ae46ca21d126f78caf# Explorer 上的事务错误代码错误:合同创建代码存储耗尽

出现这种情况通常是因为在部署过程中对气体的估计不准确。 在 Kaia 网络上,Foundry 的默认气体估算算法(默认乘数为 130%)有时会出现不足,导致部署在完成前就耗尽气体。
当实际气体需求量超过估算量时,交易将在合同部署过程中耗尽气体,从而导致_合同创建代码存储气体耗尽_错误。
快速修复:手动设置气体乘数
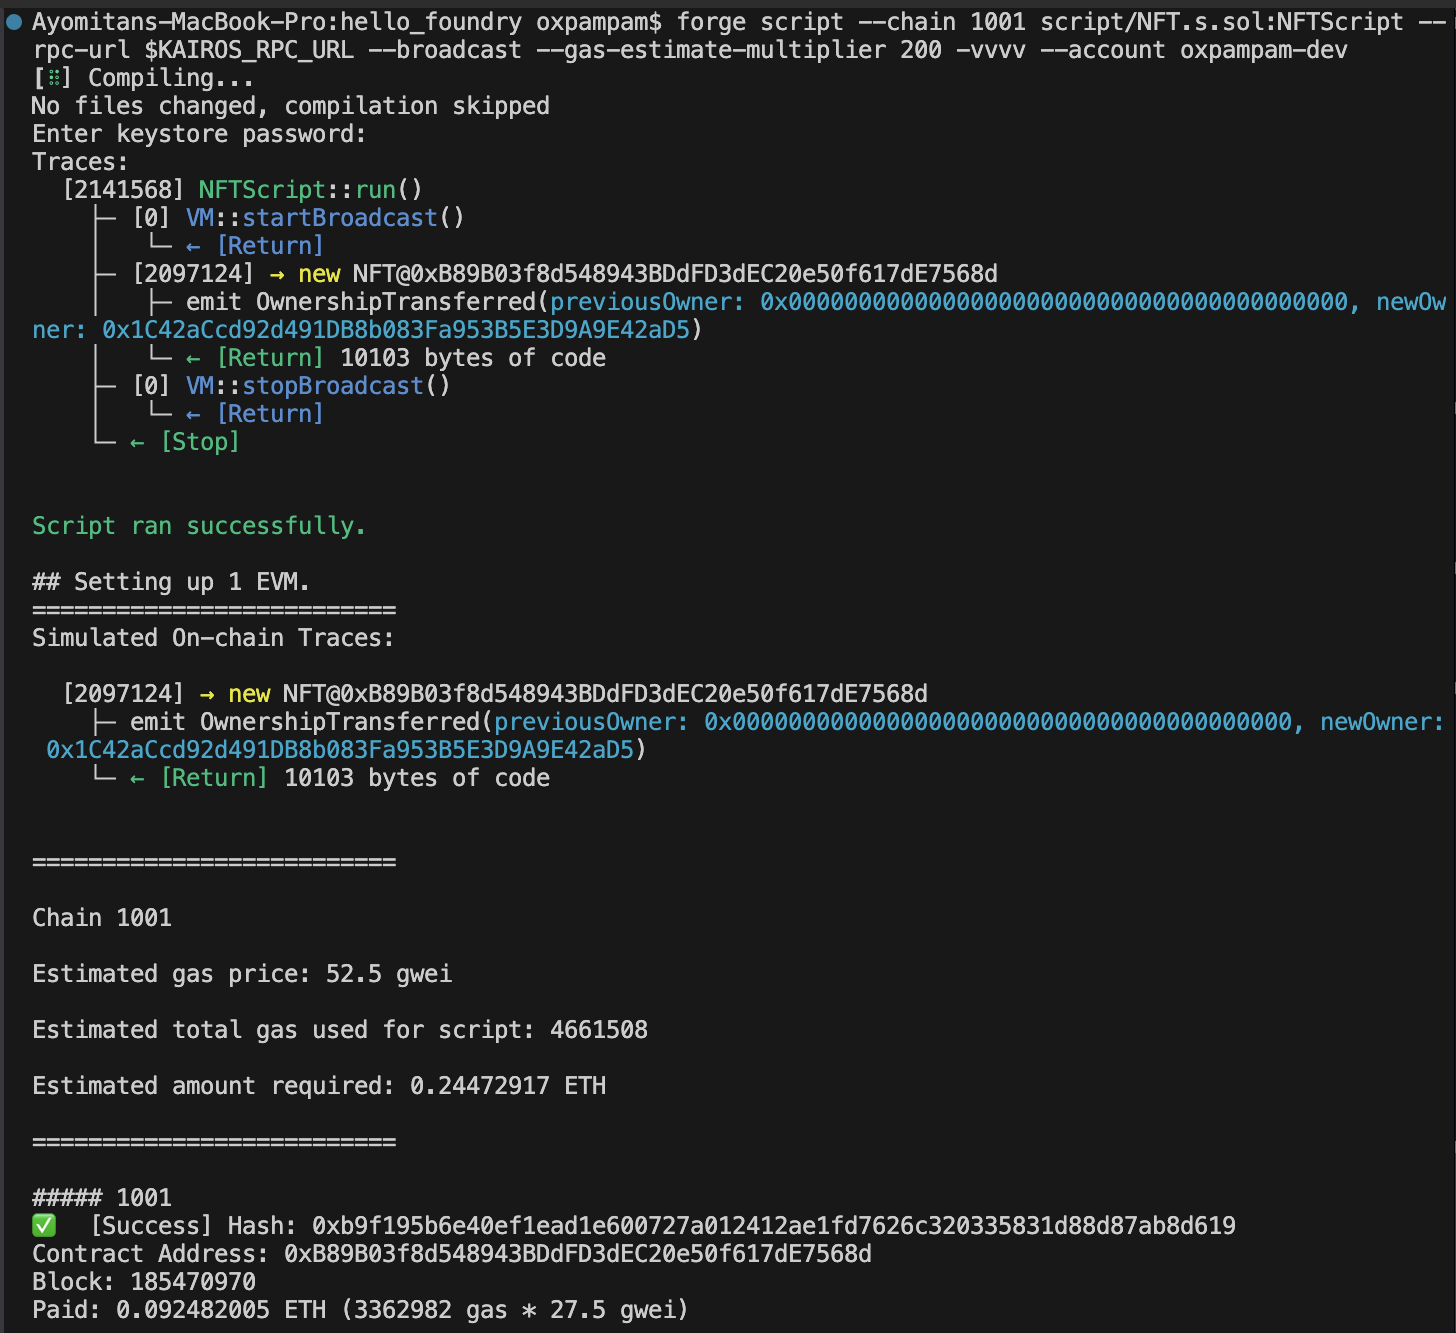
运行脚本时,将 --gas-estimate-multiplier 增加到 200 或更高,就像这样:
# commandforge script script/YourContract.s.sol:YourScript \ --chain<chain-id> \ --rpc-url $RPC_URL \ --broadcast \ --gas-estimate-multiplier 200 \ --account your-account \ -vvvv
# example forge script --chain 1001 script/NFT.s.sol:NFTScript --rpc-url $KAIROS_RPC_URL --broadcast --gas-estimate-multiplier 200 -vvvv -account oxpampam-dev-i
气体估算倍增器 "标志设置了所有气体估算值乘以的相对百分比。 将其设置为 200,就等于将气体估算值提高了一倍,从而为成功完成合同部署提供了足够的余地。
结论
如果您读完了本指南,恭喜您。 如果您有任何问题,请访问 Kaia 论坛。 不过,以下是您在 Kaia 上使用 Foundry 进一步构建时可能需要的有用资源列表。