Deploy your first smart contract using Hardhat

Introduction
This section will guide you through deploying a Soulbound Token to the Kaia Kairos Network using Hardhat.
Hardhat is a smart-contract development environment that will help you:
- Develop and compile smart contracts.
- Debug, test, and deploy smart contracts and dApps.
Soulbound tokens (SBTs) là các NFT không thể chuyển nhượng. Meaning once acquired, they cannot be sold or transferred to another user. To learn more about SBTs, how it works and their use case, you can check out this reference article published by Vitalik Buterin.
By the end of this guide you will be able to:
- Set up a Hardhat project on Kaia.
- Tạo một token gắn liền với linh hồn đơn giản.
- Compile your smart contract using Hardhat.
- Test, deploy, and interact with your smart contract using Hardhat.
- Explore Hardhat forking feature.
Pre-requisites
To follow this tutorial, the following are the prerequisites:
- Code editor: a source-code editor such VS Code.
- Metamask: used to deploy the contracts, sign transactions and interact with the contracts.
- RPC Endpoint: you can get this from one of the supported Endpoint Providers.
- Test KAIA from Faucet: fund your account with sufficient KAIA.
- NodeJS and NPM
Setting Up Your Development Environment
To make use of hardhat, we need to set up our development environment and get hardhat installed. Let's do this in the following steps:
Step 1: Create a project directory
mkdir soulbound-tokenscd soulbound-tokens
Step 2: Initialize an npm project
Paste this command in your terminal to create a package.json file
npm init -y
Step 3: Install hardhat and other dependencies:
- Paste the code below in your terminal to install hardhat
npm install --save-dev hardhat
- Paste the code below to install other dependencies
npm install dotenv @kaiachain/contracts
Lưu ý: Việc cài đặt này sẽ cài đặt các phụ thuộc khác cần thiết cho dự án này, bao gồm
hardhat,kaiachain/contract,dotenvvà các thành phần khác.
Step 4: Initialise a hardhat project:
Hướng dẫn này sử dụng Hardhat phiên bản 2. Nếu bạn muốn sử d�ụng Hardhat v3, vui lòng tham khảo hướng dẫn cài đặt này để biết các bước cấu hình.
Run the command below to initiate an hardhat project
npx hardhat --init
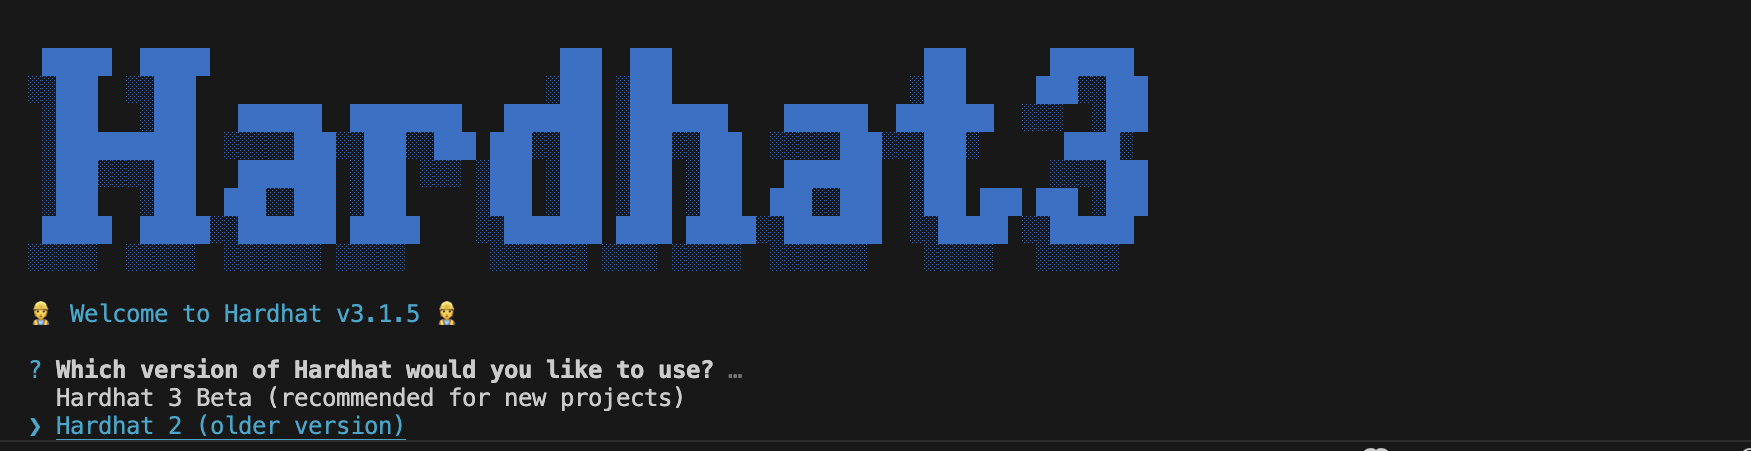
Trong hướng dẫn này, bạn sẽ chọn một dự án JavaScript sử dụng Mocha và Ethers như sau:
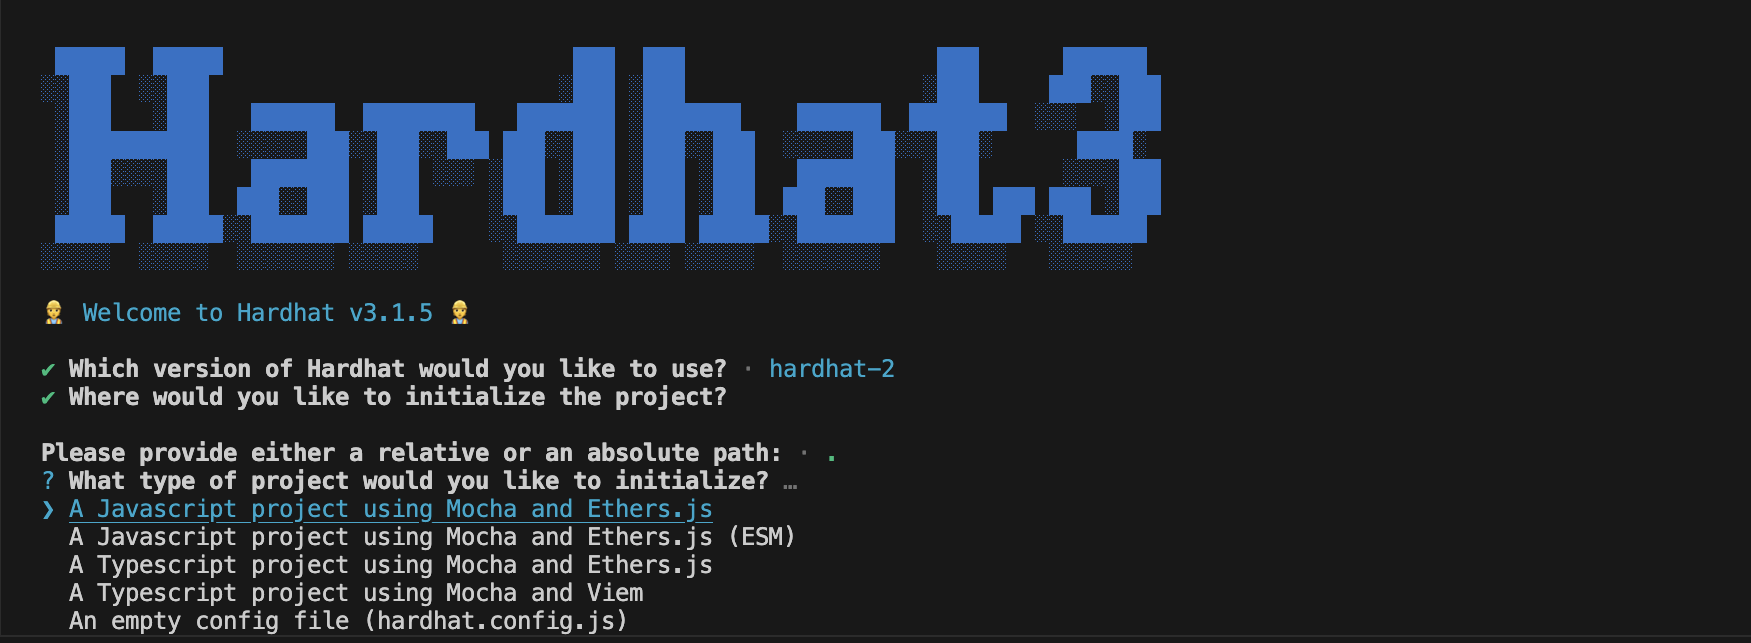
Chấp nhận các câu trả lời mặc định cho các câu hỏi.
After initializing a hardhat project, your current directory should include:
contracts/ – this folder contains smart contract code.
ignition/modules/ – this folder contains code that deploys your contracts on the blockchain network.
test/ – this folder contains all unit tests that test your smart contract.
hardhat.config.js – tệp này chứa các cấu hình quan trọng cho hoạt động của Hardhat và việc triển khai token soulbound.
Bước 5: Tạo tệp .env
Bây giờ hãy tạo tệp .env trong thư mục dự án. Tệp này giúp chúng ta tải các biến môi trường từ tệp .env vào process.env.
- Dán lệnh này vào terminal của bạn để tạo tệp
.env.
touch .env
- Sau khi tạo tệp của chúng ta, hãy cấu hình tệp
.envđể trông như sau:
KAIROS_TESTNET_URL= "Địa chỉ RPC của Kairos" PRIVATE_KEY= "Khóa riêng tư của bạn được sao chép từ ví MetaMask"
Note: You can also choose to use the configuration variable functionality provided by hardhat to configure variables that shouldn't be included in the code repository.
Step 6: Setup Hardhat Configs
Modify your hardhat.config.js with the following configurations:
require("@nomicfoundation/hardhat-toolbox");require('dotenv').config()module.exports = { solidity: "0.8.17", networks: { kairos: { url: process.env.KAIROS_TESTNET_URL || "", gasPrice: 250000000000, accounts: process.env.PRIVATE_KEY !== undefined ? [process.env.PRIVATE_KEY] : [], } }};
Bây giờ khi môi trường phát triển của chúng ta đã sẵn sàng, hãy bắt tay vào việc viết hợp đồng thông minh cho token soulbound.
Creating SBT Smart Contract
In this section, you will use the Kaia Contracts: a library for secure smart contract development built on a solid foundation of community-vetted code. It is a fork of open zeppelin contracts.
Note: You already installed this library in step 3 of the
Setting Development Environmentsection.
Step 1: Select the contracts folder in the Explorer pane, click the New File button and create a new file named SBT.sol
Step 2: Open the file and paste the following code:
// SPDX-License-Identifier: MITpragma solidity ^0.8.7;import "@kaiachain/contracts/KIP/token/KIP17/KIP17.sol";import "@kaiachain/contracts/utils/Counters.sol";import "@kaiachain/contracts/access/Ownable.sol";contract SoulBoundToken is KIP17, Ownable { using Counters for Counters.Counter; Counters.Counter private _tokenIdCounter; constructor() KIP17("SoulBoundToken", "SBT") {} function safeMint(address to) public onlyOwner { uint256 tokenId = _tokenIdCounter.current(); _tokenIdCounter.increment(); _safeMint(to, tokenId); } function _beforeTokenTransfer(address from, address to, uint256) pure override internal { require(from == address(0) || to == address(0), "This a Soulbound token. It cannot be transferred."); } function _burn(uint256 tokenId) internal override(KIP17) { super._burn(tokenId); }}
Code Walkthrough
This is your smart contract. line 1 shows that Hardhat uses the Solidity version 0.8.7 or greater. Other than that, it imports KIP17.sol and other supporting contracts. From lines 6-12, a smart contract that inherits KIP17 is been created. Also, the token name and symbol was passed in the constructor.
As you can see in the code above, the token name and symbol have been set to SoulBoundToken and SBT respectively. You can change the token name and symbol to anything you desire.
One major thing in this contract is that it prohibits token transfer, which makes the issued tokens soulbond.
Testing SBT Smart Contract
In this section, we would be testing some of our contract functionalities.
Step 1: In the Explorer pane, select the test folder and click the New File button to create a new file named sbtTest.js
Step 2: Copy the code below in the sbtTest.js file.
// This is an example test file. Hardhat will run every *.js file in `test/`,// so feel free to add new ones.// Hardhat tests are normally written with Mocha and Chai.// We import Chai to use its asserting functions here.const { expect } = require("chai");// We use `loadFixture` to share common setups (or fixtures) between tests.// Using this simplifies your tests and makes them run faster, by taking// advantage of Hardhat Network's snapshot functionality.const { loadFixture } = require("@nomicfoundation/hardhat-network-helpers");// `describe` is a Mocha function that allows you to organize your tests.// Having your tests organized makes debugging them easier. All Mocha// functions are available in the global scope.//// `describe` receives the name of a section of your test suite, and a// callback. The callback must define the tests of that section. This callback// can't be an async function.describe("Token contract", function () { // We define a fixture to reuse the same setup in every test. We use // loadFixture to run this setup once, snapshot that state, and reset Hardhat // Network to that snapshot in every test. async function deployTokenFixture() { // Get the ContractFactory and Signers here. const [owner, addr1, addr2] = await ethers.getSigners(); // To deploy our contract, we just have to call ethers.deployContract() and call the // waitForDeployment() method, which happens onces its transaction has been // mined. const sbtContract = await ethers.deployContract("SoulBoundToken"); await sbtContract.waitForDeployment(); // Fixtures can return anything you consider useful for your tests return { sbtContract, owner, addr1, addr2 }; } // You can nest describe calls to create subsections. describe("Deployment", function () { // `it` is another Mocha function. This is the one you use to define each // of your tests. It receives the test name, and a callback function. // // If the callback function is async, Mocha will `await` it. it("Should mint SBT to owner", async function () { const { sbtContract, owner } = await loadFixture(deployTokenFixture); const safemint = await sbtContract.safeMint(owner.address); expect(await sbtContract.ownerOf(0)).to.equal(owner.address); }); }); describe("Transactions", function () { it("Should prohibit token transfer using transferFrom", async function () { const { sbtContract, owner, addr1 } = await loadFixture( deployTokenFixture ); const safemintTx = await sbtContract.safeMint(owner.address); // prohibit token transfer of token id (0) from owner to addr1 await expect( sbtContract.transferFrom(owner.address, addr1.address, 0) ).to.be.reverted; }); it("Should prohibit token transfer using safeTransferFrom", async function () { const { sbtContract, owner, addr1 } = await loadFixture( deployTokenFixture ); const safemintTx = await sbtContract.safeMint(owner.address); // prohibit token transfer of token id (0) from owner to addr1 await expect(sbtContract['safeTransferFrom(address,address,uint256)']( owner.address, addr1.address, 0 )).to.be.reverted; }); });})
In the code you just copied, line 7 & 12 shows you imported expect from Chai and loadFixture from hardhat-network-helpers.
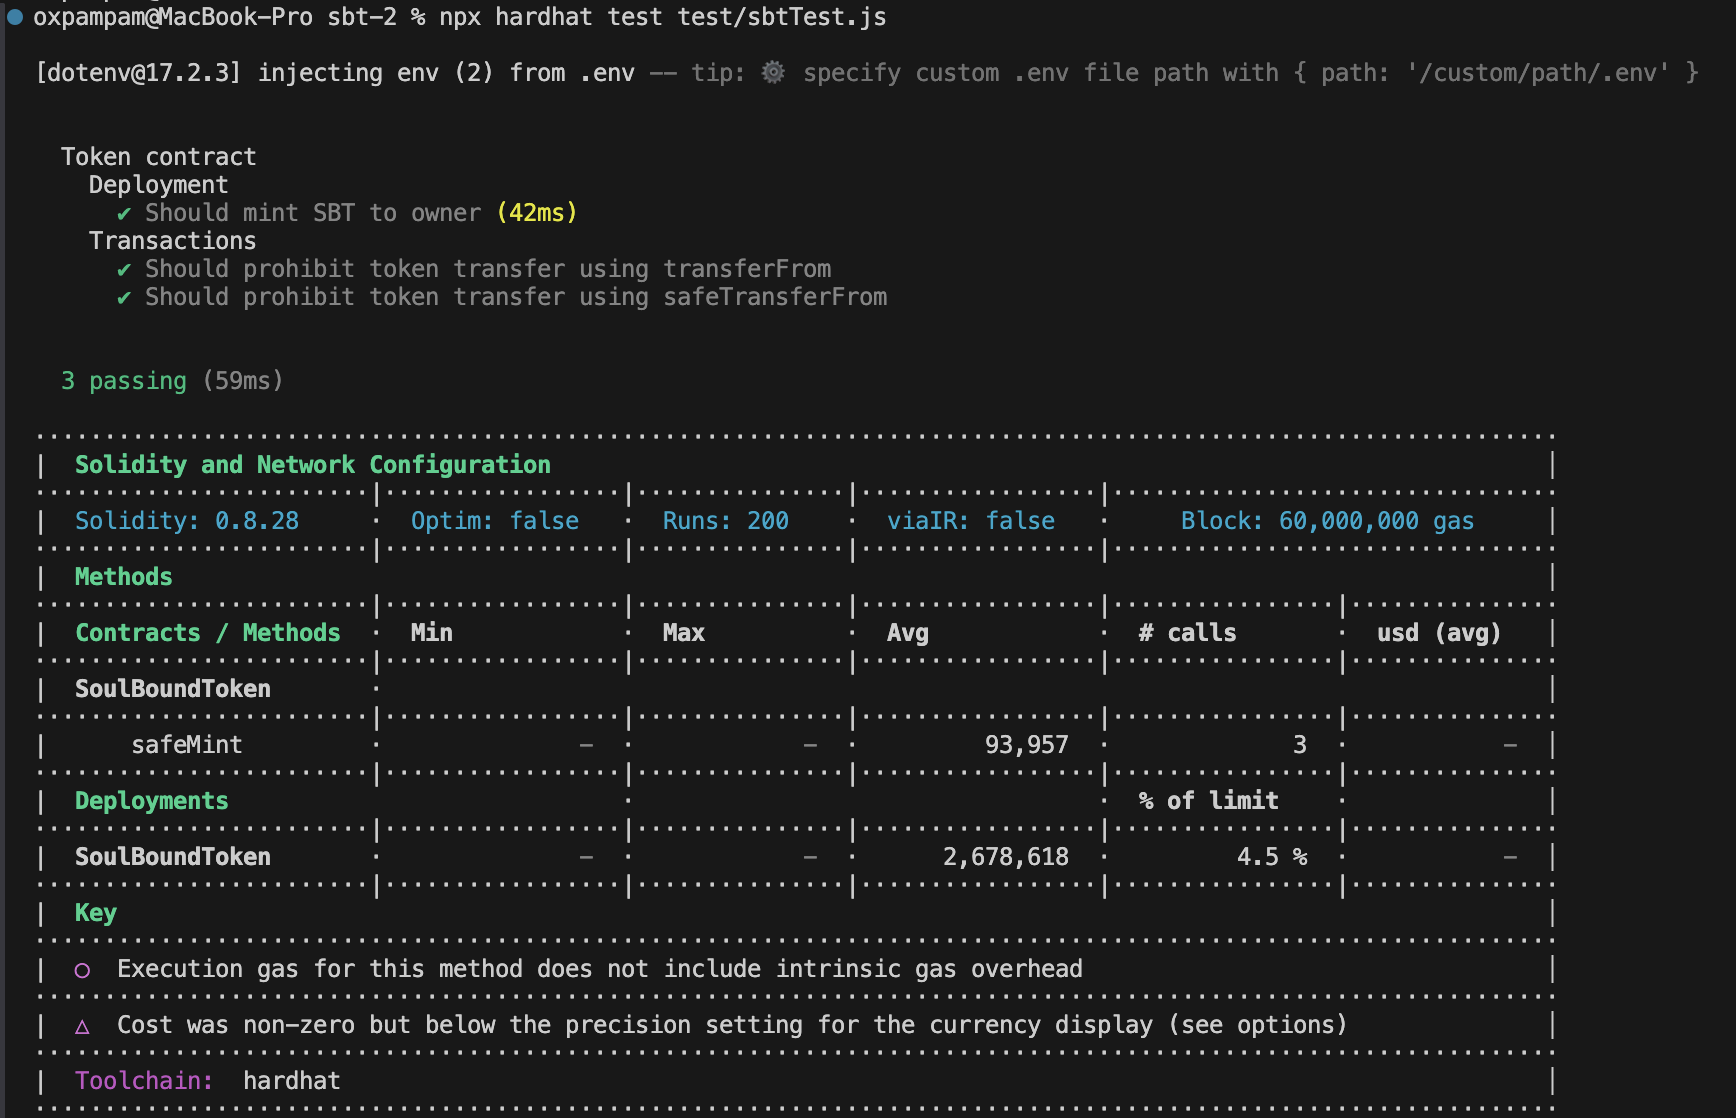
The tests above check the following:
- Is the owner of a particular token id the same as who it was minted to?
- Did it prohibit transfer of tokens between accounts?
Step 3: To run your test, run the command below:
npx hardhat test test/sbtTest.js
For more in-depth guide on testing, please check Hardhat testing.
Deploying the smart contract
Các mô-đun khởi tạo là các tệp JavaScript/TypeScript giúp bạn triển khai hợp đồng thông minh lên mạng blockchain. Trong phần này, bạn sẽ tạo một mô-đun cho hợp đồng thông minh.
Bước 1: Trong cửa sổ Explorer, chọn thư mục ignition/module và nhấp vào nút Tạo tệp mới để tạo một tệp mới có tên sbtDeploy.js.
Step 2: Copy and paste the following code inside the file.
// Cài đặt này sử dụng Hardhat Ignition để quản lý việc triển khai hợp đồng thông minh.// Tìm hiểu thêm tại https://hardhat.org/ignitionconst { buildModule } = require("@nomicfoundation/hardhat-ignition/modules");module.exports = buildModule("SBTModule", (m) => { const sbt = m.contract("SoulBoundToken", []); return { sbt };});
Bước 3: Trong terminal, chạy lệnh sau để Hardhat triển khai token SBT của bạn trên mạng thử nghiệm Kaia Kairos.
Chạy lệnh npx hardhat ignition deploy ./ignition/modules/sbtDeploy.js --network kairos
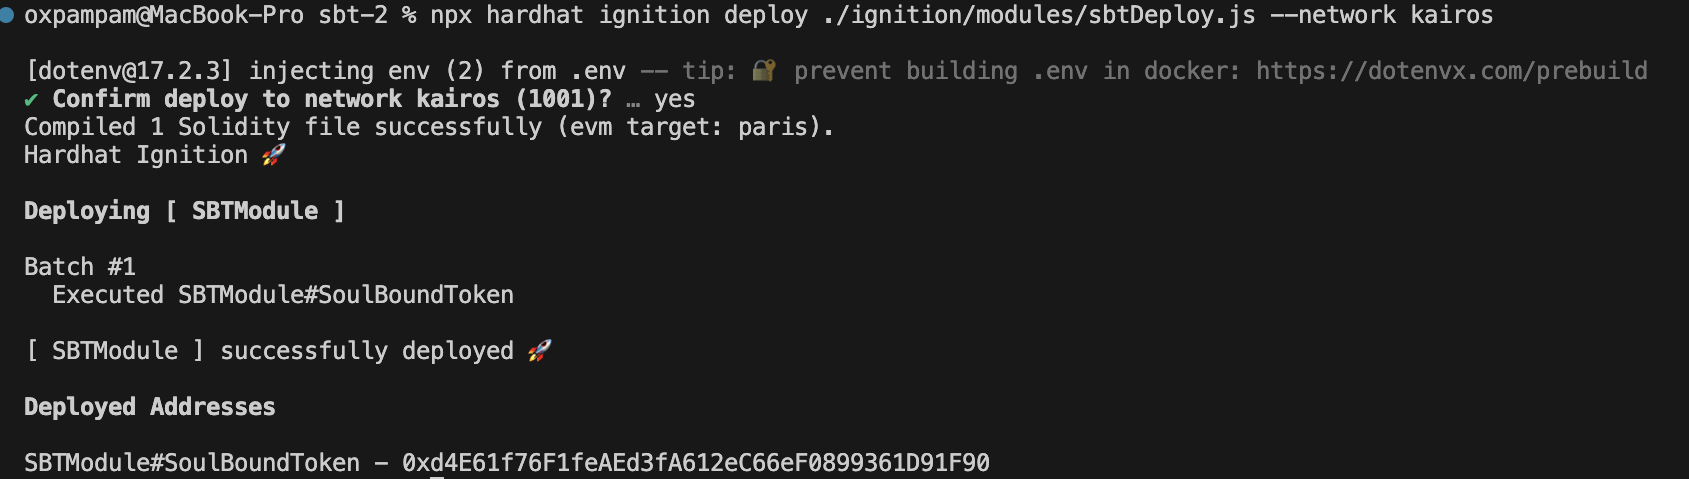
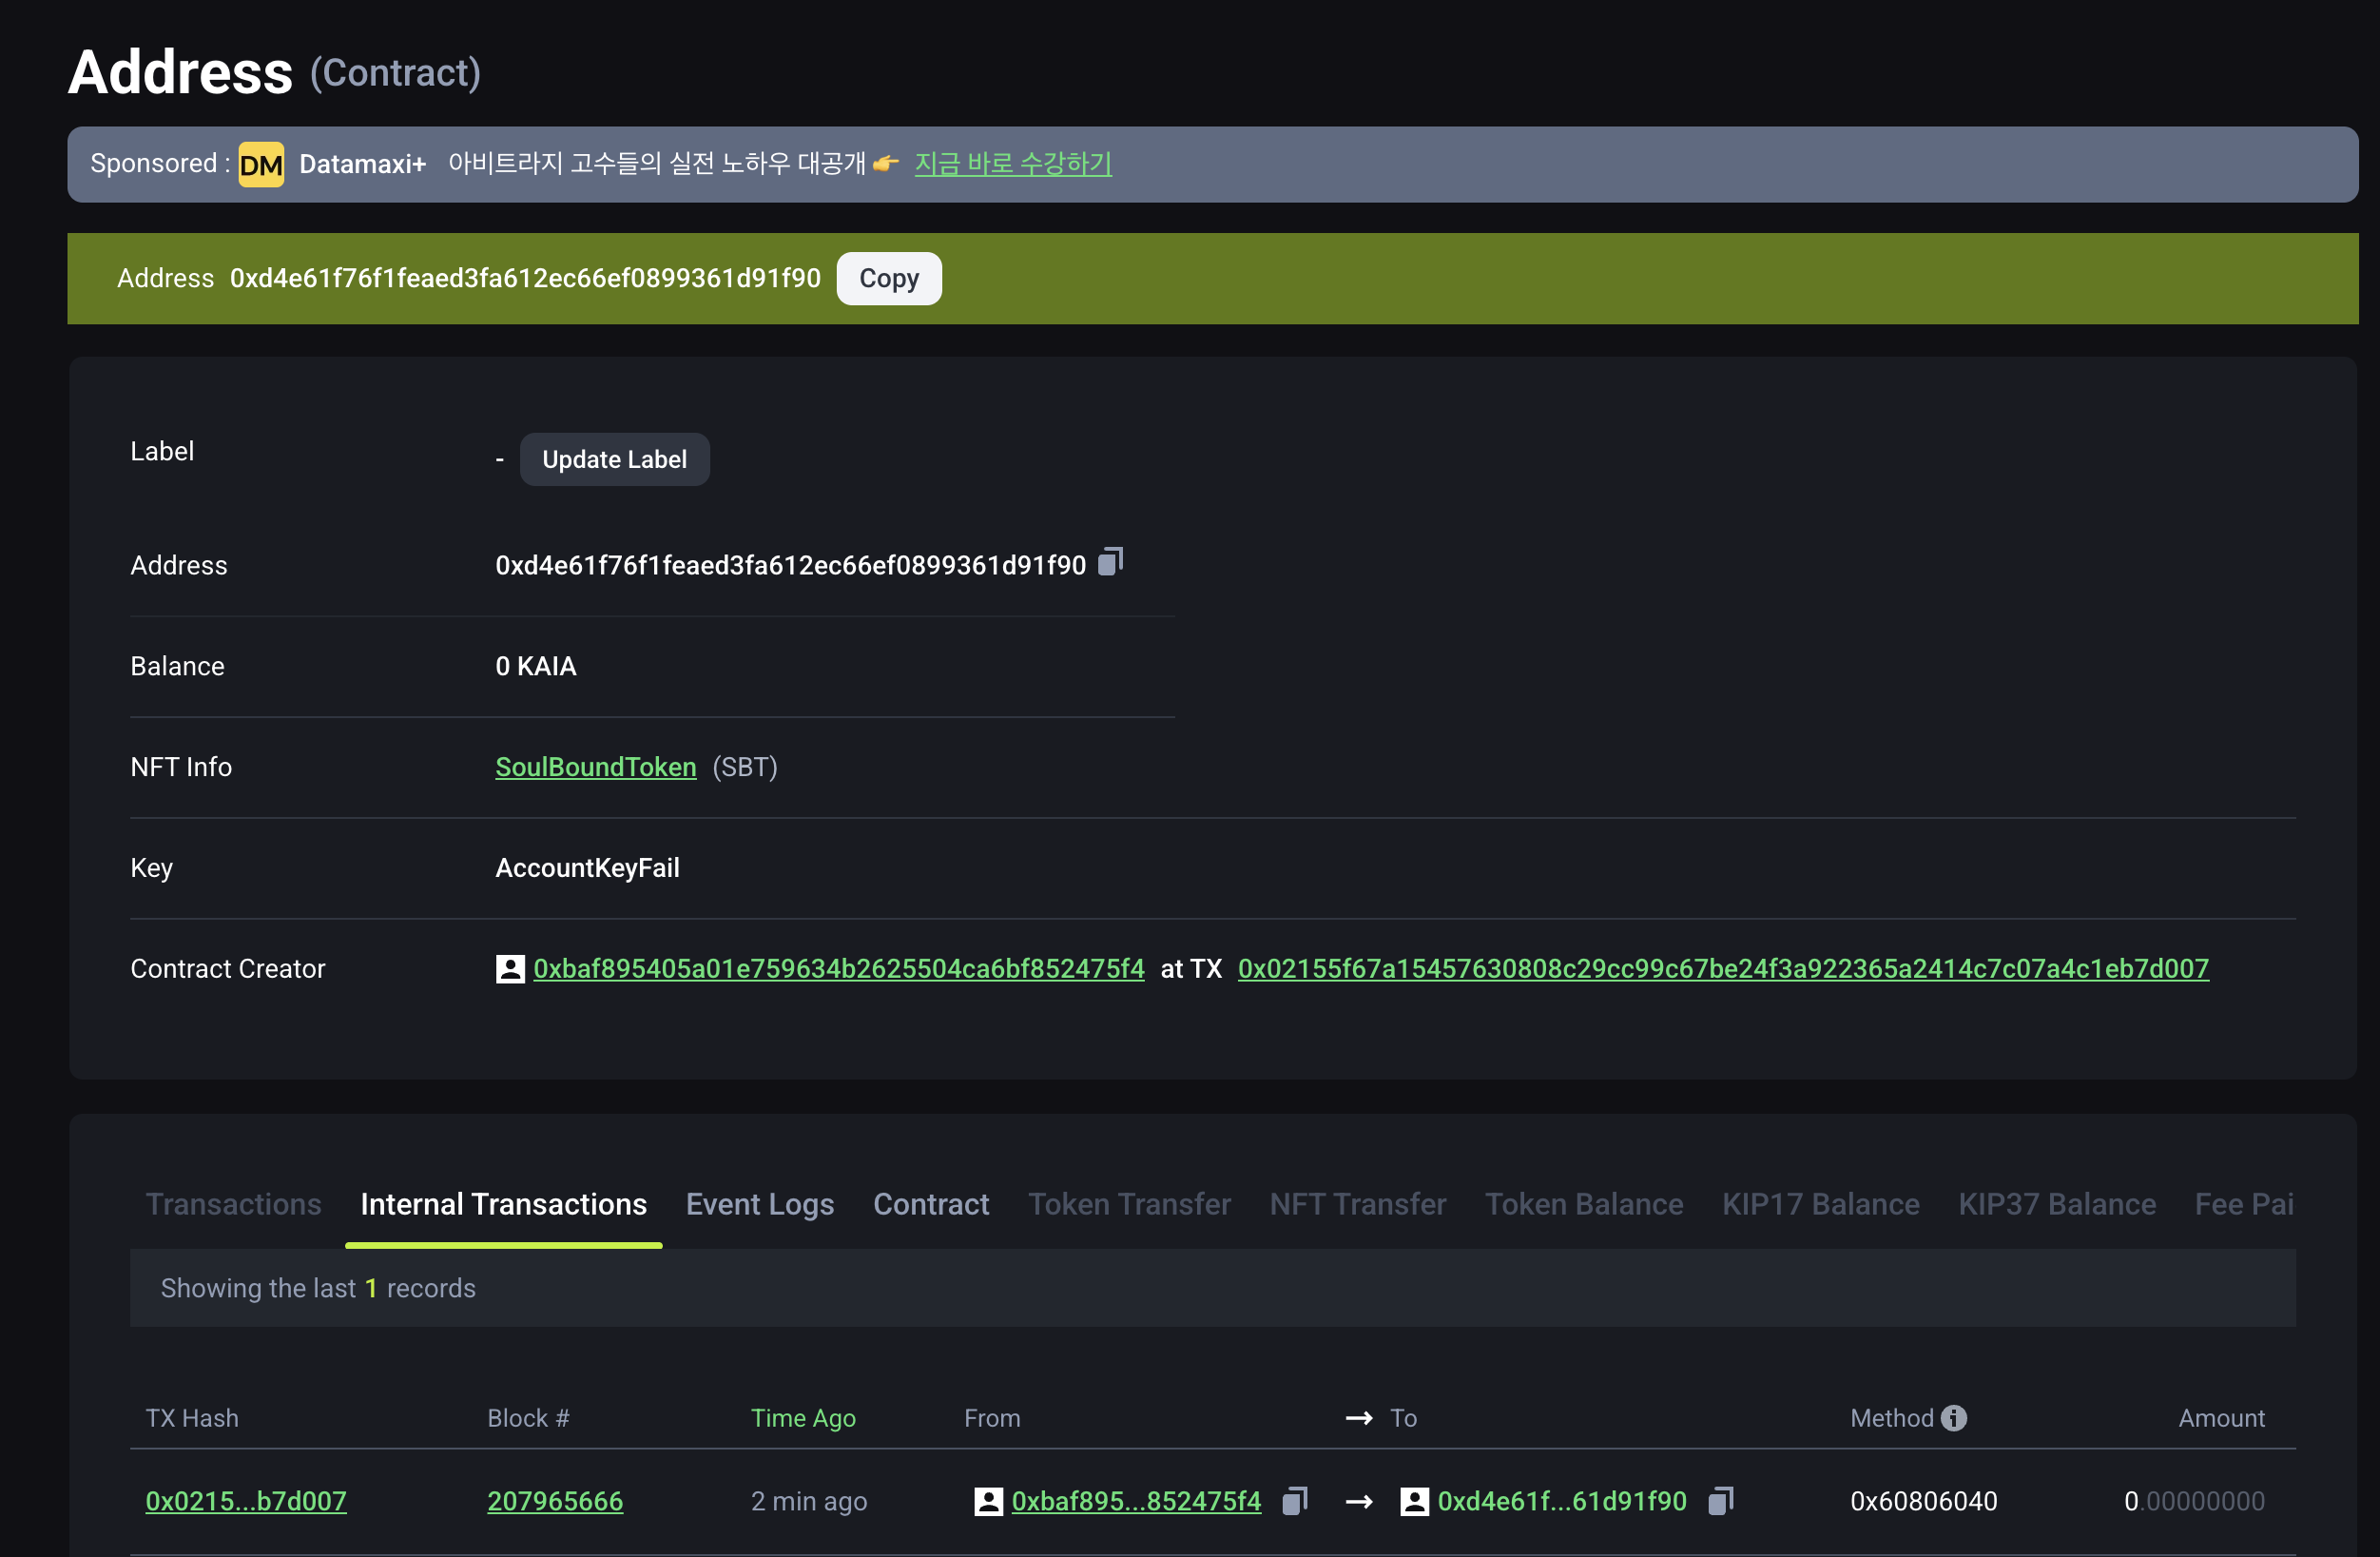
Bước 4: Mở KaiaScan để kiểm tra xem token SBT đã được triển khai thành công hay chưa.
Step 5: Copy and paste the deployed contract address in the search field and press Enter. You should see the recently deployed contract.
Hardhat Forking
Hardhat provides developers the functionality of simulating the mainnet (at any given block) to a local development network. One of the major benefit of this feature is that it enables developers to interact with deployed contract and also write test for complex cases.
For this feature to work effectively, you need to connect to an archive node. You can read more about this feature here
Forking Mainnet
Now that we have our Hardhat project set up let’s fork the Kaia Mainnet using Hardhat. Open your terminal and run this command
npx hardhat node --fork <YOUR ARCHIVE NODE URL>npx hardhat node --fork https://archive-en.node.kaia.io
You can also configure hardhat.config.js - Hardhat Network to always do this:
networks: { hardhat: { forking: { url: "<YOUR ARCHIVE NODE URL>", } }}
Output
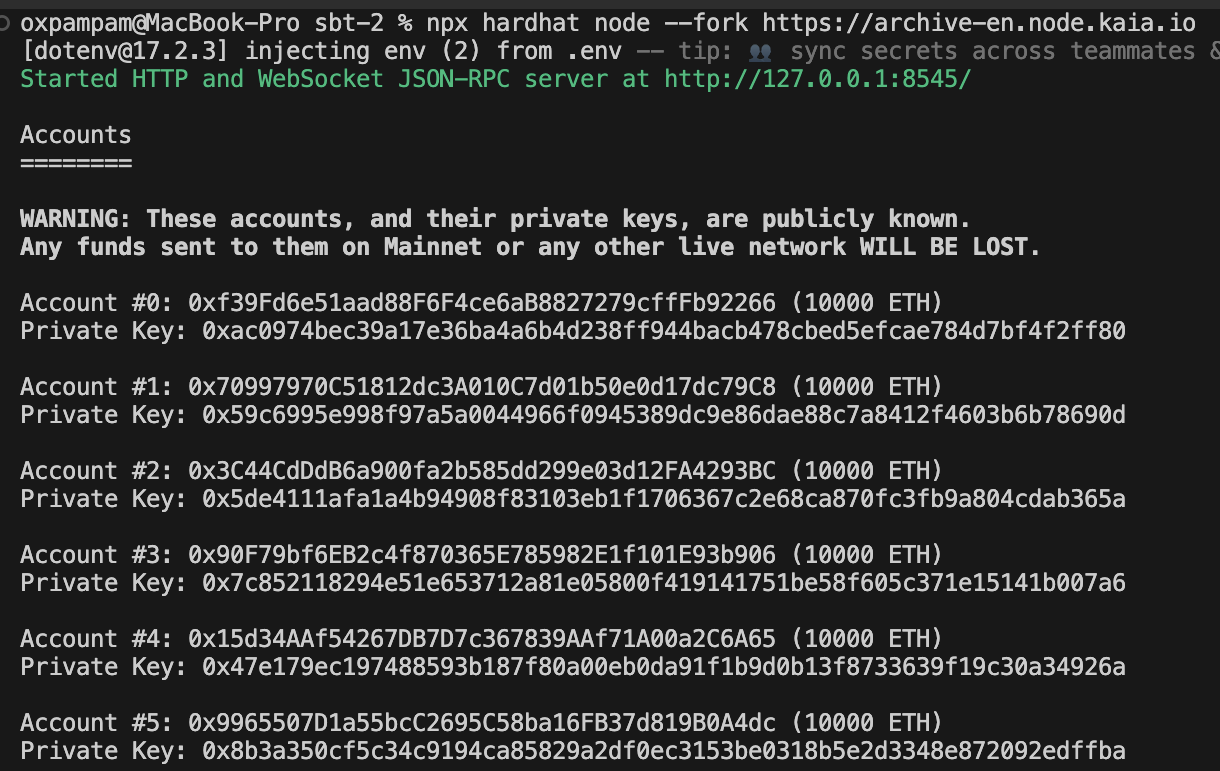
After successfully running this command, your terminal looks like the above image. You'll have 20 development accounts that are pre-funded with 10,000 test tokens.
The forked chain's RPC server is listening at http://127.0.0.1:8545/. You can verify the forked network by querying the latest block number. Let's try to make a cURL to the RPC to get the block number. Open a new terminal window and use the following command:
curl --data '{"method":"eth_blockNumber","params":[],"id":1,"jsonrpc":"2.0"}' -H "Content-Type: application/json" -X POST localhost:8545
Output

The output is an hexadecimal as seen above. To get the block number from the hex, convert the hex to a decimal using this tool. You should get the latest block number from the time you forked the network. Bạn có thể xác nhận số khối trên KaiaScan.
Forking at a Block
With hardhat, you can fork the mainnet at a particular block. In that case, let’s fork the chain at block number 105701850.
npx hardhat node --fork <YOUR ARCHIVE NODE URL> --fork-block-number 105701850npx hardhat node --fork https://archive-en.node.kaia.io --fork-block-number 105701850
To confirm the forked chain at the stated block, open a new terminal window and use the following command:
curl --data '{"method":"eth_blockNumber","params":[],"id":1,"jsonrpc":"2.0"}' -H "Content-Type: application/json" -X POST localhost:8545

The output returns hexadecimal which when converted using this tool should be equal to 105701850.
For more in-depth guide on Hardhat, please refer to Hardhat Docs. Also, you can find the full implementation of the code for this guide on GitHub