WebGL Build Settings
In this section, we will configure our dApp for the web! This will configure Unity for Web3 compatibility and create a custom template for Kaia integration.
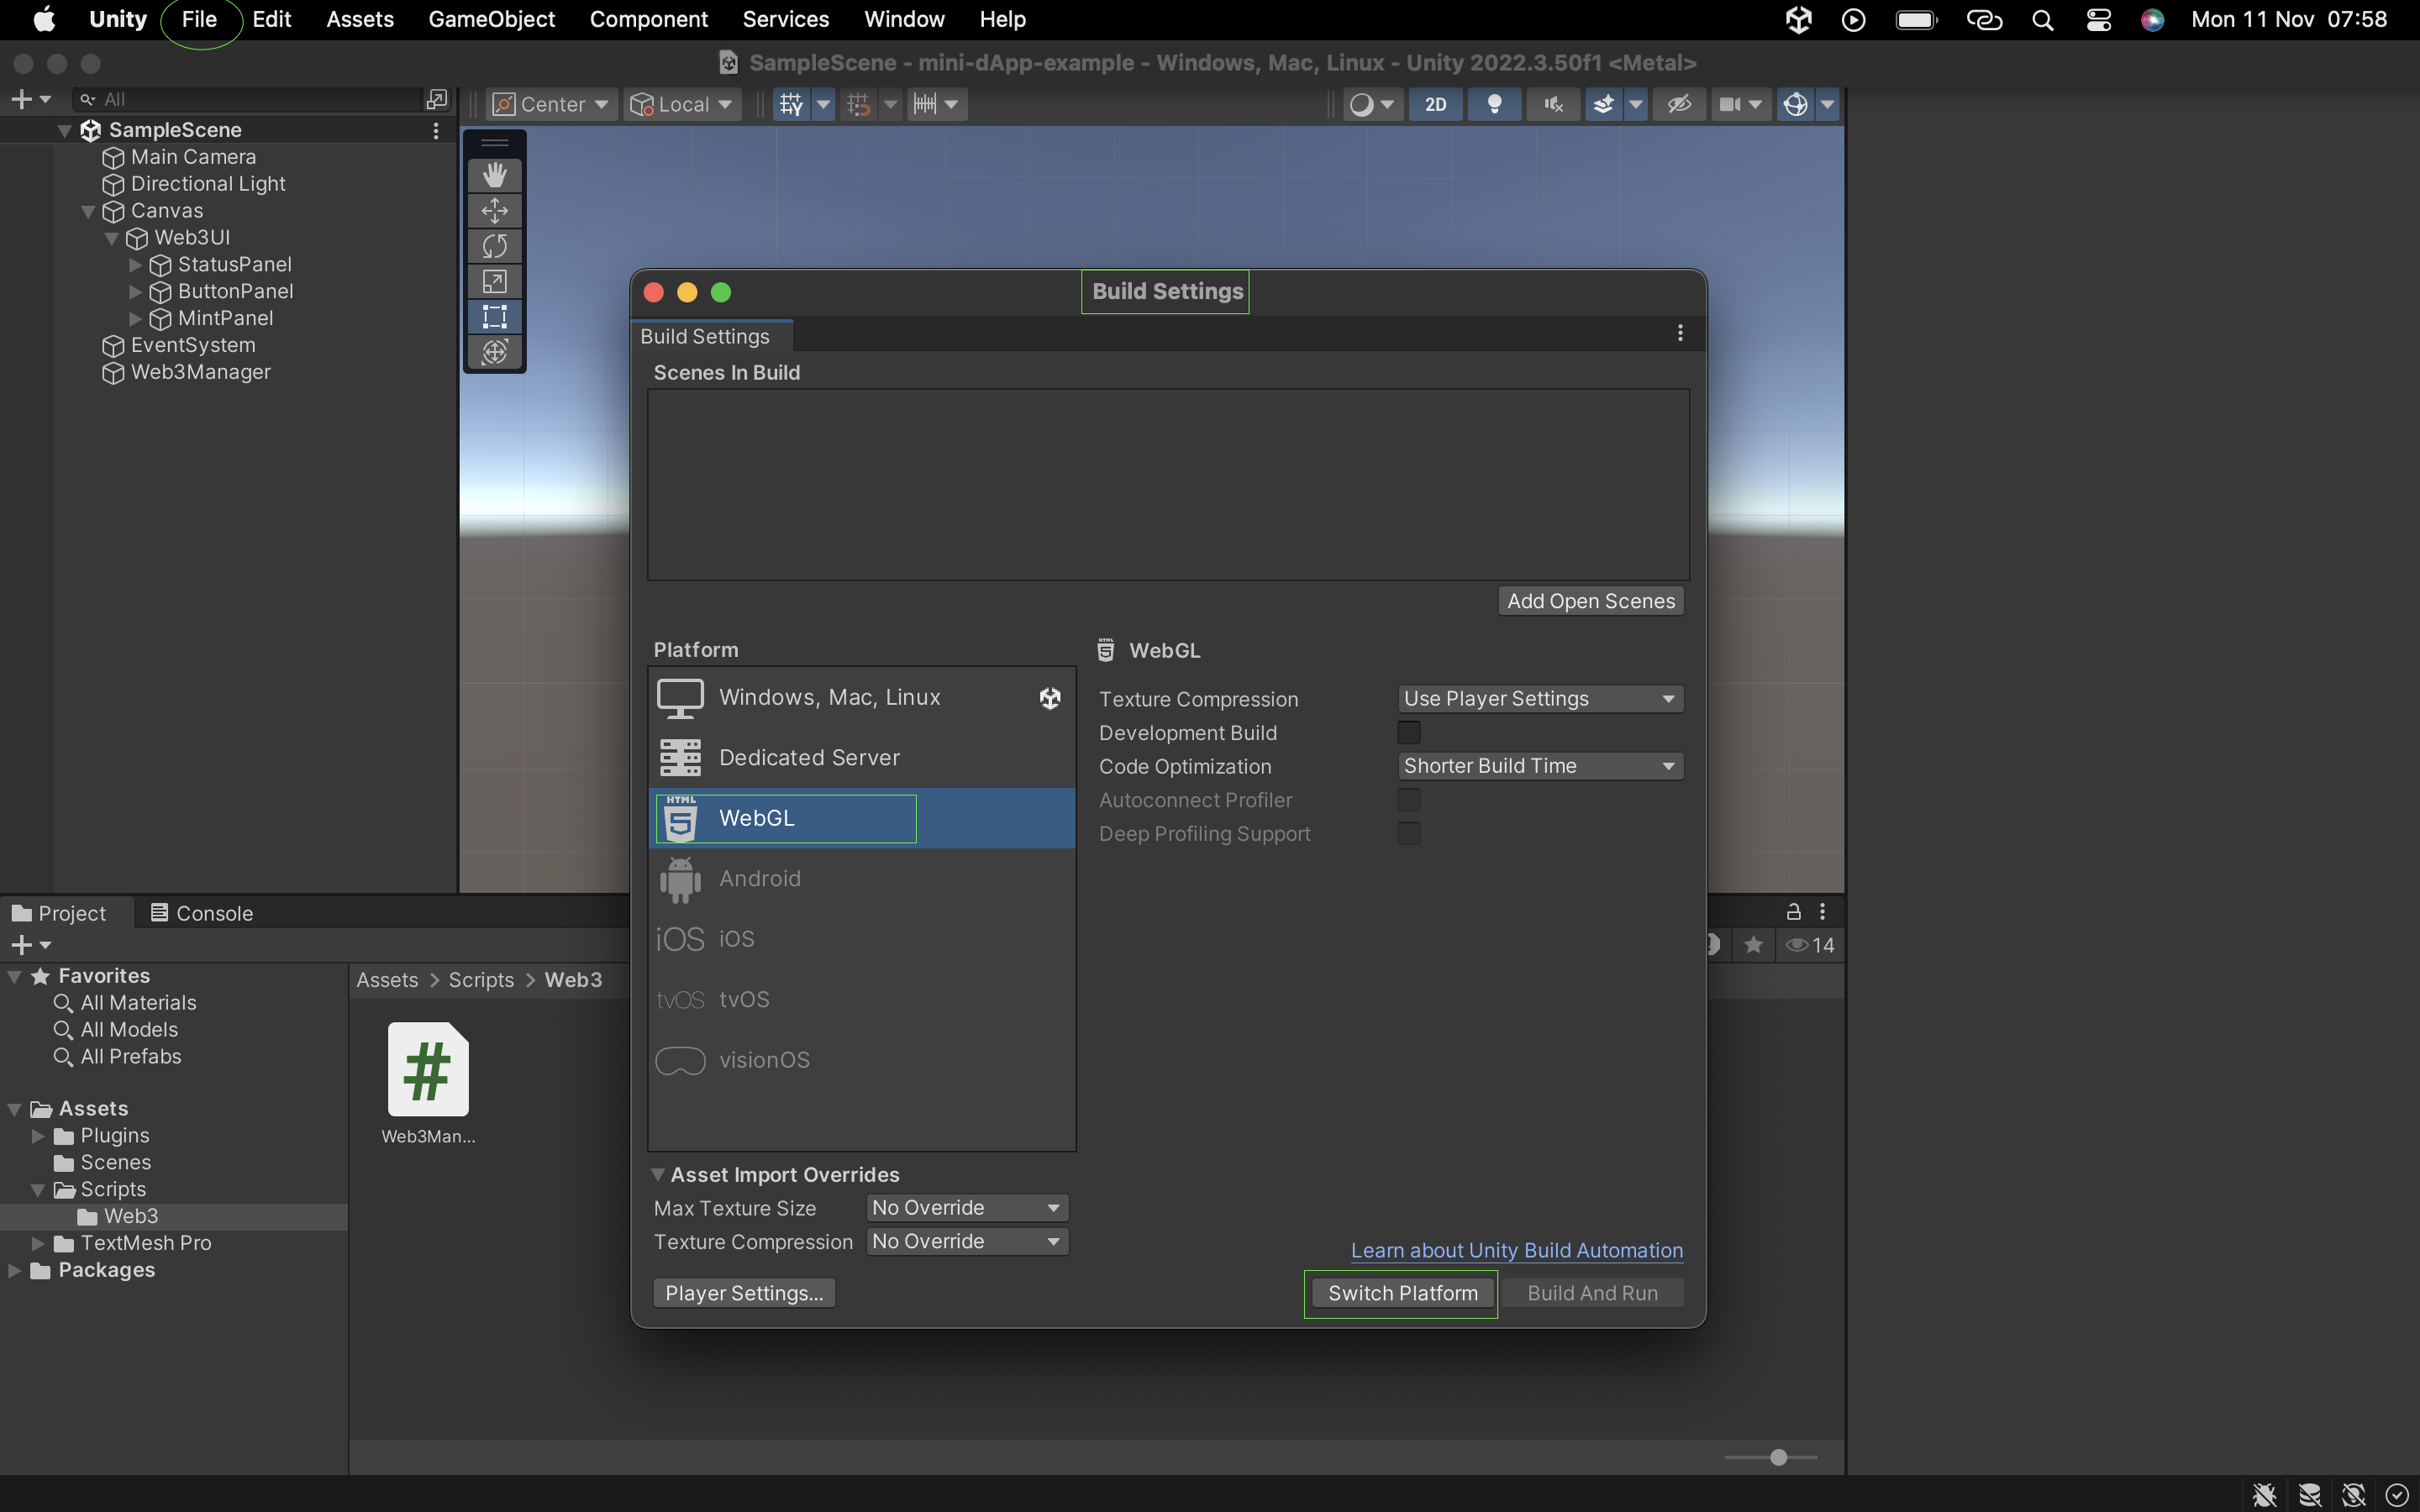
Step 1: Switch to WebGL Platform
- Navigate to File → Build Settings.
- Select WebGL and click "Switch Platform".
This might take a few minutes if it's your first time switching.
Step 2: Creating a Custom WebGL Template
We need a custom template to integrate Web3 capabilities. Here's our folder structure:
Assets/└── WebGLTemplates/ └── KaiaTemplate/ ├── index.html └── scripts/ └── dapp_portal_sdk.js
Why Custom Template?
The default Unity template doesn't include Web3 support. Our custom template will:
- Load necessary Web3 libraries.
- Enable Kaia Wallet integration.
- Handle blockchain interactions properly.
Step 3: Setting Up index.html
Copy and paste the code below in your index.html file:
<!DOCTYPE html><html lang="en-us"> <head> <meta charset="utf-8"> <meta name="viewport" content="width=device-width, initial-scale=1.0"> <title>Unity WebGL Player</title> <script src="scripts/dapp_portal_sdk.js"></script> <style> body { margin: 0; padding: 0; } #unity-container { width: 100%; height: 100%; position: absolute; } #unity-canvas { width: 100%; height: 100%; background: #231F20; } #unity-loading-bar { display: none; } #unity-progress-bar-empty { width: 141px; height: 18px; margin-top: 10px; background: url('Build/minidapp.progress-bar-empty-dark.png') no-repeat center; } #unity-progress-bar-full { width: 0%; height: 18px; margin-top: 10px; background: url('Build/minidapp.progress-bar-full-dark.png') no-repeat center; } </style> </head> <body> <div id="unity-container"> <canvas id="unity-canvas"></canvas> <div id="unity-loading-bar"> <div id="unity-progress-bar-empty"> <div id="unity-progress-bar-full"></div> </div> </div> </div> <script src="Build/minidapp.loader.js"></script> <script> var sdk = null; var connectedAddress = null; var myGameInstance = null; var Module = { onRuntimeInitialized: function() { console.log("Runtime initialized"); }, env: { MintToken: function(amount) { window.MintToken(amount); }, GetBalance: function() { window.GetBalance(); }, ConnectWallet: function() { window.ConnectWallet(); }, DisconnectWallet: function() { window.DisconnectWallet(); }, GetConnectedAddress: function() { var address = window.GetConnectedAddress(); var bufferSize = lengthBytesUTF8(address) + 1; var buffer = _malloc(bufferSize); stringToUTF8(address, buffer, bufferSize); return buffer; } } }; async function initializeSDK() { try { sdk = await DappPortalSDK.init({ clientId: 'PASTE CLIENT ID', chainId: '1001' }); console.log("SDK initialized"); return true; } catch (error) { console.error("SDK init error:", error); return false; } } window.ConnectWallet = async function() { try { if (!sdk) { const initialized = await initializeSDK(); if (!initialized) return null; } const provider = sdk.getWalletProvider(); const accounts = await provider.request({ method: 'kaia_requestAccounts' }); if (accounts && accounts.length > 0) { connectedAddress = accounts[0]; myGameInstance.SendMessage('Web3Manager', 'OnWalletConnected', connectedAddress); } } catch (error) { myGameInstance.SendMessage('Web3Manager', 'OnWalletError', error.message); } } window.DisconnectWallet = async function() { try { if (!sdk) { console.error("SDK not initialized"); return; } const provider = sdk.getWalletProvider(); await provider.disconnect(); // Reset connected address connectedAddress = null; myGameInstance.SendMessage('Web3Manager', 'OnWalletDisconnected'); console.log("Wallet disconnected successfully"); } catch (error) { console.error("Disconnect error:", error); myGameInstance.SendMessage('Web3Manager', 'OnWalletError', "Disconnect failed: " + error.message); } } window.GetConnectedAddress = function() { return connectedAddress || ''; } window.MintToken = async function(amount) { try { const provider = sdk.getWalletProvider(); const mintSignature = '0xa0712d68'; const amountHex = amount.toString(16).padStart(64, '0'); const data = mintSignature + amountHex; const tx = { from: connectedAddress, to: '0x099D7feC4f799d1749adA8815eB21375E13E0Ddb', value: '0x0', data: data, gas: '0x4C4B40' }; const txHash = await provider.request({ method: 'kaia_sendTransaction', params: [tx] }); myGameInstance.SendMessage('Web3Manager', 'OnMintSuccess', txHash); GetBalance(); // Get updated balance after mint } catch (error) { myGameInstance.SendMessage('Web3Manager', 'OnMintError', error.message); } } window.GetBalance = async function() { try { const provider = sdk.getWalletProvider(); const balanceSignature = '0x70a08231'; const addressParam = connectedAddress.substring(2).padStart(64, '0'); const data = balanceSignature + addressParam; const result = await provider.request({ method: 'kaia_call', params: [{ from: connectedAddress, to: '0x099D7feC4f799d1749adA8815eB21375E13E0Ddb', data: data }, 'latest'] }); const balance = parseInt(result, 16); myGameInstance.SendMessage('Web3Manager', 'OnBalanceReceived', balance.toString()); } catch (error) { myGameInstance.SendMessage('Web3Manager', 'OnBalanceError', error.message); } } createUnityInstance(document.querySelector("#unity-canvas"), { dataUrl: "Build/minidapp.data", frameworkUrl: "Build/minidapp.framework.js", codeUrl: "Build/minidapp.wasm", streamingAssetsUrl: "StreamingAssets", companyName: "DefaultCompany", productName: "minidapp", productVersion: "0.1", }).then((unityInstance) => { myGameInstance = unityInstance; }); </script> </body></html>
Step 4: Setting Up Mini Dapp SDK
- Visit: https://static.kaiawallet.io/js/dapp-portal-sdk.js
- Save the content to your
scripts/dapp-portal-sdk.js. Using a local Mini Dapp SDK file improves load times and reliability.
Alternatively, you can directly add the link to the Mini Dapp SDK as the src in the script tag in your index.html.
// <script src="scripts/dapp_portal_sdk.js"></script><script src="https://static.kaiawallet.io/js/dapp-portal-sdk.js"></script>
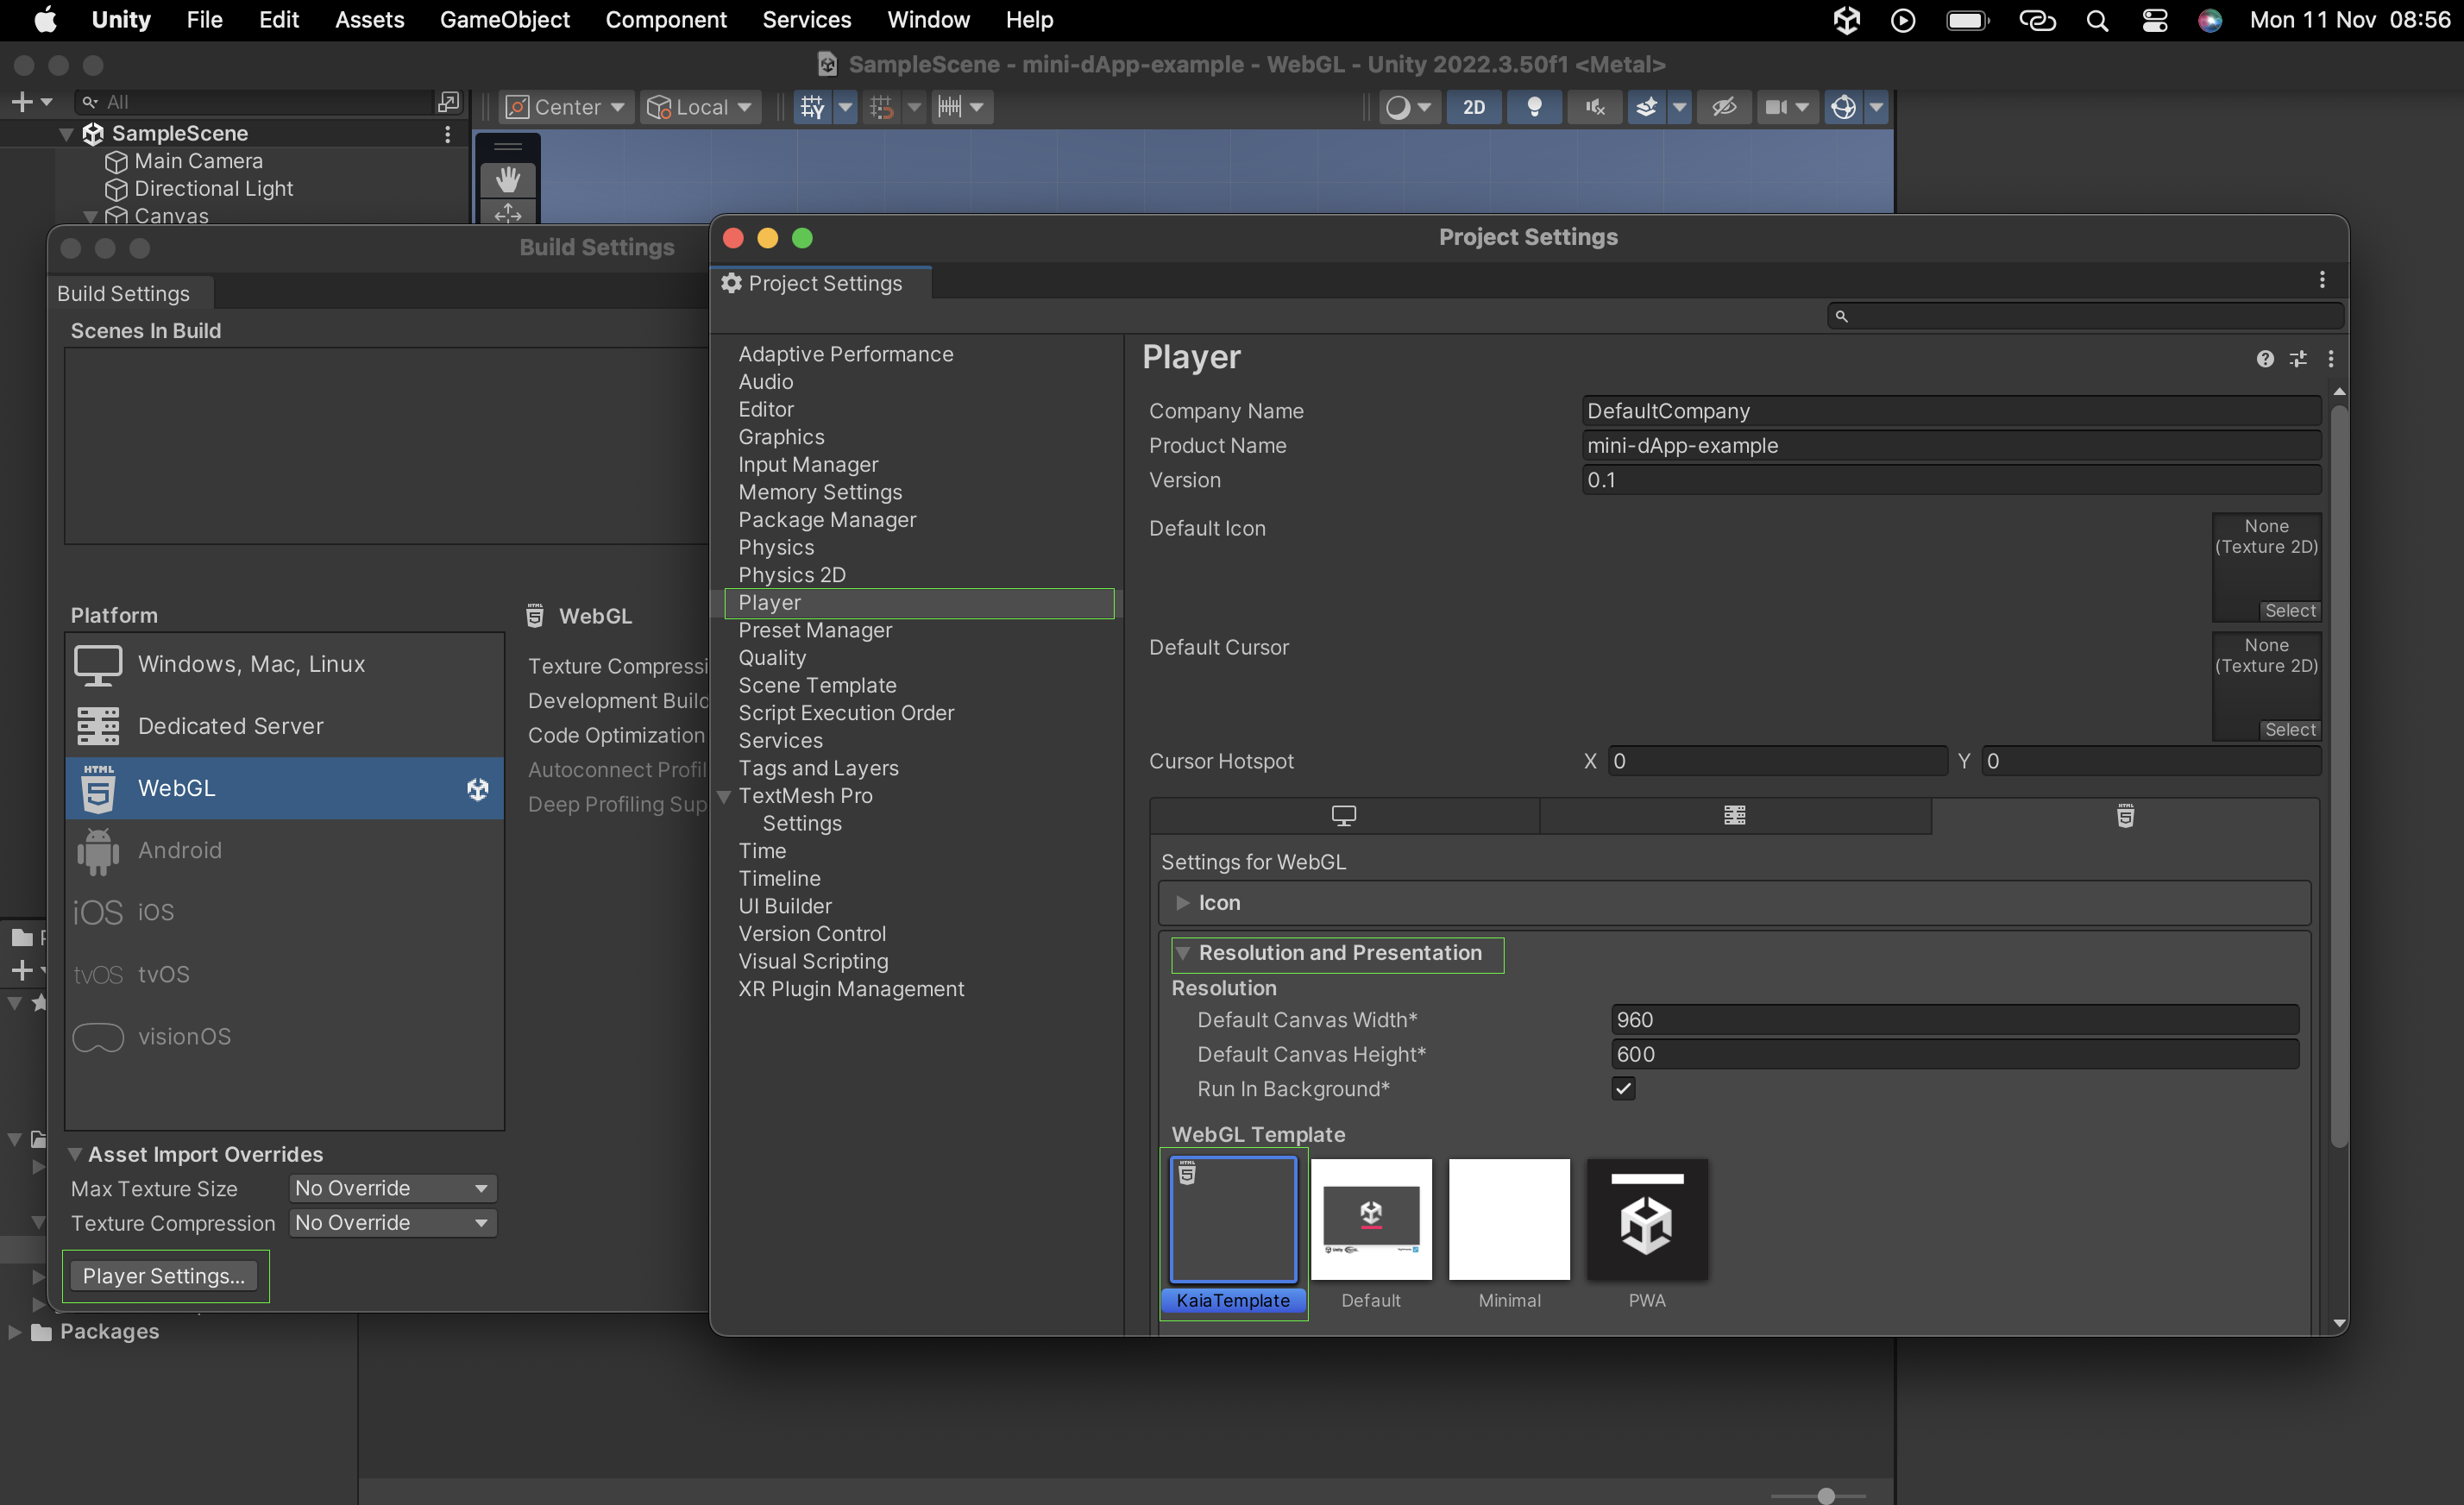
Step 5: Configure Unity to Use Custom Template
- Open Build Settings.
- Navigate to Player Settings.
- Under "Resolution and Presentation":
- Find "WebGL Template".
- Select "KaiaTemplate".
- Under "Publish Settings" select disabled in the Compression Format field.
Step 6: Building Your dApp
Now Let's bring it all together:
- Open Build Settings (File → Build Settings).
- Click "Build And Run".
- Save the build project as prompted on Unity; e.g "minidapp".
- Important Build Files:
minidapp/├── minidapp.loader.js├── minidapp.data├── minidapp.framework.js└── minidapp.wasm
Step 7: Post-Build Configuration
After building your project,
- Open your build folder.
- Note all generated file names.
- Update your index.html to match these names.
- Save changes and rebuild.
- You should now see a tab opened in your browser.
Step 8: Route WebGL build to Localhost:3000
For security and development purposes, the Mini Dapp SDK currently works on localhost:3000. At the moment, the default Unity WebGL builds use random ports (like 61445) and for our app to work efficiently we need to configure our Unity WebGL build to open on localhost:3000.
To do so, follow the steps below:
- Copy and Paste the code below in your project terminal
# Install http-server globallynpm install -g http-server
- Navigate to build folder
cd path/to/minidapp
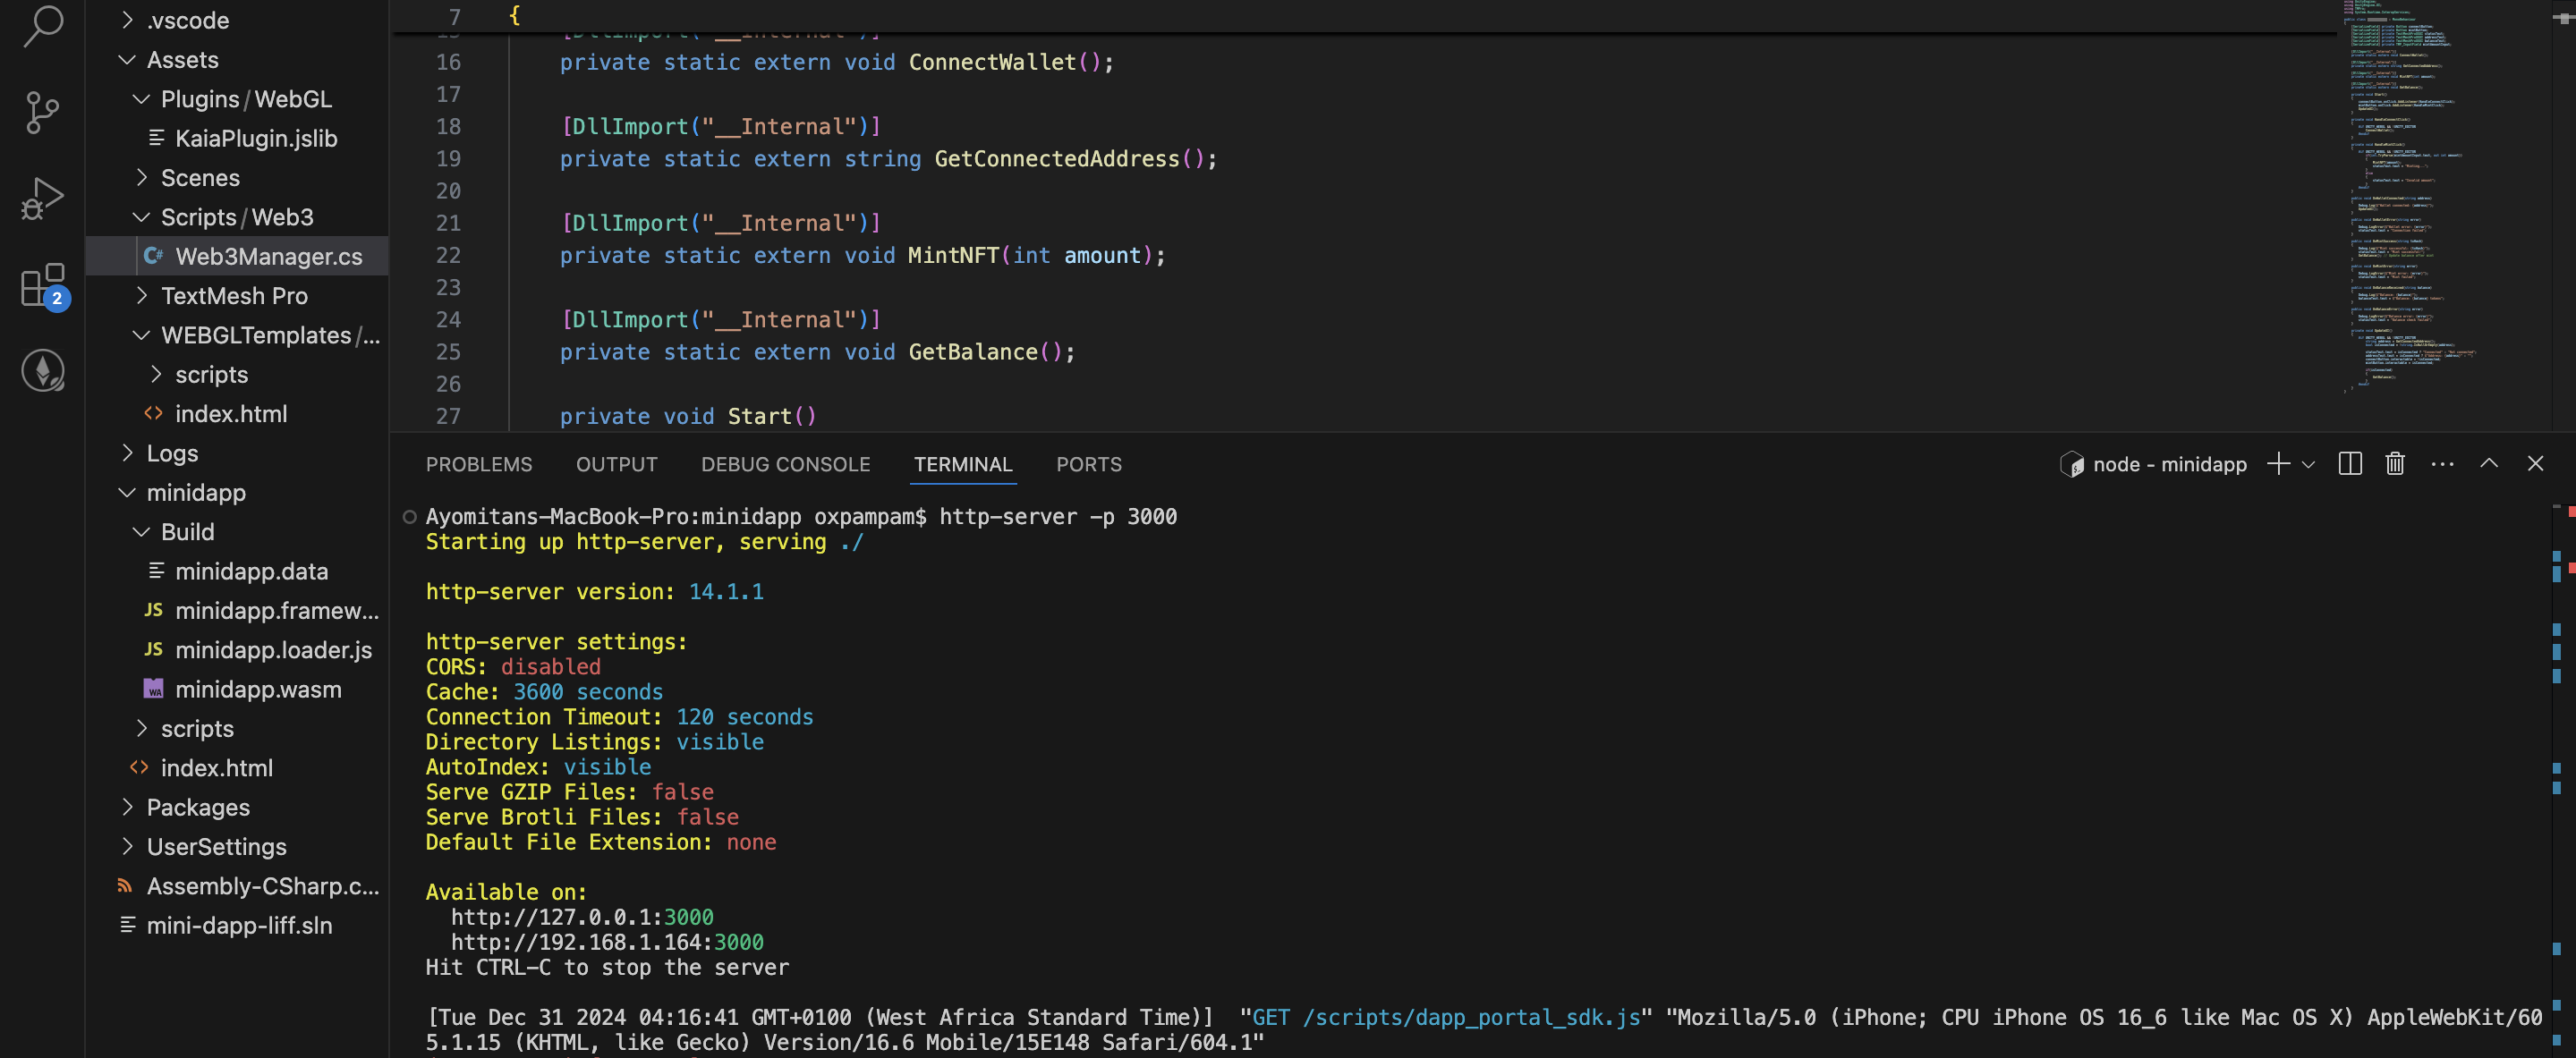
- Start server on port 3000
http-server -p 3000
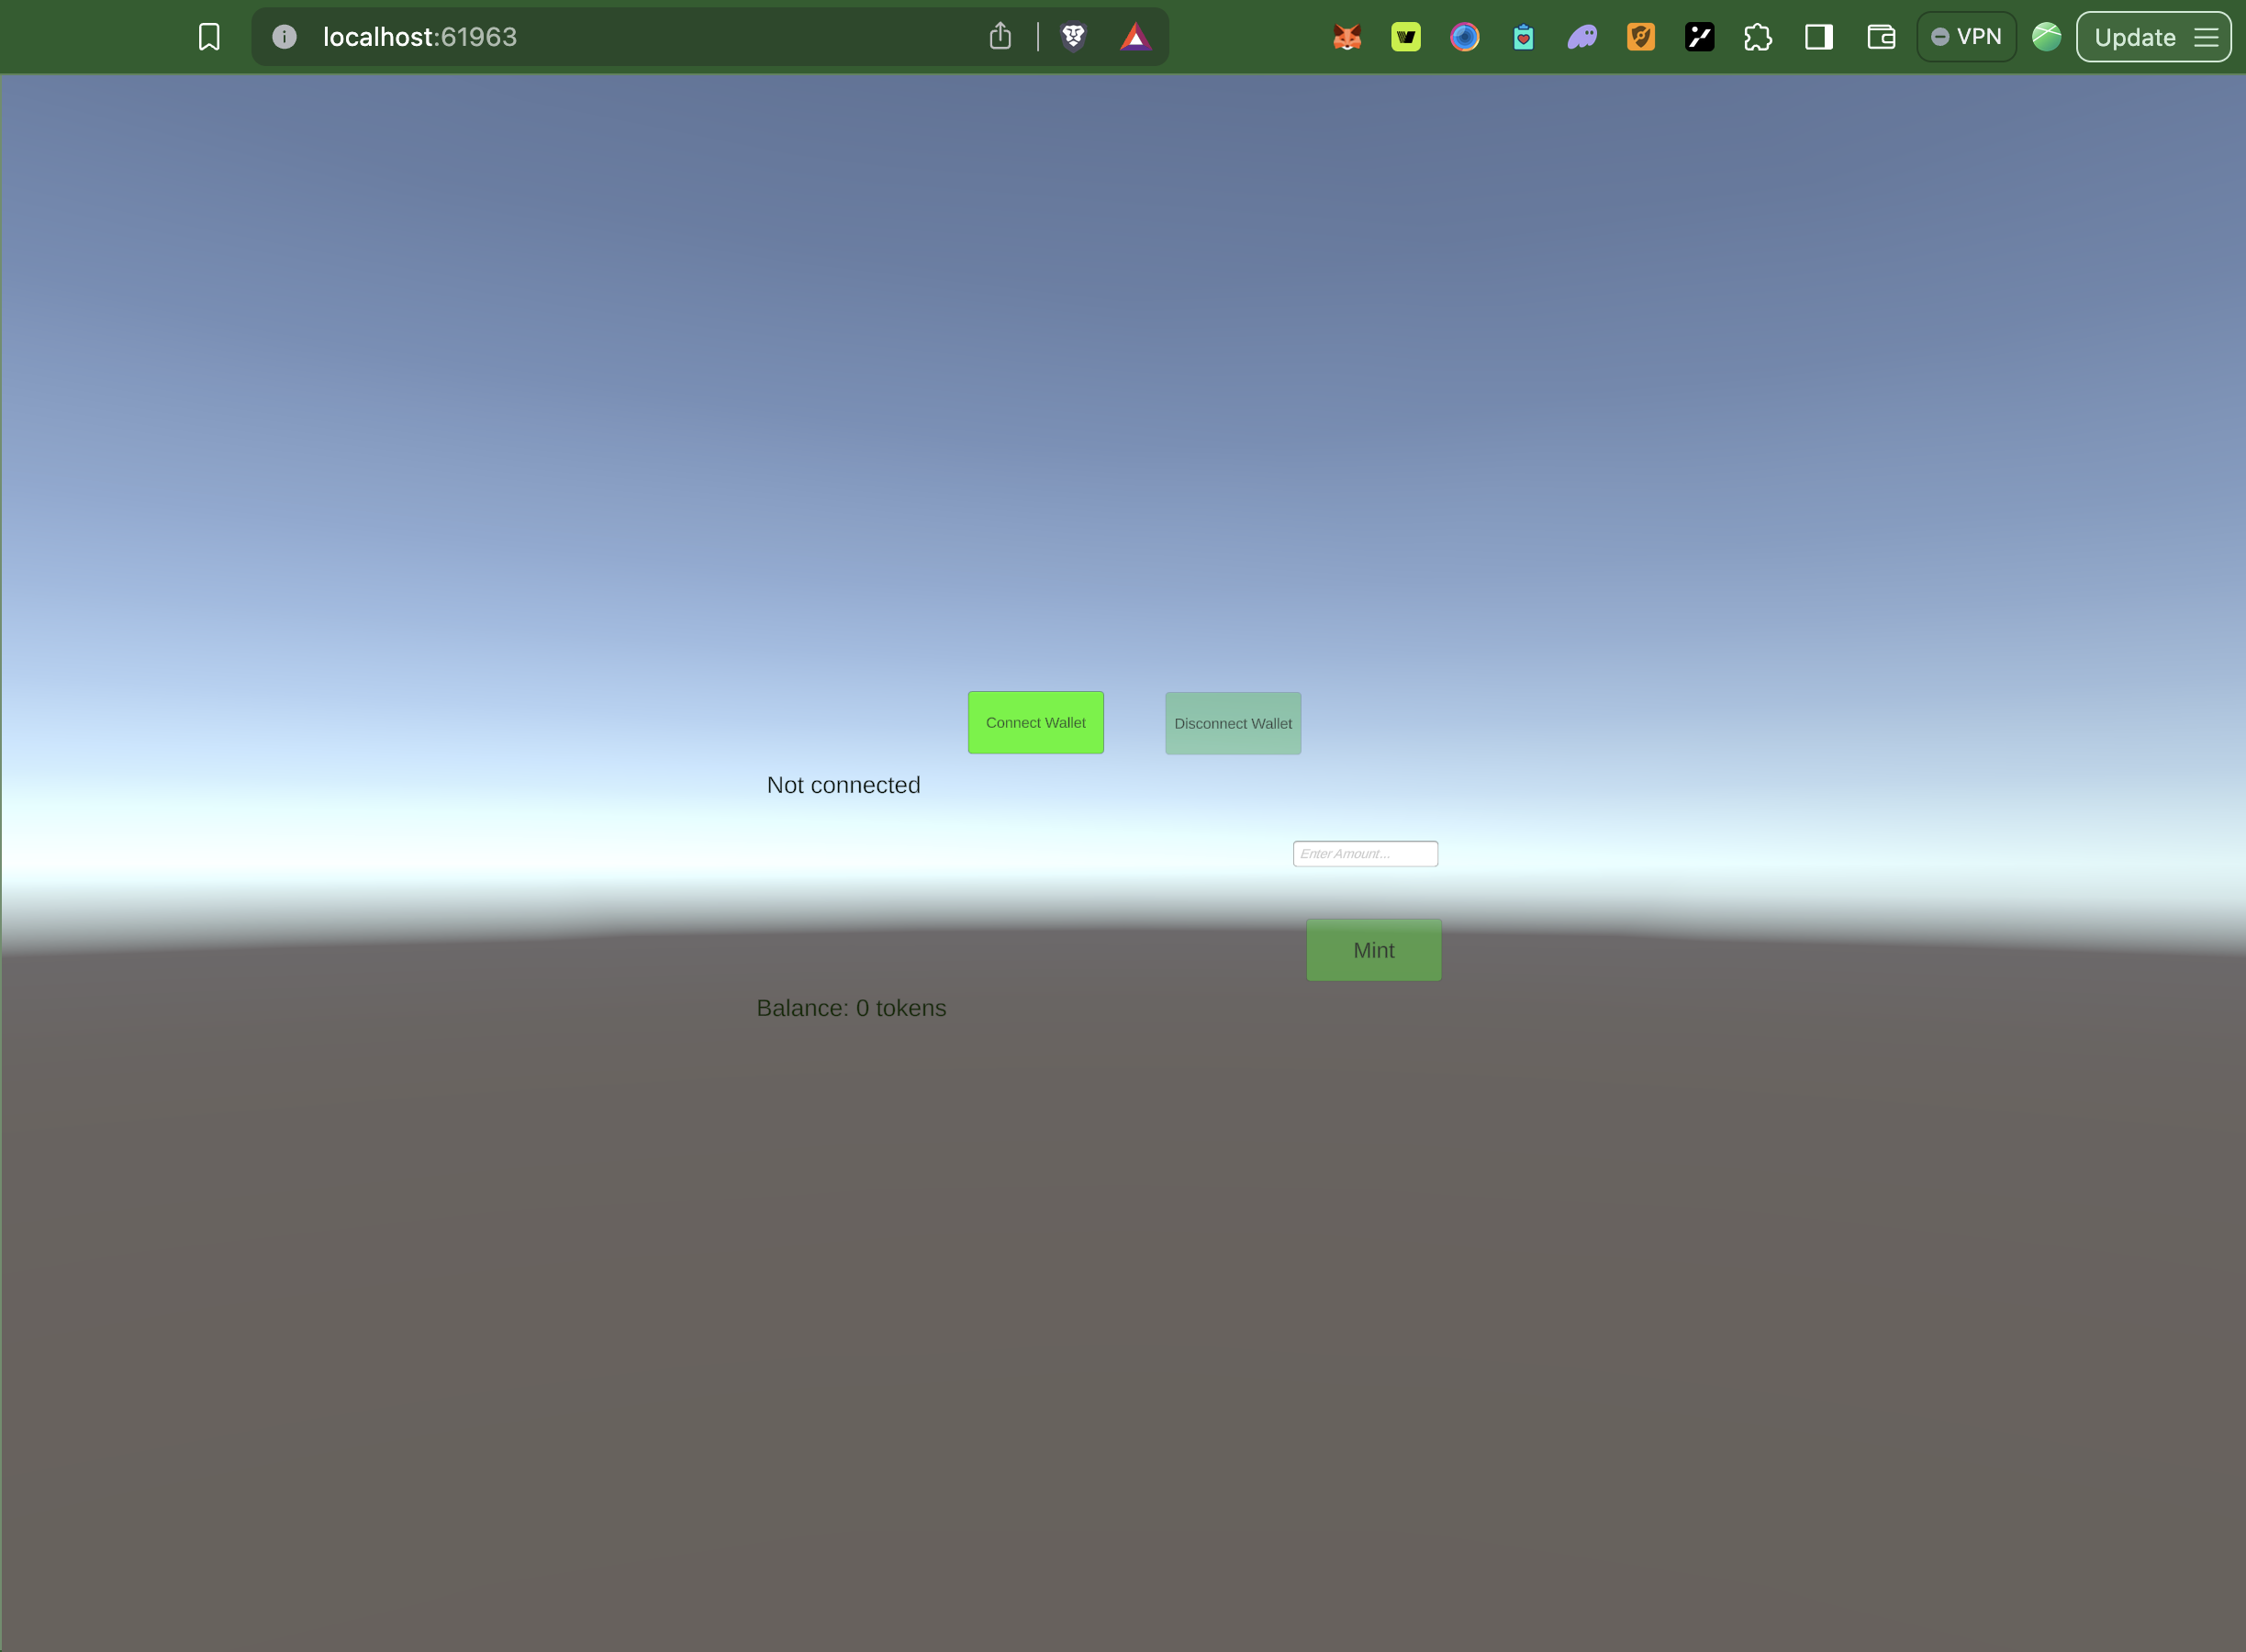
Testing and running application
Now that we have our project running, let’s test and interact with it.
- Click on the Connect Wallet button to connect to Dapp Portal Wallet.
- Once connected, fill in details (amount) to mint to the connected address.