UI Creation
In this section, we will build our dApp's user interface! We'll create a structured UI system with three main panels for status updates, actions, and minting functionality.
Setting Up the Main Canvas
First, let's create our base canvas:
- In the Hierarchy window, right-click on "Sample Scene".
- Navigate to GameObject → UI → Canvas.
Creating the Web3UI Container
- Right-click on your new Canvas.
- Select "Create Empty".
- Rename it to "Web3UI".
Setting Up Main Panels
Inside Web3UI, create three panel objects:
- Right-click on Web3UI and select "Create Empty".
- Create and rename these panels:
- StatusPanel - Your dApp's information display
- ButtonPanel - For user interactions
- MintPanel - For token minting features
Creating Panel Components
StatusPanel Components
This panel shows all your important Web3 information:
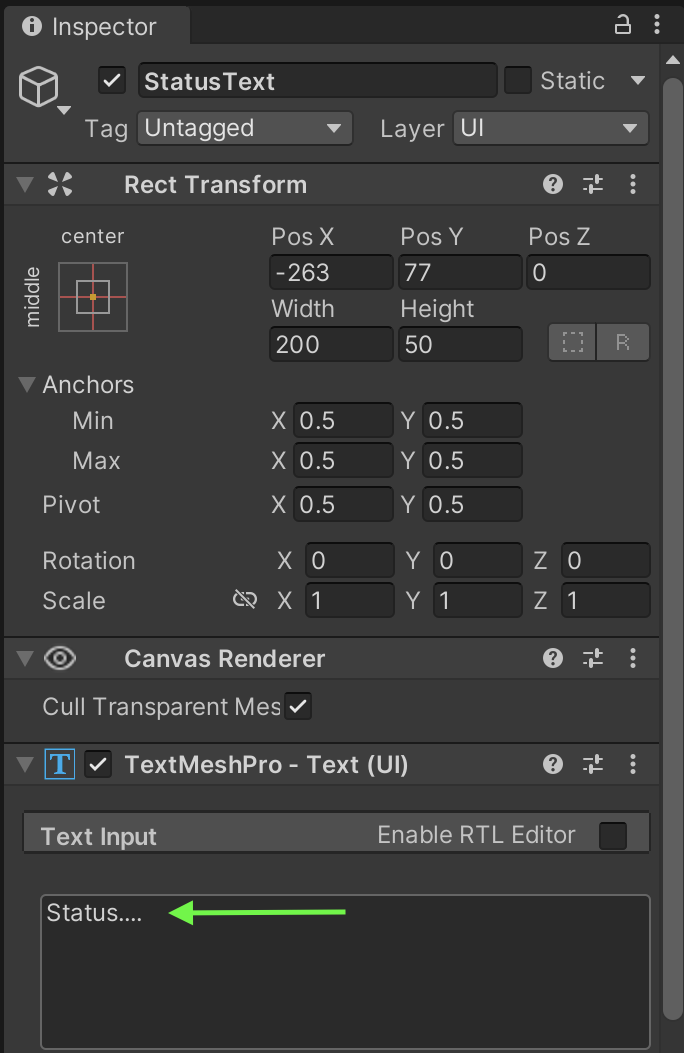
- Right click on StatusPanel, click on UI → Text - TextMeshPro and then rename to StatusText. Make sure to fill the “Text Input” field in the Inspector pane e.g. "Status..."
TextMeshPro (TMP) Setup
When you first create a TextMeshPro element (UI - Text - TextMeshPro), Unity automatically prompts you to import TMP Essentials. If you accidentally skip this prompt, you can manually import it through Window > TextMeshPro > Import TMP Essentials.
Why we need this: TextMeshPro requires core resources (shaders, default fonts, and materials) to properly display text in your game. Without these essentials, your text components won't render correctly and you'll see shader/material errors in your project. This is a one-time setup that's necessary for text to work properly.

- Right click on StatusPanel, click on UI → Text - TextMeshPro and then rename to AddressText. Make sure to fill the text object e.g "Address Text..."
- Right click on StatusPanel, click on UI → Text - TextMeshPro and then rename to TokenBalanceText. Make sure to fill the text object e.g "0.0000 ET"
├── StatusText (TextMeshPro)│ └── Default: "Status..."├── AddressText (TextMeshPro)│ └── Default: "Address Text..."└── TokenBalanceText (TextMeshPro) └── Default: "0.0000 ET"
ButtonPanel Components
Your main interaction buttons:
-
Right click on ButtonPanel, click on UI → Button - TextMeshPro and then rename it to ConnectWalletButton. Make sure to fill the "Text Input" field in the Inspector pane with "Connect Wallet".
-
Right click on ButtonPanel, click on UI → Button - TextMeshPro and then rename it to DisconnectWalletButton. Make sure to fill the "Text Input" field in the Inspector pane with “Disconnect Wallet".
ButtonPanel├── ConnectWalletButton (Button - TextMeshPro)│ └── Text: "Connect Wallet"├── DisconnectWalletButton (Button - TextMeshPro)│ └── Text: "Disconnect Wallet"
MintPanel Components
The token minting interface:
- Right click on MintPanel, click on UI → Input Field → TextMeshPro and then rename to MintAmountInput. Make sure to fill the placeholder object with "Enter Amount…"
- Right click on MintPanel, click on UI → Button → TextMeshPro and then rename to MintButton. Make sure to fill the text object with "Mint"
MintPanel├── MintAmountInput (Input Field - TextMeshPro)│ └── Placeholder: "Enter Amount..."└── MintButton (Button - TextMeshPro) └── Text: "Mint"
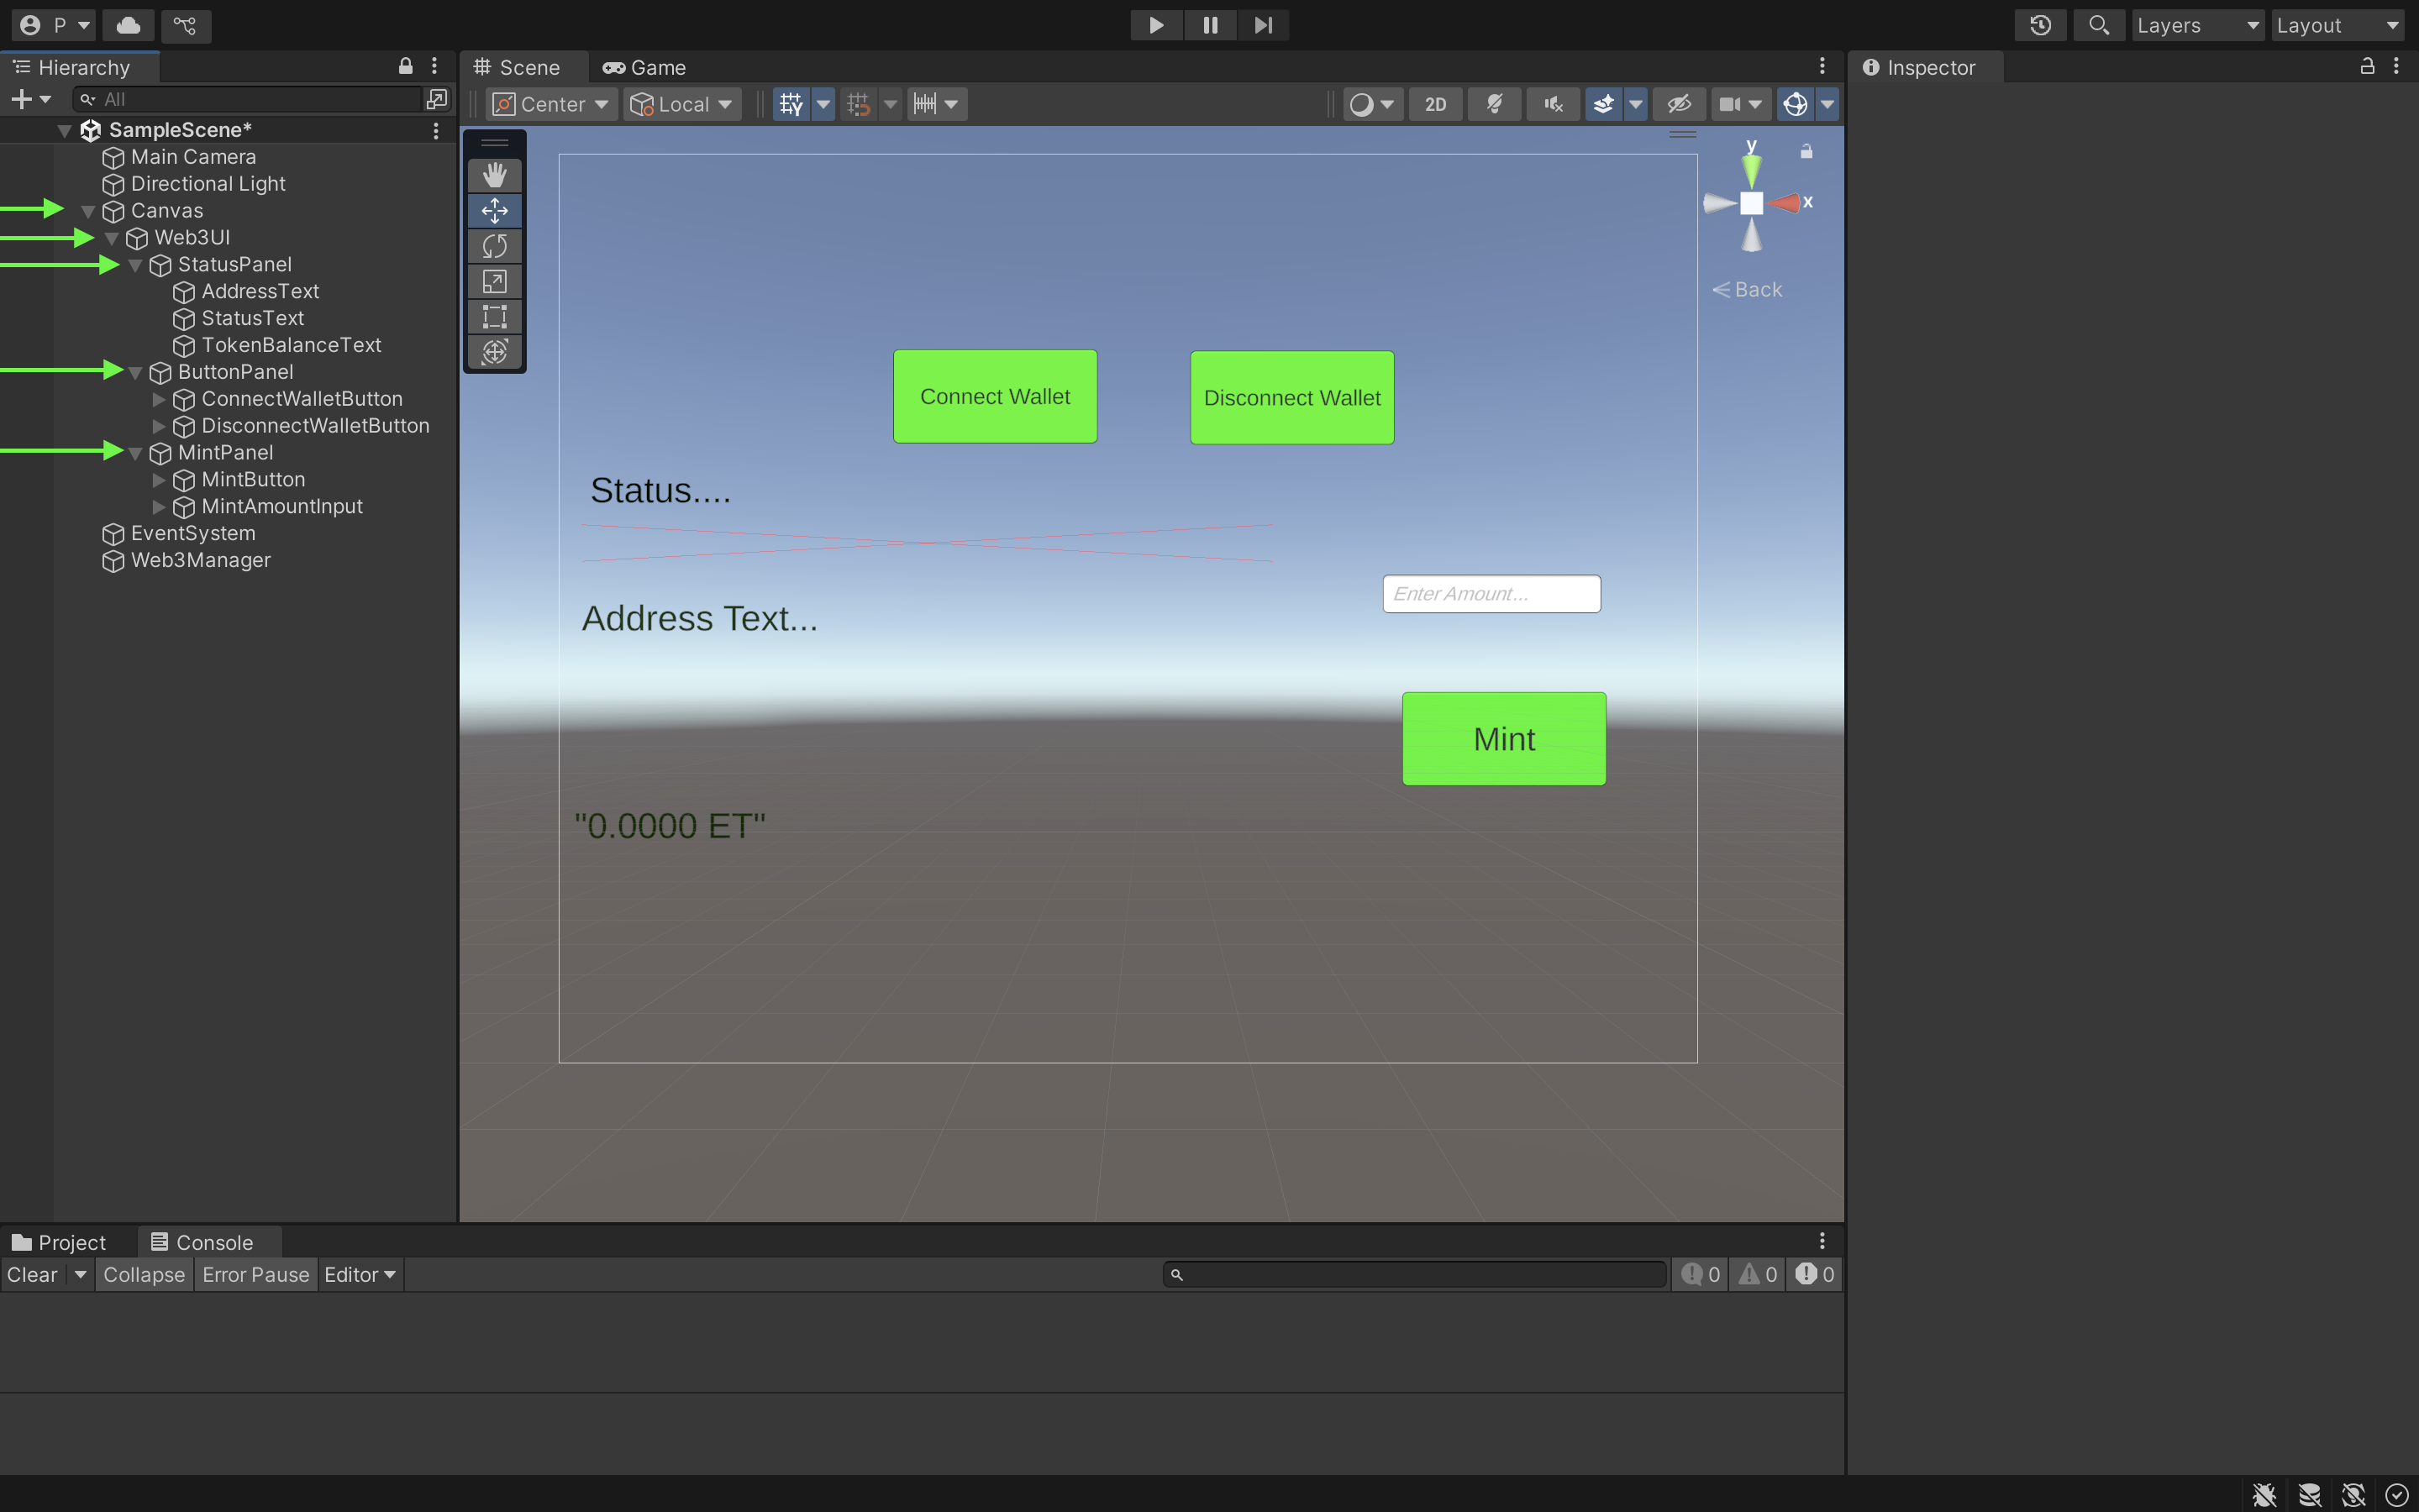
After creating all components, your hierarchy should look like this:
Canvas└── Web3UI ├── StatusPanel ├── ButtonPanel └── MintPanel

For your component to be well arranged as seen in the image above, you have to manually arrange them with the icon on the right-hand side when you click on each component.