Quick Start
Prerequisites
Before we dive in, make sure you have:
- Cocos Dashboard installed on your computer
- Basic TypeScript knowledge
- A Cocos Developer Account
- A LINE Developer Account (easily created with your email)
- Test KAIA tokens from the Kaia Faucet
- Mini Dapp SDK Client ID (provided by the DApp Portal team)
- Basic Web3 familiarity(a general understanding of wallets and tokens is sufficient)
Setting Up Development Environment for Cocos Creator
Before we begin, let's ensure your development environment is properly set up. We'll start by installing and verifying the Cocos Dashboard.
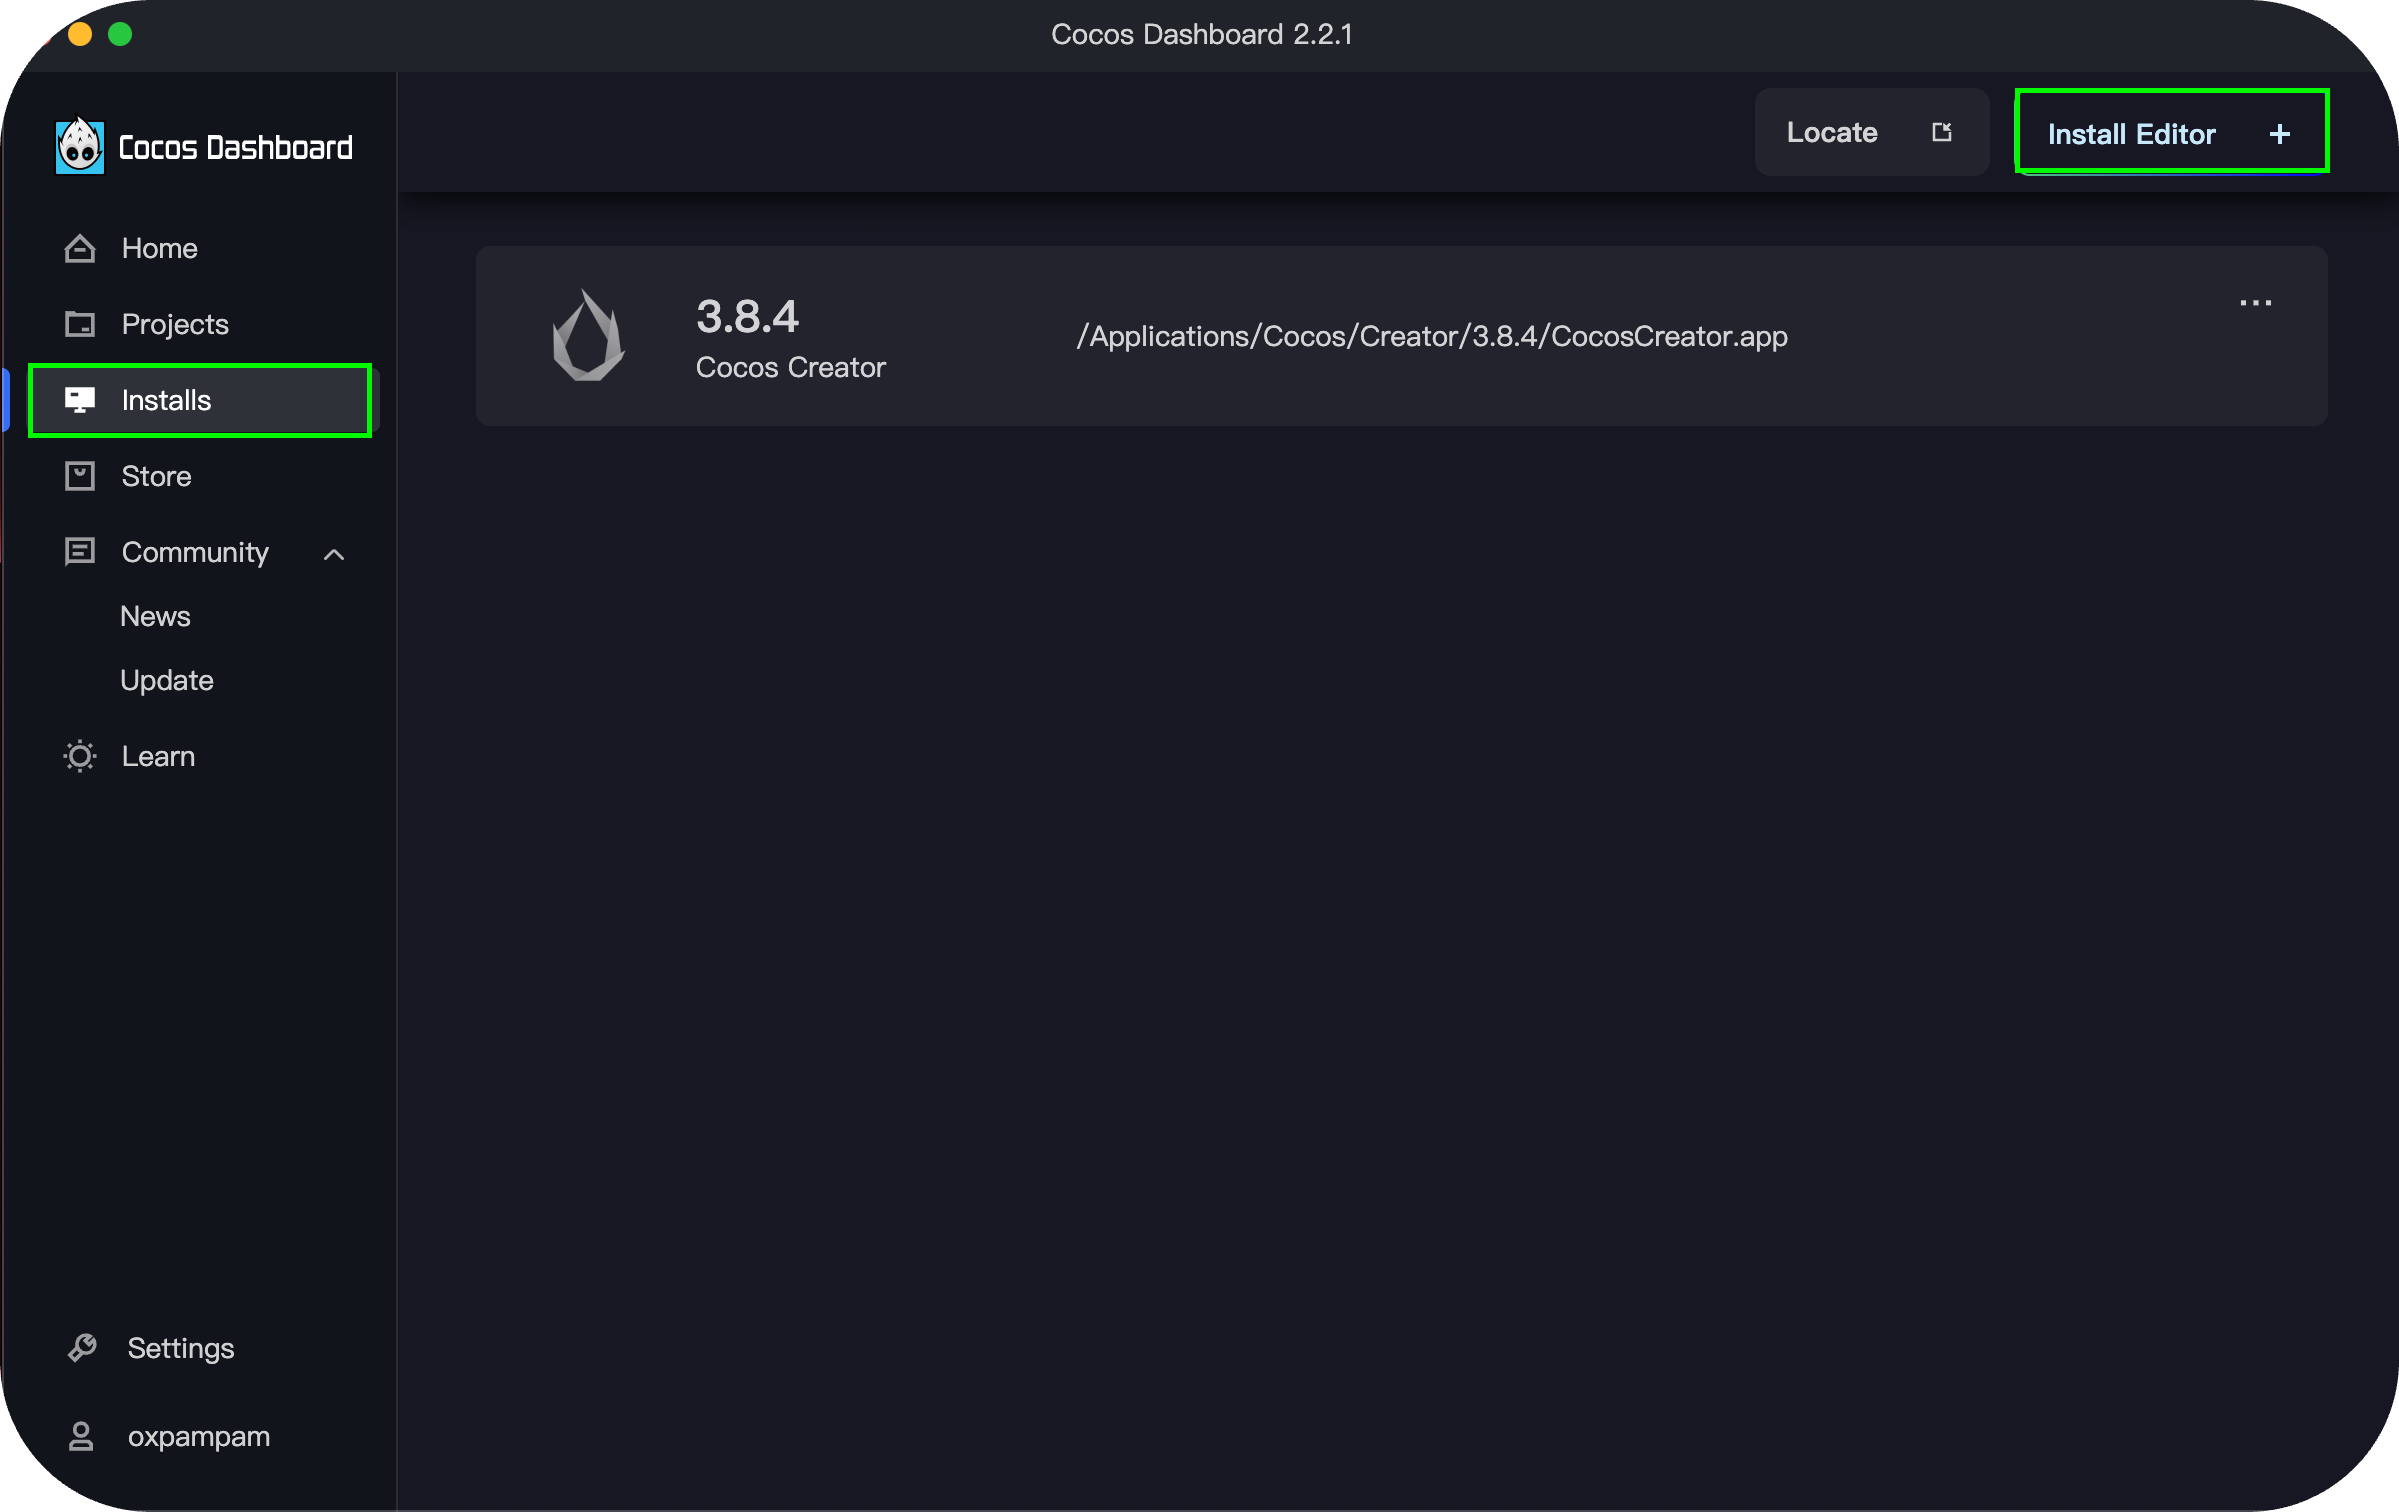
Step 1: Install and Verify Cocos Dashboard
To avoid compatibility issues, ensure you're using the correct version of Cocos Creator:
- Install Cocos Dashboard if you haven’t already.
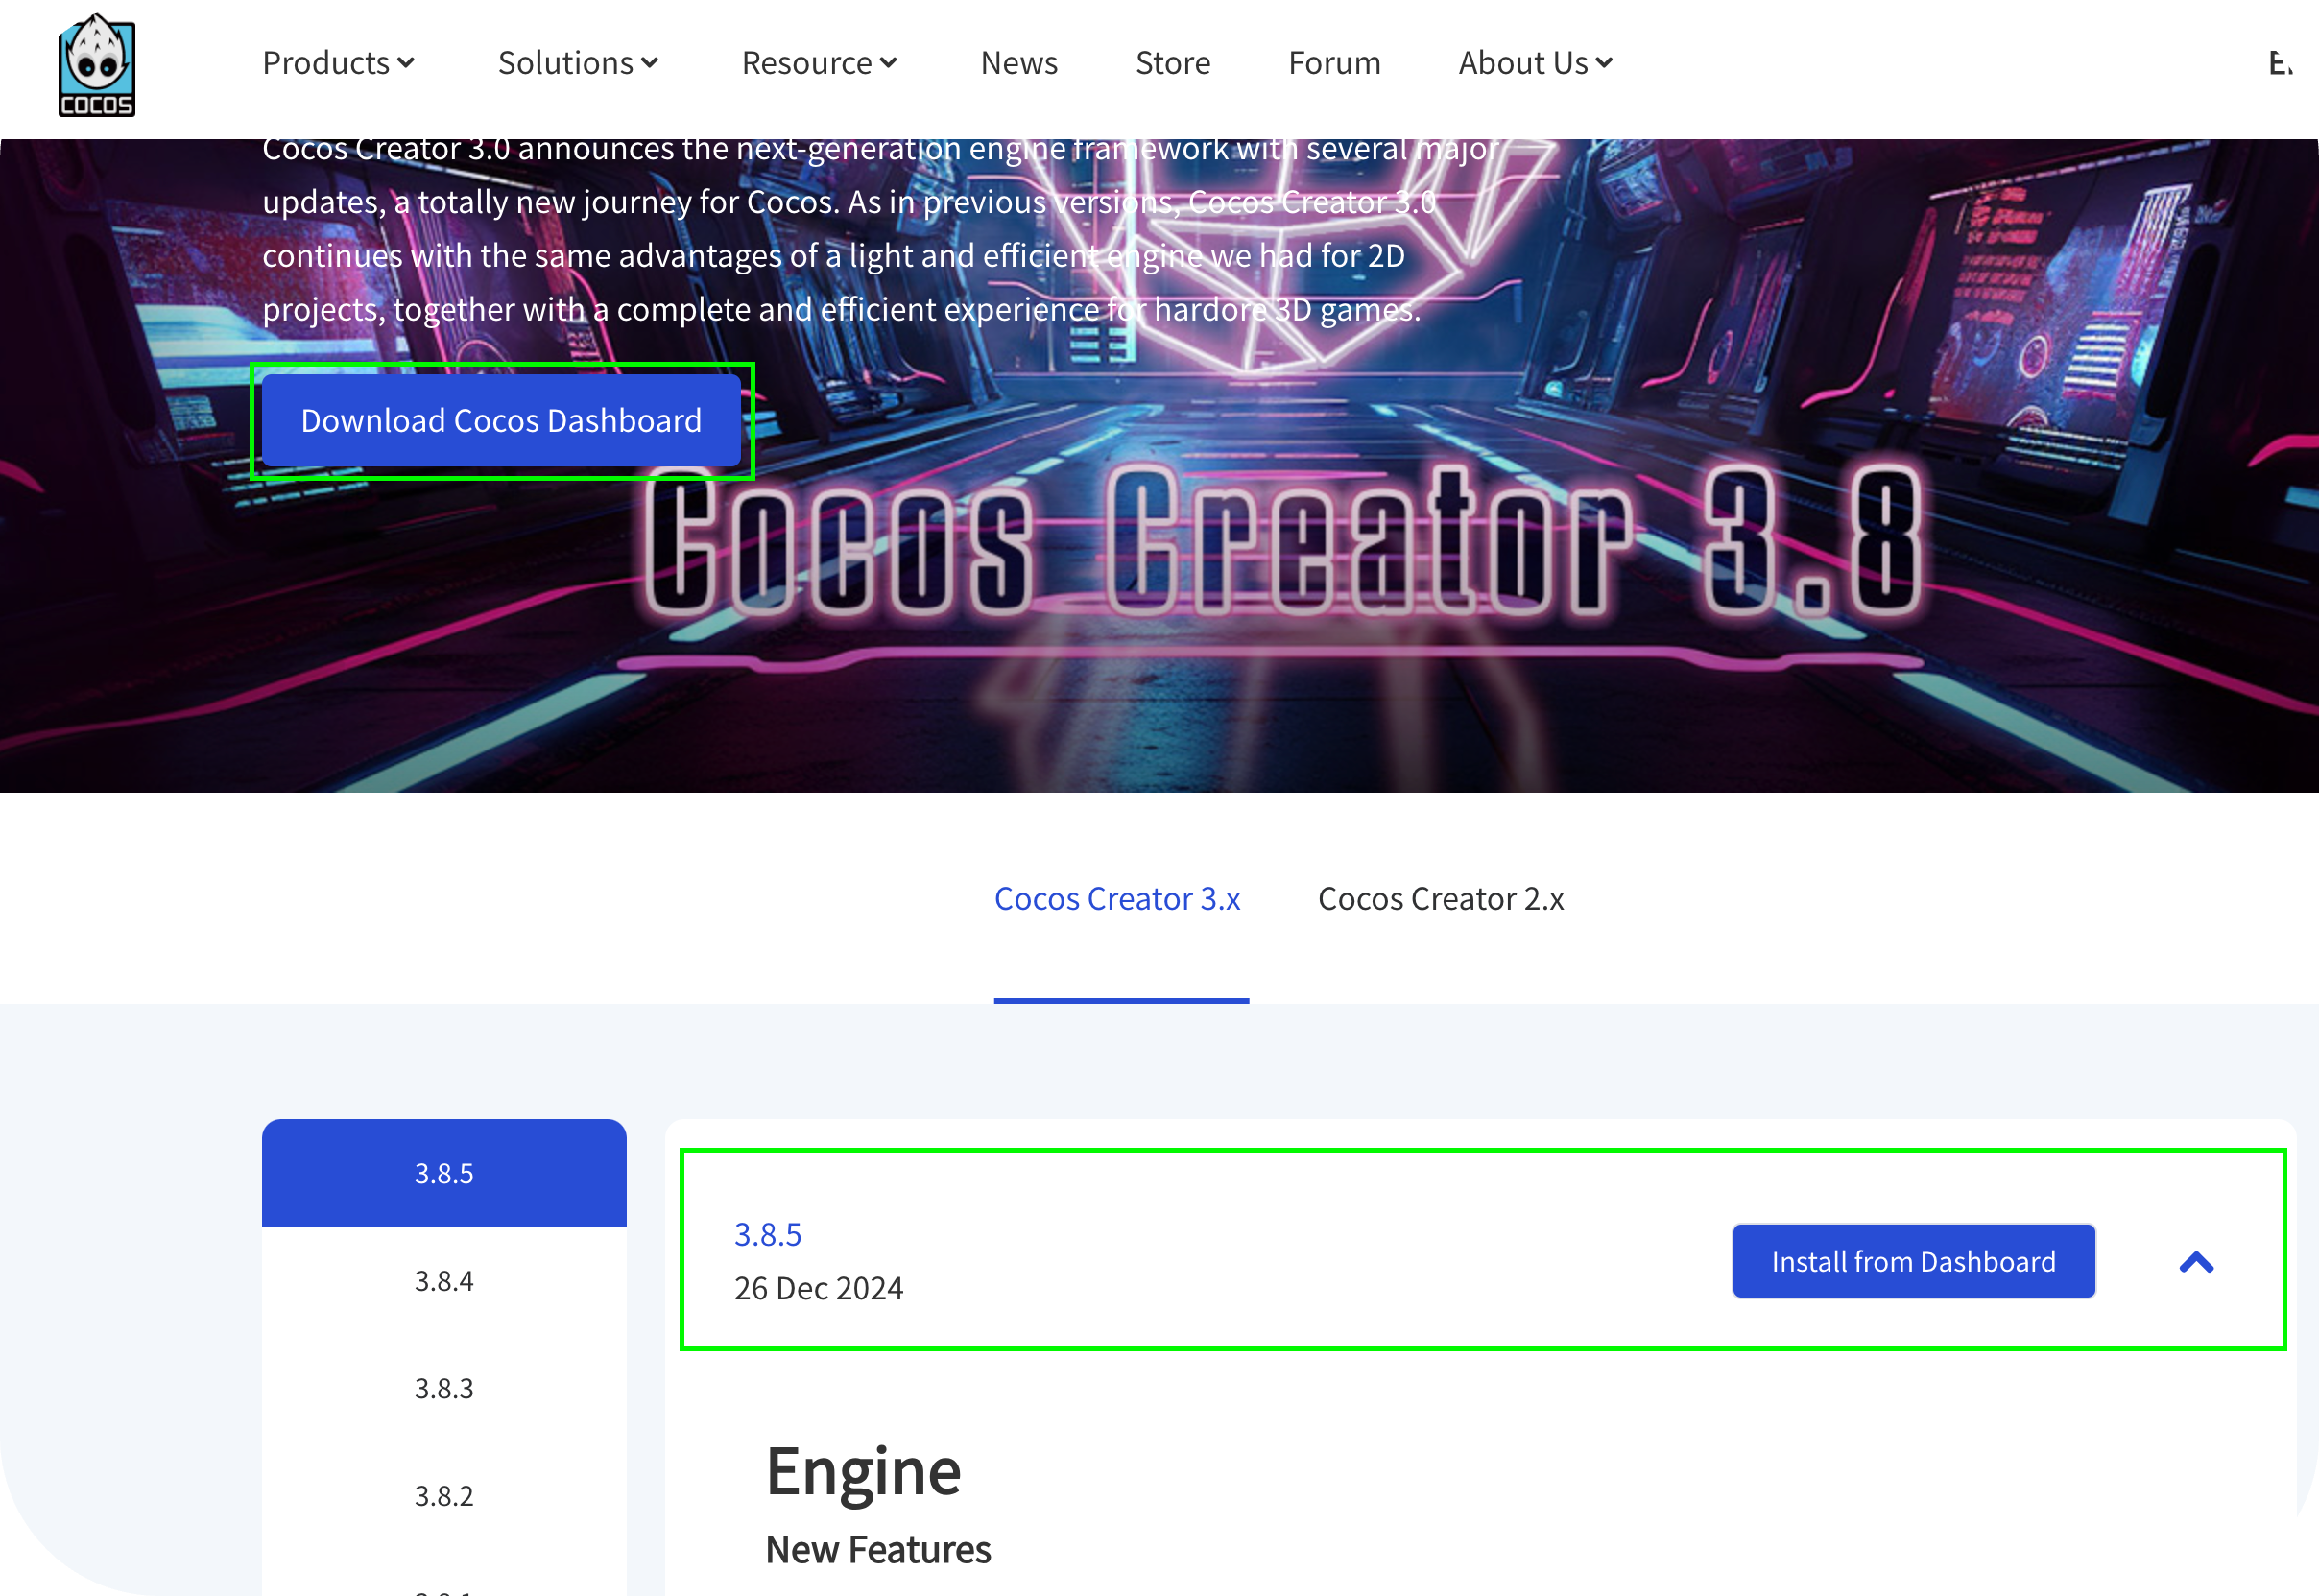
- Install Cocos Creator Editor (this guide uses version 3.8.4).
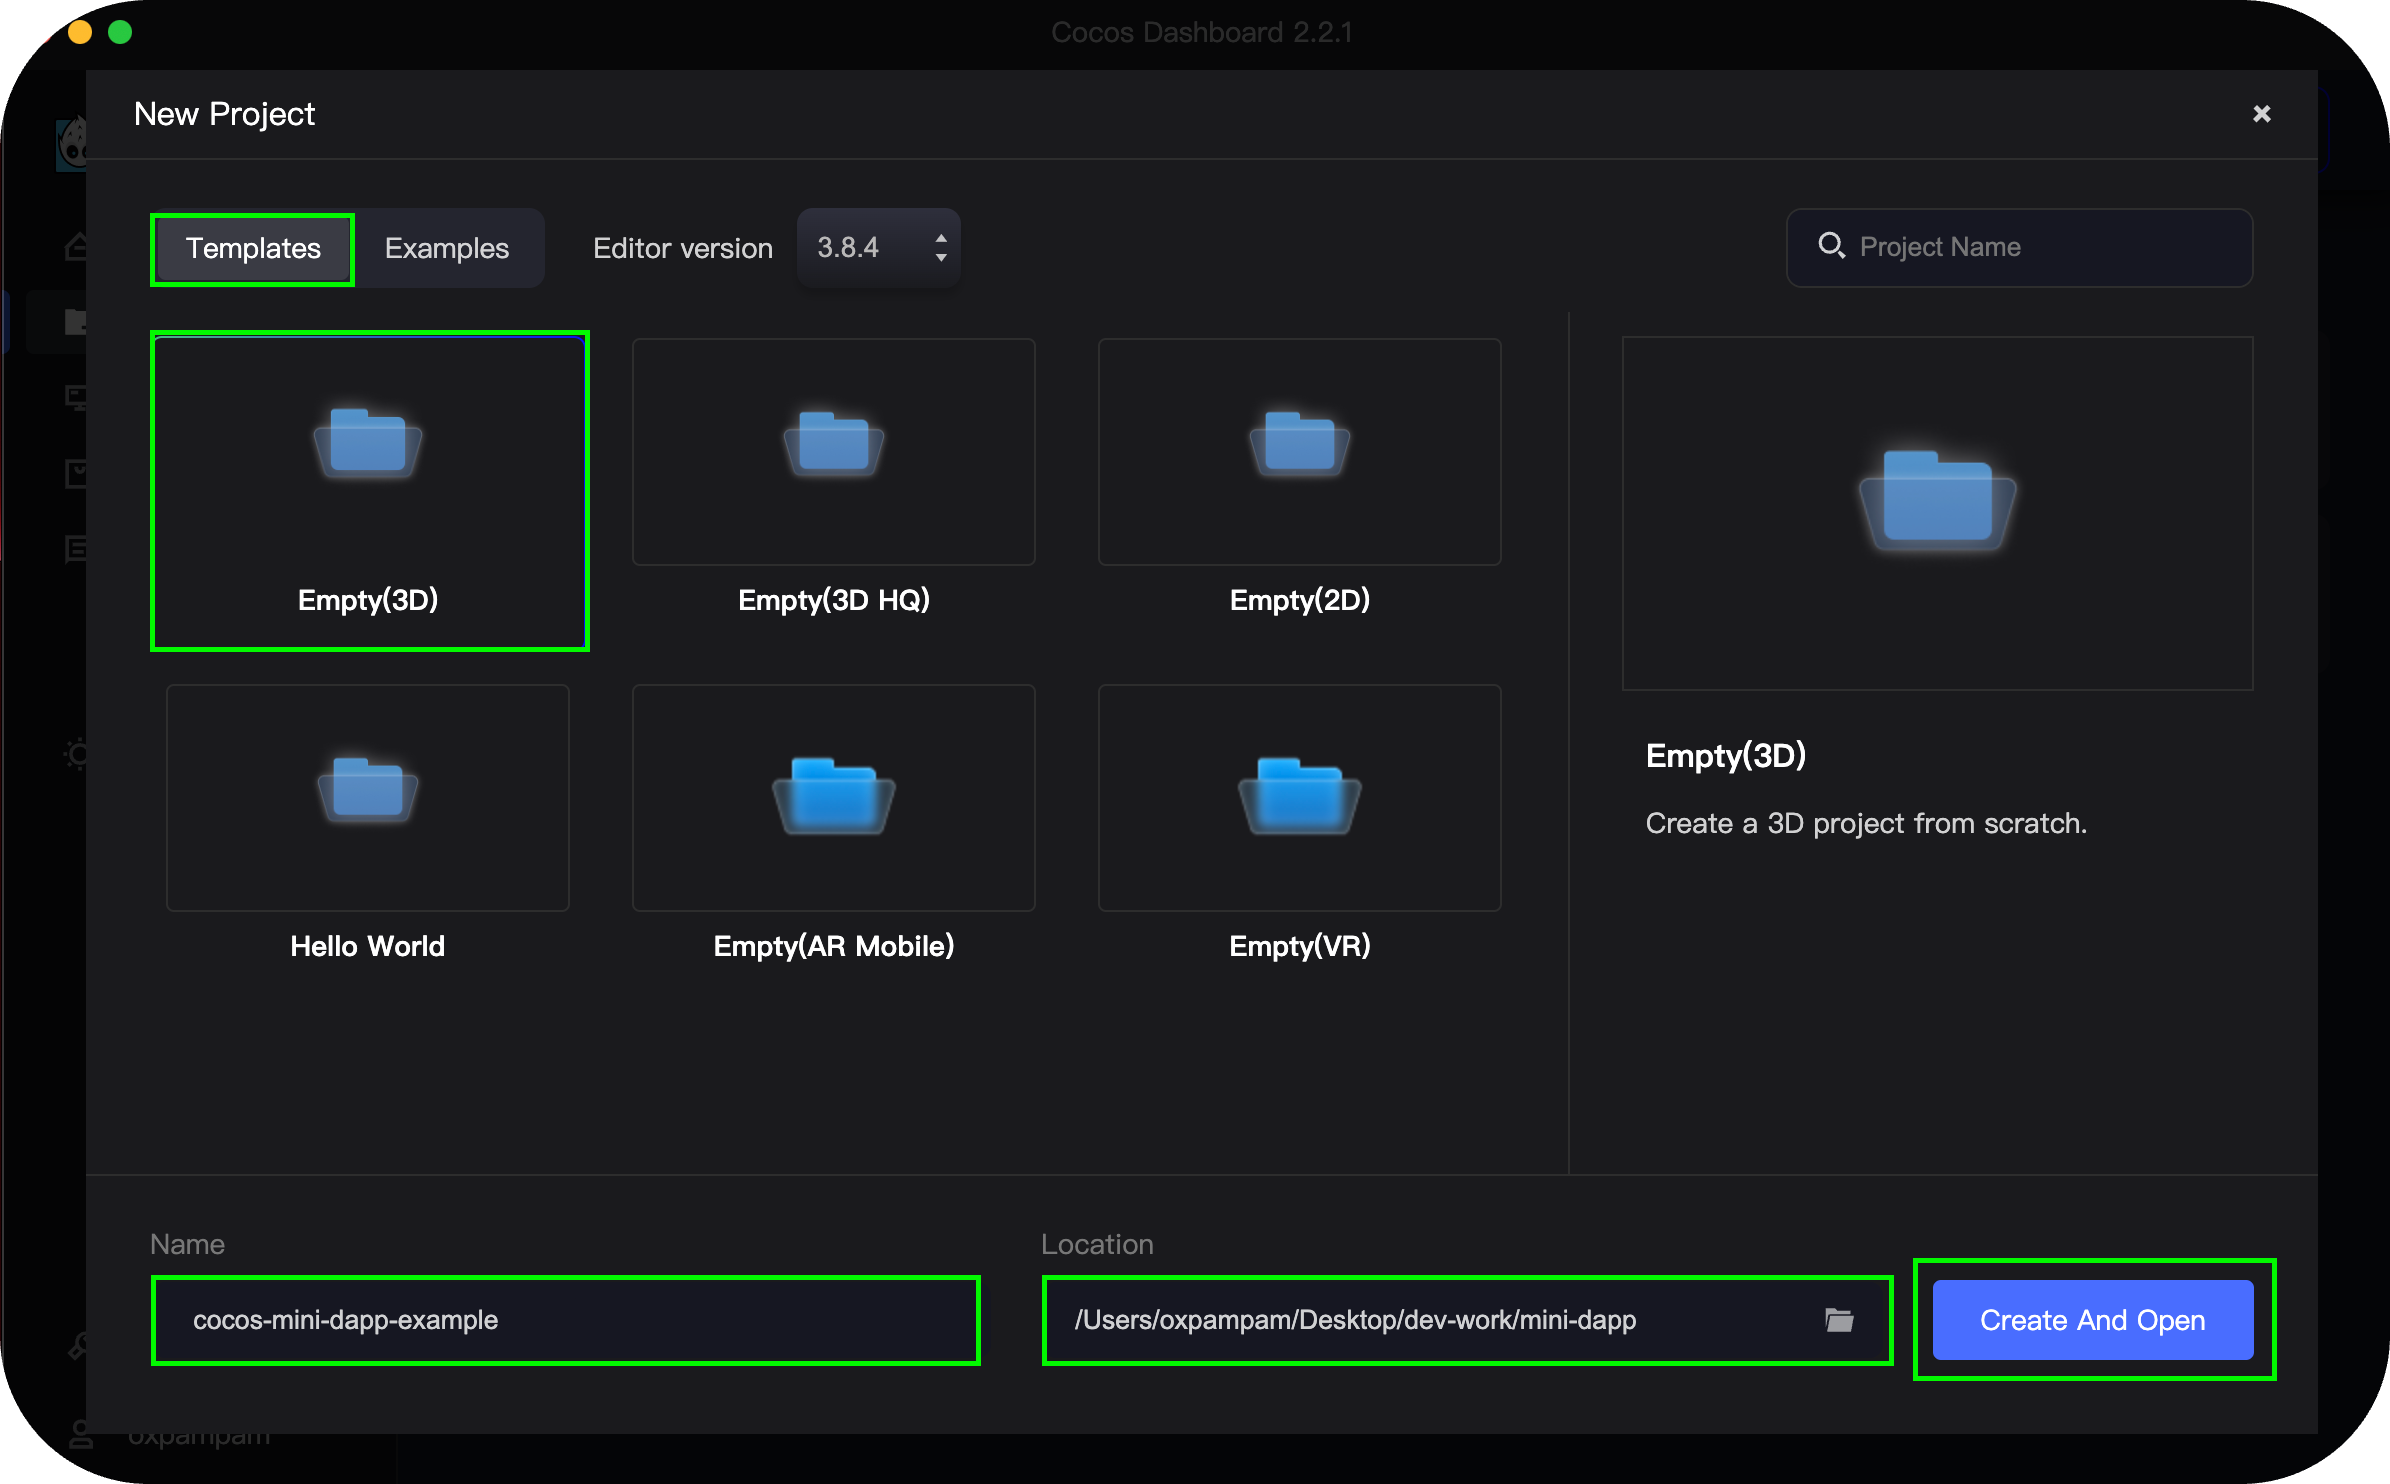
Step 2: Create a New Cocos Creator Project
- Open Cocos Dashboard and navigate to the Projects tab.
- Click New Project in the top-right corner.
- Under Templates, select Empty (3D).
- Enter a project name (e.g., cocos-mini-dapp-example).
- Choose a preferred location for your project files.
- Click Create and Open to finalize setup.