UI Creation
In this section, we'll build the user interface (UI) for our dApp, including wallet connection, balance updates, and minting functionality.
Setting Up the Main Scene
Step 1: Create a Scenes Folder
- Navigate to your project's assets folder.
- Right-click and select Create Folder.
- Name it scenes. (Insert Image)
- Inside the scenes folder, right-click and select Create → Scene.

- Save the scene file when prompted.
- Double-click the newly created scene to set it as the default scene.
Step 2: Creating the Base Canvas
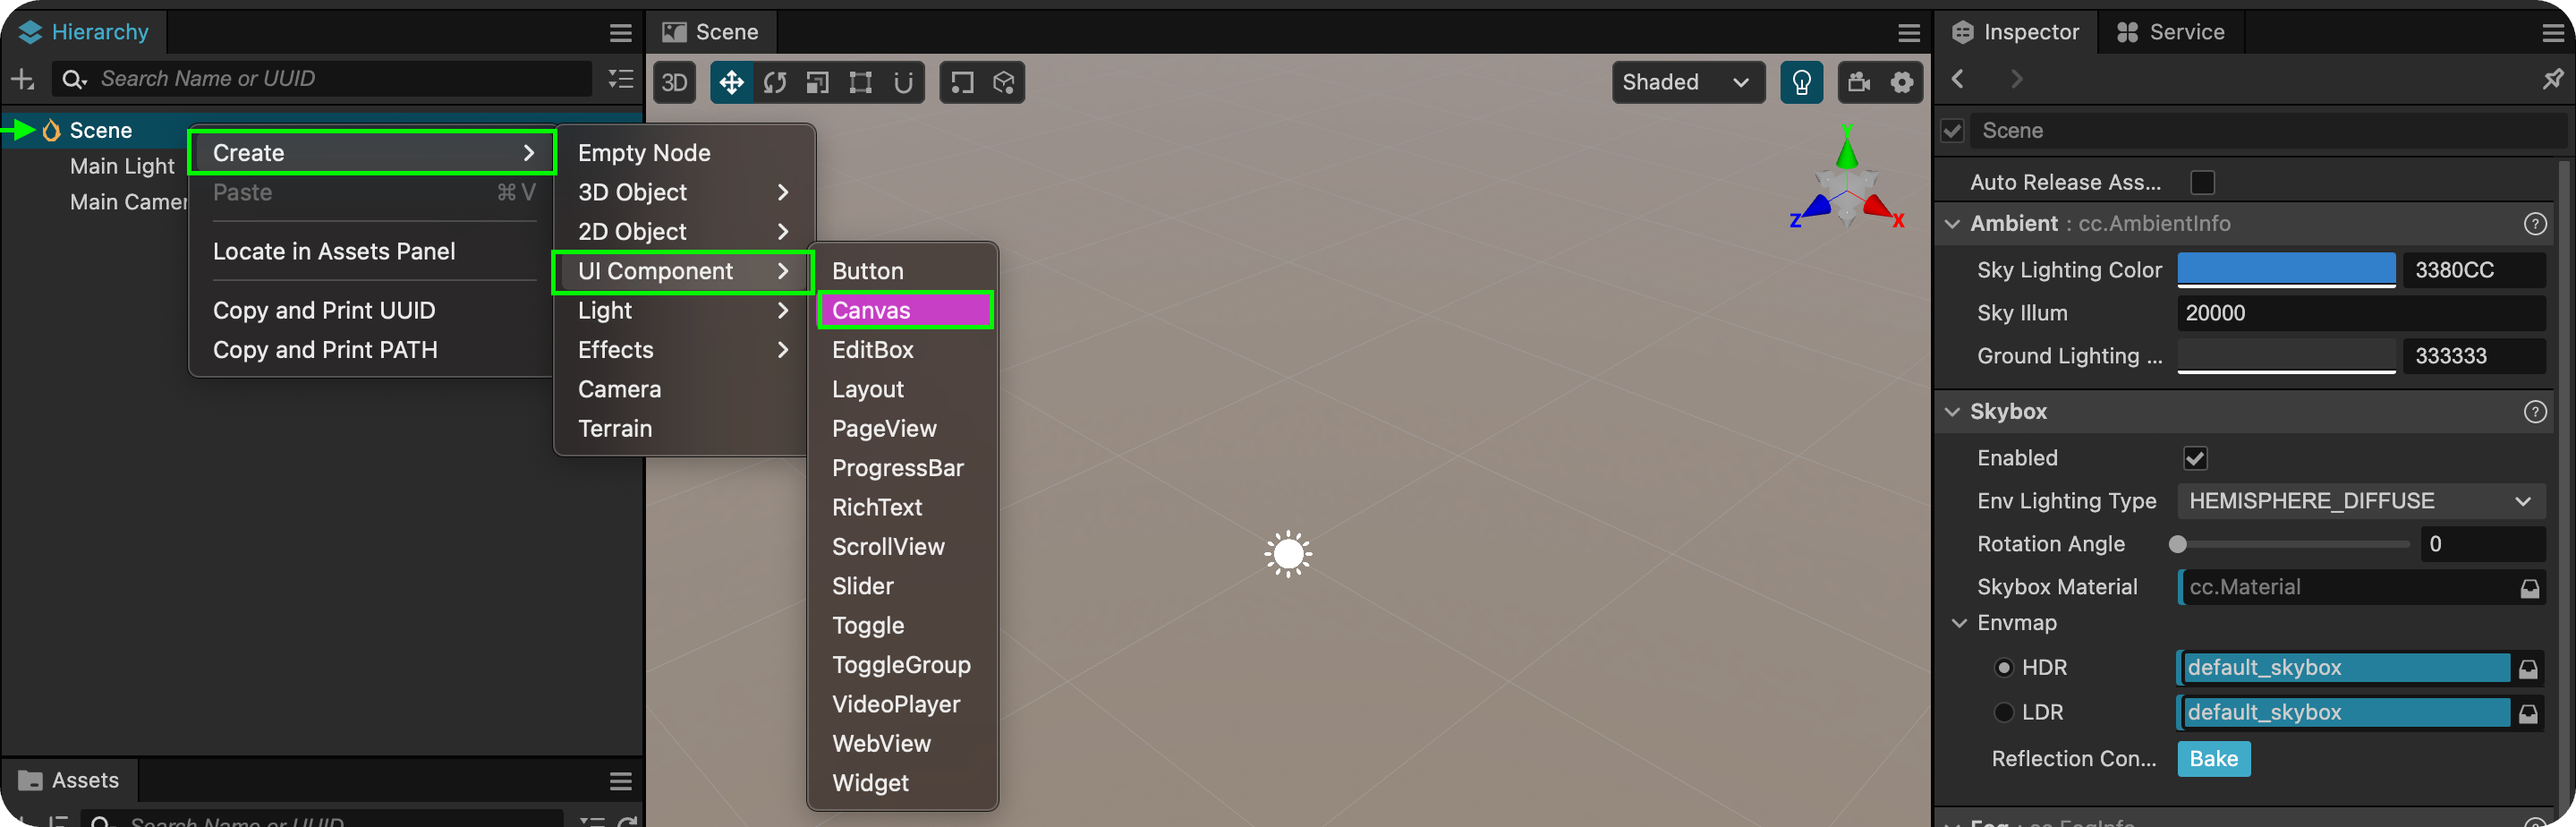
- In the Hierarchy window, right-click on Scene.
- Navigate to Create → UI Component → Canvas.
- Rename it to Canvas
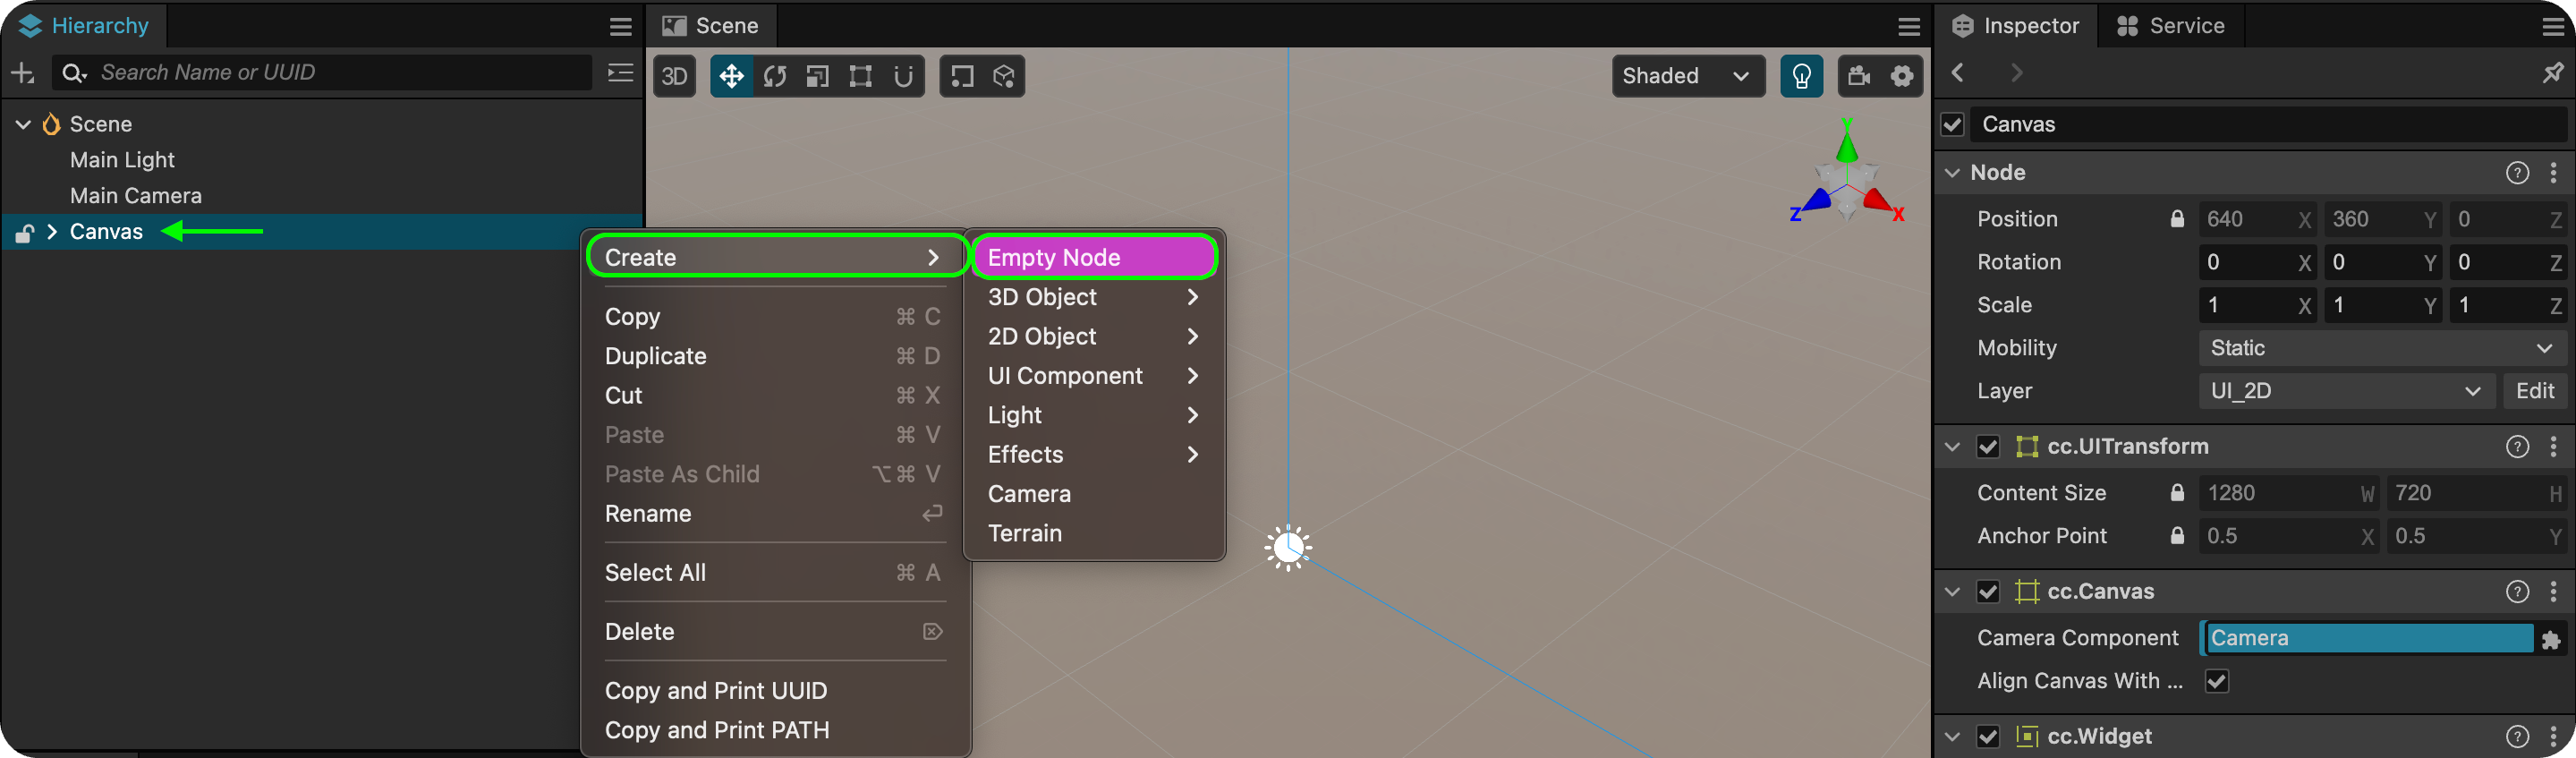
Step 3: Creating the Web3UI Container
- Right-click on the newly created Canvas.
- Select Create → Empty Node.
- Rename it to Web3UI.
Step 4: Setting Up Main UI Objects
Inside Web3UI, create the following components:
1. Connect Wallet Button
- Right-click Web3UI → Create → UI Component → Button.
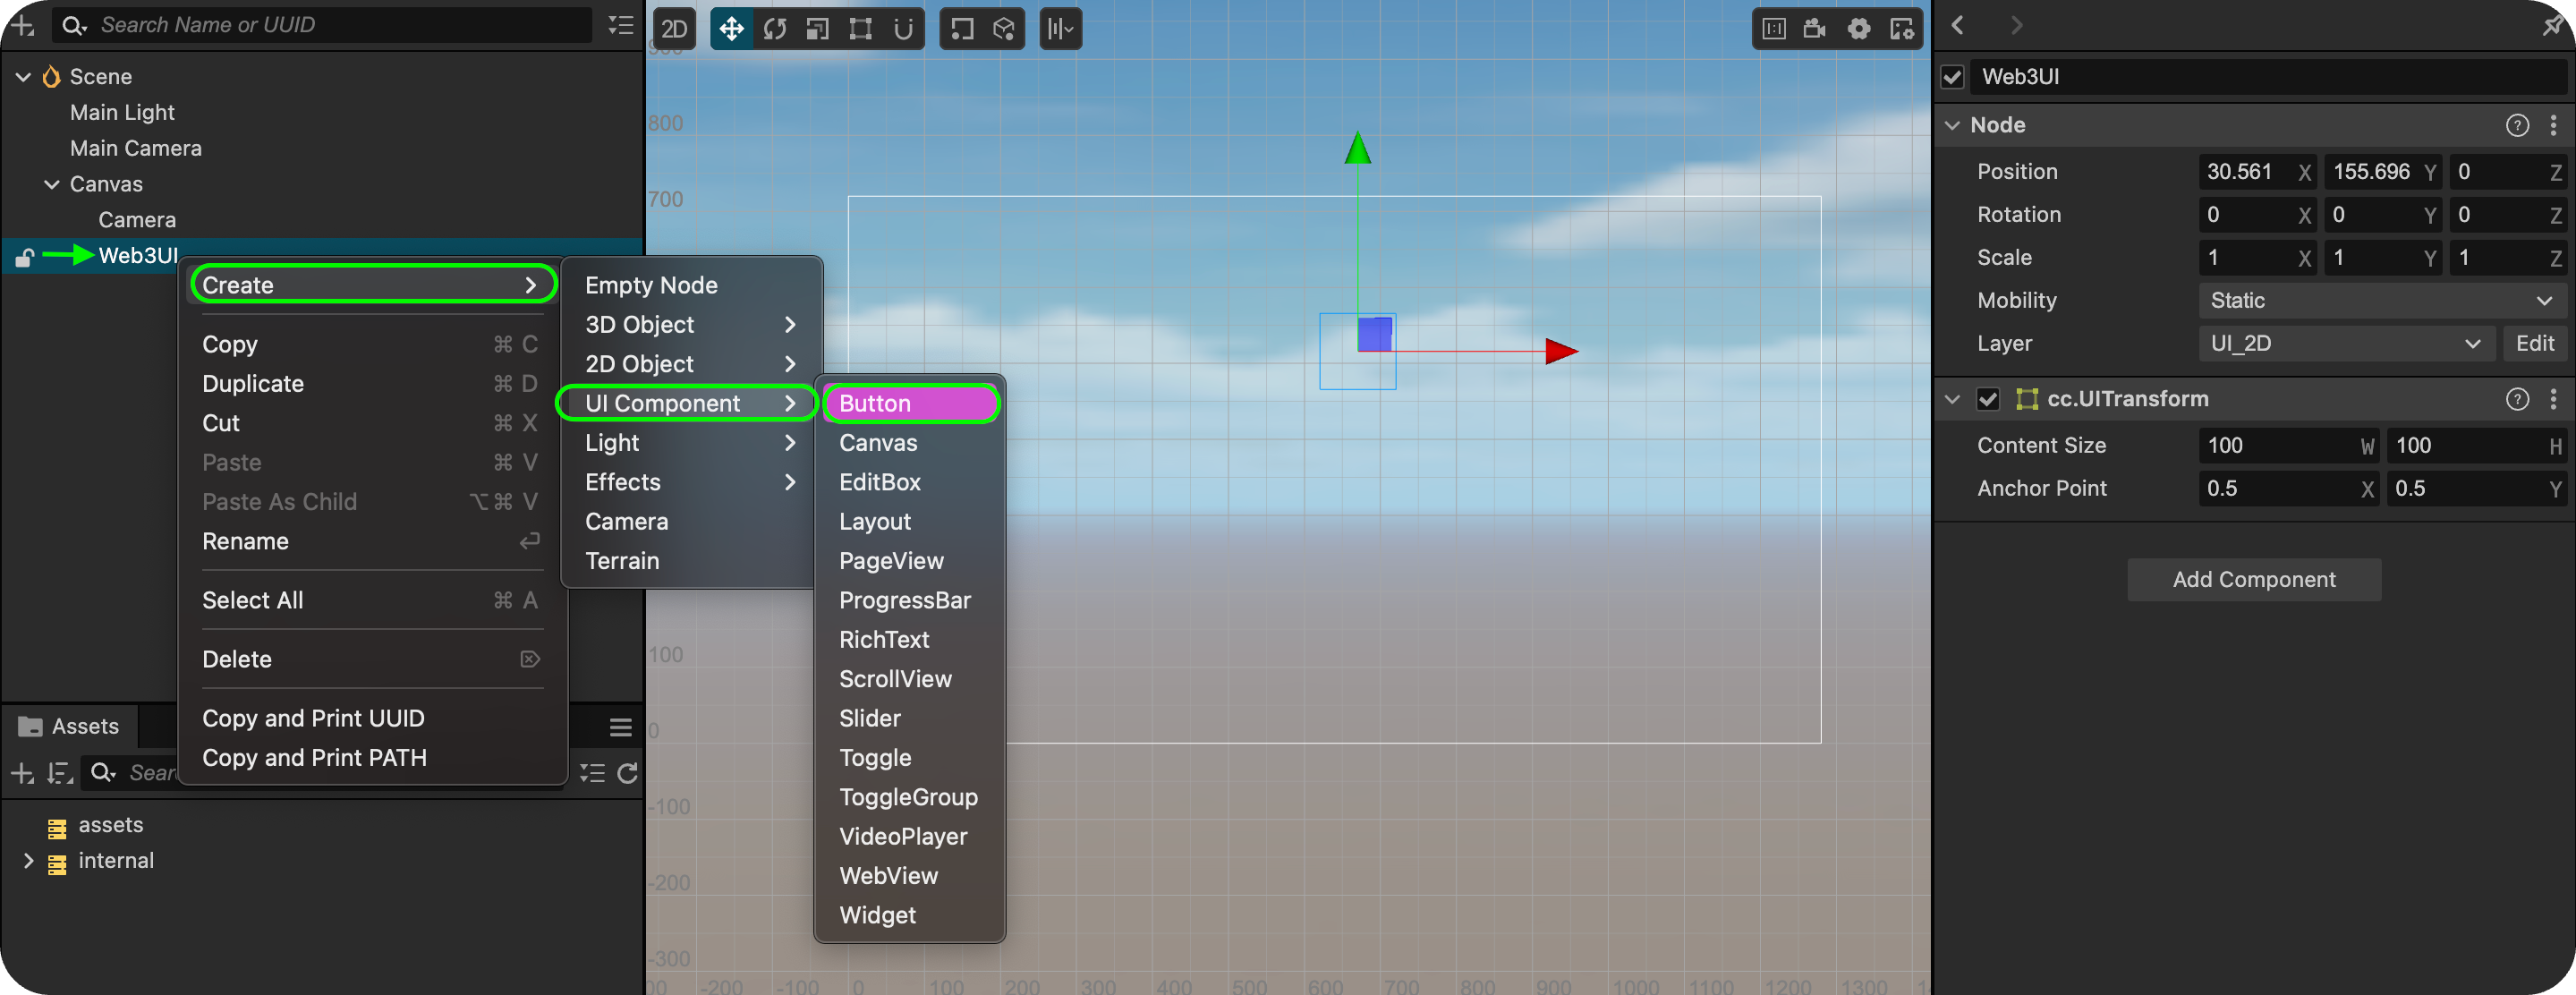
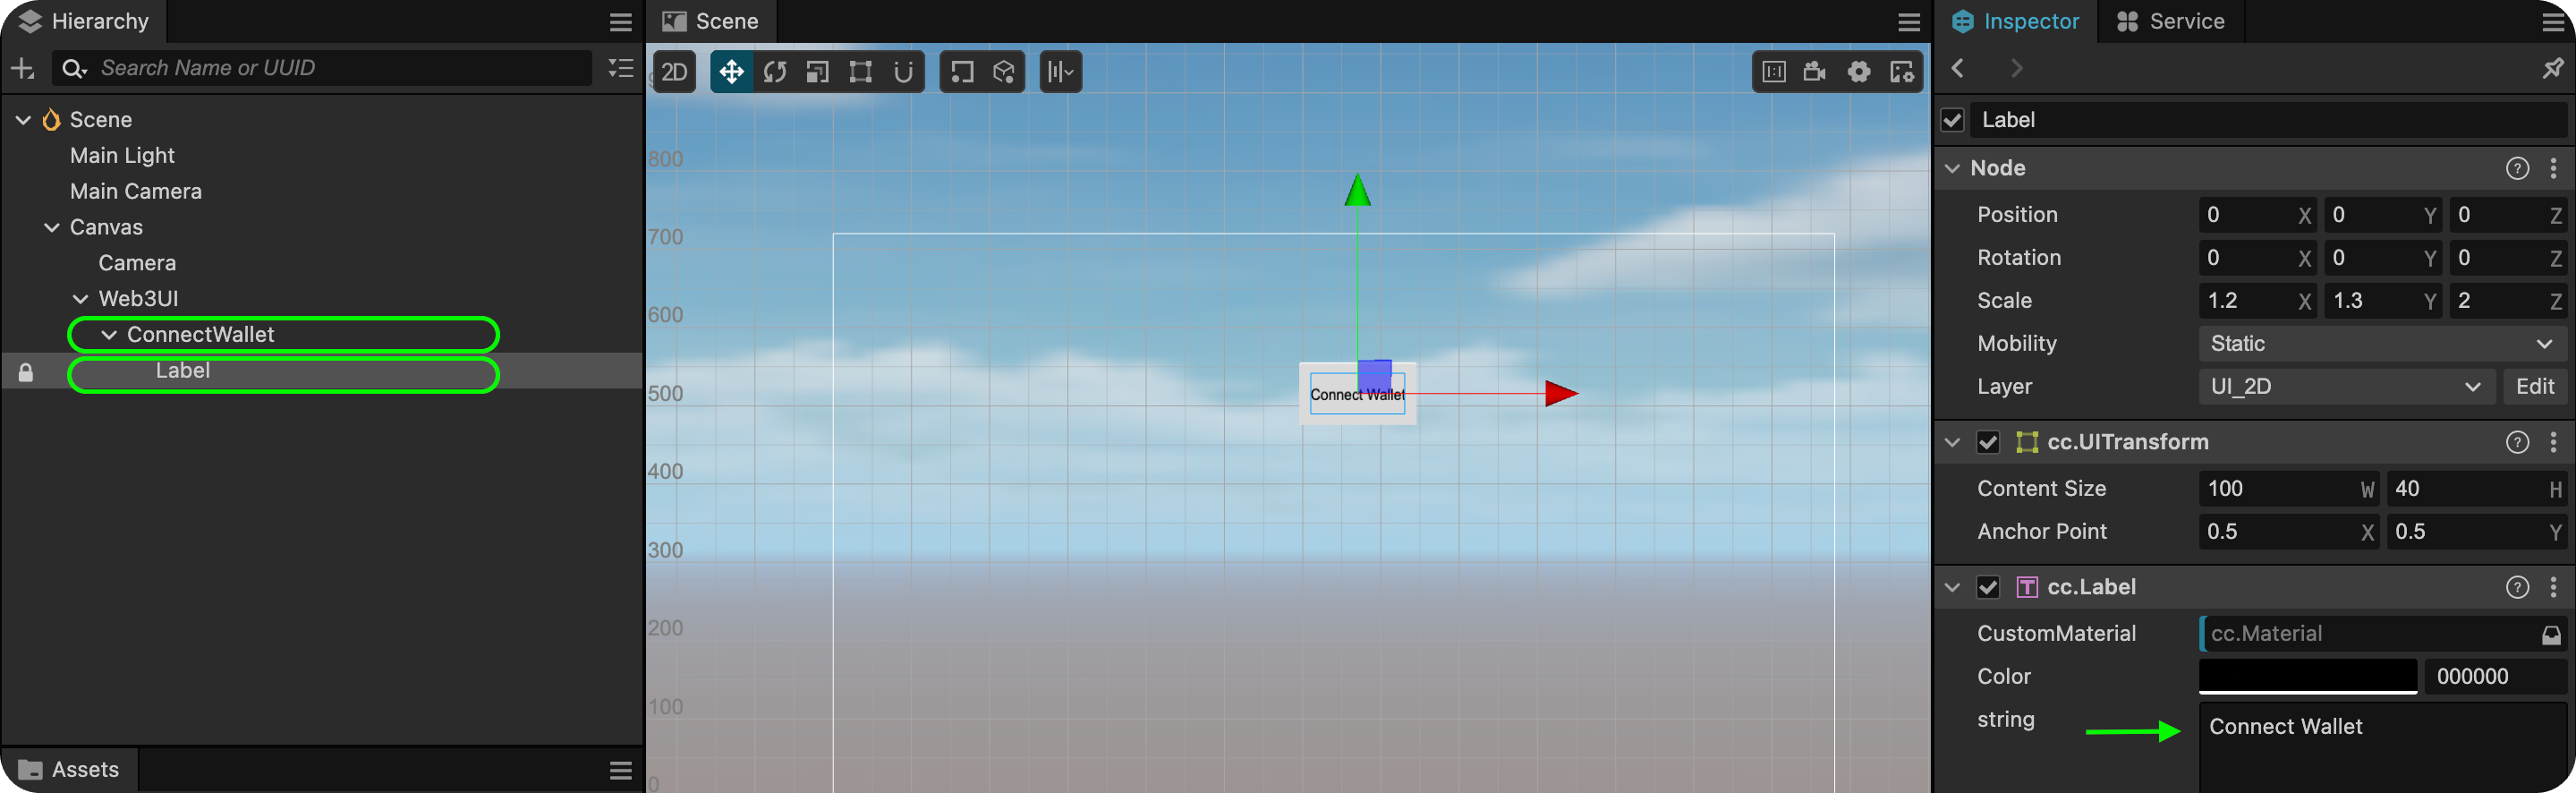
- Rename it to ConnectWallet.
- In the Inspector Pane, set the button label text to Connect Wallet.
2. Mint Button
- Right-click Web3UI → Create → UI Component → Button.
- Rename it to MintButton.
- Set the button label text to Mint Button.
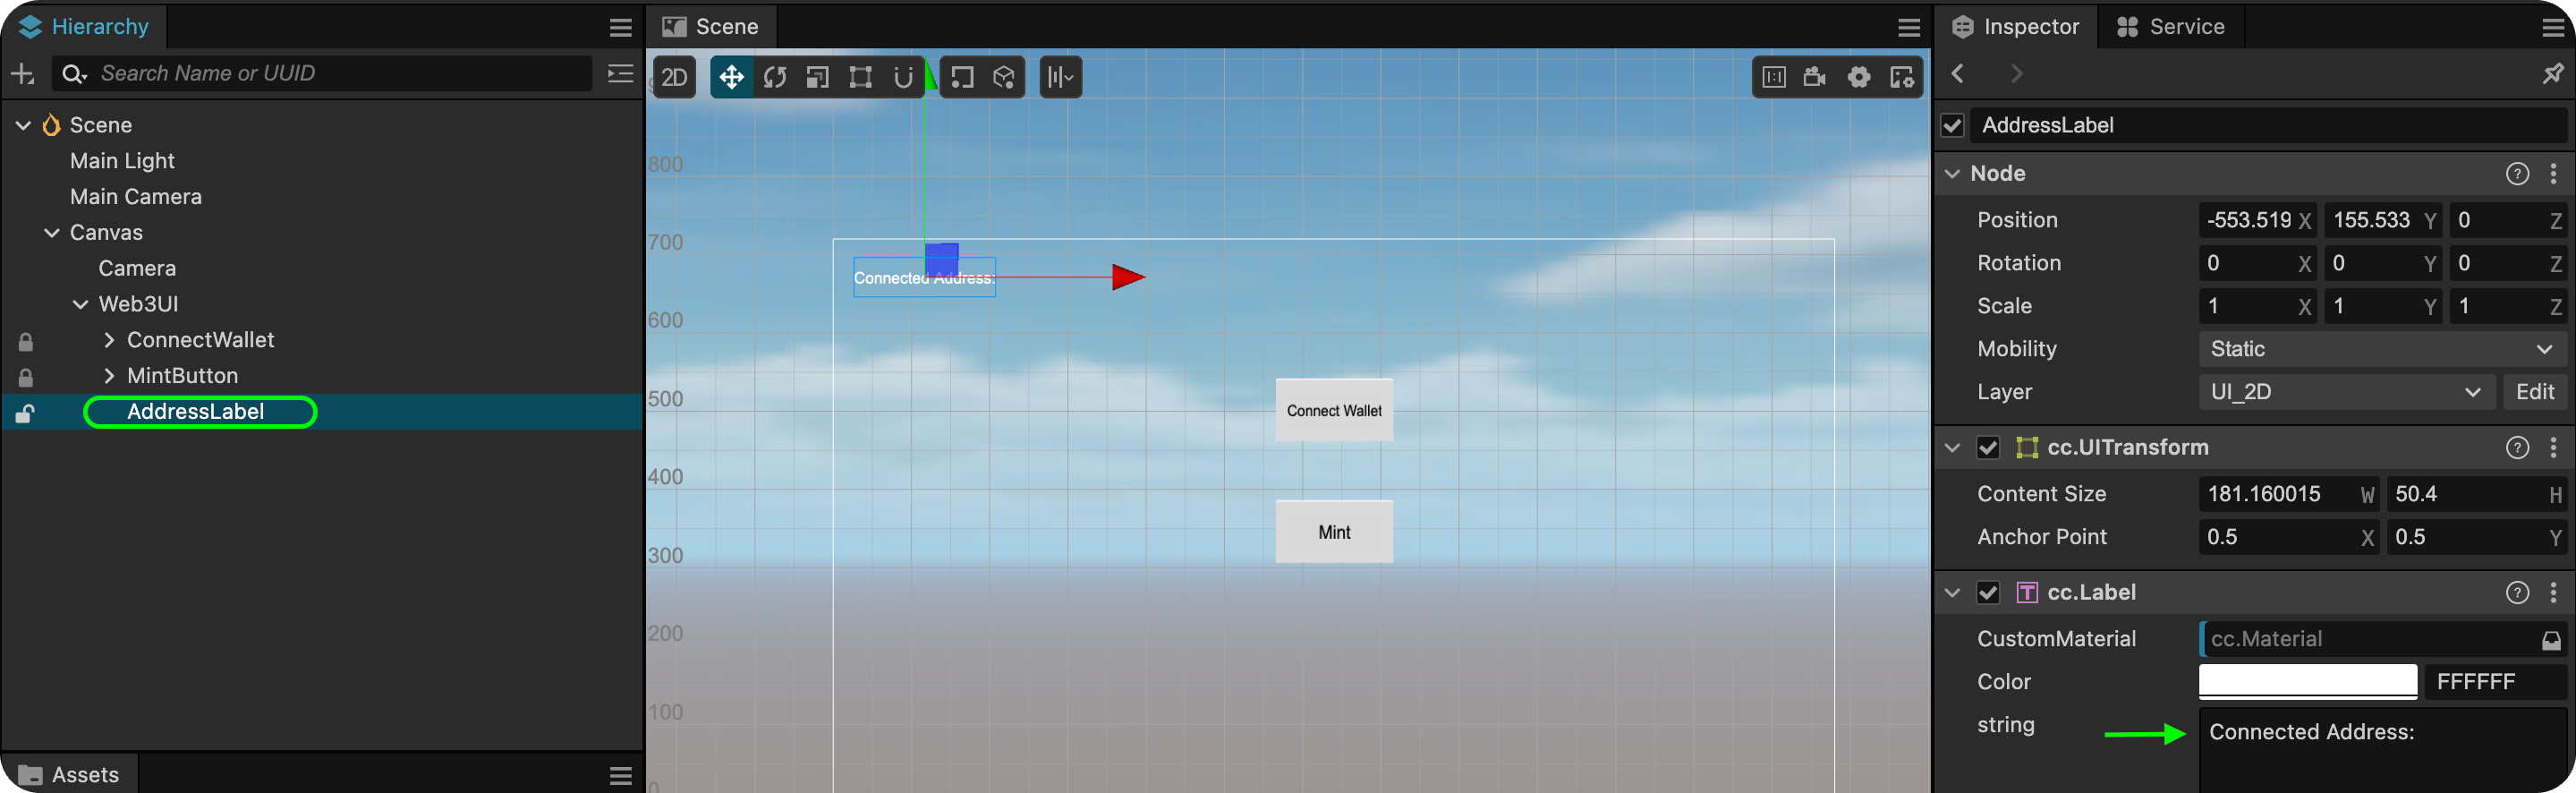
3. Address Label
- Right-click Web3UI → Create → 2D Object → Label.
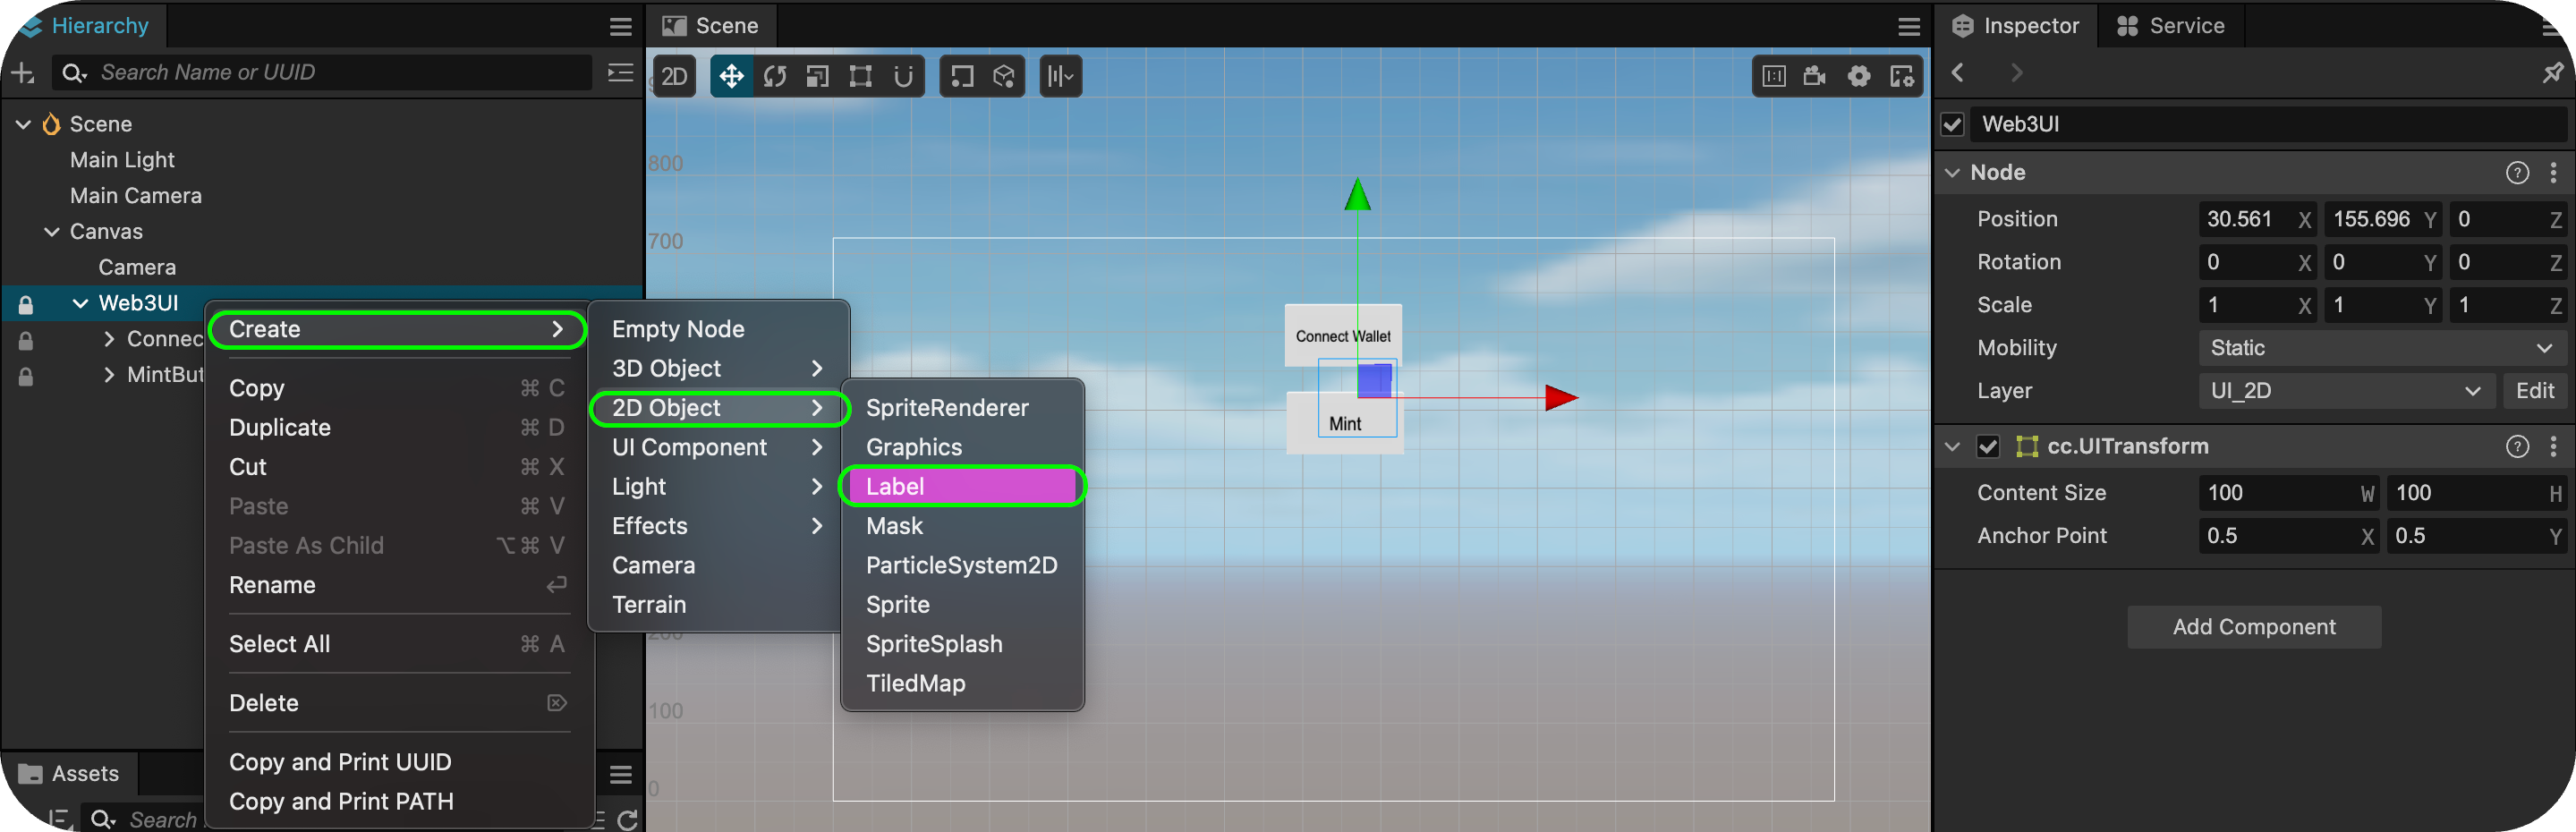
- Rename it to AddressLabel.
- Set the label text to Connected Address:.
4. Balance Label
- Right-click Web3UI → Create → 2D Object → Label.
- Rename it to BalanceLabel.
- Set the label text to 0.000ET.
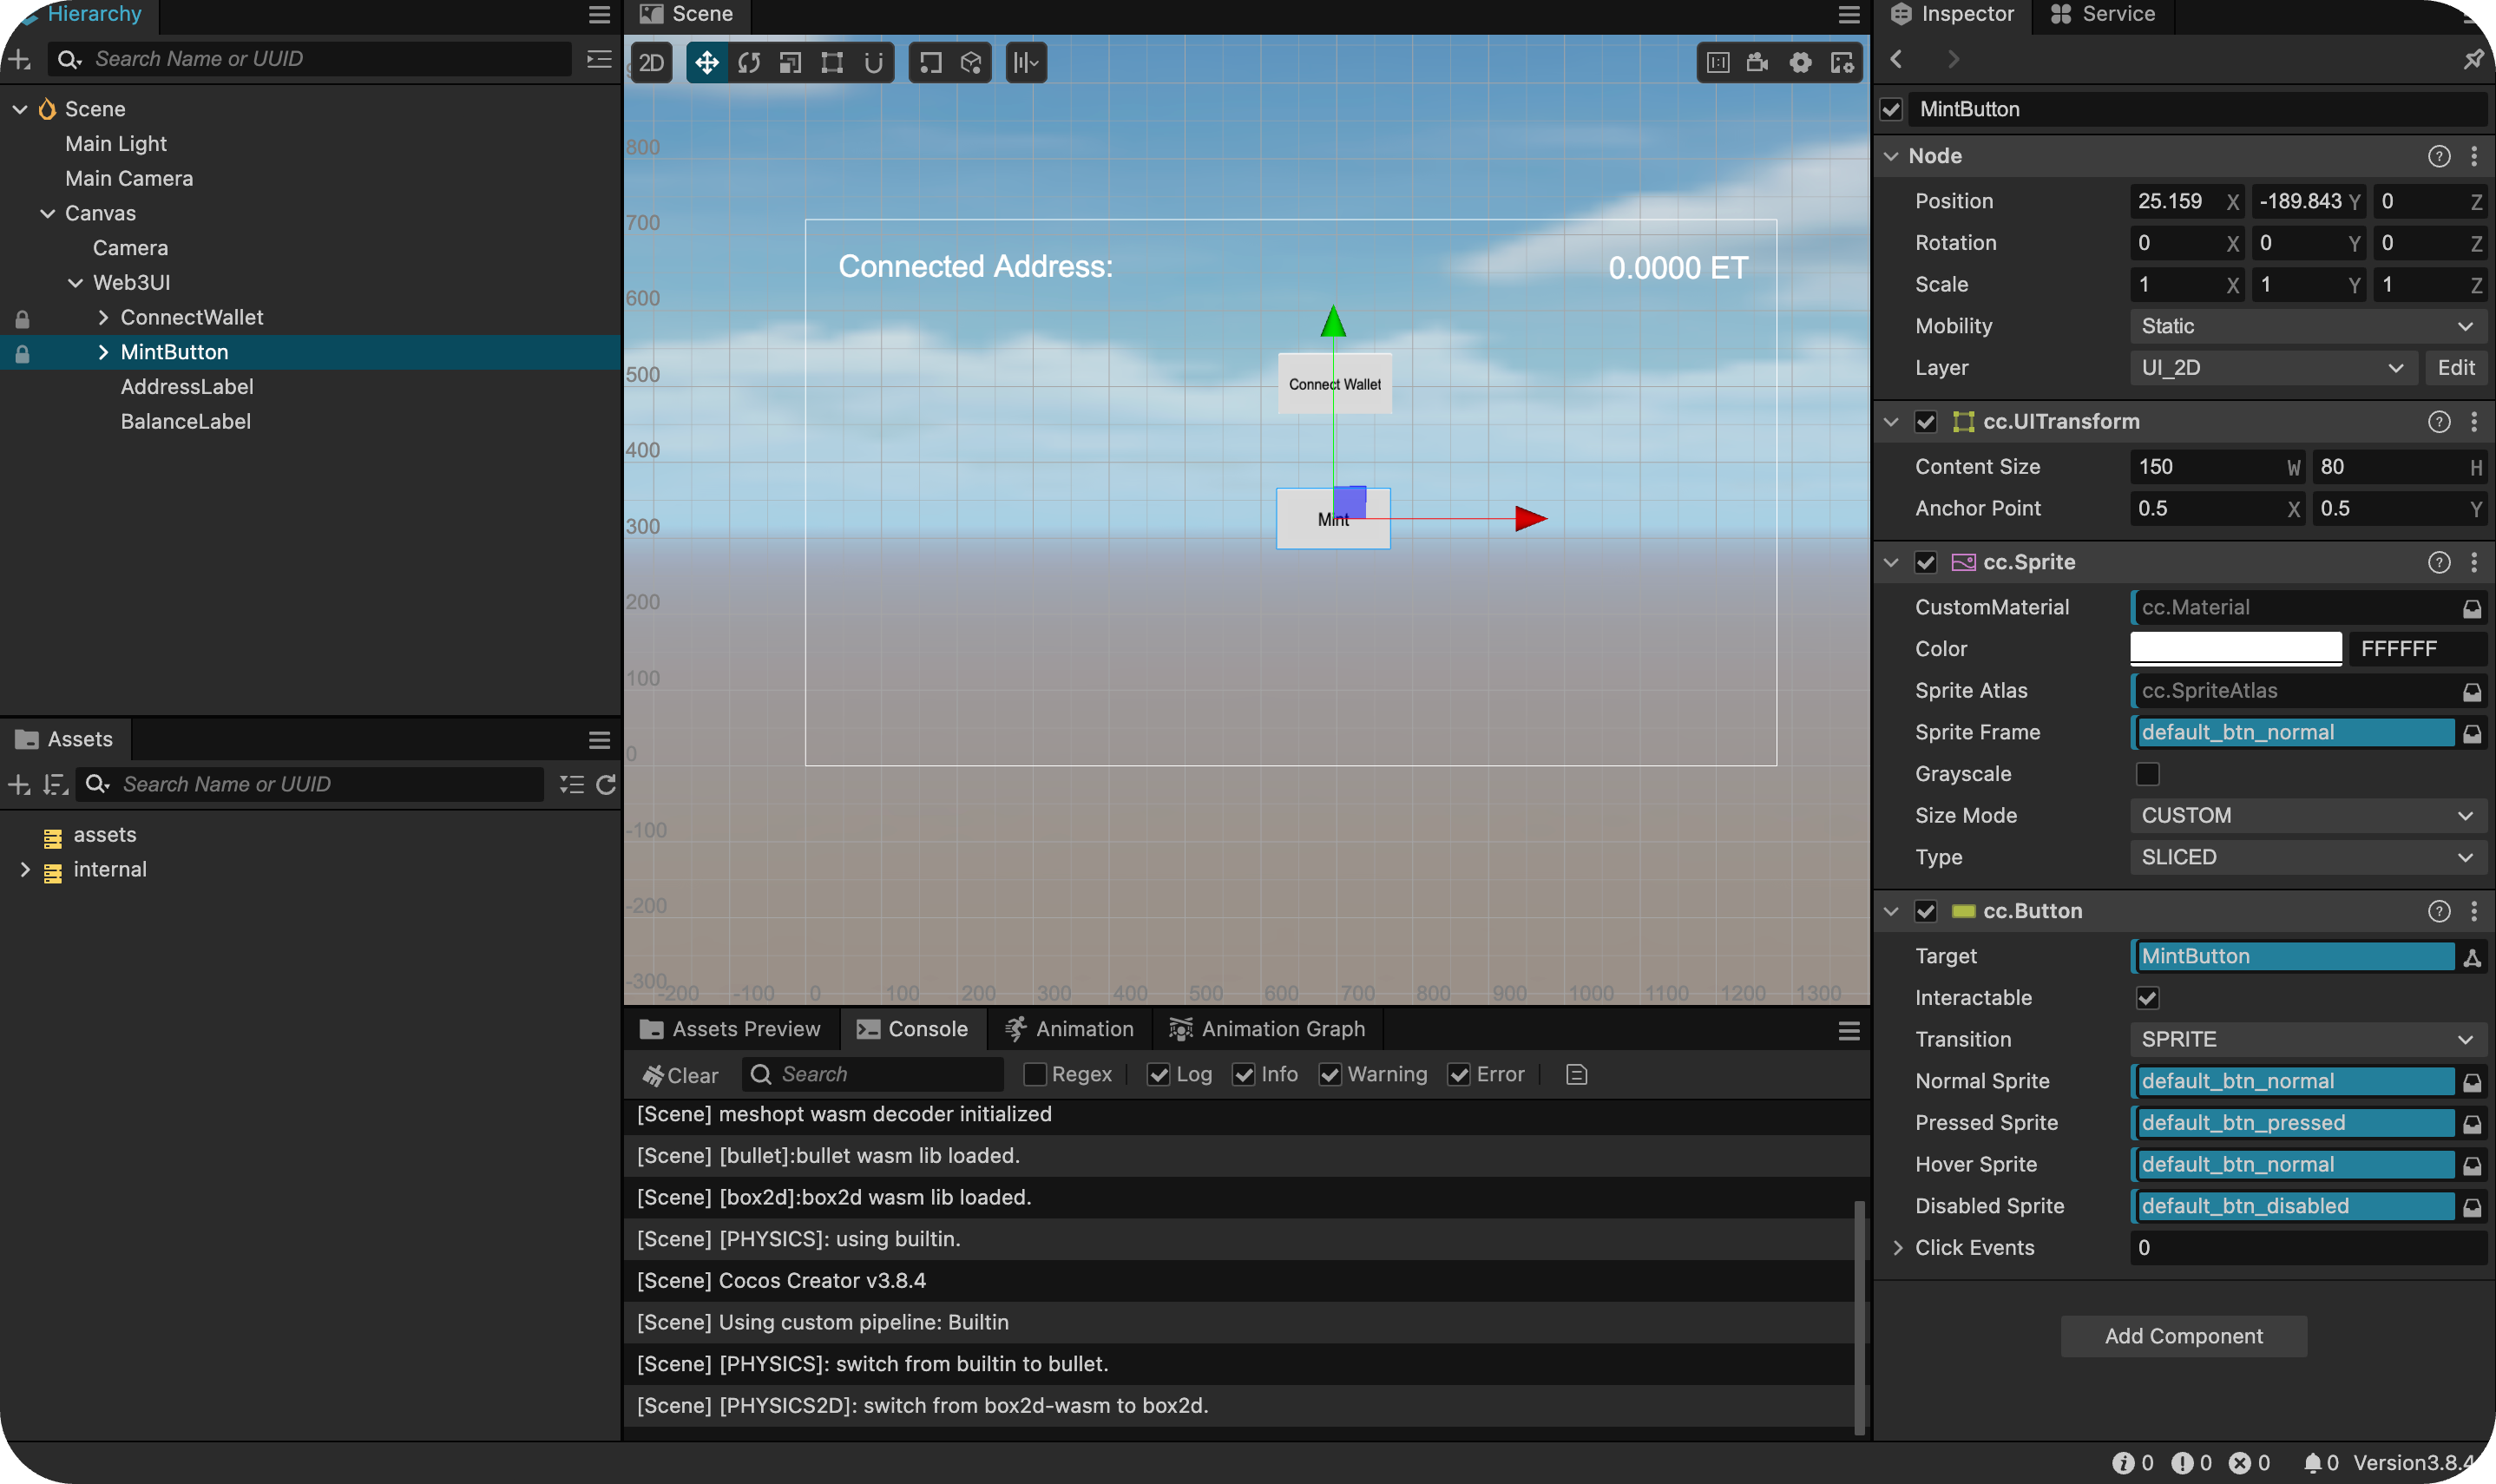
After adding all components, your Hierarchy should look like this:
Canvas└── Web3UI ├── ConnectWallet ├── MintButton ├── AddressLabel ├── BalanceLabel
note
To properly arrange your components, use the alignment tools at top of the Scene. Click on each component and adjust its position as needed