이 페이지는 영문에서 기계 번역되었으므로 오역이나 어색한 표현이 있을 수 있습니다. 따라서 정확한 정보는 영어 원문을 참조하시기 바랍니다. 또한 잦은 업데이트로 인해 일부 콘텐츠는 영문이 그대로 남아있을 수 있습니다. Crowdin에서 이 페이지의 번역을 개선하는 데 동참하여 도움을 주세요. (Crowdin translation page, Contributing guide)
Remix를 Kaia에 연결하기
Overview
Remix는 Solidity 컨트랙트를 개발하기 위한 브라우저 기반 IDE(통합 개발 환경)입니다. In this guide, you will learn how to:
- Create and Upload a pre-built smart contract on Remix IDE.
- Compile the smart contract.
- Connect to Kaia Plugin for Remix IDE
- Set up deployment environment
- Import account
- Connect Kaia to Remix using Kaia Wallet
- Connect Kaia to Remix using MetaMask
- Deploy the smart contract.
This will cover connecting Remix with Kaia. If you want to know more about how to use Remix, please refer to Remix docs or Remix IDE.
Creating a file on Remix
스마트 컨트랙트 구축을 시작하려면 파일 탐색기 탭의 계약 폴더에서 새 파일 만들기 아이콘을 클릭하고 이름을 KaiaGreeter.sol로 지정합니다.
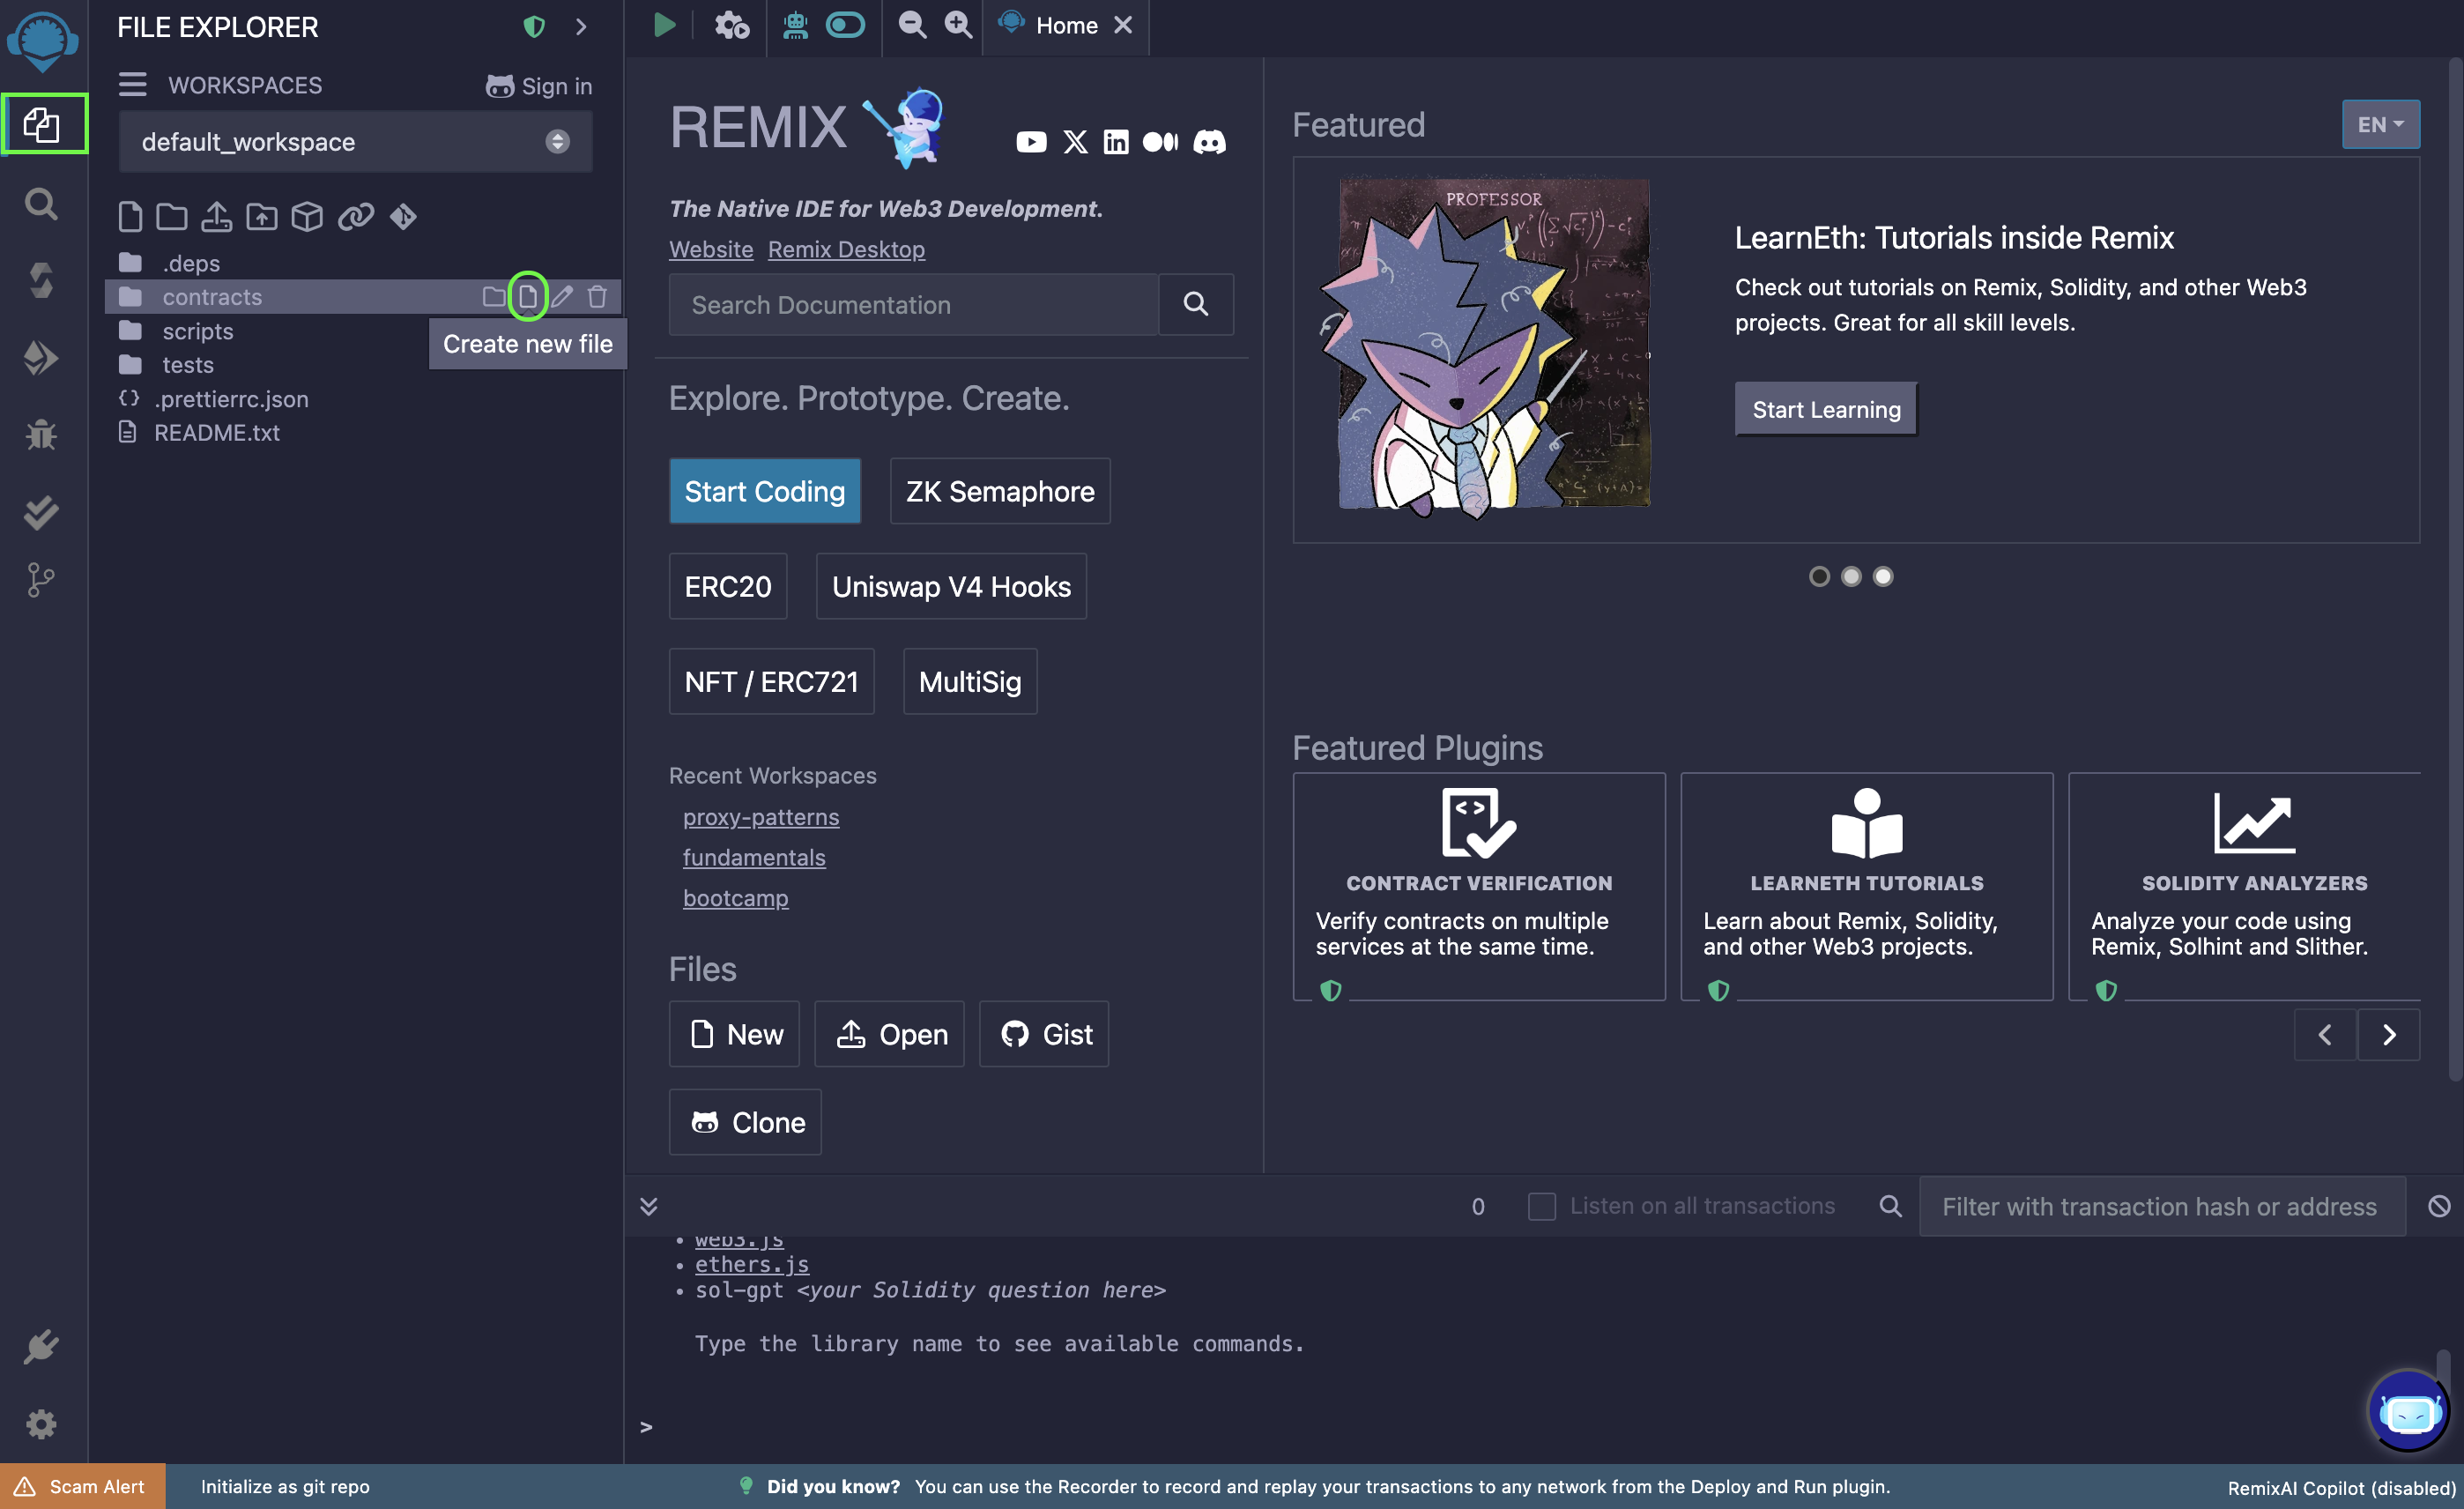
다음은 아래에 제공된 스마트 컨트랙트 코드를 복사하여 새로 생성된 KaiaGreeter.sol 파일에 붙여넣는 것입니다.
// SPDX-라이센스 식별자: UNLICENSEDpragma solidity ^0.8.0;import "hardhat/console.sol";contract KaiaGreeter { uint256 totalGreetings; constructor() { console.log("Yo yo, Welcome to Kaia"); } function greet() public { totalGreetings += 1; console.log(msg.sender, "says hello kaia!"); } function getTotalGreetings() public view returns (uint256) { console.log("We have %d total waves!", totalGreetings); return totalGreetings; }}
Compile smart contract
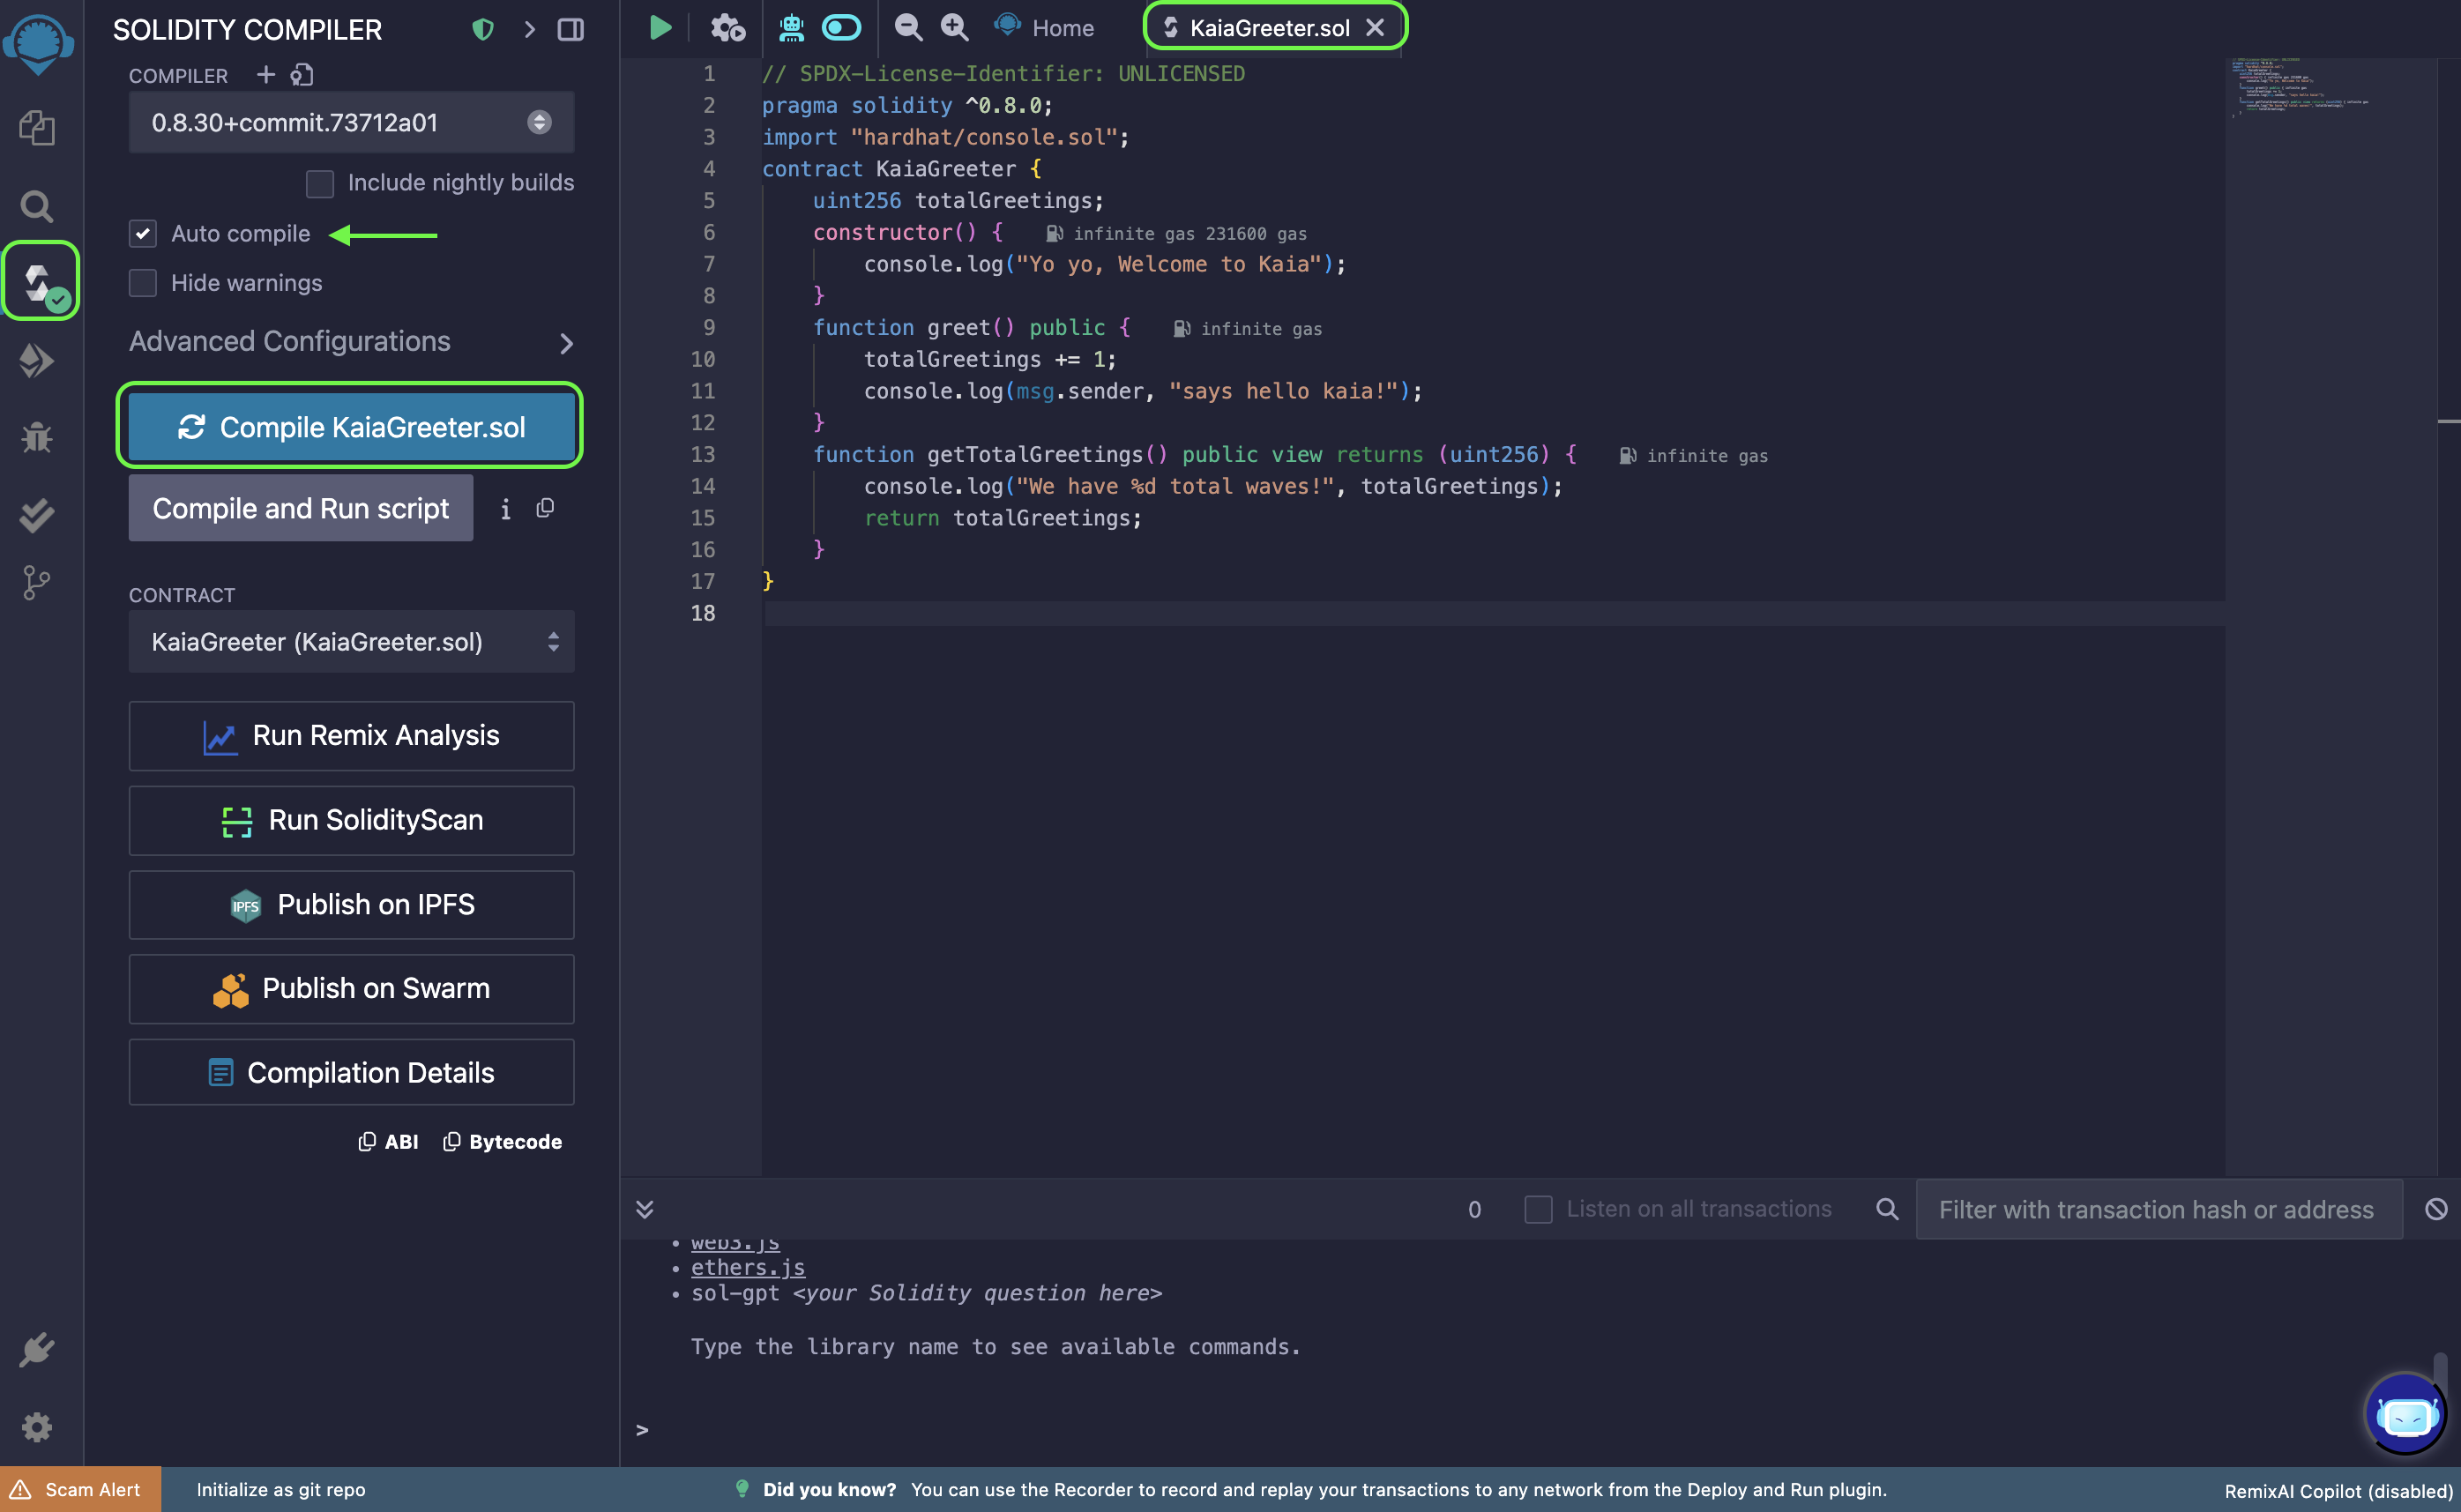
To compile your contract, do the following:
- Go to the Solidity Compiler tab
- 컴파일러 버전을 0.8.30으로 선택
- 자동 컴파일** 옵션을 켭니다.
- 컴파일하기** 버튼을 클릭하여
KaiaGreeter.sol컨트랙트를 컴파일합니다. - After successful compilation, it will show a green tick mark on the Compiler tab button
Connect to Kaia Plugin on Remix IDE
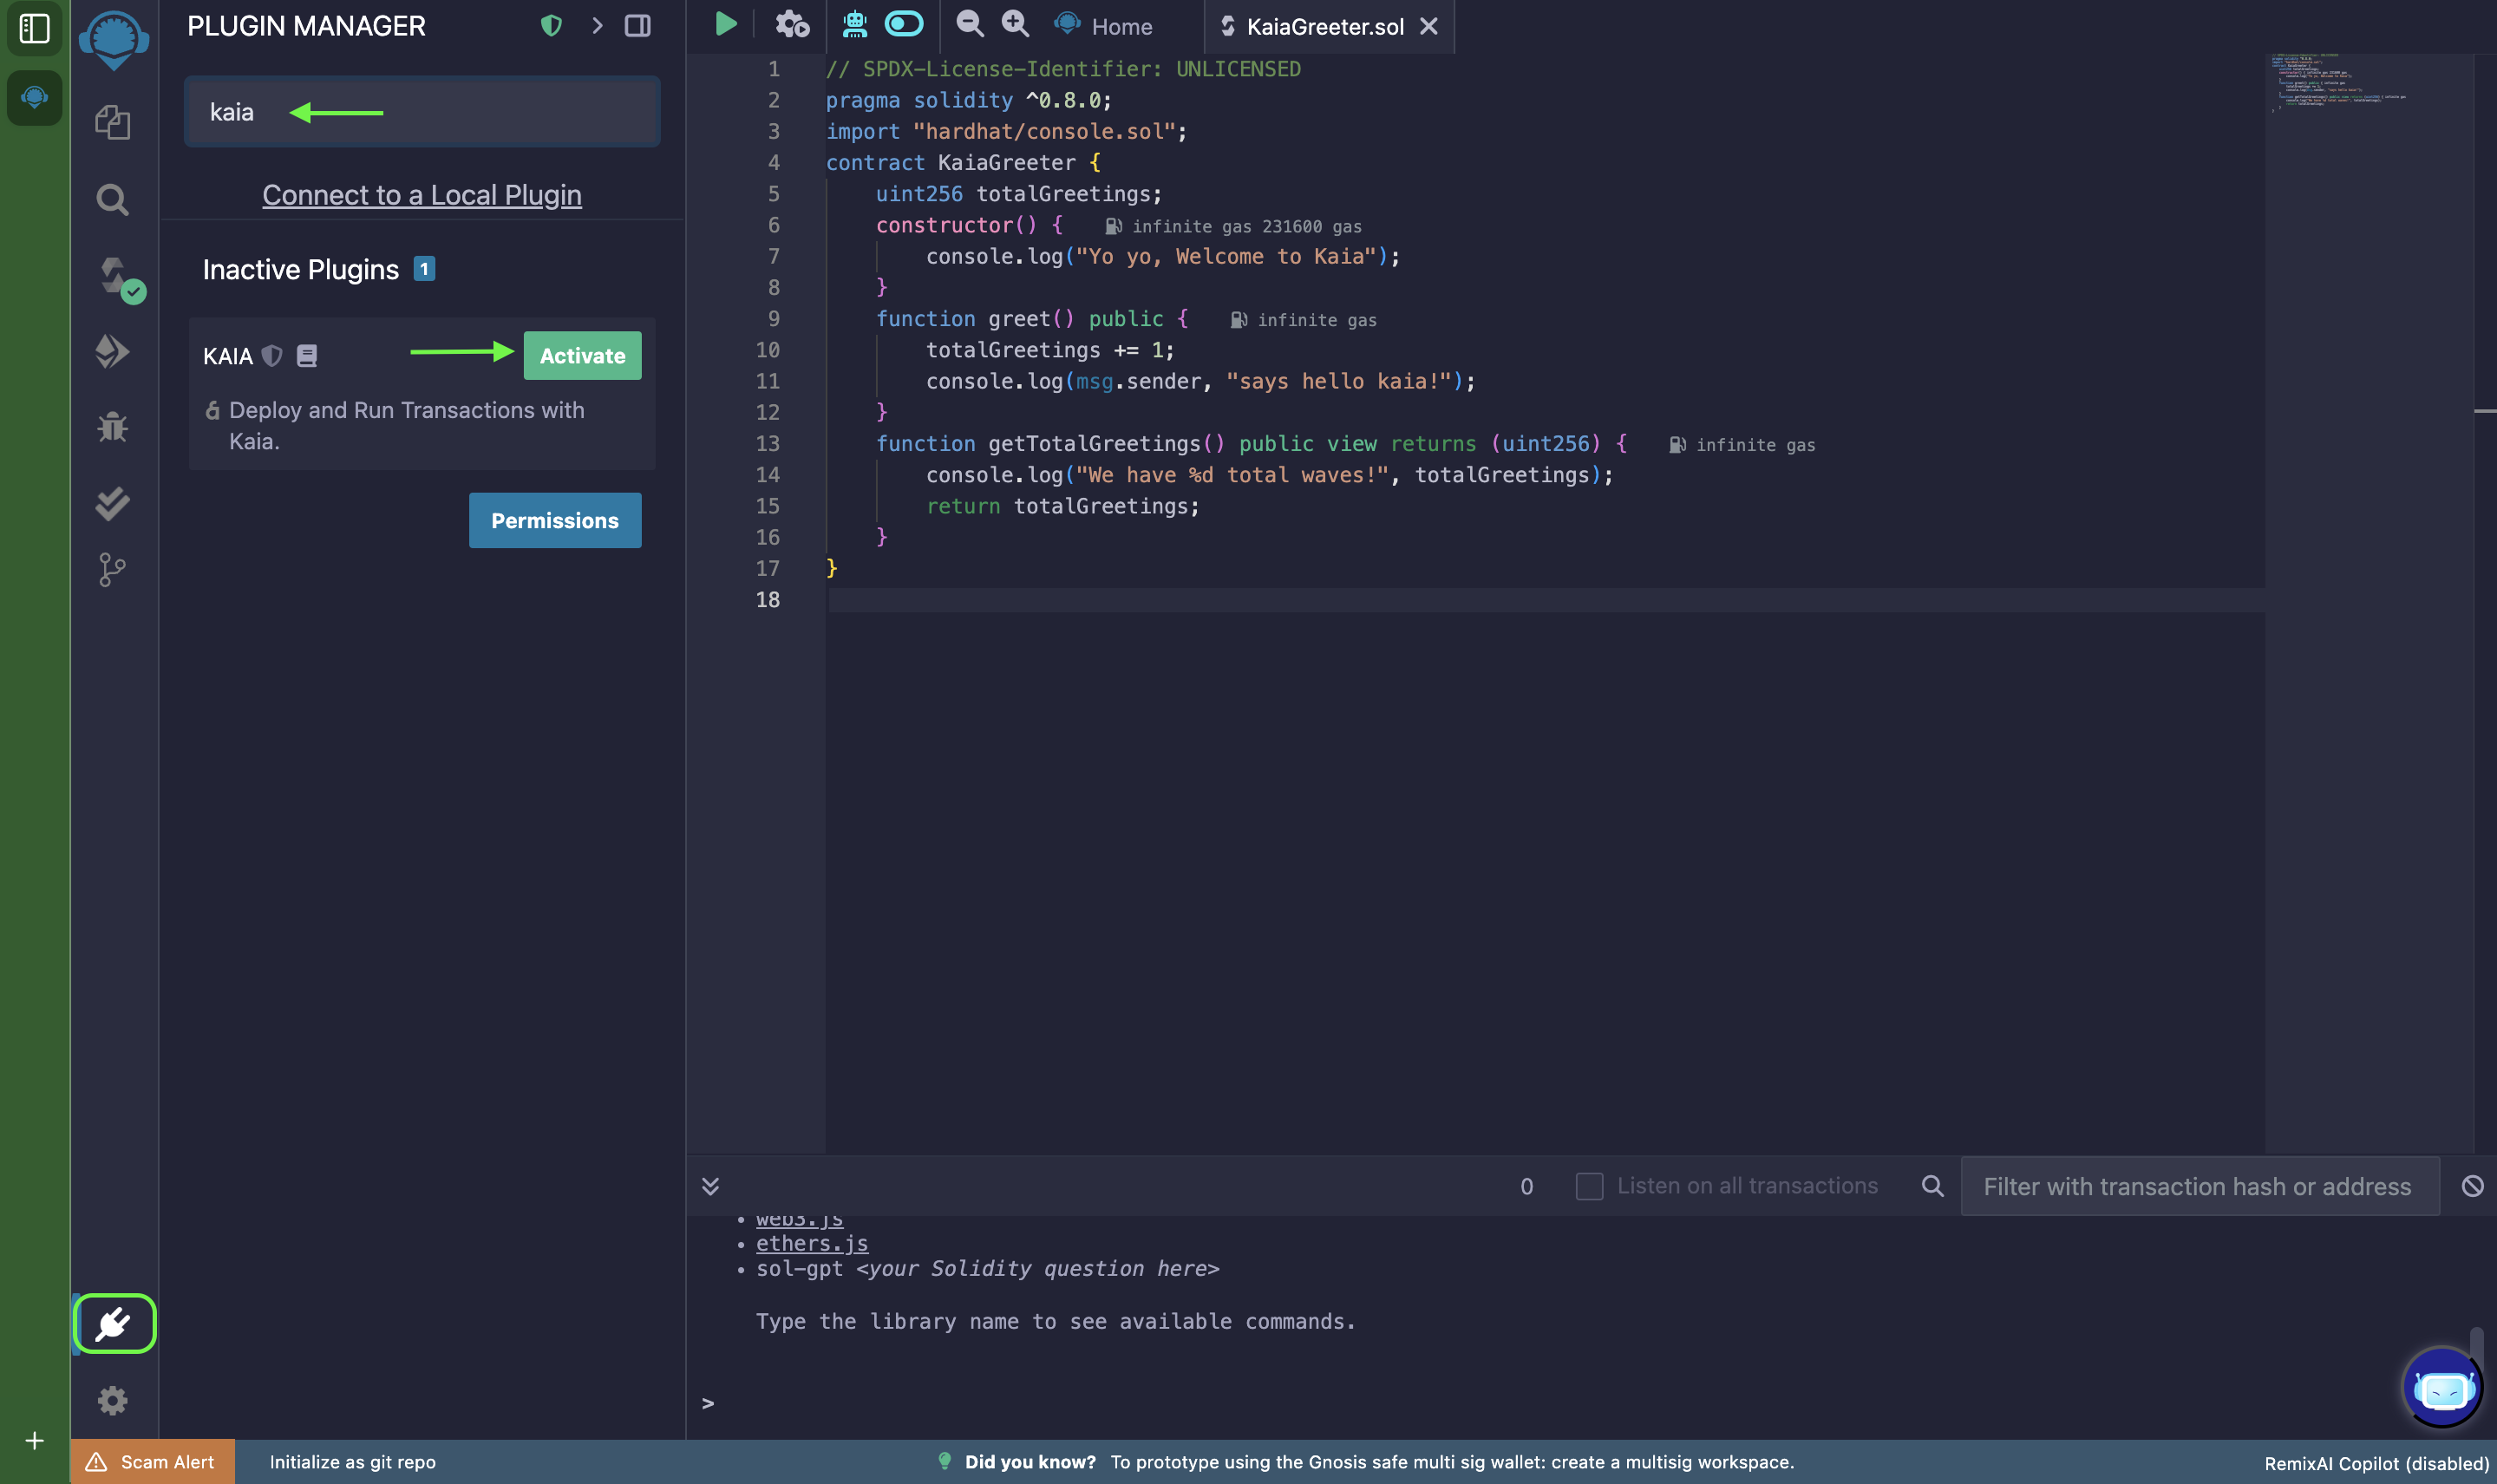
To connect to Kaia plugin on Remix IDE, you can either use this Kaia Plugin for Remix or follow this step:
- Navigate to the Plugin manager tab
- 검색 필드에 Kaia 입력
- Kaia 플러그인을 활성화합니다. Kaia 탭이 나타나면 Kaia와 상호작용할 준비�가 된 것입니다.
Setting up deployment environment
- Kaia 플러그인을 클릭합니다.
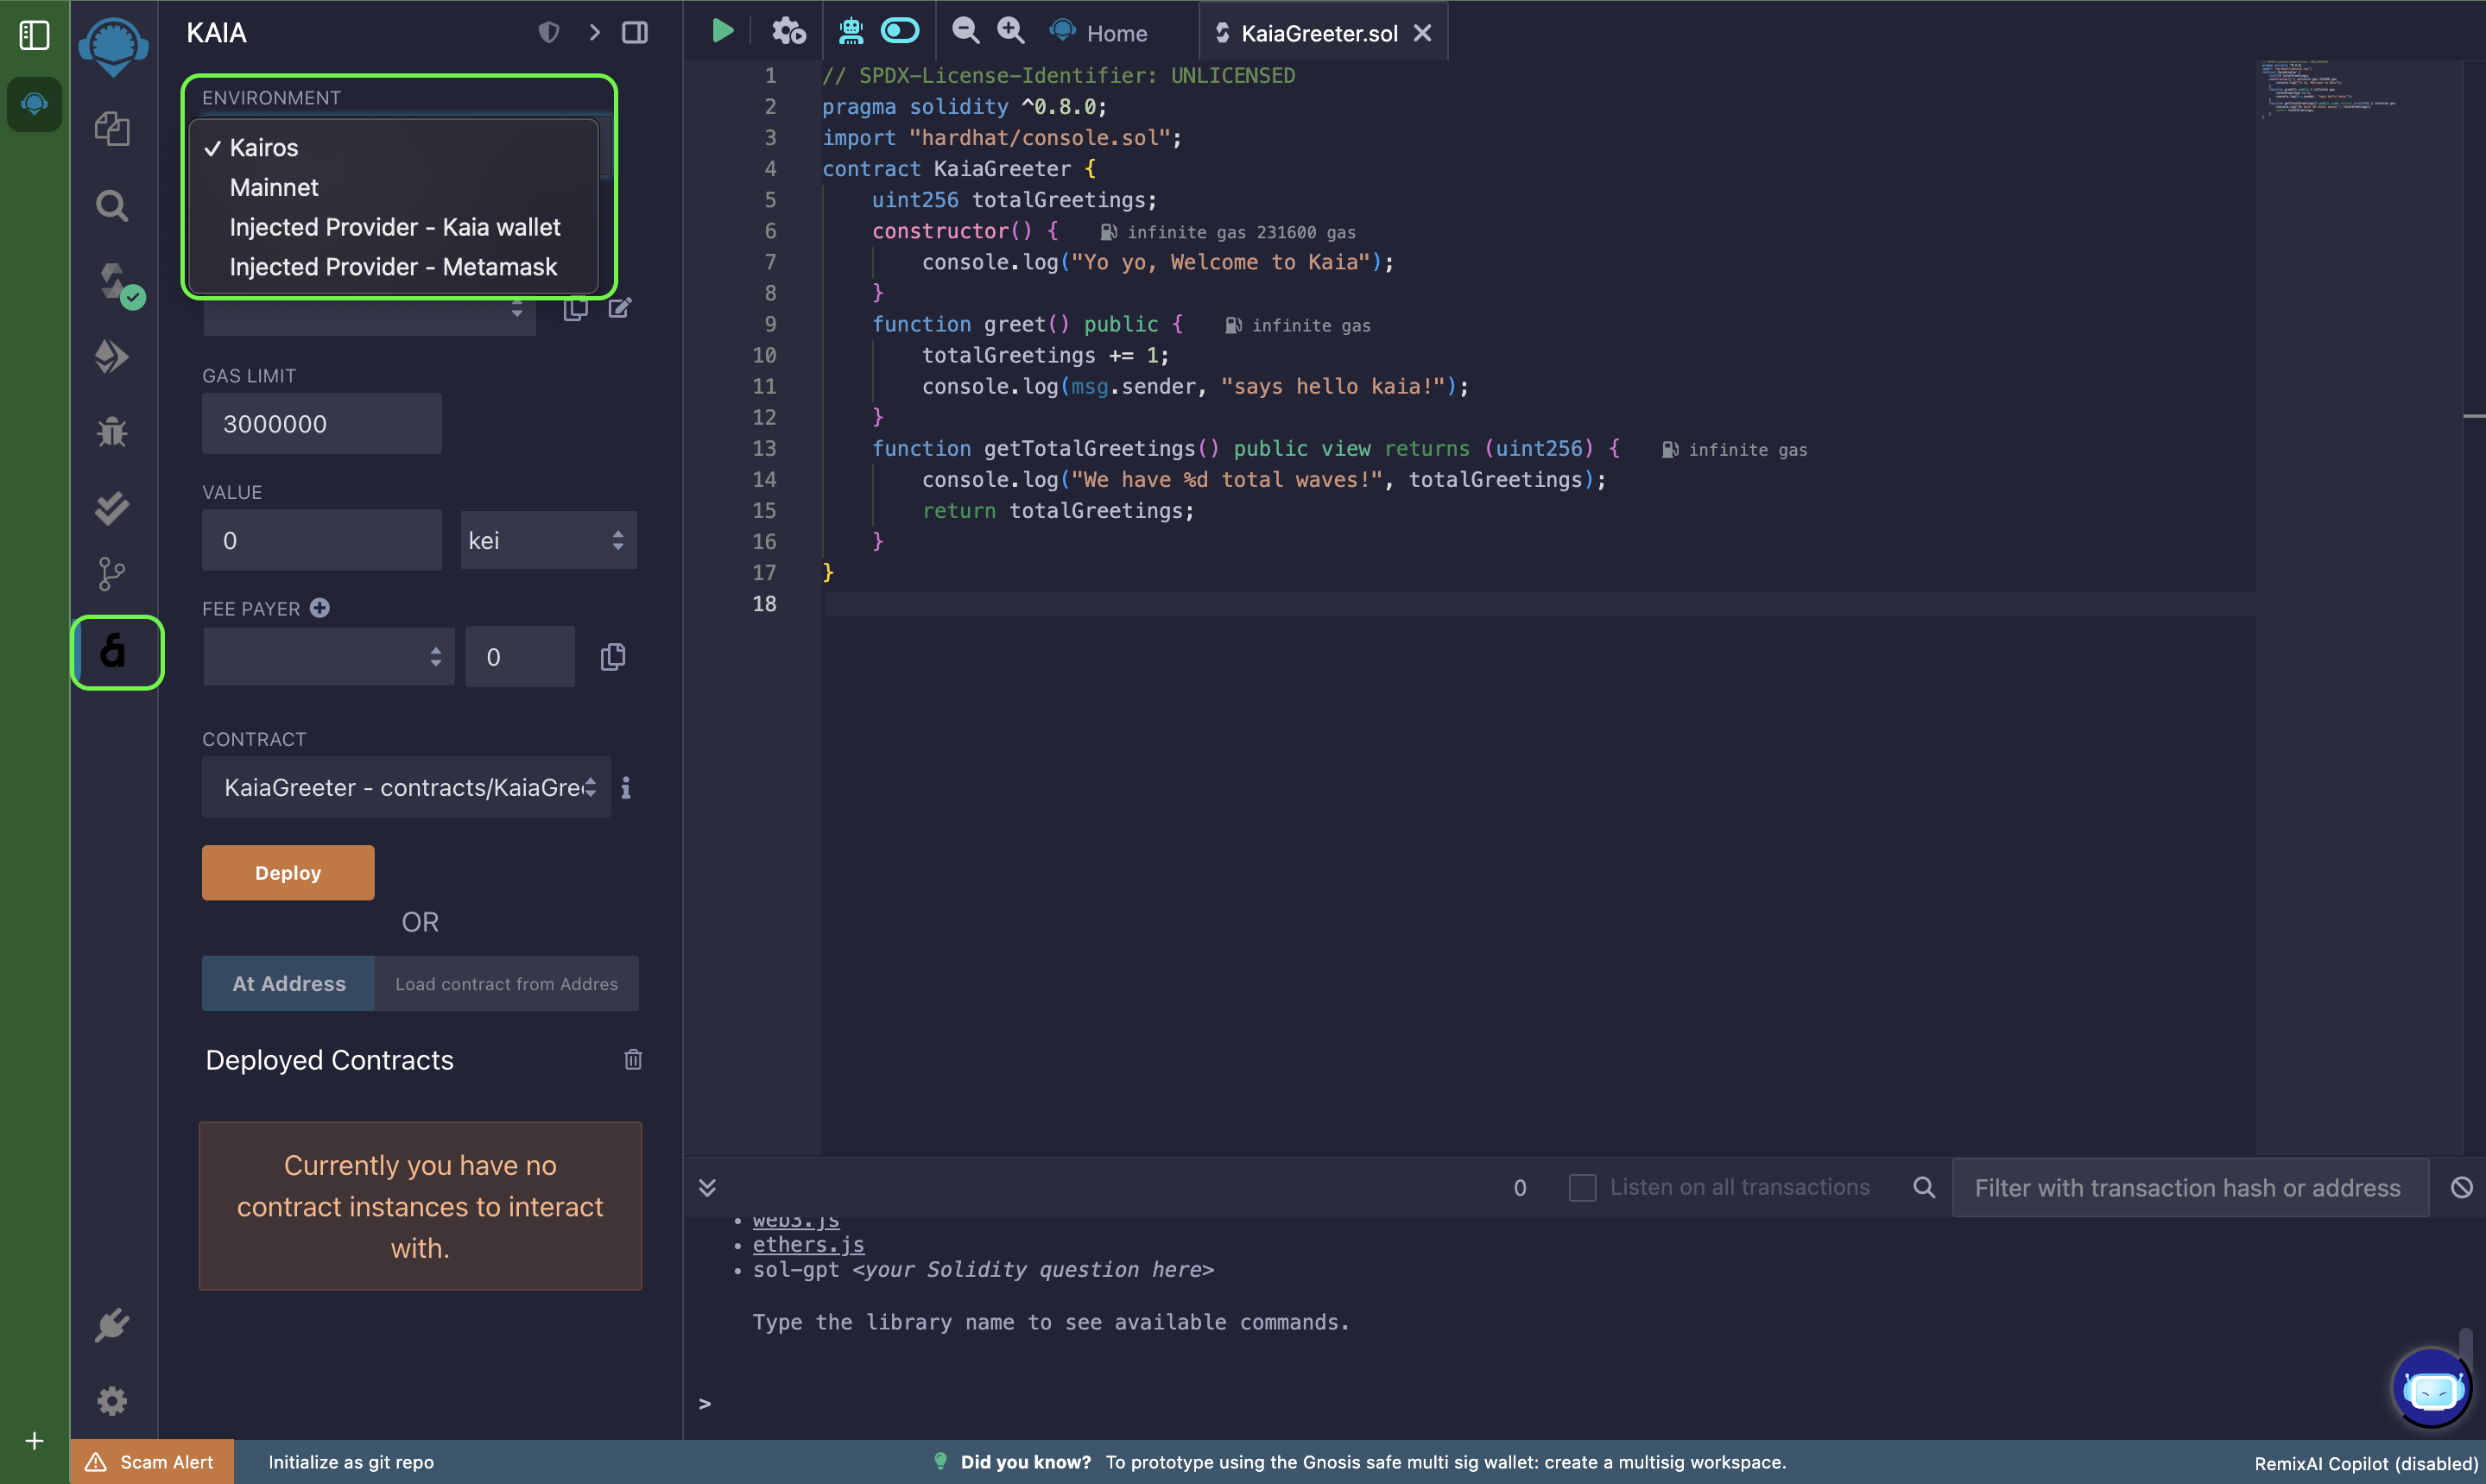
- Select the appropriate [Environment].
- You can select Kairos, Mainnet, Injected Provider - Kaia Wallet, Injected Provider - MetaMask
- [Kairos]: Connects to the Kairos network
- [Mainnet]: Connects to the Mainnet
- [Injected Provider - Kaia Wallet]: Connects to Kaia Wallet
- [Injected Provider - MetaMask ]: Connects to Metamask
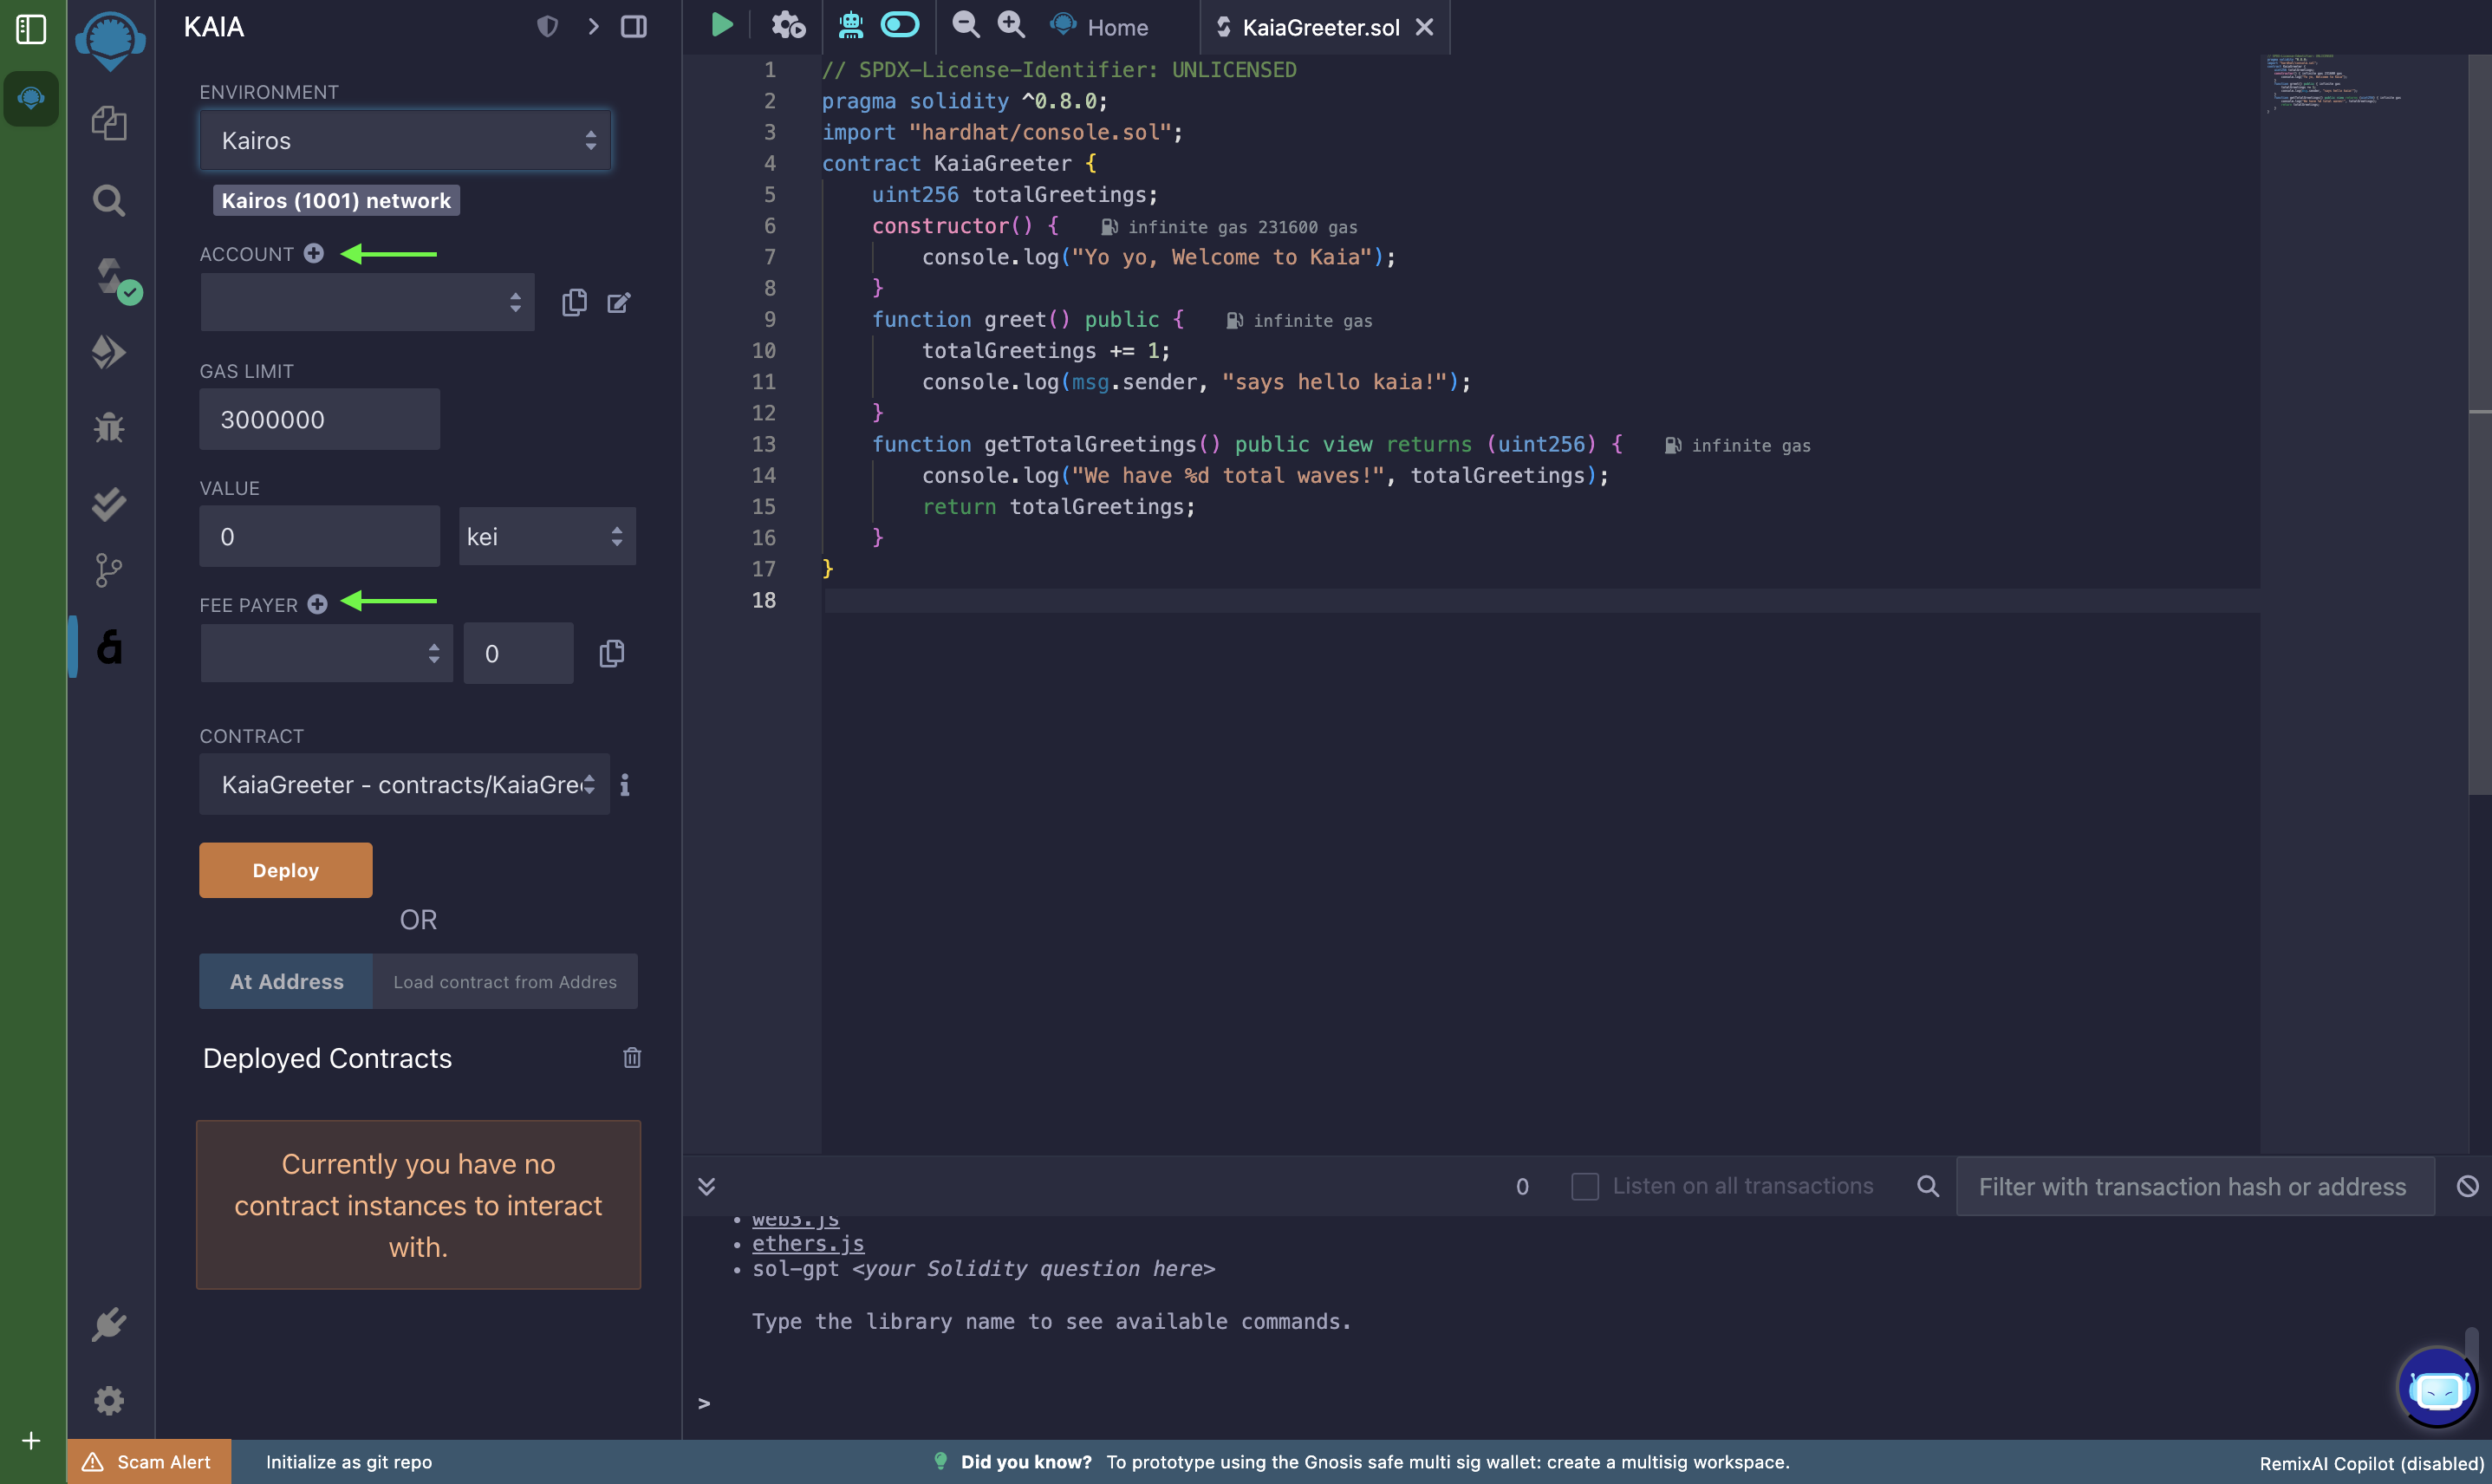
계정 가져오기
You can export private key or Keystore from any compatible wallet to use here.
- Click plus button next to the ACCOUNT.
- 그런 다음 개인 키 또는 키 저장소를 삽입합니다.
- You can also import keys for the feePayer. It only supports private key.
Connecting Kaia to Remix using Kaia Wallet
- Select [Injected Provider - Kaia Wallet] on the Remix Environment menu.
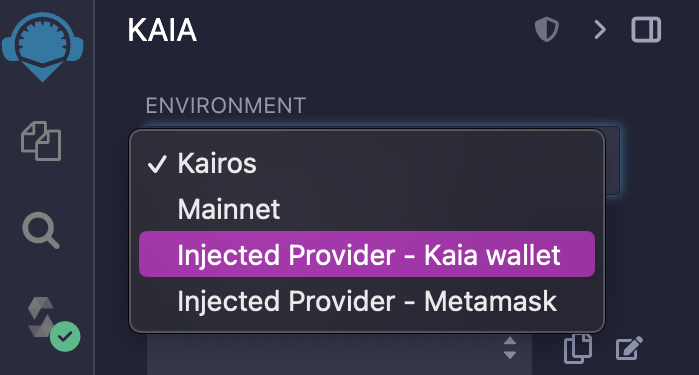
- When you see the Kaia Wallet pop-up, click [Connect].
- 네트워크에 성공적으로 연결되면 연결된 네트워크의 체인 ID와 계정이 표시됩니다.
Connecting Kaia - Remix using MetaMask
- Connect Kaia with MetaMask by referring to the Connecting to MetaMask.
- Select [Injected Provider - MetaMask] on the Remix Environment menu.
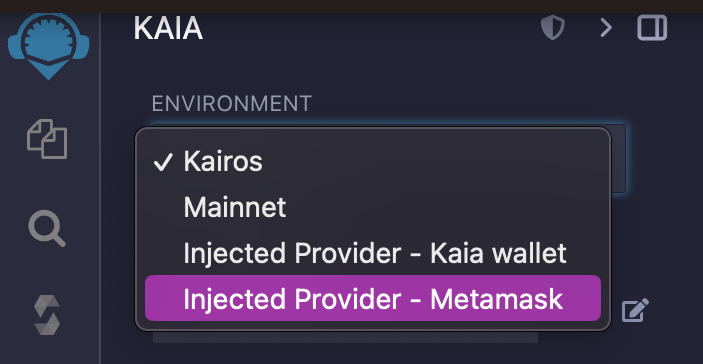
- MetaMask 팝업이 표시되면 해당 계정을 클릭하여 선택합니다.
- 네트워크에 성공적으로 연결되면 연결된 네트워크의 체인 ID와 계정이 표시됩니다.
Deploying the smart contract
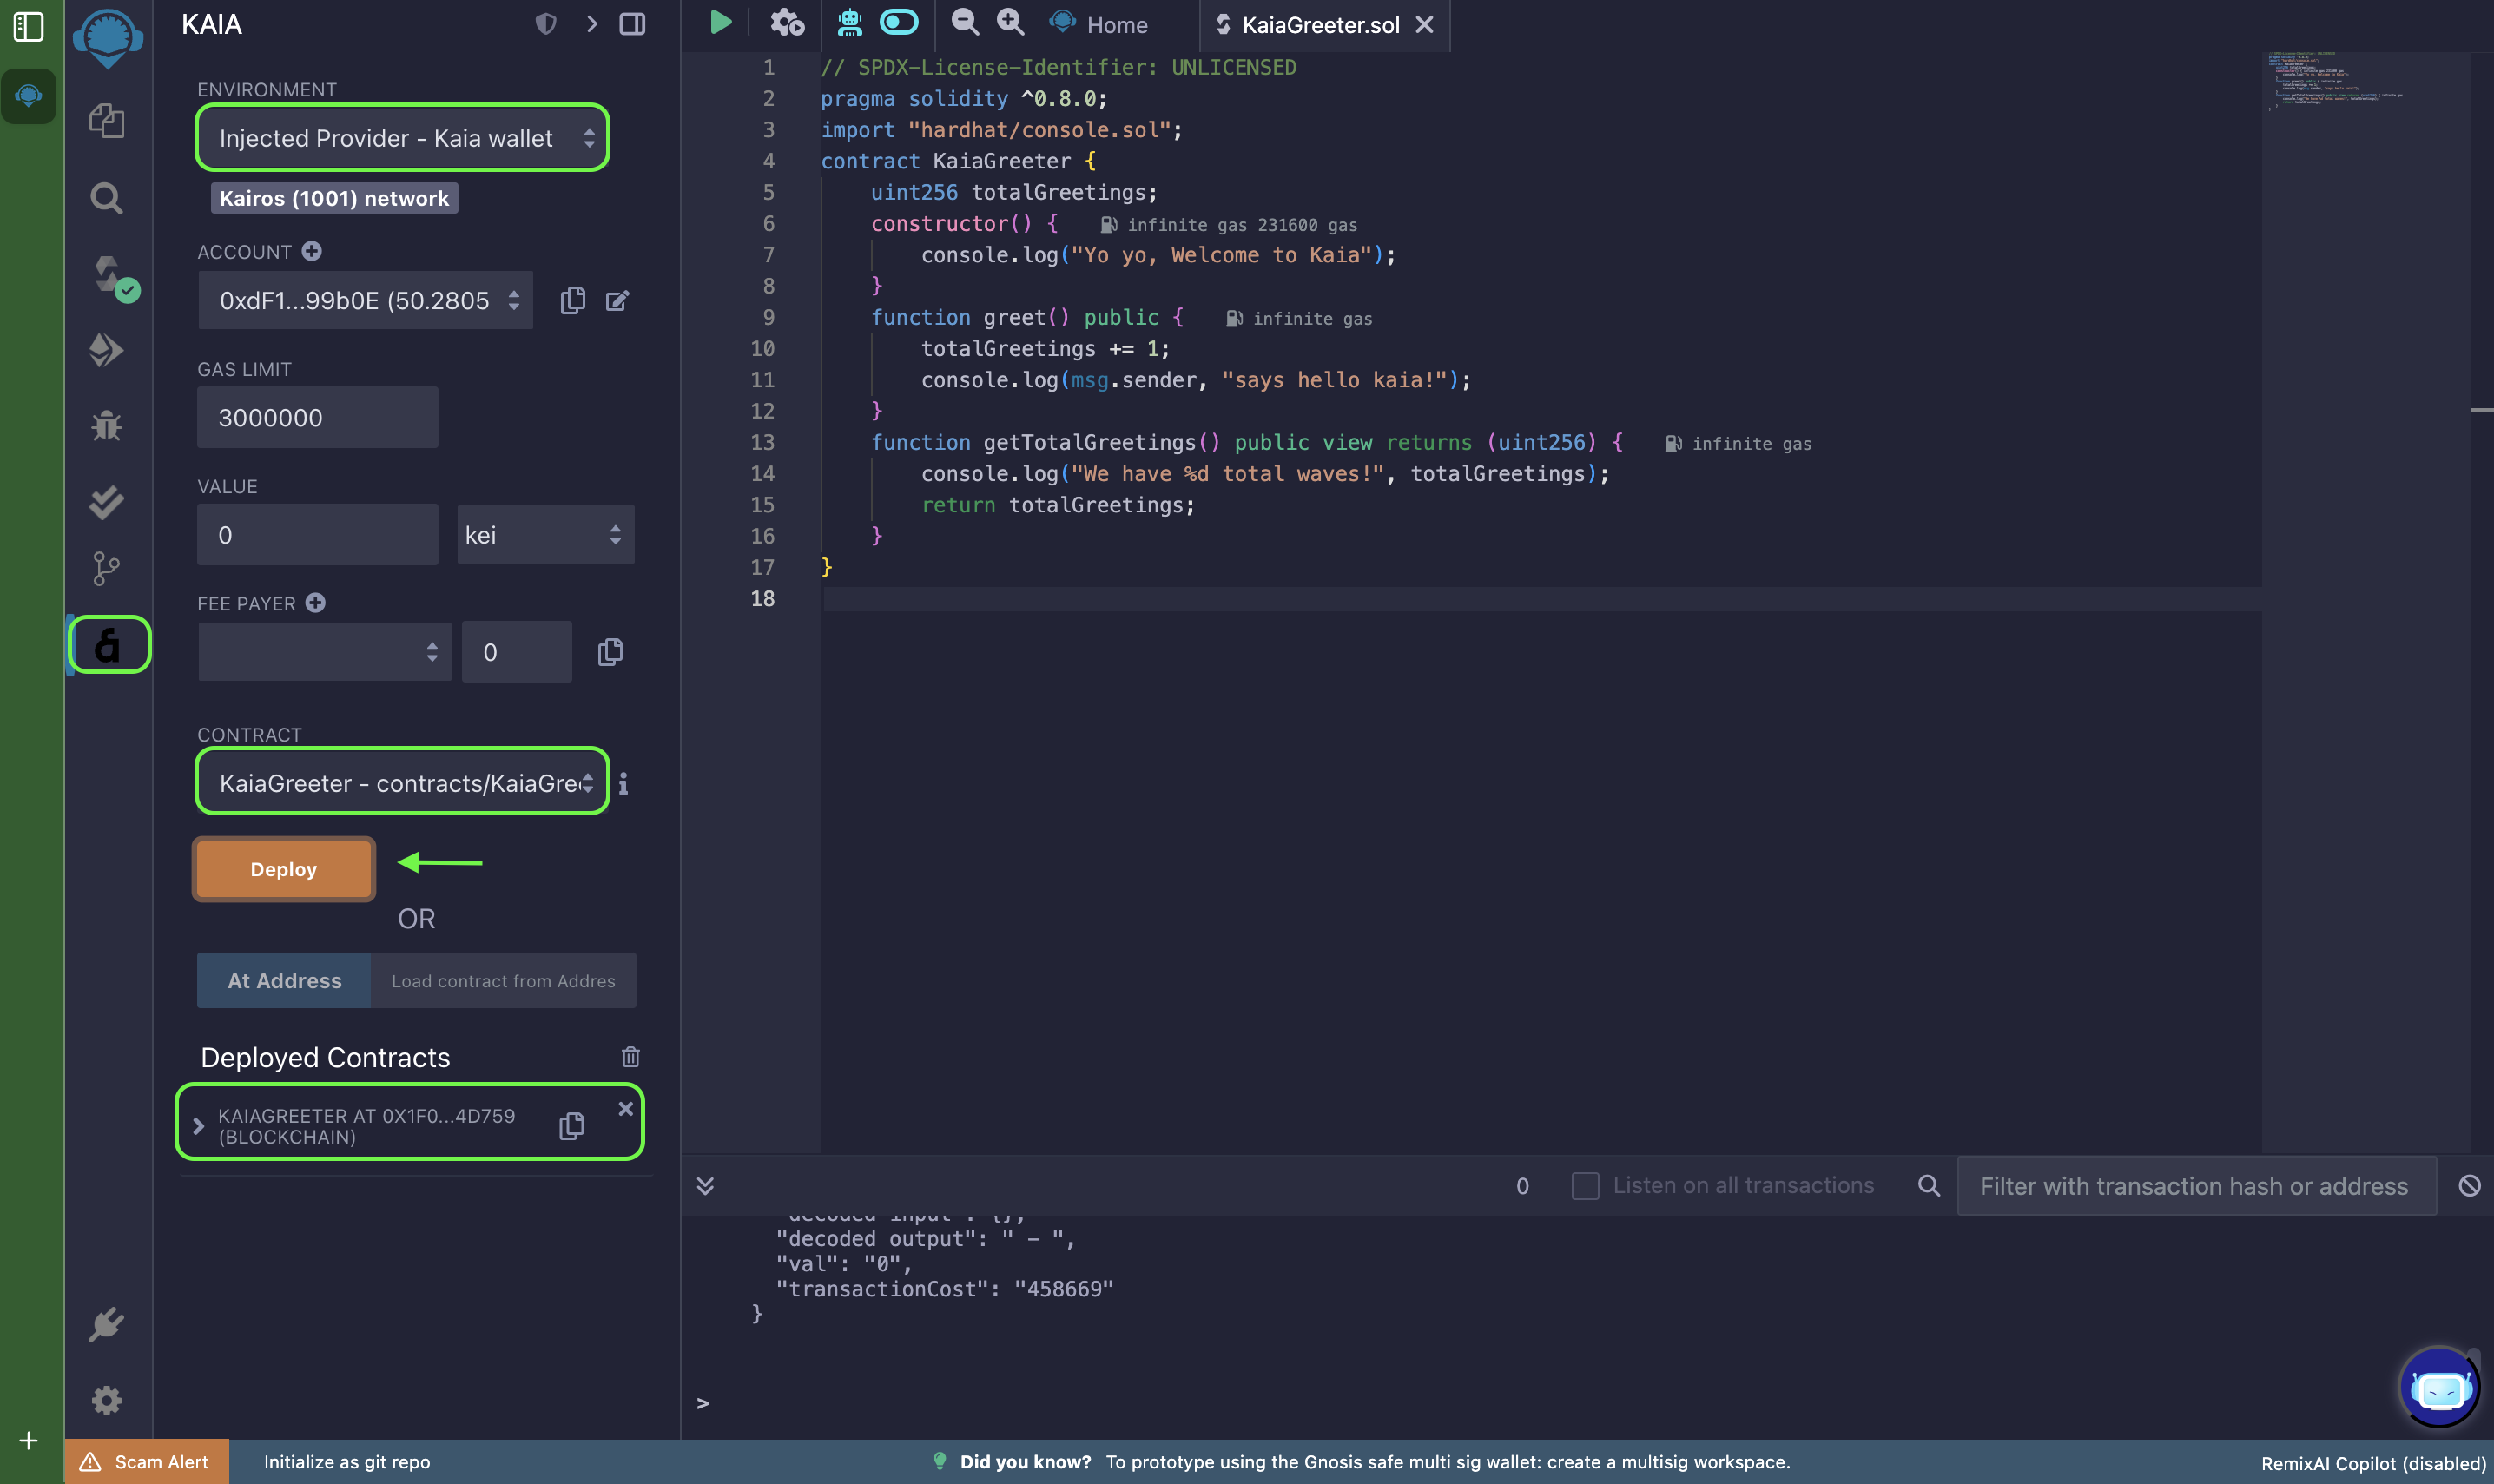
이 섹션에서는 Kaia 월렛을 사용하여 KaiaGreeter.sol 컨트랙트를 배포하겠습니다. Having compiled the contract in the Compile Section, follow the deployment process below:
- 배포 환경을 [주입된 공급자 - Kaia 지갑]으로 설정합니다. Make sure to confirm all the connection prompts to Remix.
- Select the contract you want to deploy in the CONTRACT field.
- Click on the Deploy button. This would generate a Kaia Wallet popup that requires transaction confirmation. Simply confirm the transaction!
- You can view the deployed contract on Kaiascan, and also test or debug it on Remix IDE.