本頁面使用機器翻譯自英語,可能包含錯誤或不清楚的語言。如需最準確的信息,請參閱英文原文。由於更新頻繁,部分內容可能與英文原文有出入。請加入我們在 Crowdin 上的努力,幫助我們改進本頁面的翻譯。 (Crowdin translation page, Contributing guide)
NFT 鎖
Team Finance 的 NFT 鎖定功能可讓創造者將個人或團隊分配的 NFT 轉移到有時間鎖定的智慧型契約保管庫,以在設定的時間內安全鎖定其個人或團隊分配的 NFT。
透過使用 Team Finance NFT 鎖,專案可以展現承諾、建立可信度並降低詐騙風險,最終在社區和投資人之間建立信任。
開始使用
在本教程中,您將學習如何使用 Team Finance 鎖定 NFT。 讓我們開始吧!
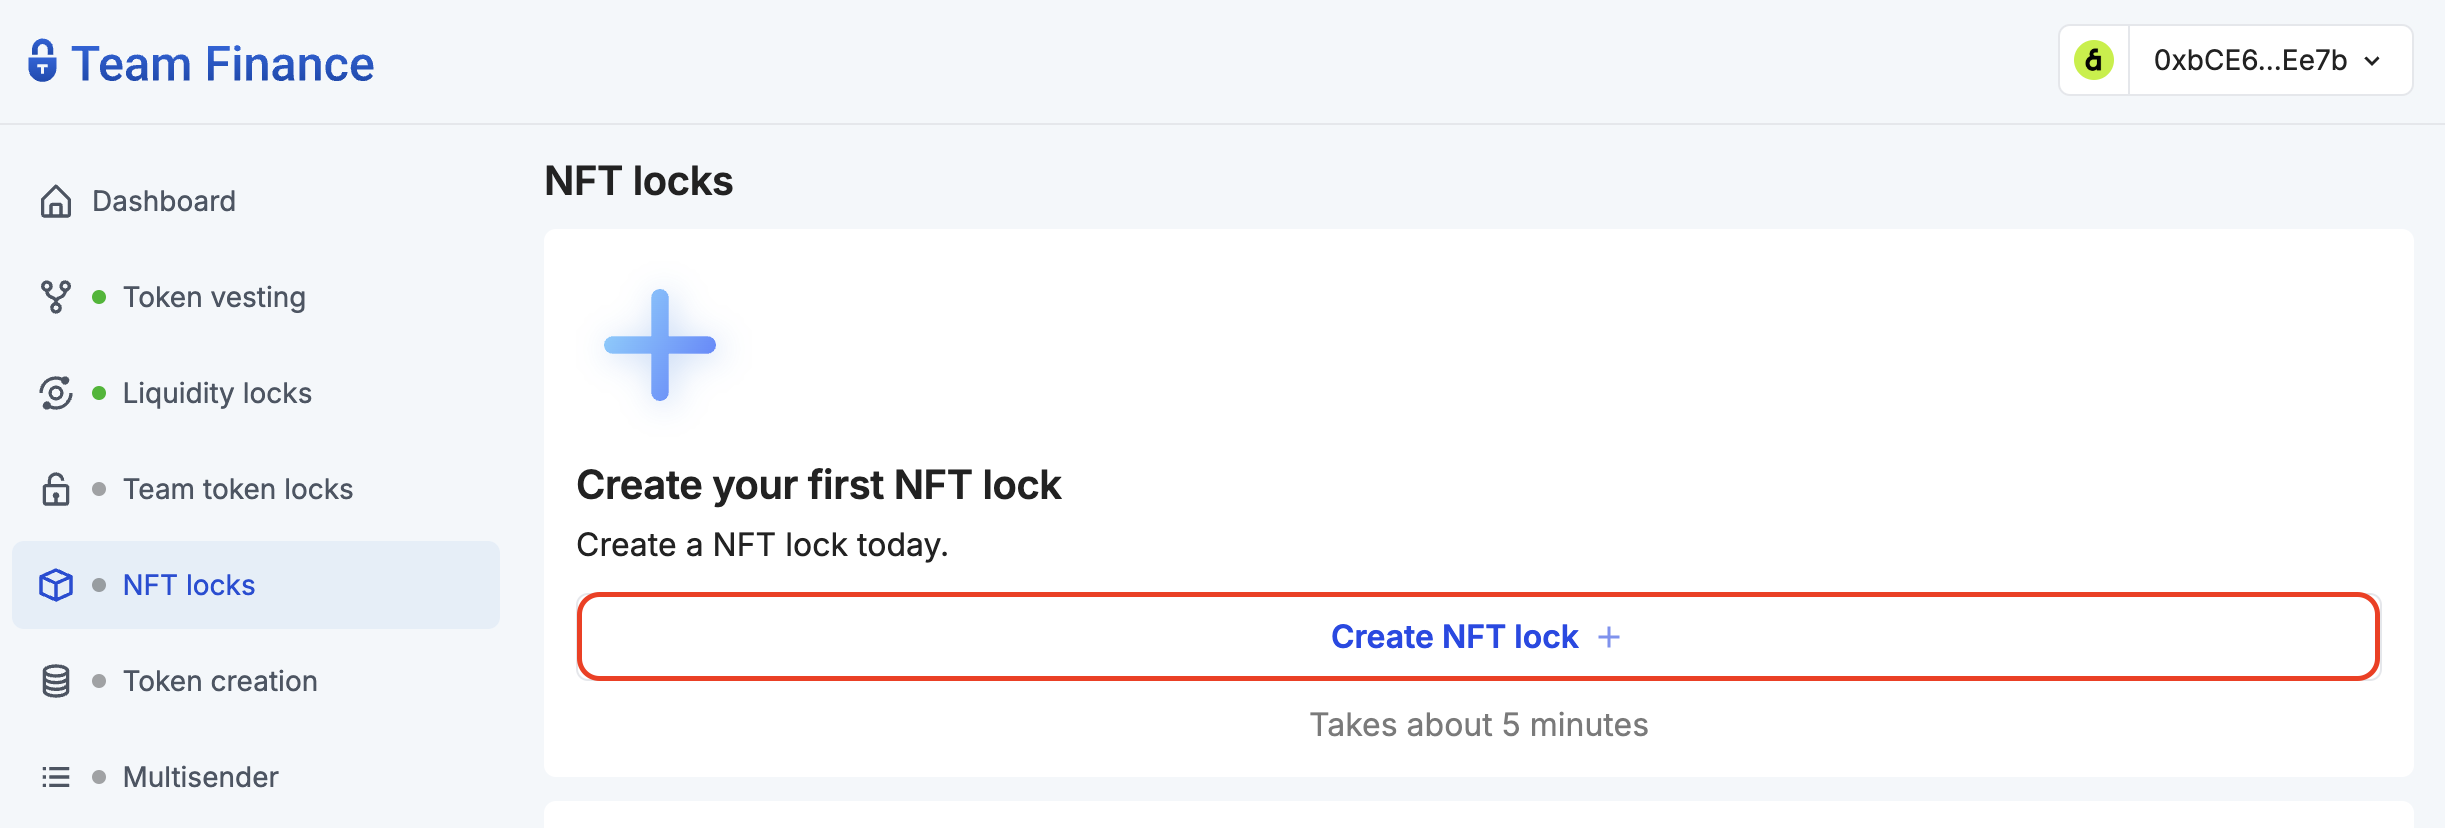
- 導覽至「團隊財務」NFT 鎖 標籤,然後按一下 ** 建立 NFT 鎖**。
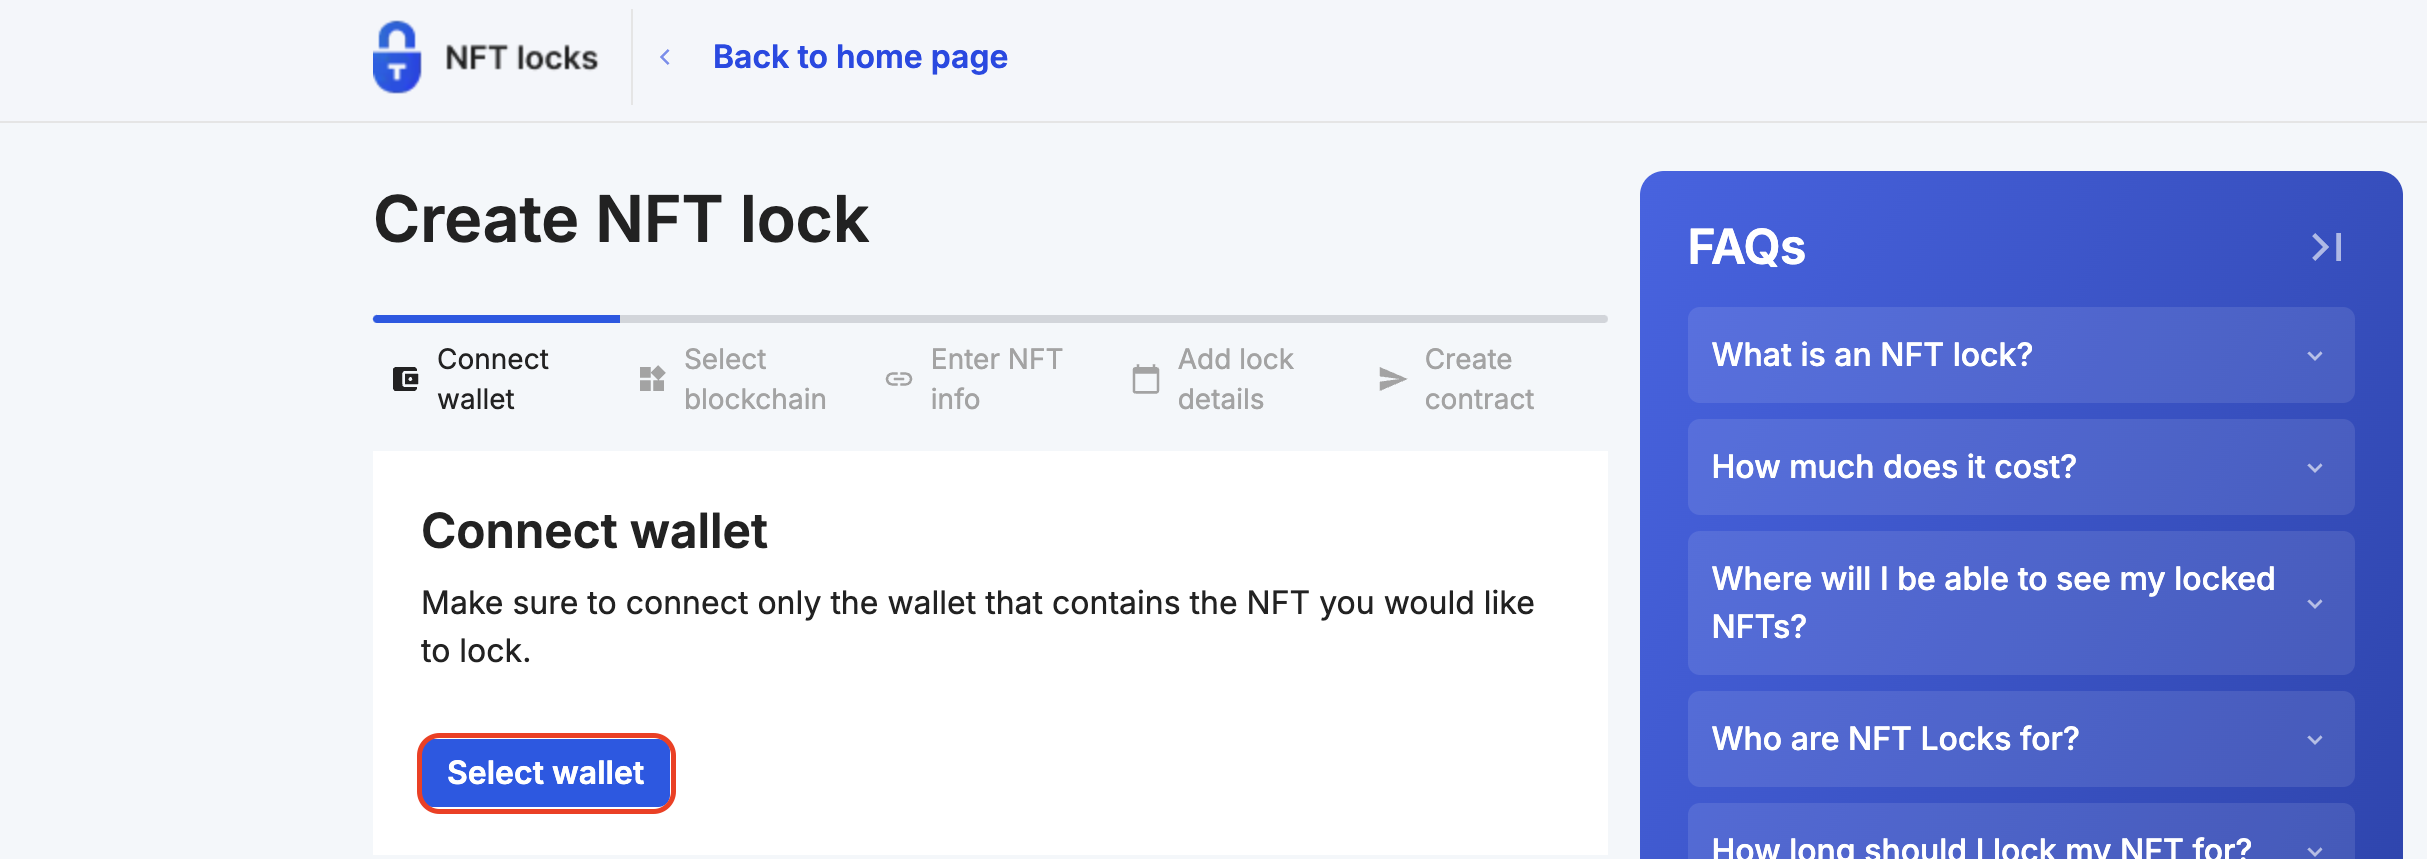
- 按一下 ** 選擇錢包**,然後按一下 ** 繼續**,將您的錢包連接到 Team Finance。
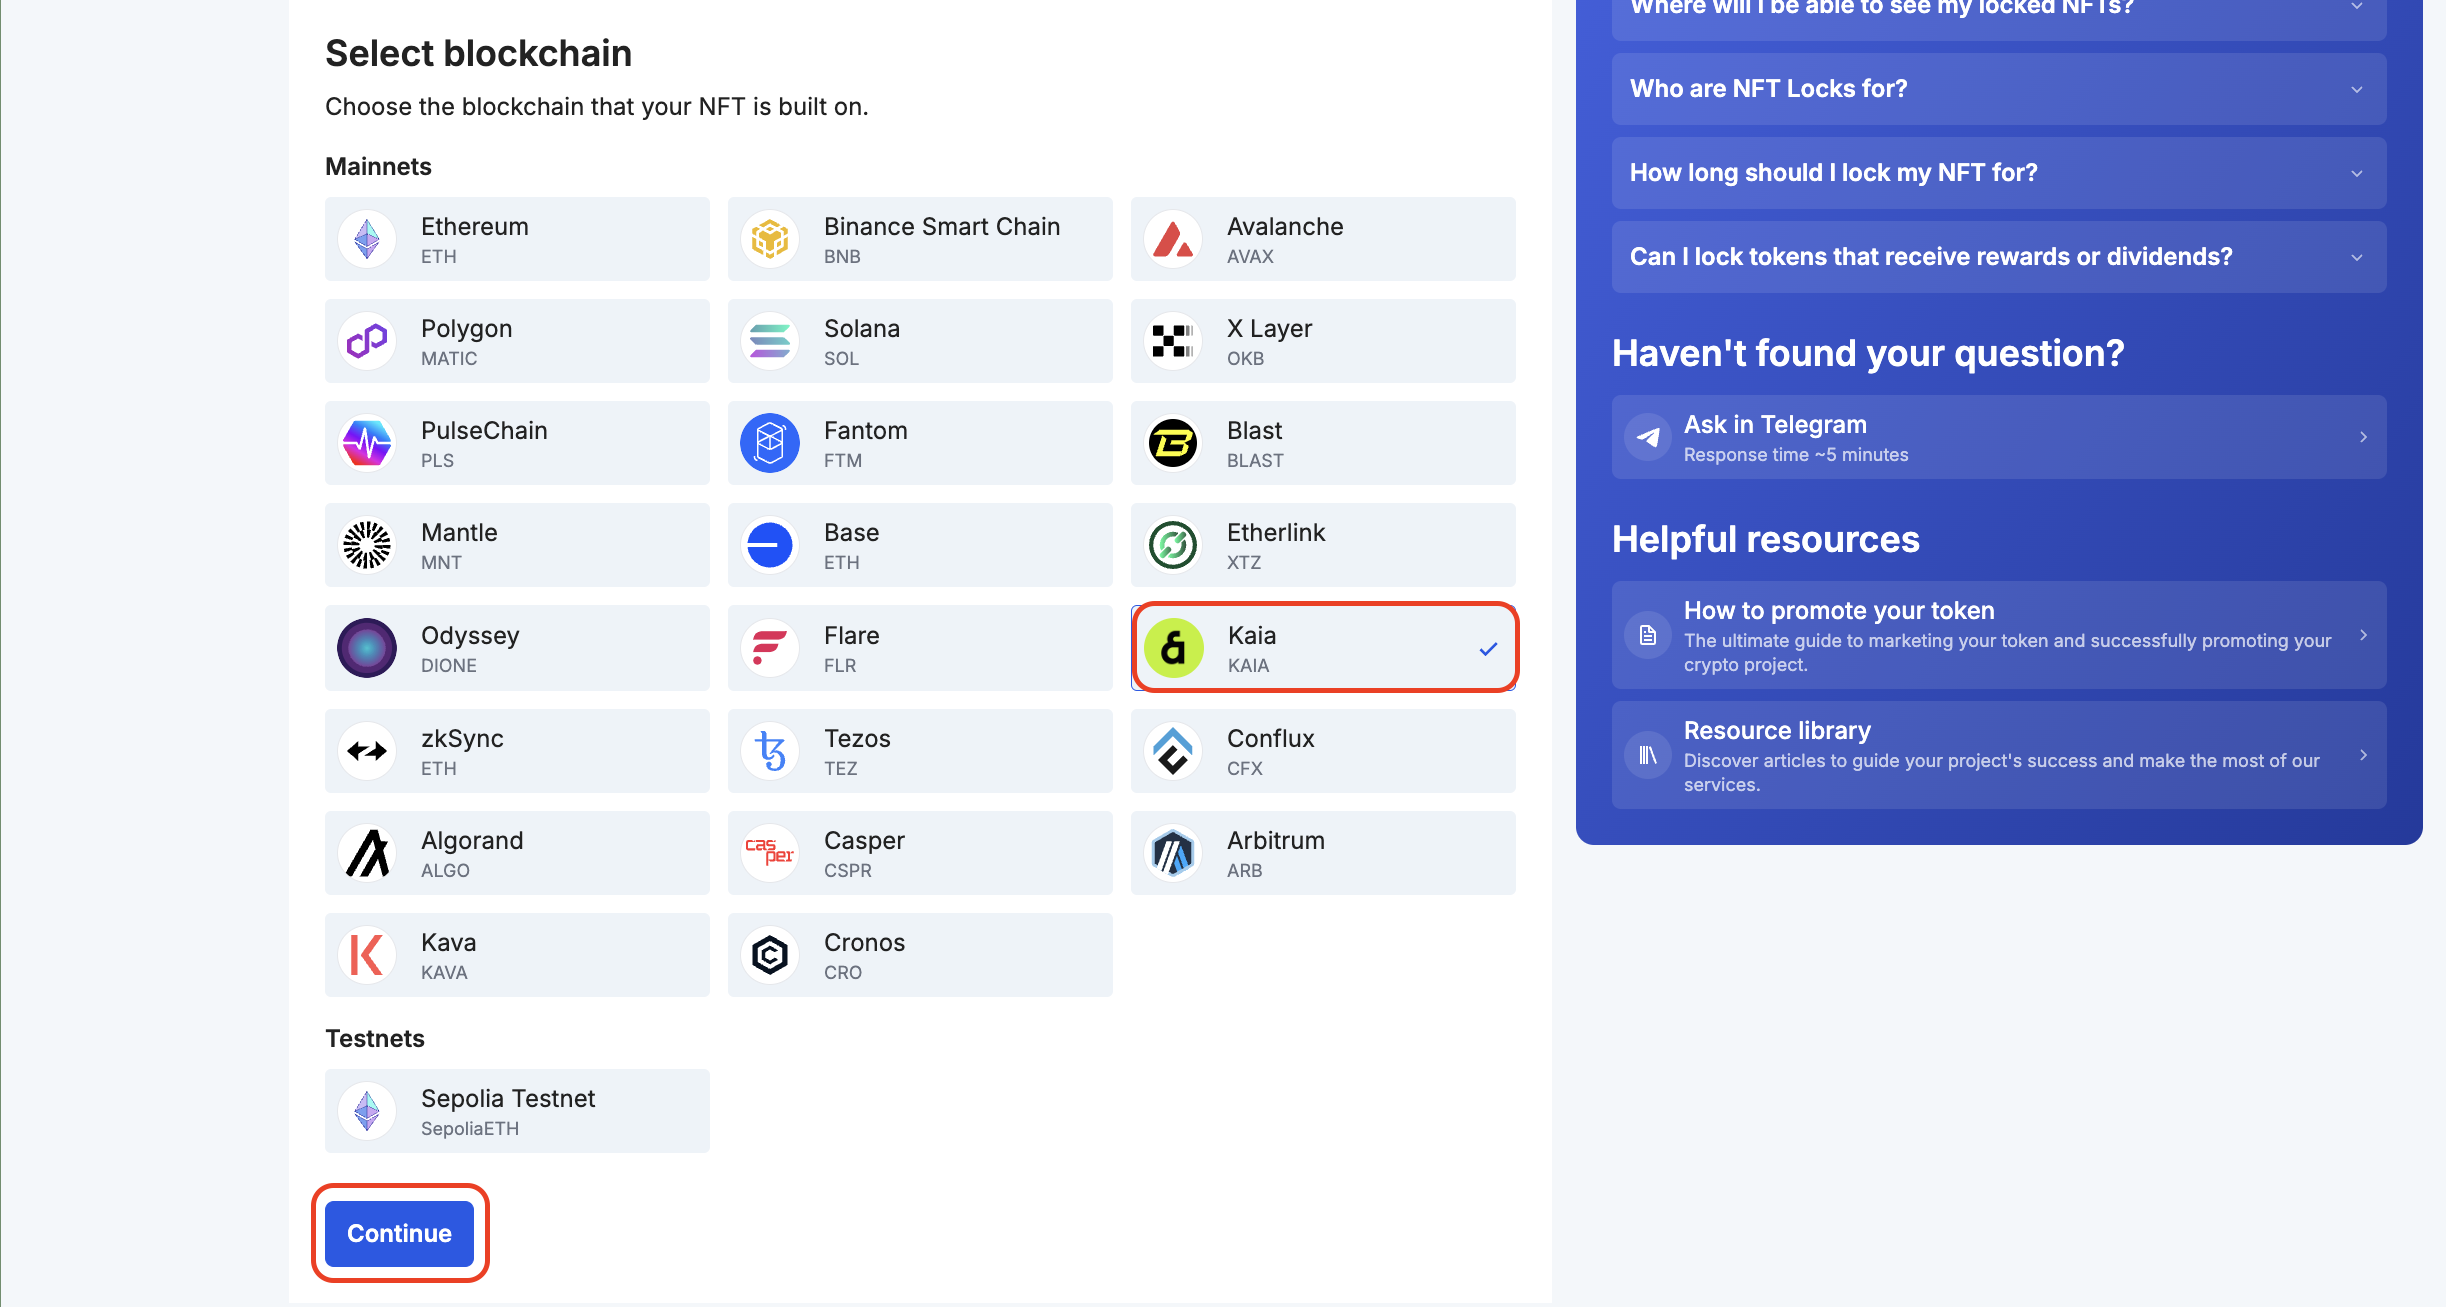
- 在區塊鏈網路下選擇 Kaia,然後按一下 繼續。
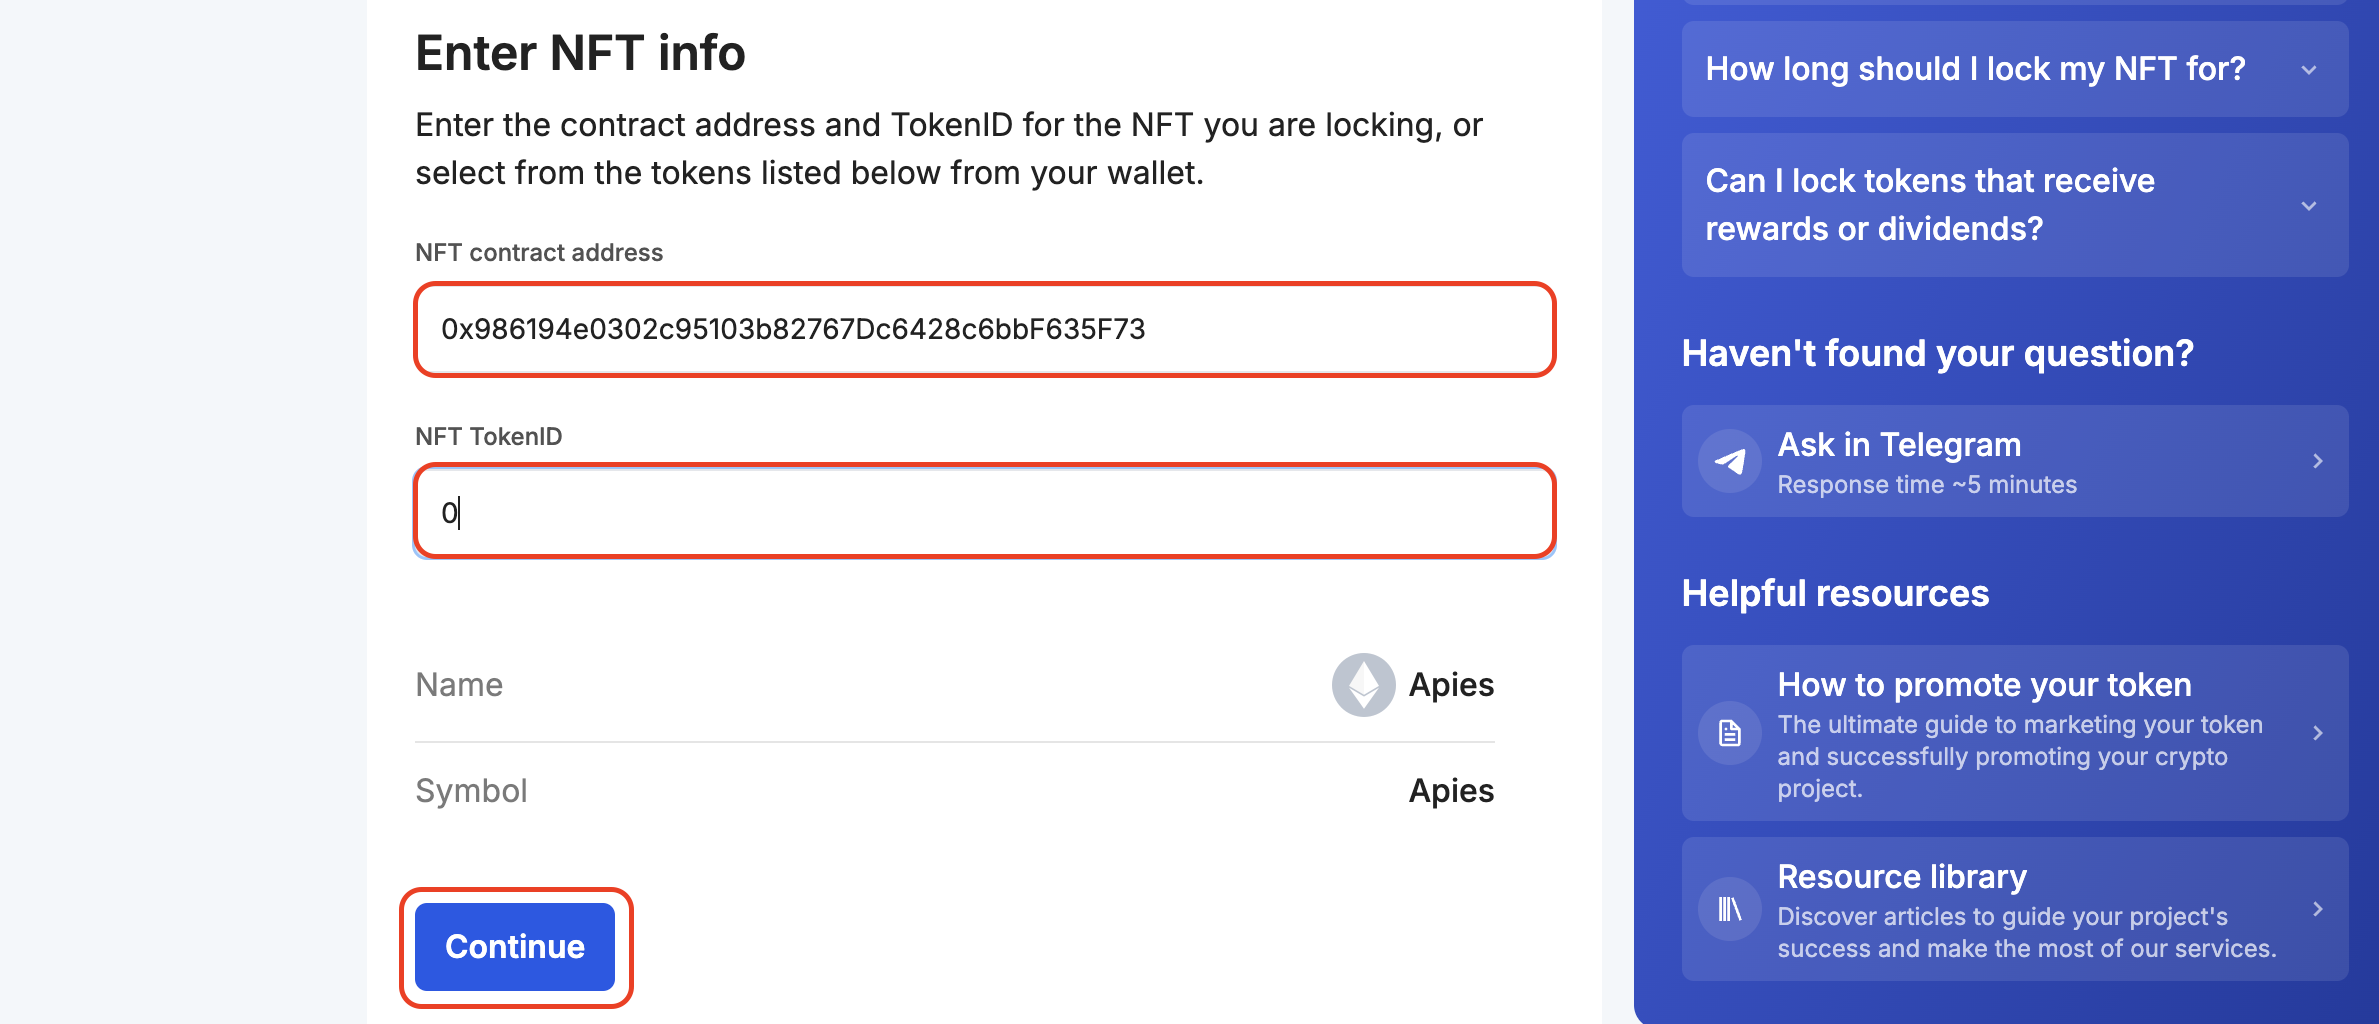
- 輸入您要鎖定的 NFT 的 NFT 資訊(合約位址和 tokenid),然後按一下 繼續。
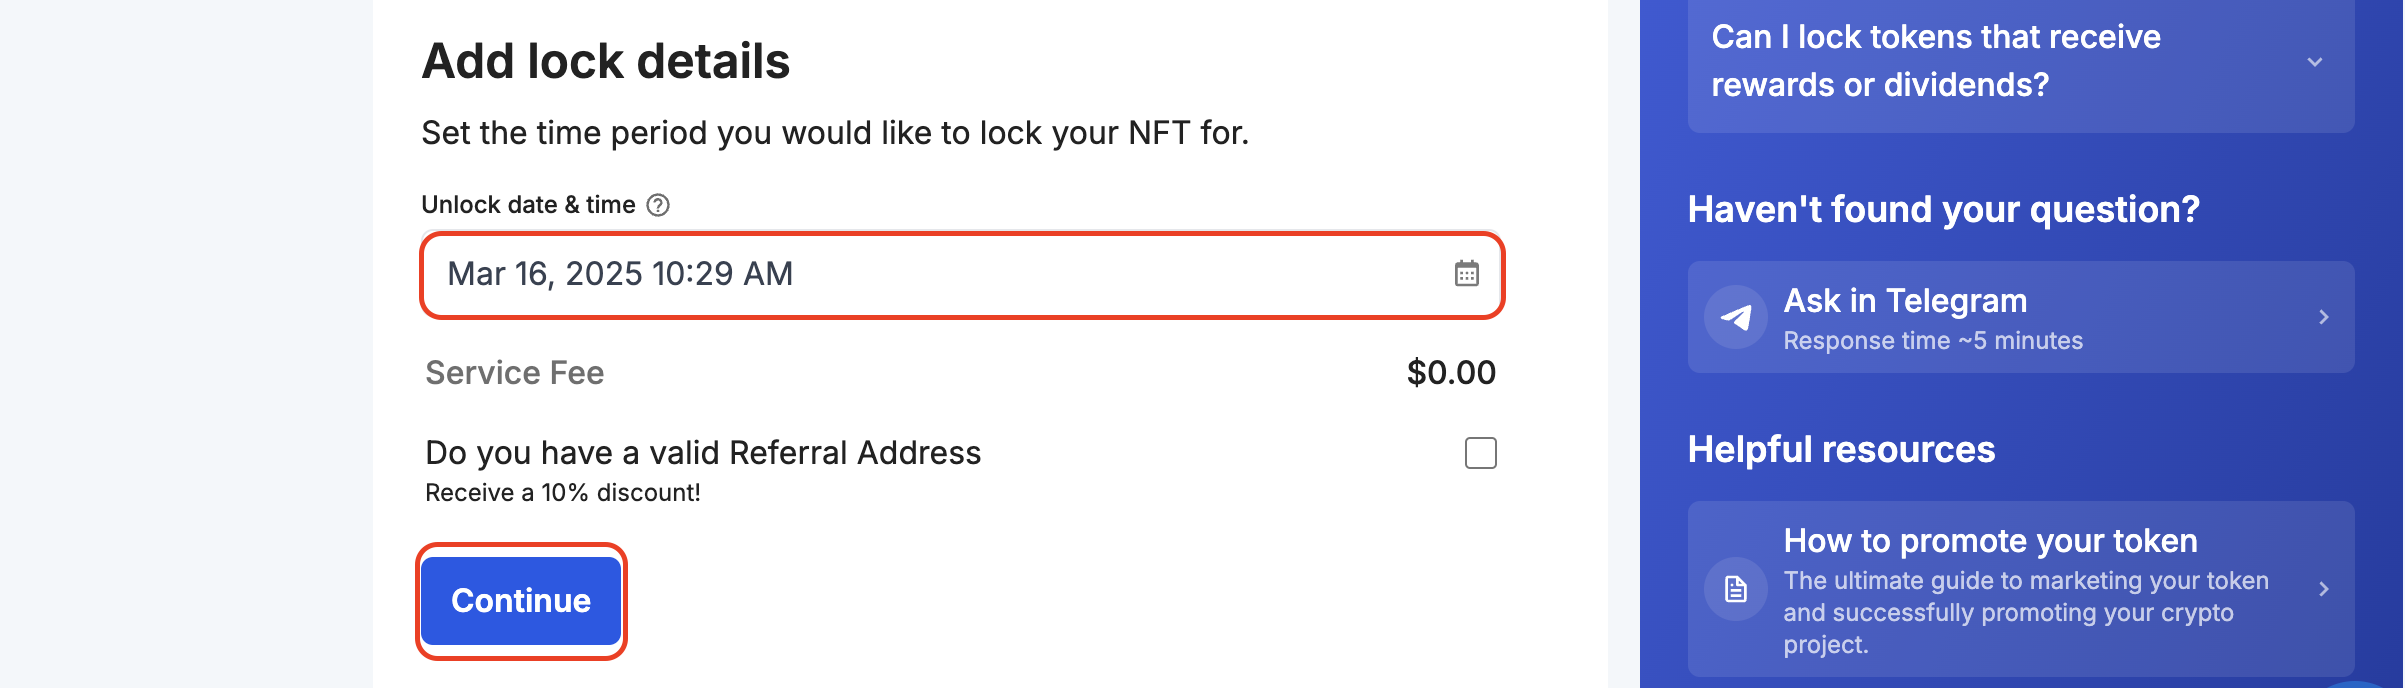
- 設定您想要鎖定 NFT 的時間段。
- 按一下 ** 授權**,授權鎖定您的 NFT 代幣。

這會提示您簽署授權交易。
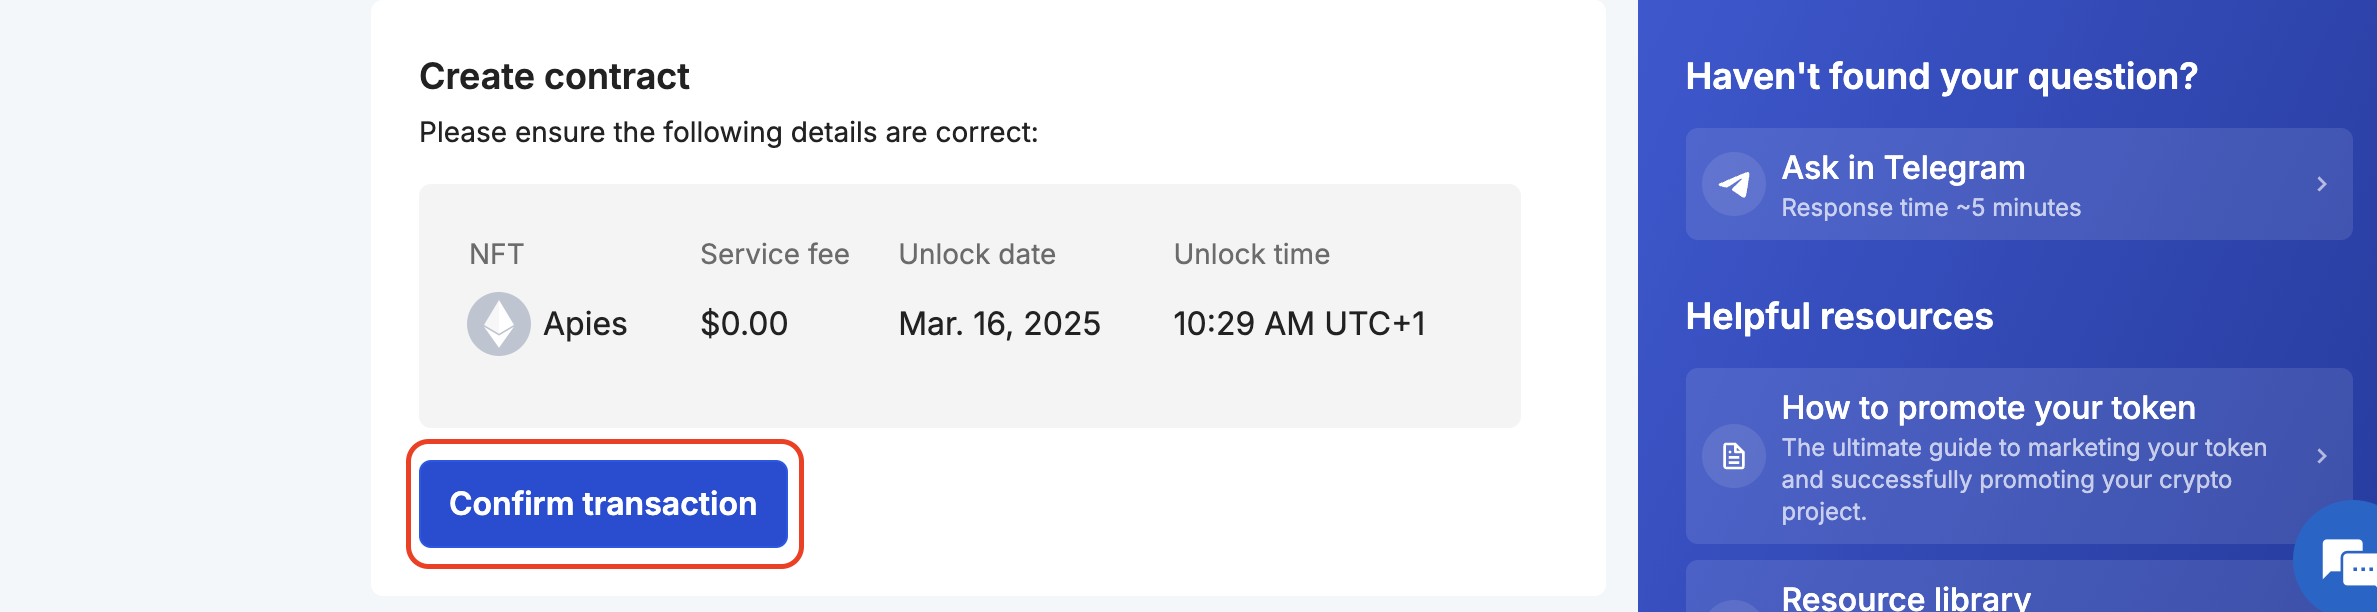
- 驗證您的 NFT 鎖詳細資料,然後繼續按一下 確認交易。 您的錢包將被提示簽署交易,以完成交易過程。
- 確認後,您會被重新導向一個頁面,在那裡顯示交易的狀態。 在交易確認之前,請不要離開該頁面。
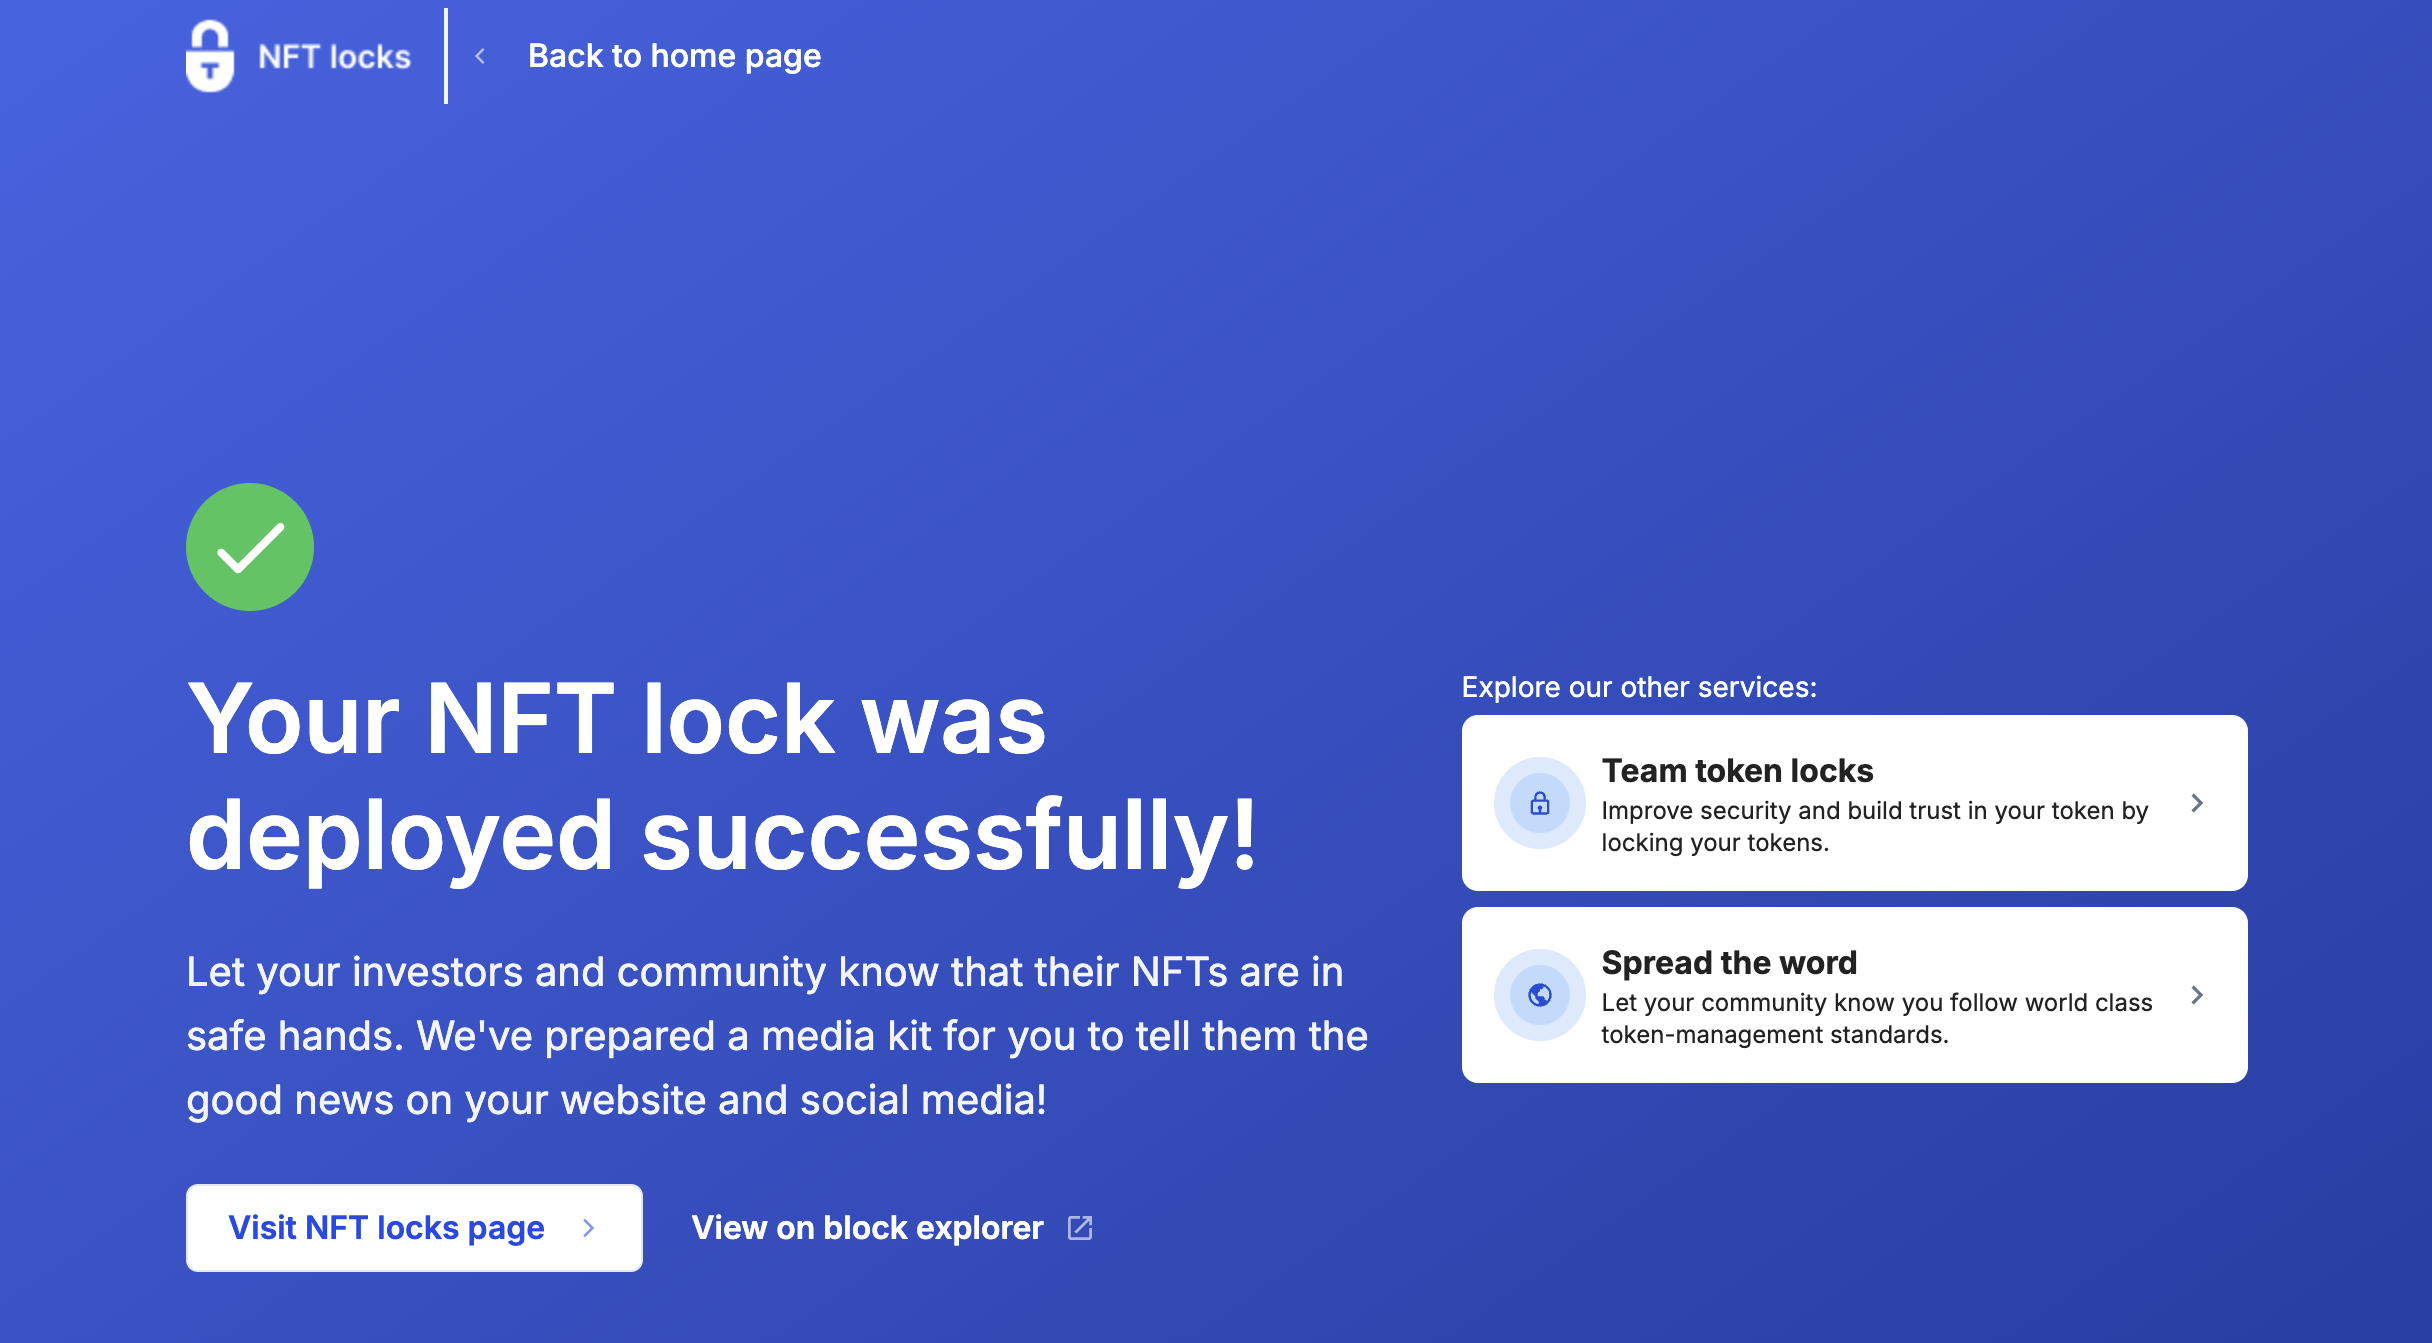
- 恭喜你 您已使用 Team Finance 成功建立 NFT 鎖。 您可以在儀表板上查看鎖的詳細資訊並追蹤進度。
