构建 "我买咖啡 "应用程序
目录
- 1. 项目设置
- 2. 创建 "请我喝咖啡 "智能合约
- 3. 使用脚本测试合同功能
- 4. 将 BMC 智能合约部署到 Kaia Testnet
- 5. 使用 React 和 Web3Onboard 构建 BMC 前端
- 6. 使用 Fleek 在 IPFS 上部署前端代码
- 7. 结论
导言
Buy Me a Coffee (BMC) 是一个创作者从粉丝或观众那里获得资金支持和捐赠的平台。 这些创作者可以是作家、艺术家、音乐家、视频创作者等。在这个平台的帮助下,粉丝可以在创作者的成功故事中扮演重要角色,受众可以对创作者完成的工作表示赞赏,创作者也可以将自己的作品货币化。
从高层次上讲,Buy-me-a-Coffee 简化了创作者接受付款的流程,增强了创作者与受众之间的互动。 这些都是 BMC 平台上令人兴奋的功能。 好的一面是,想象一下区块链上的这个平台。 现在,创作者将获得更多好处,例如
- 完全付费,而传统的 BMC 则对创作者获得的任何支持收取 5%的费用。
- 透明度高,因为所有交易都记录在区块链上。
- 无需任何中间环节,直接从粉丝那里获得支持费。
- 去中心化,即没有中央机构控制平台。
在本教程中 您将构建一个去中心化版本的 Buy Me a Coffee (BMC) 平台(前端 + 智能合约)。 该平台将是传统 BMC 平台的最小化实现,支持者可以在该平台上向您支付小费,而您则可以作为合约的所有者,提取交付给 BMC 智能合约的任何小费。 支持者可以通过该网站在咖啡交易中一起发送测试 KAIA 和可爱的信息。
本指南结束时,您将使用以下方法创建此 dApp:
- Solidity:编写 BMC 智能合约
- NextJs 和 Tailwind:为我们的 BMC dApp 构建前端网站
- Web3Onboard:实现与 Kaia Testnet Kairos 的多钱包连接。
- Fleek:有了 Fleek,我们就能在 IPFS 上托管 BMC dApp。
先决条件
要完成本教程,您需要
- Node.js
- 熟悉 Javascript 和 React 基础知识,如钩子等
- 安装必要的钱包,如 Coinbase Wallet 和 Metamask Wallet
- 从 水龙头 测试 KAIA。
- RPC 端点:您可以从支持的端点提供程序中获取。
- 在 Fleek 上创建账户。
1. 项目设置
在本节中,我们将初始化项目文件夹。 该文件夹将包含两个单独的文件夹:
- frontend 文件夹--其中包含我们 dApp 前端实现的代码
- smart-contract 文件夹--其中包含 BMC dApp 的智能合约代码。
要创建项目文件夹,请在终端中粘贴以下代码
mkdir BuyMeACoffeecd BuyMeACoffee
1.1. 前台文件夹
该文件夹包含用于构建项目前端网站的工具。 在本指南中,我们将使用 Next 的 create-next-app 工具来引导我们的 Next.js 和 Tailwind CSS 项目。 请按照以下步骤安装必要的依赖项,并创建前台文件夹:
步骤 1 - 创建前台文件夹
将下面的代码粘贴到 BuyMeACoffee 文件夹中,使用 create-next-app 工具创建前端文件夹:
npx create-next-app frontendcd frontend
步骤 2 - 下载 Tailwind 依赖项并设置其配置
npm install -D tailwindcss postcss autoprefixernpx tailwindcss init -p
步骤 3 - 修改 tailwind.config.js
导航至 tailwind.config.js 文件,并替换为以下代码:
module.exports = { content: [ "./pages/**/*.{js,ts,jsx,tsx}", "./components/**/*.{js,ts,jsx,tsx}", ], theme: { extend: {}, }, plugins: [],}
步骤 4 - 替换 styles/global.css 中的代码
导航至 styles/global.css 文件,并用下面的代码替换:
@tailwind base;@tailwind components;@tailwind utilities;
我们已经成功建立了前端项目文件夹。 稍后将讨论更多内容。 下一步是设置智能合约文件夹。
1.2. 智能合约文件夹
该文件夹包含 BuyMeACoffee 功能的智能合约。 请按照以下步骤安装必要的依赖项,并创建我们的智能合约文件夹:
步骤 1 - 创建智能合约文件夹
要创建该文件夹,请导航至项目目录:BuyMeACoffee 并运行以下命令创建智能合约文件夹:
cd ..mkdir smart-contractcd smart-contract
步骤 2 - 生成硬礼帽项目模板
该模板适用于编写、测试和部署智能合约。 首先,在终端运行下面的代码,启动一个新的 npm 项目:
npm init -y
这将��为您创建一个 package.json 文件,看起来像这样:
{ "name": "buymeacoffee", "version": "1.0.0", "description": "", "main": "index.js", "scripts": { "test": "echo \"Error: no test specified\" && exit 1" }, "keywords": [], "author": "", "license": "ISC"}
然后,安装 hardhat 和其他依赖项,如 hardhat-toolbox 和 dotenv。 为此,请用下面的代码替换 package.json 文件:
{ "name": "buymeacoffee", "devDependencies": { "@nomicfoundation/hardhat-toolbox": "^2.0.2", "hardhat": "^2.14.0" }, "dependencies": { "dotenv": "^16.0.3" }}
最后,在终端中运行 npm install。
成功安装所有依赖项(hardhat、hardhat-toolbox、dotenv)后,您可以通过以下方式确认 hardhat 的安装:
a. 检查当前版本:
npx hardhat --version
控制台应打印出当前安装的版本,在我们的例子中是 2.14.0.
b. 查看项目目录 当前目录应包括
- contracts/ - 这是包含智能合约的文件夹。
- scripts/ - 此文件夹包含在区块链网络上部署合约的代码
- test/ - 该文件夹包含测试智能合约的所有单元测试
- hardhat.config.ts - 该文件包含对 Hardhat 工作非常重要的配置, 智能合约的部署。
2. 创建 "请我喝咖啡 "智能合约
在本节中,我们将创建容纳 BMC 功能的智能合约。 要开始操作,请导航至您的合同文件夹,创建一个名为 "BuyMeACoffee.sol "的新文件,并粘贴以下代码:
// SPDX-License-Identifier: UNLICENSEDpragma solidity ^0.8.9;contract BuyMeACoffee { // event to emit when a message is sent with tip event NewCoffee(address indexed _sender, string name, string _message, uint256 _timestamp); // address of contract deployer address payable owner; constructor() { // stores deployer as owner owner = payable(msg.sender); } // struct of BuyMeACoffe Tx struct BuyCoffee { address sender; string name; uint timestamp; string message; } // maps id to BuyCoffee struct mapping (uint => BuyCoffee) idToBuyCoffee; // id uint public coffeeId; // buy coffee function function buyCoffee(string memory name, string memory message) public payable { // Must accept more than 0 KAIA for a coffee. require(msg.value > 0, "Tip must be greater than zero"); coffeeId++; // Add the coffee tx to storage BuyCoffee storage coffee = idToBuyCoffee[coffeeId]; coffee.message = message; coffee.name = name; coffee.sender = msg.sender; coffee.timestamp = block.timestamp; // Emit a NewCoffee event with details about the coffee tx. emit NewCoffee(msg.sender, name, message, block.timestamp); } // withdraw coffee tips to the contract owner function withdrawCoffeTips() public { require(owner == msg.sender, "Not owner"); require(owner.send(address(this).balance) ); } // get all coffee function getAllCoffee(uint _id) public view returns(BuyCoffee[] memory c){ require(_id <= coffeeId, "Non-existent id"); c = new BuyCoffee[](_id); for(uint i = 0; i < _id; i++) { c[i] = idToBuyCoffee[i + 1]; } }}
让我们快速了解一下每行代码的作用:
当执行 buyCoffee 函数时,NewCoffee 事件就会发生。 它会记录下发件人地址、发件人姓名、发送的信息和时间戳。
接下来是 owner 变量,它代表合同部署者。 然后,我们在构造函数中将 msg.sender 设置为合约的所有者。
创建 coffeeId 是为了跟踪所创建的咖啡交易。
随后,我们声明了一个buyMeACoffee 结构,其中存储了与咖啡交易相关的所有数据:地址发送者、字符串名称、uint 时间戳、字符串消息。 然后,我们使用 idToBuyCoffee 变量将此结构映射为一个 id。
buyCoffee 功能是 BMC 智能合约的核心实现。 这是一个应付款函��数,需要两个参数,即发件人的姓名和地址。 它检查发送的 KAIA 金额是否大于零。 接下来,它会增加 coffeeId,然后将咖啡 tx 或信息添加到区块链中。 最后,它会发出一个 NewCoffee 事件,其中包含咖啡 tx 的详细信息。
我们创建了一个 **withdraw()**函数,用于向所有者提取合同的总余额(address(this).balance)。
最后,创建了一个 getAllCoffee() 函数。 它将返回所有加班创建的咖啡交易。
现在我们已经完成了 BMC 智能合约的编写,下一步就是测试智能合约的功能,在 Kaia Testnet Kairos 上部署智能合约并与之交互。
3. 使用脚本测试合同功能
在本节中,我们将编写脚本来测试智能合约的功能。 要开始使用,请导航至脚本文件夹,新建一个名为 bmc-sample.js 的文件,并在其中粘贴以下代码:
const hre = require("hardhat");// Logs the KAIA balances of a specific address.async function getBalance(address) { const balanceBigInt = await hre.ethers.provider.getBalance(address); return hre.ethers.utils.formatEther(balanceBigInt)}// Logs the KAIA balances for a list of addresses.async function getBalances(addresses) { let idx = 0; for (const address of addresses) { console.log(`address ${idx} balances`, await getBalance(address)); idx++; }}// Logs all the coffee info stored on-chain from coffee tx.async function getAllCoffee(memos) { for (const memo of memos) { const timestamp = memo.timestamp; const sender = memo.sender; const name = memo.name; const message = memo.message console.log(`At ${timestamp}, ${name}, with ${sender}, said: "${message}"`); }}async function main() { const [owner, tipper1, tipper2, tipper3 ] = await hre.ethers.getSigners(); const BuyMeACoffee = await hre.ethers.getContractFactory("BuyMeACoffee"); const buyMeACoffe = await BuyMeACoffee.deploy(); await buyMeACoffe.deployed(); console.log(`BuyMeACoffee Contract Address`, buyMeACoffe.address); // (========Check Balance==========) const addressses = [owner.address, tipper1.address, buyMeACoffe.address]; console.log("======GET BALANCE======="); await getBalances(addressses); // Buy Coffee for owner const tip = {value: hre.ethers.utils.parseEther("1")} await buyMeACoffe.connect(tipper1).buyCoffee("Alice", "Hi Jude", tip); await buyMeACoffe.connect(tipper2).buyCoffee("Bob", "Hi Alice", tip); await buyMeACoffe.connect(tipper3).buyCoffee("Japhet", "Hi Ox", tip); // check balance after tipping console.log("======GET BALANCE AFTER TIPPING======="); await getBalances(addressses); // withdraw coffee tips await buyMeACoffe.connect(owner).withdrawCoffeTips(); // check balance after withdrawing tip console.log("======GET BALANCE AFTER WITHDRAWING TIP======="); await getBalances(addressses); // get the current coffee tx id. const coffeeId = await buyMeACoffe.coffeeId() const id = coffeeId.toString(); console.log(coffeeId.toString()); // get all existing coffee tx const allCoffee = await buyMeACoffe.getAllCoffee(id); await getAllCoffee(allCoffee);}// We recommend this pattern to be able to use async/await everywhere// and properly handle errors.main().catch((error) => { console.error(error); process.exitCode = 1;});
像往常一样,让我们来看看每行代码的作用:
您会注意到,在代码顶端有一些辅助函数,用于获取单个地址和多个地址的余额。 代码中还有一个主函数,其中包含测试智能合约的功能。
让我们来看看 main() 函数中的代码。
首先,我们通过调用await hre.ethers.getSigners() 来设置账户列表(所有者、小费 1、小费 2、小费 3),以便进行测试。
接下来,我们创建了一个合同实例并进行了部署。 在这种情况下,就是 BuyMeACoffee.sol 合同。
然后,我们设置收件人列表,使用 getBalances() 函数检查他们的余额。 然后,我们在三个不同的实例中调用了buyCoffee函数。 接下来,我们检查了每个地址在咖啡交易后的余额。
然后,我们调用提款函数,将所有资金提取到所有者的地址。 接下来,我们检查了取款后的地址余额。
最后,我们调用**getAllCoffee()**函数,获取智能合约中的所有咖啡交易。 要查看脚本的运行情况,请运行下面的命令:
npx hardhat run scripts/bmc-coffee.js
终端中的输出结果应该如下所示:
Ayomitans-MacBook-Pro:smart-contract oxpampam$ npx hardhat run scripts/bmc-sample.jsBuyMeACoffee Contract Address 0x5FbDB2315678afecb367f032d93F642f64180aa3======GET BALANCE=======address 0 balances 9999.998295071875address 1 balances 10000.0address 2 balances 0.0======GET BALANCE AFTER TIPPING=======address 0 balances 9999.998295071875address 1 balances 9998.999752128832448226address 2 balances 3.0======GET BALANCE AFTER WITHDRAWING TIP=======address 0 balances 10002.998249102355276178address 1 balances 9998.999752128832448226address 2 balances 0.03At 1686307885, Alice, with 0x70997970C51812dc3A010C7d01b50e0d17dc79C8, said: "Hi Jude"At 1686307886, Bob, with 0x3C44CdDdB6a900fa2b585dd299e03d12FA4293BC, said: "Hi Alice"At 1686307887, Japhet, with 0x90F79bf6EB2c4f870365E785982E1f101E93b906, said: "Hi Ox"
4. 部署 BMC 智能合约
4.1 向 Kaia Testnet 部署 BMC 智能合约
在成功测试了 BMC 智能合约的功能后,让我们按以下步骤将其部署到 Kaia Testnet Kairos:
步骤 1 - 创建 .env 文件
现在,在项目文件夹中创建 .env 文件。 该文件可帮助我们将 .env 文件中的环境变量加载到 process.env 文件中。
在终端中粘贴此命令以创建 .env 文件
touch .env
创建文件后,让我们把 .env 文件配置成这样:
KAIROS_TESTNET_URL= "您的 RPC URL"PRIVATE_KEY= "从 metamask 钱包复制的您的私人密钥"
步骤 2 - 设置硬头盔配置
将此配置粘贴到 hardhat.config.js 文件中
require("@nomicfoundation/hardhat-toolbox");require("dotenv").config();const KAIROS_TESTNET_URL = process.env.KAIROS_TESTNET_URL;const PRIVATE_KEY = process.env.PRIVATE_KEY;/** @type import('hardhat/config').HardhatUserConfig */module.exports = { solidity: "0.8.18", defaultNetwork: "hardhat", networks: { kairos: { url: KAIROS_TESTNET_URL, accounts: [PRIVATE_KEY], } }};
步骤 3 - 创建部署脚本
要创建一个新的部署脚本,将此智能合约部署到指定网络,请创建一个新文件 scripts/deploy.js,并粘贴以下代码:
const hre = require("hardhat");async function main() { const BuyMeACoffee = await hre.ethers.getContractFactory("BuyMeACoffee"); const buyMeACoffe = await BuyMeACoffee.deploy(); await buyMeACoffe.deployed(); console.log(`BuyMeACoffee Contract Address`, buyMeACoffe.address);}// We recommend this pattern to be able to use async/await everywhere// and properly handle errors.main().catch((error) => { console.error(error); process.exitCode = 1;});
现在,我们的配置已全部就绪,让我们运行下面的命令将其部署到 Kaia Testnet Kairos:
npx hardhat run scripts/deploy.js --network kairos
合同部署成功后,您的终端应该是这样的:
BuyMeACoffee Contract Address 0x0bEd1ed7B205d8c18e38A20b5BaB6e265A96d1AC
恭喜您在 Kaia Kairos 网络上部署了 BMC 智能合约! 您可以在 KaiaScan 的搜索栏中粘贴您的地址来验证此交易。
4.2 与 BMC 智能合约互动
在本节中,您将学习如何使用硬帽脚本提取发送到智能合约中的咖啡提示。 要开始使用,请在脚本文件夹中新建一个文件 withdraw.js 并粘贴下面的代码:
const hre = require("hardhat");// contract address of BMC Contractconst buyMeACoffeAddress = "Paste BMC contract address";// address of the contract deployer// useful when calling the withdrawCoffeTips() function// ensure that this address is the SAME address as the original contract deployerconst deployerAddress = "Paste deployer address";// get the balance of a specified addressasync function getBalance(address) { const balanceBigInt = await hre.ethers.provider.getBalance(address); return hre.ethers.utils.formatEther(balanceBigInt)}async function main() { // initialize the deployerAddress to a signer object // this will be useful when calling the withdrawCoffeTips() to the owner address const signer = await hre.ethers.getSigner(deployerAddress); // instantiate the BMC contract const BuyMeACoffee = await hre.ethers.getContractAt("BuyMeACoffee", buyMeACoffeAddress, signer); const balanceBefore = await getBalance(signer.address); const contractBalance = await getBalance(BuyMeACoffee.address); console.log(`Owner balance before withdrawing tips: ${balanceBefore} KAIA`); console.log(`Contract balance before withdrawing tips: ${contractBalance} KAIA`); // Withdraw funds if there are funds to withdraw. if (contractBalance !== "0.0") { console.log("withdrawing funds..") const withdrawCoffeTxn = await BuyMeACoffee.withdrawCoffeTips(); await withdrawCoffeTxn.wait(); // check owner's balance after withdrawing coffee tips const balanceAfter = await getBalance(signer.address); console.log(`Owner balance after withdrawing tips ${balanceAfter} KAIA`); } else { console.log("no funds to withdraw!"); }}// We recommend this pattern to be able to use async/await everywhere// and properly handle errors.main().catch((error) => { console.error(error); process.exitCode = 1;});
从上面的代码可以看出,在实例化 BMC 合约后,脚本只有在合约余额大于零时才会执行 withdrawCoffeTips 函数。 有道理吧?
是的! 在合同没有资金的情况下,它会打印 "无资金可提取",从而为我们节省了一些调用合同的汽油。
让我们运行下面的脚本,看看它是如何运行的:
npx hardhat run scripts/withdraw.js --network kairos
成功执行脚本后,您的终端应该是这样的:
Ayomitans-MacBook-Pro:smart-contract oxpampam$ npx hardhat run scripts/withdraw.js --network kairos提现提示前的所有者余额:155.8337532 KAIA提取提示前的合同余额: 2.0 KAIAwithdrawing funds...提取提示后的所有者余额 157.83298835 KAIA
从输出结果可以看出,提取咖啡小费后,所有者余额增加了 2 KAIA。
现在,我们已经部署了合同并测试了所有功能,是时候构建前端了。
前端将使 BMC 功能上线,即我们现在可以直观地看到如何与 BMC 智能合约进行交互。
5. 使用 React 和 Web3Onboard 构建 BMC 前端
在本节中,我们将使用 Next.js 和 Web3Onbaord 构建 dApp 前端网站。 要开始操作,您必须导航到之前创建的前台文件夹。
cd ..cd frontend
下一步是安装必要的依赖项,以启动并运行我们的 BMC 前端网站。 以下是需要安装的软件包:
- Web3Onboard 软件包:Web3-Onboard 是一个与链无关的钱包库,支持在 Kaia 区块链等 EVM 兼容��网络上构建的 dApp 中兼容多个钱包。
- ether.js:Web3-Onboard 提供商可与 ethers.js 和 web3.js 等库一起使用。 在本指南中,我们将使用 ethers.js 进行 Kaia 区块链调用,如获取用户账户、获取余额、签署交易、发送交易、读取和写入智能合约。
重要提示:我们需要编辑 frontend/pages 文件夹中的 2 个文件
- _app.js
- index.js
5.1 设置 Web3Onboard 提供程序和钱包模块
步骤 1 - 安装 @web3-onboard/react
npm install @web3-onboard/react
在_app.js文件中,导入 web3OnboardProvider 和 init 函数。 更多内容稍后讨论。
import { Web3OnboardProvider, init } from '@web3-onboard/react'
步骤 2 - 安装和实例化钱包模块
在这一步中,您可以使用钱包模块在您的 dApp 中添加尽可能多的钱包。 但在本指南中,您将在 web3-Onboard 实现中添加 Coinbase 钱包、WalletConnect、注入式钱包。
npm install @web3-onboard/coinbase // Coinbase Walletnpm install @web3-onboard/walletconnect // WalletConnectnpm install @web3-onboard/injected-wallets // Used to connect to Metamask
在您的 _app.js 文件中,导入并实例化钱包模块,以便与您的 dApp 集成。 请注意,每个模块都有自己独特的选项参数,如备用 JSON RPC URL 或默认链 ID。
import coinbaseWalletModule from "@web3-onboard/coinbase";import walletConnectModule from "@web3-onboard/walletconnect";import injectedModule from "@web3-onboard/injected-wallets";const coinbaseWalletSdk = coinbaseWalletModule();const walletConnect = walletConnectModule();const injected = injectedModule();const modules = [coinbaseWalletSdk, walletConnect, injected];
步骤 3 - 安装醚类
npm install --save ethers
步骤 4 - 使用 Web3OnboardProvider 实例化 Web3Onboard
Web3OnboardProvider 提供了管理全局状态的更好方法。 它简化了在应用程序周围包装提供程序对象的过程,初始化的 Web3Onboard 实例将在所有子组件中可用。
Init 函数初始化 web3-Onboard,使其可供所有钩子使用。
要查看具体操作,请在您的 _app.js文件中粘贴前一段代码下面的代码:
const ETH_MAINNET_RPC_URL = `https://eth-mainnet.g.alchemy.com/v2/demo`;const KAIA_MAINNET_URL = `https://public-en.node.kaia.io`;const KAIROS_TESTNET_URL = `https://public-en-kairos.node.kaia.io`; const web3Onboard = init({ wallets: modules, chains: [ { id: "0x1", // chain ID must be in hexadecimal token: "ETH", namespace: "evm", label: "Ethereum Mainnet", rpcUrl: ETH_MAINNET_RPC_URL }, { id: "0x2019", // chain ID must be in hexadecimal token: "KAIA", namespace: "evm", label: "Kaia Mainnet", rpcUrl: KAIA_MAINNET_URL }, { id: "0x3e9", // chain ID must be in hexadecimel token: "KAIA", namespace: "evm", label: "Kairos Testnet", rpcUrl: KAIROS_TESTNET_URL }, // you can add as much supported chains as possible ], appMetadata: { name: "Kaia-web3-onboard-App", // change to your dApp name icon: "paste your icon url" logo: "paste your logo url" description: "Web3Onboard-Kaia", recommendedInjectedWallets: [ { name: "Coinbase", url: "https://wallet.coinbase.com/" }, { name: "MetaMask", url: "https://metamask.io" } ] } })export default function App({ Component, pageProps }) { return ( <Web3OnboardProvider web3Onboard={web3Onboard}> <Component {...pageProps} /> </Web3OnboardProvider> )}
设置好 _app.js 文件后,我们就可以在所有子组件中使用应用程序的提供程序对象和 web3Onboard 实例了。接下来,我们要在 index.js 文件中构建前端逻辑
- Index.js
该页面处理钱包连接和向 BMC 智能合约发送咖啡,由合约部署者撤回。
import React, { useEffect, useState } from 'react';import { useConnectWallet } from '@web3-onboard/react'import abi from "../utils/BuyMeACoffee.json"import { ethers } from "ethers";export default function Home() { const [name, setName] = useState(""); const [message, setMessage] = useState(""); const [coffee, setGetCoffee] = useState([]); const [coffeeContract, setCoffeeContract] = useState(); const [{ wallet, connecting }, connect, disconnect] = useConnectWallet(); const contractAddress = "Paste BMC contract address"; const contractABI = abi.abi; const getCoffee = async () => { try { console.log("getting coffee Id") const coffeeId = await coffeeContract.coffeeId(); console.log(coffeeId.toString()); const getCoffee = await coffeeContract.getAllCoffee(coffeeId.toString()); setGetCoffee(getCoffee); } catch (error) { console.log(error); } }; useEffect(() => { let ethersProvider if (wallet) { ethersProvider = new ethers.BrowserProvider(wallet.provider, 'any') } if (ethersProvider) { try { const getCoffeContract = async () => { const signer = await ethersProvider.getSigner(); const buyMeACoffee = new ethers.Contract(contractAddress, contractABI, signer); setCoffeeContract(buyMeACoffee) } getCoffeContract(); } catch (error) { console.log(error); } } }, [wallet]) useEffect(() => { const onNewCoffee = (from, timestamp, name, message) => { console.log("Coffee received: ", from, timestamp, name, message); setGetCoffee((prevState) => [ ...prevState, { address: from, timestamp: new Date(timestamp * 1000), message, name } ]); }; if (wallet && coffeeContract) { getCoffee() coffeeContract.on("NewCoffee", onNewCoffee); } else { console.log("provider not initialized yet"); } }, [wallet, coffeeContract]) const onNameChange = (event) => { setName(event.target.value); } const onMessageChange = (event) => { setMessage(event.target.value); } const buyCoffee = async (e) => { e.preventDefault(); try { if (!wallet && !coffeeContract) { console.log("provider not initialized yet"); return; } console.log("buying coffee..") const coffeeTxn = await coffeeContract.buyCoffee(name, message, {value: ethers.parseEther("1.0")}); const coffeTx = await coffeeTxn.wait(); console.log("mined ", coffeTx.hash); console.log("coffee sent!"); // clear target value fields e.target.inputName.value = ""; e.target.inputAmount.value = ""; // Clear the form fields. setName(""); setMessage(""); // set all coffees await getCoffee(); } catch (error) { console.log(error); } }; return ( <main className='coffeeMain max-w-8xl min-h-[100vh] p-10 bg-black mt-0 shadow-2xl m-auto flex flex-col justify-center items-center bg-[url("https://static.vecteezy.com/system/resources/previews/001/330/185/original/coffee-cup-on-hand-drawn-doodle-background-free-vector.jpg")]'> <div className='coffeContent'> <div className='compOne flex flex-col justify-center items-center'> <h1 className='text-white text-center text-2xl'>Buy me a coffee</h1> { wallet ? ( <div> <form onSubmit={buyCoffee} className="flex flex-col justify-center items-center mt-4"> <input type="text" name='inputName' placeholder="Enter your name" className="p-5 rounded-md bg-black text-white border-solid border-2 border-white outline-0" onChange={onNameChange} /> <input type="text" name='inputAmount' placeholder="Send your message" className="p-5 rounded-md bg-black text-white border-solid border-2 border-white mt-3 outline-0" onChange={onMessageChange}/> <input type="submit" value="Send Coffee" className="p-3 mt-4 rounded-2xl bg-white text-black cursor-pointer"/> </form> </div> ) : ( <button className='text-black bg-white p-3 rounded-lg mt-3 cursor-pointer' disabled={connecting} onClick={() => (wallet ? disconnect(wallet) : connect())}> {connecting ? 'Connecting' : wallet ? 'Disconnect' : 'Connect'} </button>) } </div> <div className="comp2 flex flex-col justify-normal items-center py-3 px-10"> {wallet && ( <div className="flex mt-5 mb-3"> <h1 className="text-white text-2xl">Coffee Transaction</h1> </div> ) } <div className="coffeeTransaction w-[1300px] flex flex-row gap-5 overflow-x-scroll"> {/* grid gap-4 grid-cols-2 */} {wallet && (coffee.map((coff, id) => { return ( <div key={id} className=" border-solid border-2 border-white p-5 w-auto rounded-2xl mb-3"> <p className=" text-white font-bold">"{coff.message}"</p> <p className=" text-white">From: {coff.name} at {`${new Date(coff.timestamp.toString() * 1000)}`}</p> </div> ) }))} </div> </div> </div> </main> )}
上述代码的重要说明
-
获取合约 ABI: 合约 ABI 向前端代码指定了智能合约上可调用的函数。 要获取合同 abi,请导航至 smart-contract 文件夹,并按照以下路径复制该文件中的文本 artifacts/contracts/BuyMeACoffee.sol/BuyMeACoffee.json. 接下来,我们在 frontend/src 文件夹中创建了一个 utils 文件夹。 然后将其粘贴到新创建的名为 BuyMeACoffee.json 文件中。
-
将 BMC 合同地址更改为 BMC 部署的合同地址。
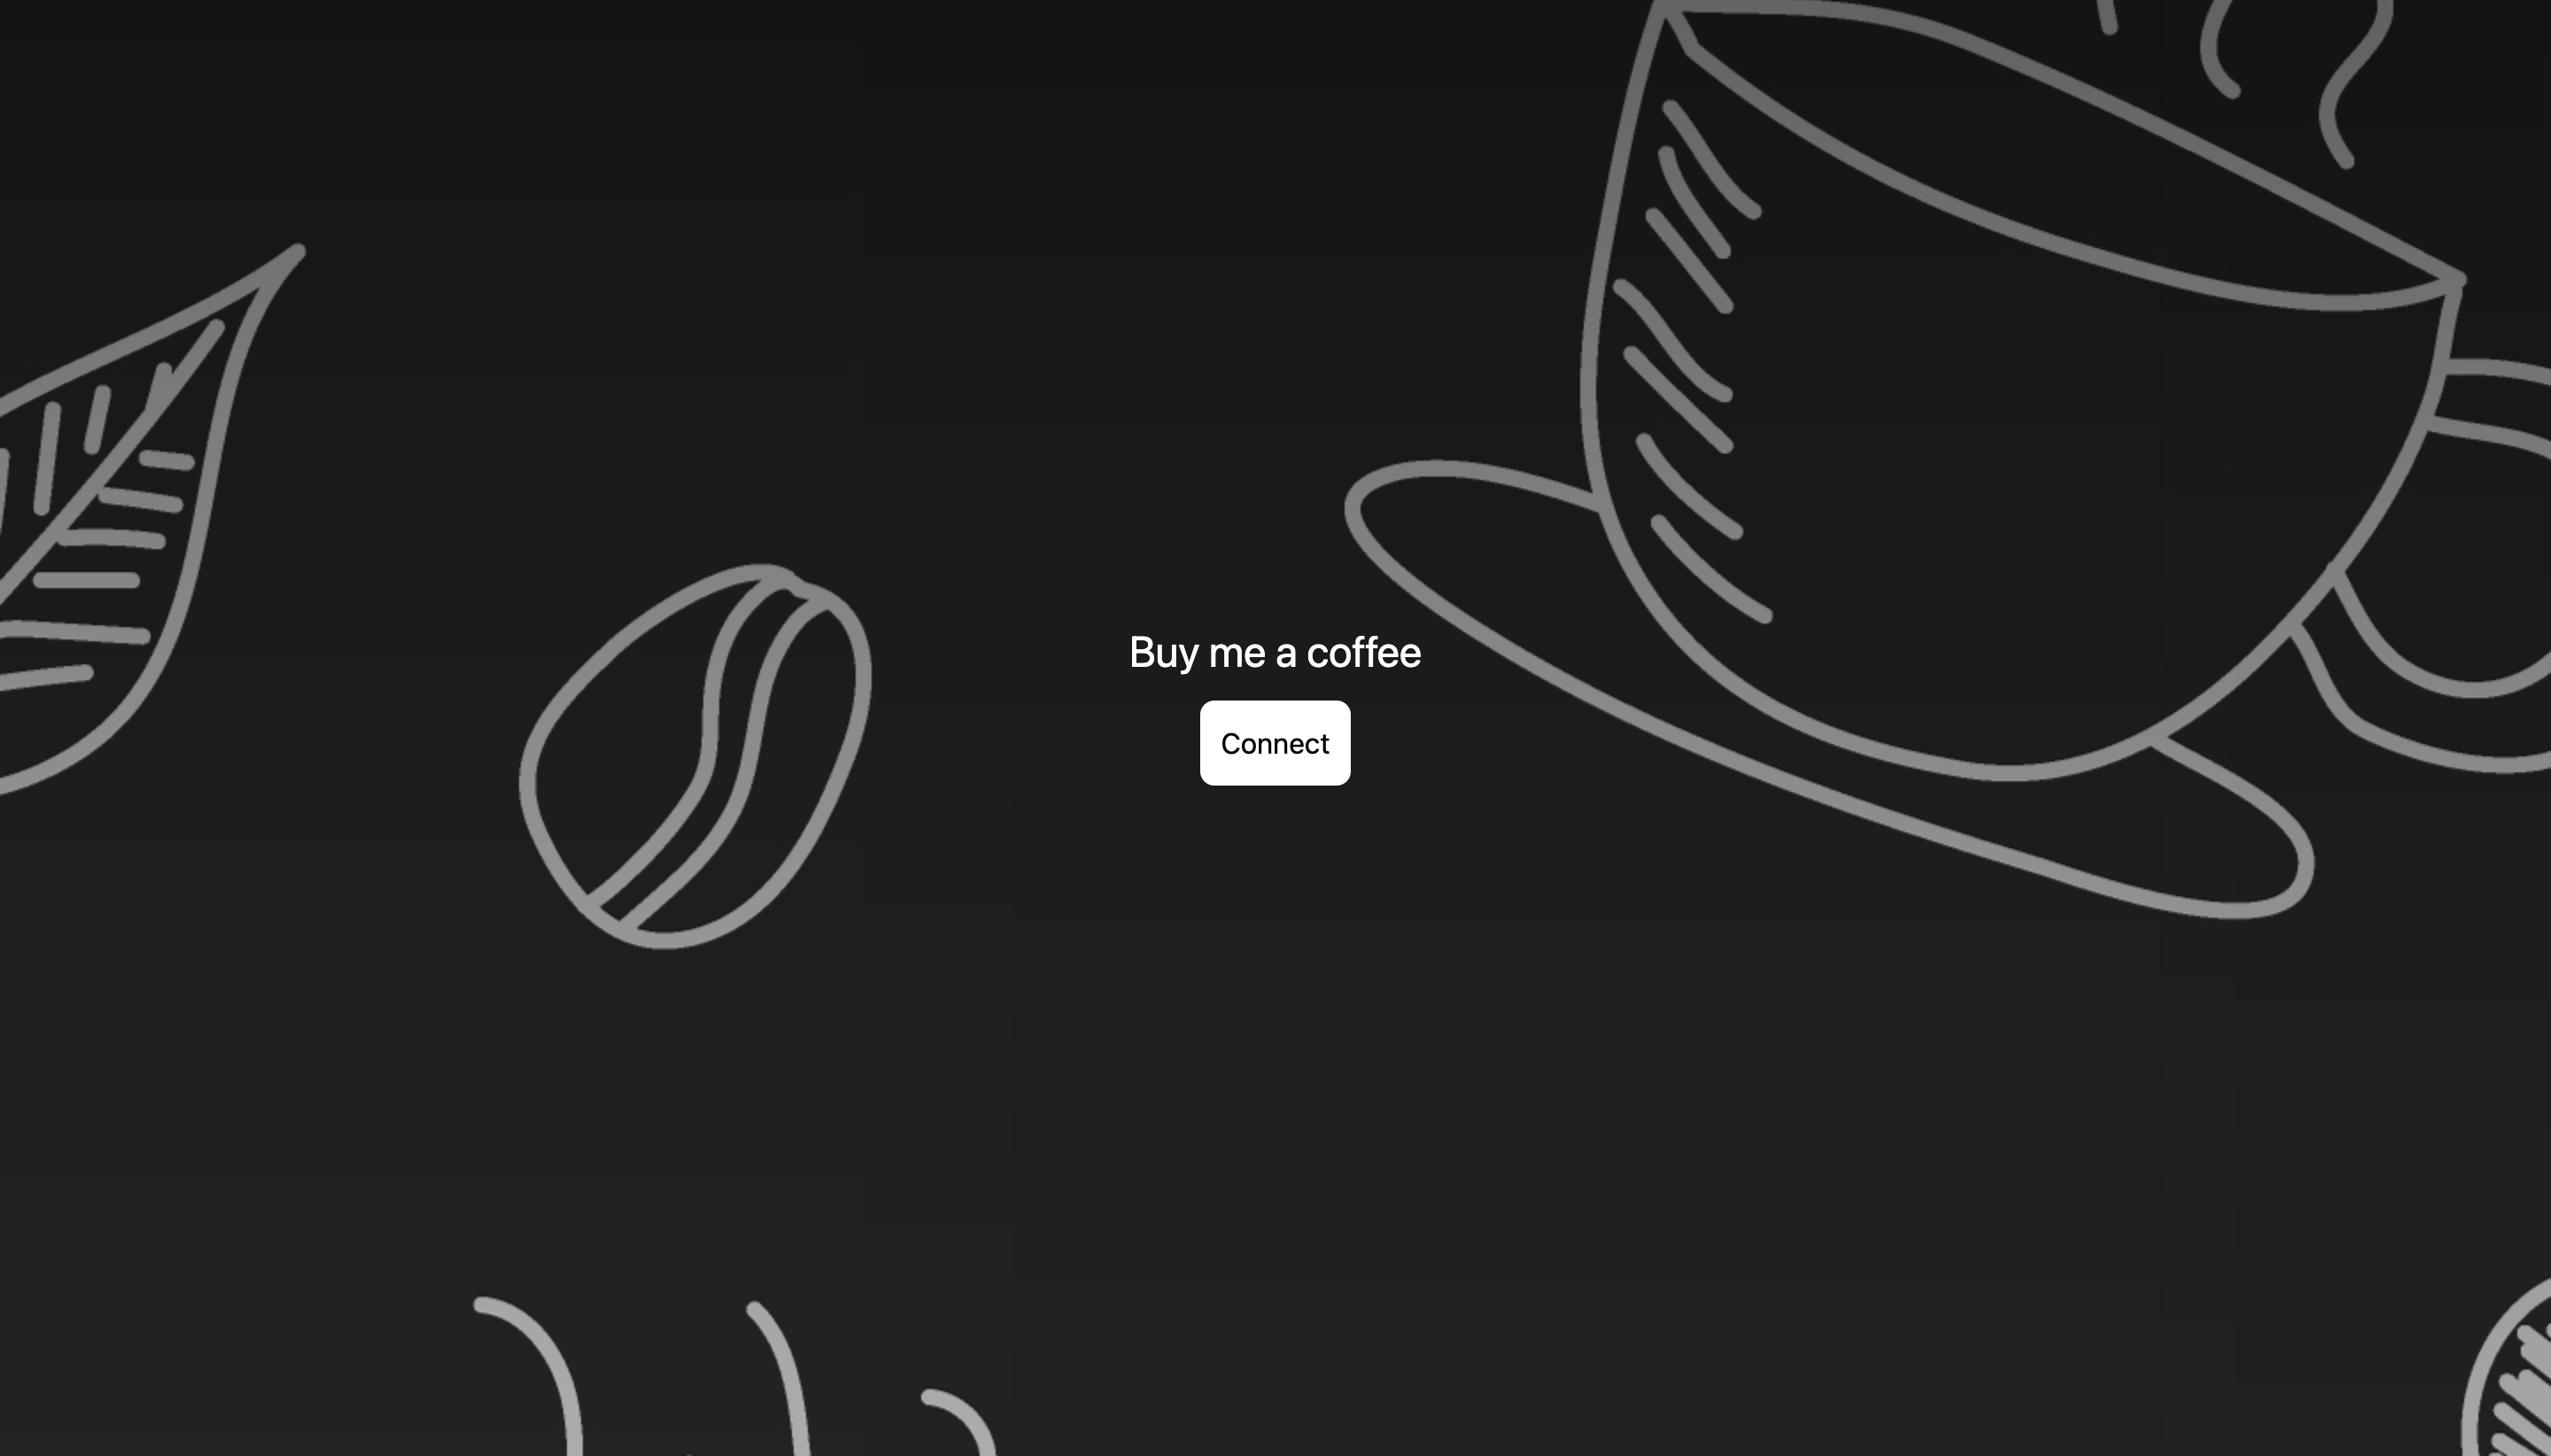
现在,如果应用程序尚未运行,你可以进入 shell,使用 npm run dev 启动本地服务器,测试你的更改。 网站应在几秒钟内加载完毕,用户界面应如下所示:
连接钱包页面:
发送咖啡的前端网站
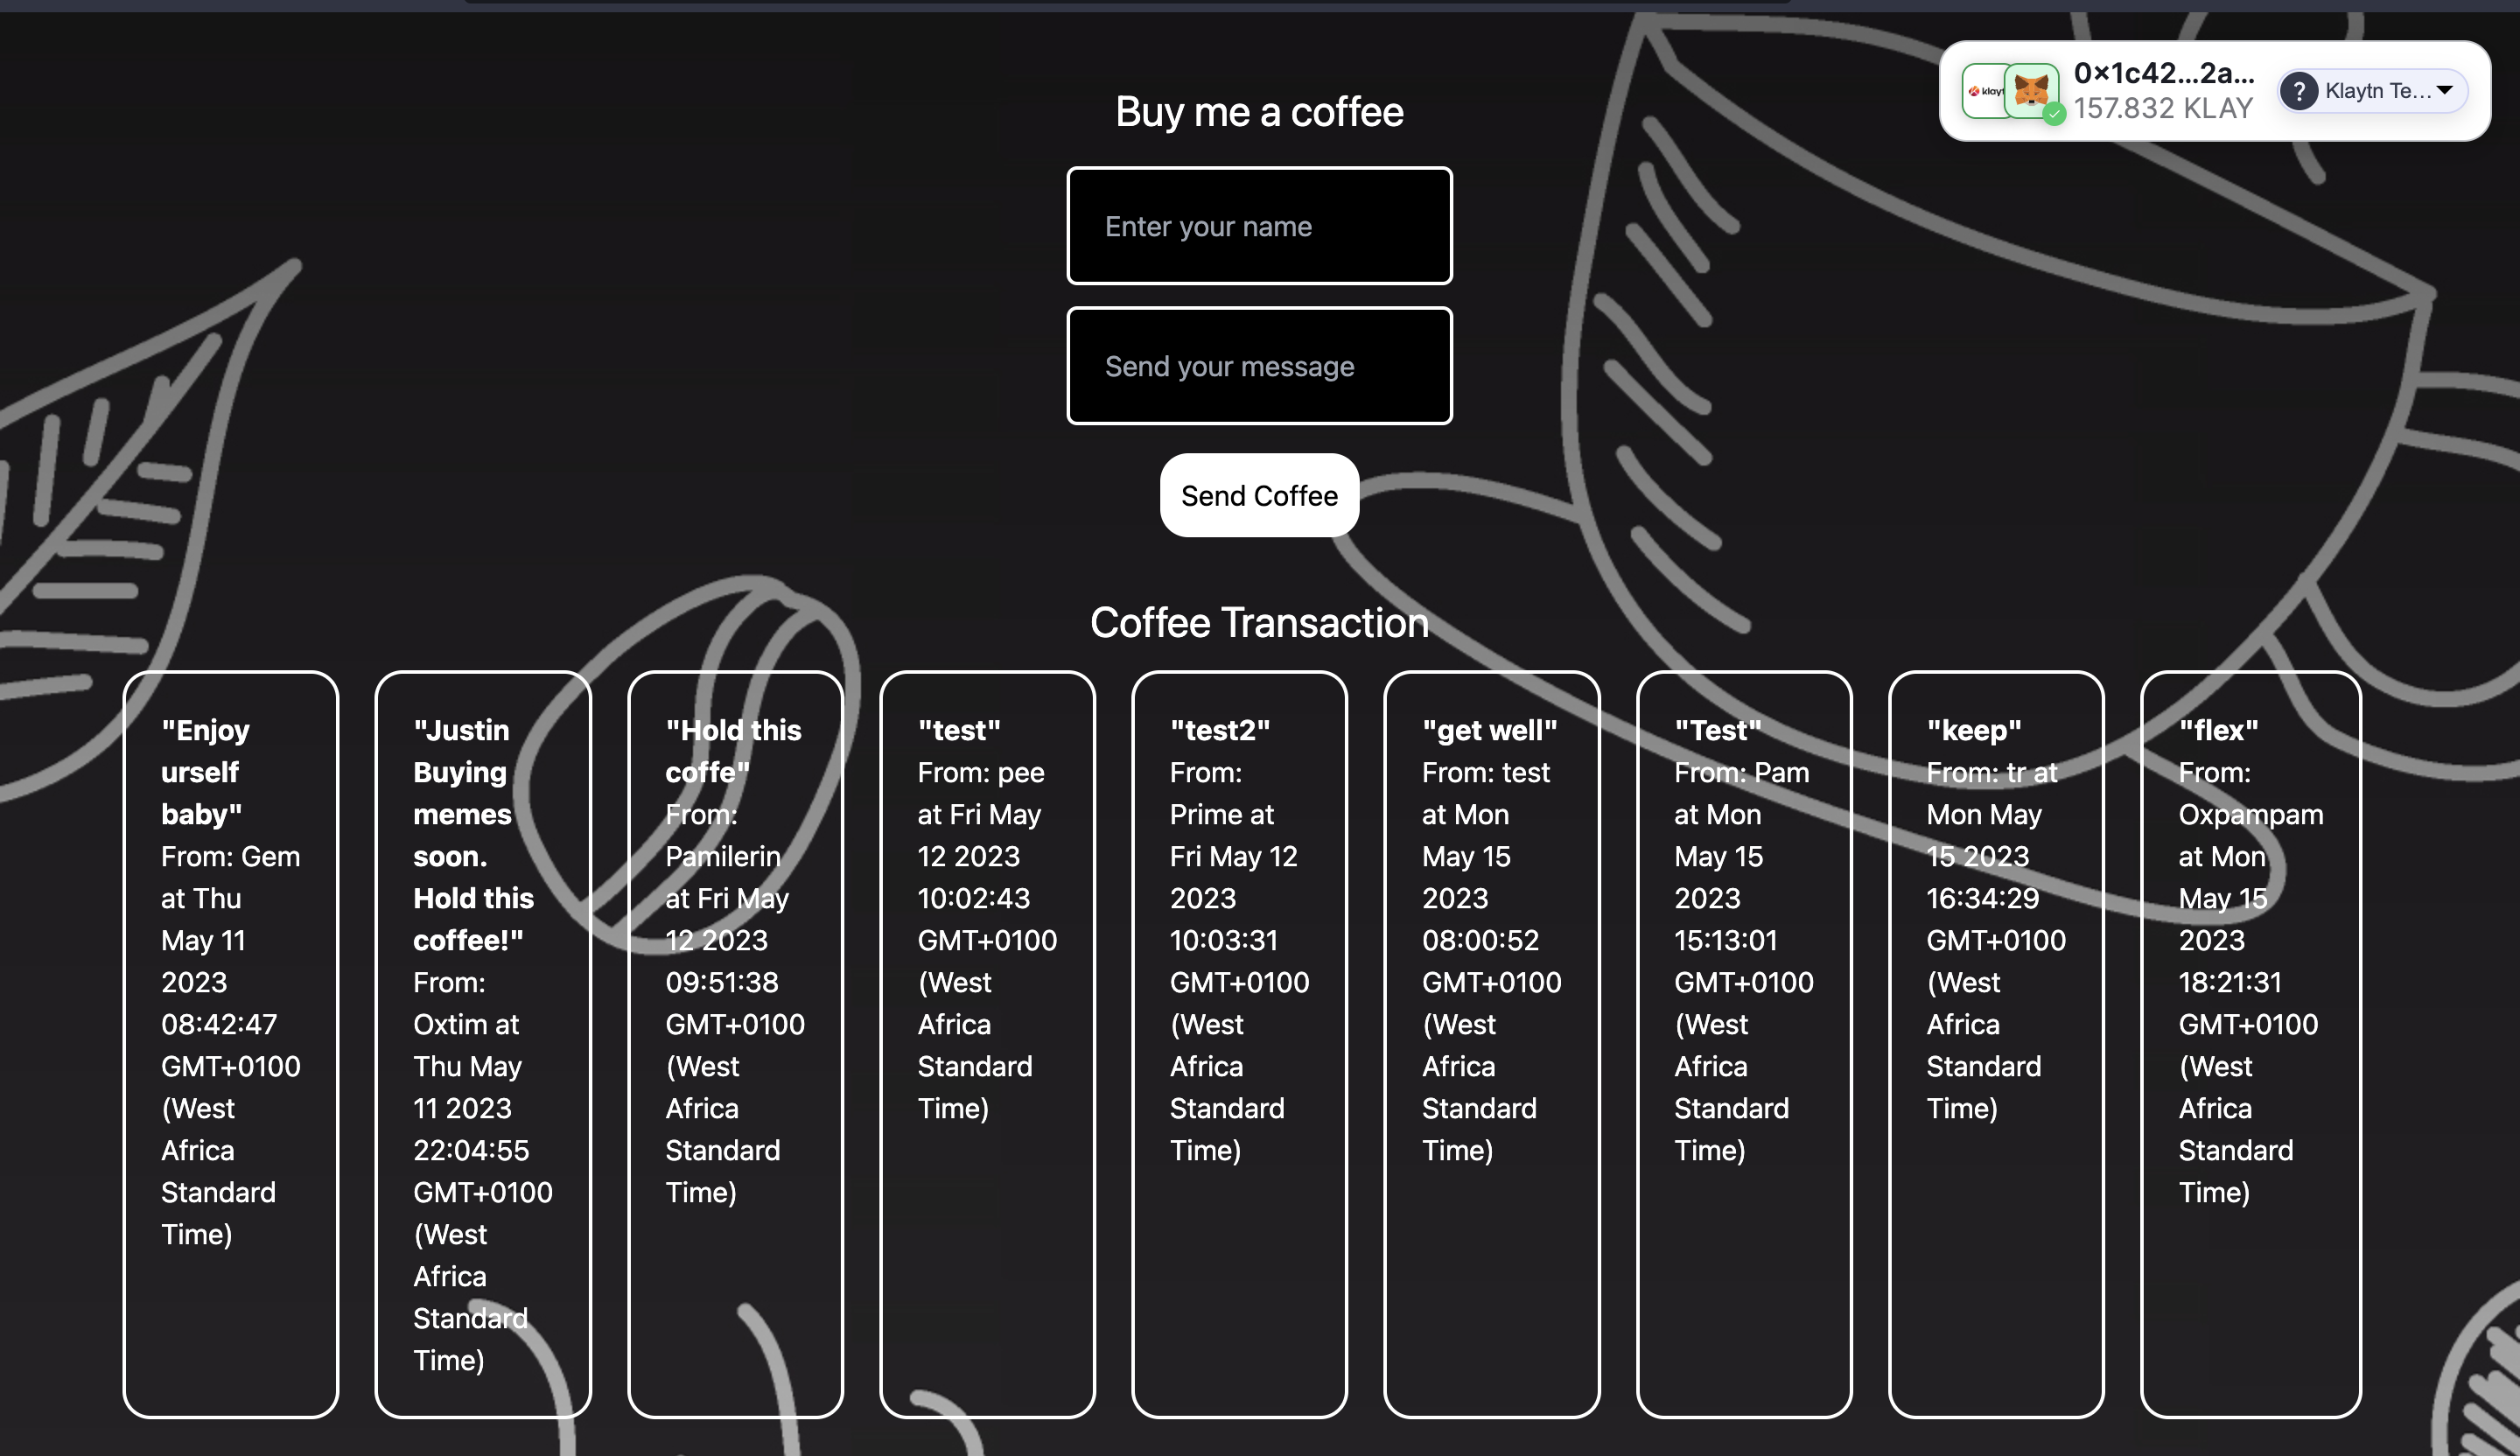
现在,让我们探索一下我们的网站和代码。
从上面的截图中您可以看到,当您第一次访问 dApp 时,它会要求您连接一个钱包。 接下来会弹出 Web3Onboard 实例中已初始化的可用钱包列表。
然后,选择您所需的钱包;如上图所示,我们选择了 MetaMask。 连接钱包后,您会在网站右上方看到一个用户界面组件,其中包含所连接钱包的详细信息。 您还可以在页面上看到咖啡交易表单,其中包含发送者的姓名和信息,以及其他访客之前向智能合约支付的咖啡。
6. 使用 Fleek 在 IPFS 上部署前端代码
Fleek 是一种基础设施,使我们能够在 IPFS 上构建现代网站和应用程序。 有了 fleek,您的网站或应用程序将变得无权限、无信任、无审查,并且不受集中式看门人的限制。 在本教程中,我们将把 Next js 应用程序部署到 Fleek,而不是 Vercel 等传统平台。 是的,你说对了! 我们正在一个分散托管平台上部署一个分散应用程序!
以下是将 BMC dApp 部署到 Fleek 的步骤:
-
确保在前端代码中确认这些配置:
a. 打开 package.json,添加以下脚本:
"scripts": {"dev": "next","build": "next build","start": "next start","export": "next export"}b. 将下面的代码粘贴到根目录下的 next.config.js 文件中:
module.exports = {exportTrailingSlash: true,};
如需了解更多信息,请访问本 指南
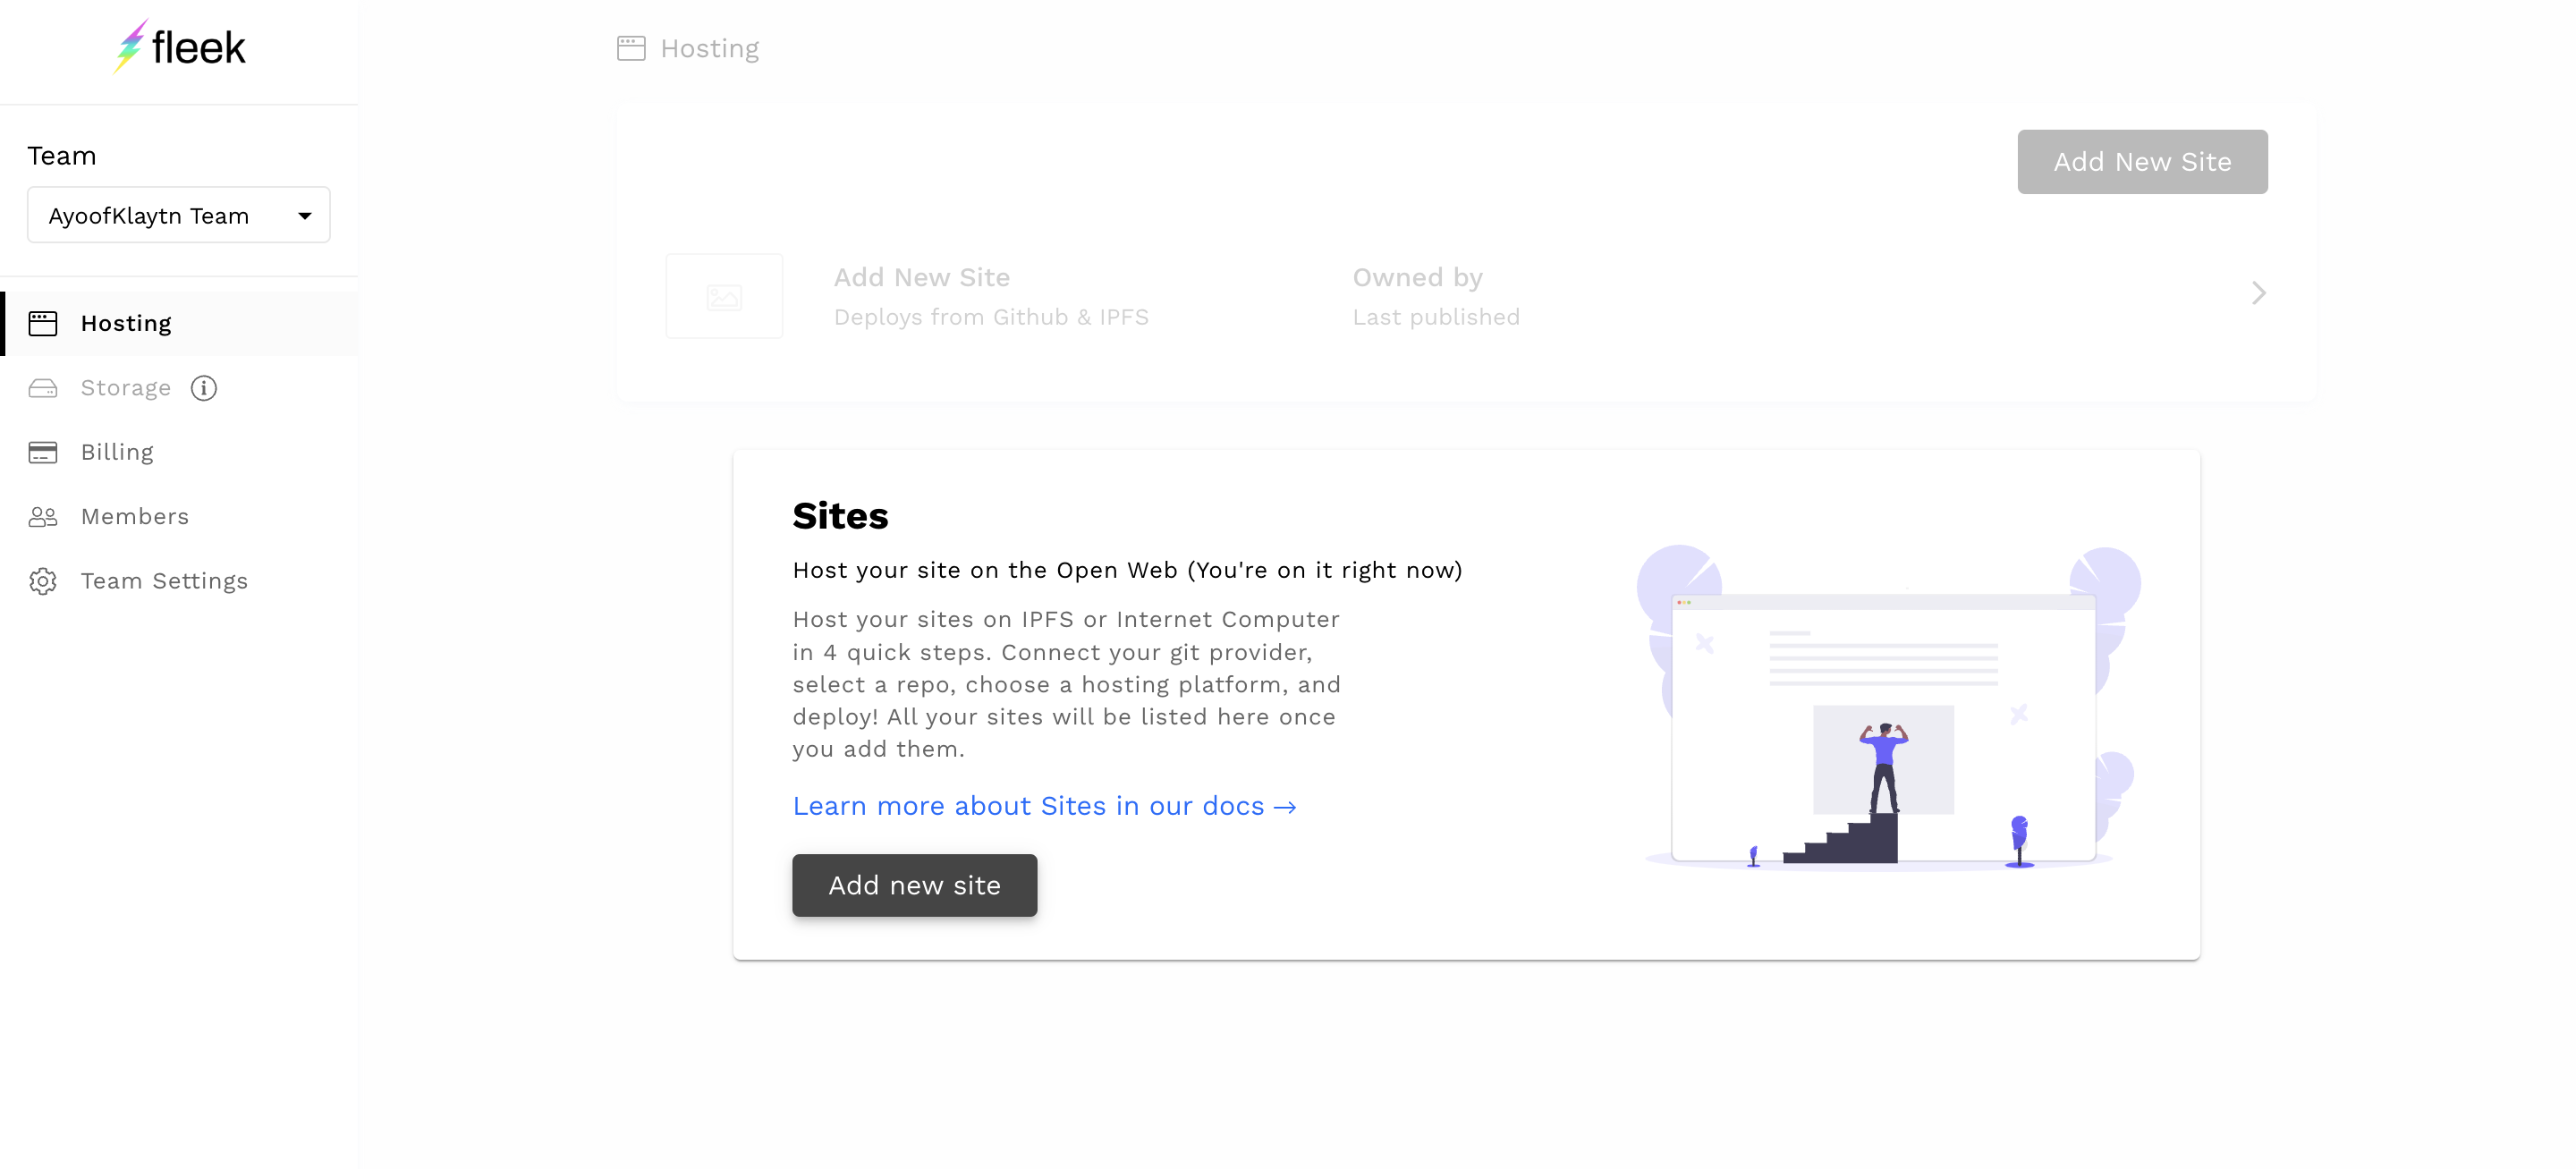
- 导航至 Fleek 上的仪表板,点击 ** 添加新网站**
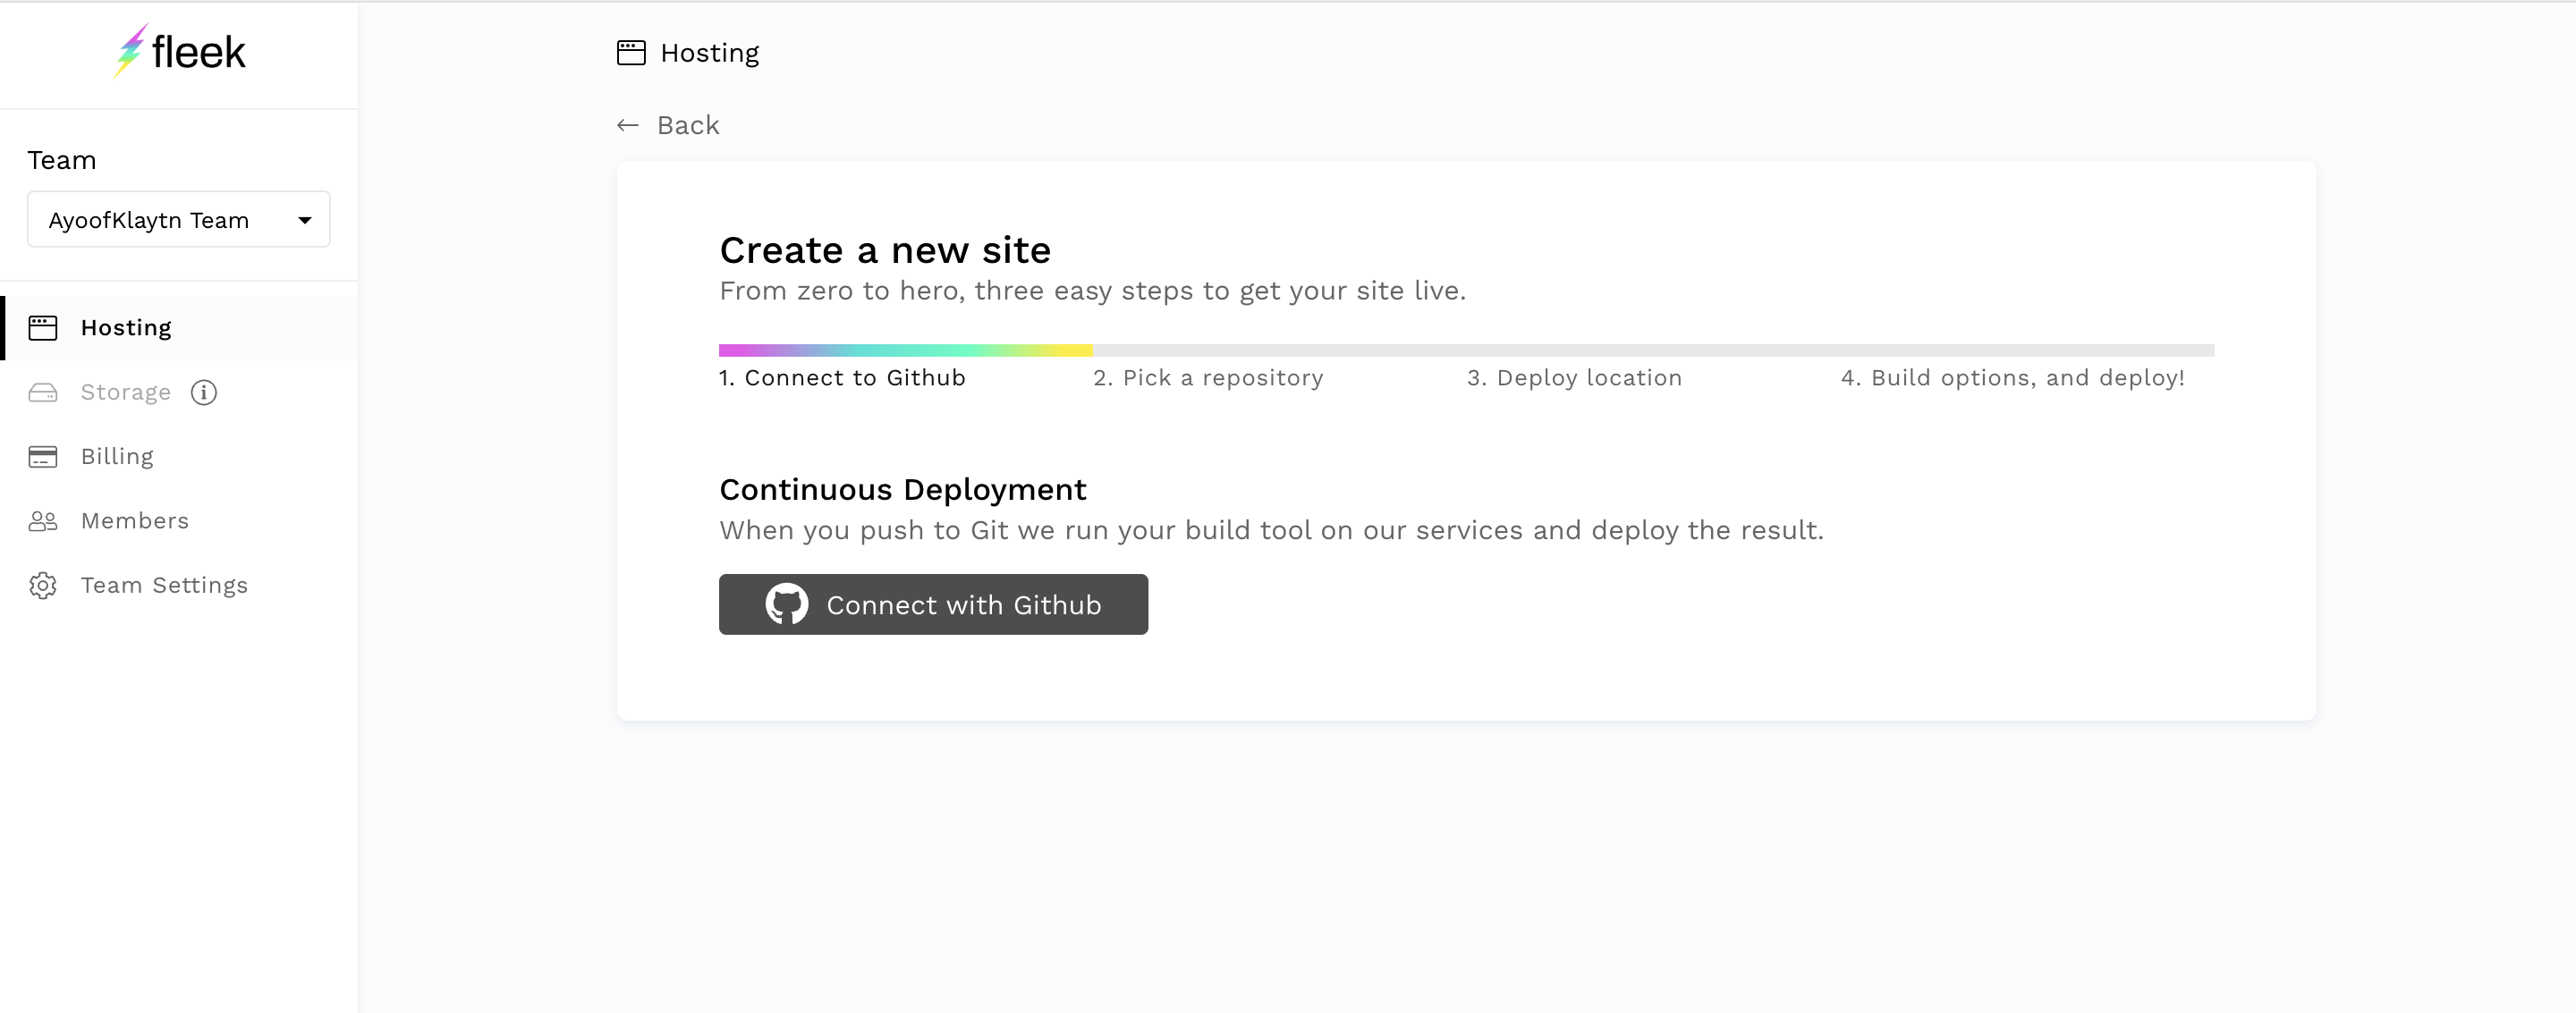
- 连接 GitHub 账户以访问您的软件源。
-
选择要部署的版本库。
-
在下一页,在 "基本构建设置 "选项卡中选择 "下一个 Js 框架",Fleek 将自动填充其他字段。
-
点击部署网站
-
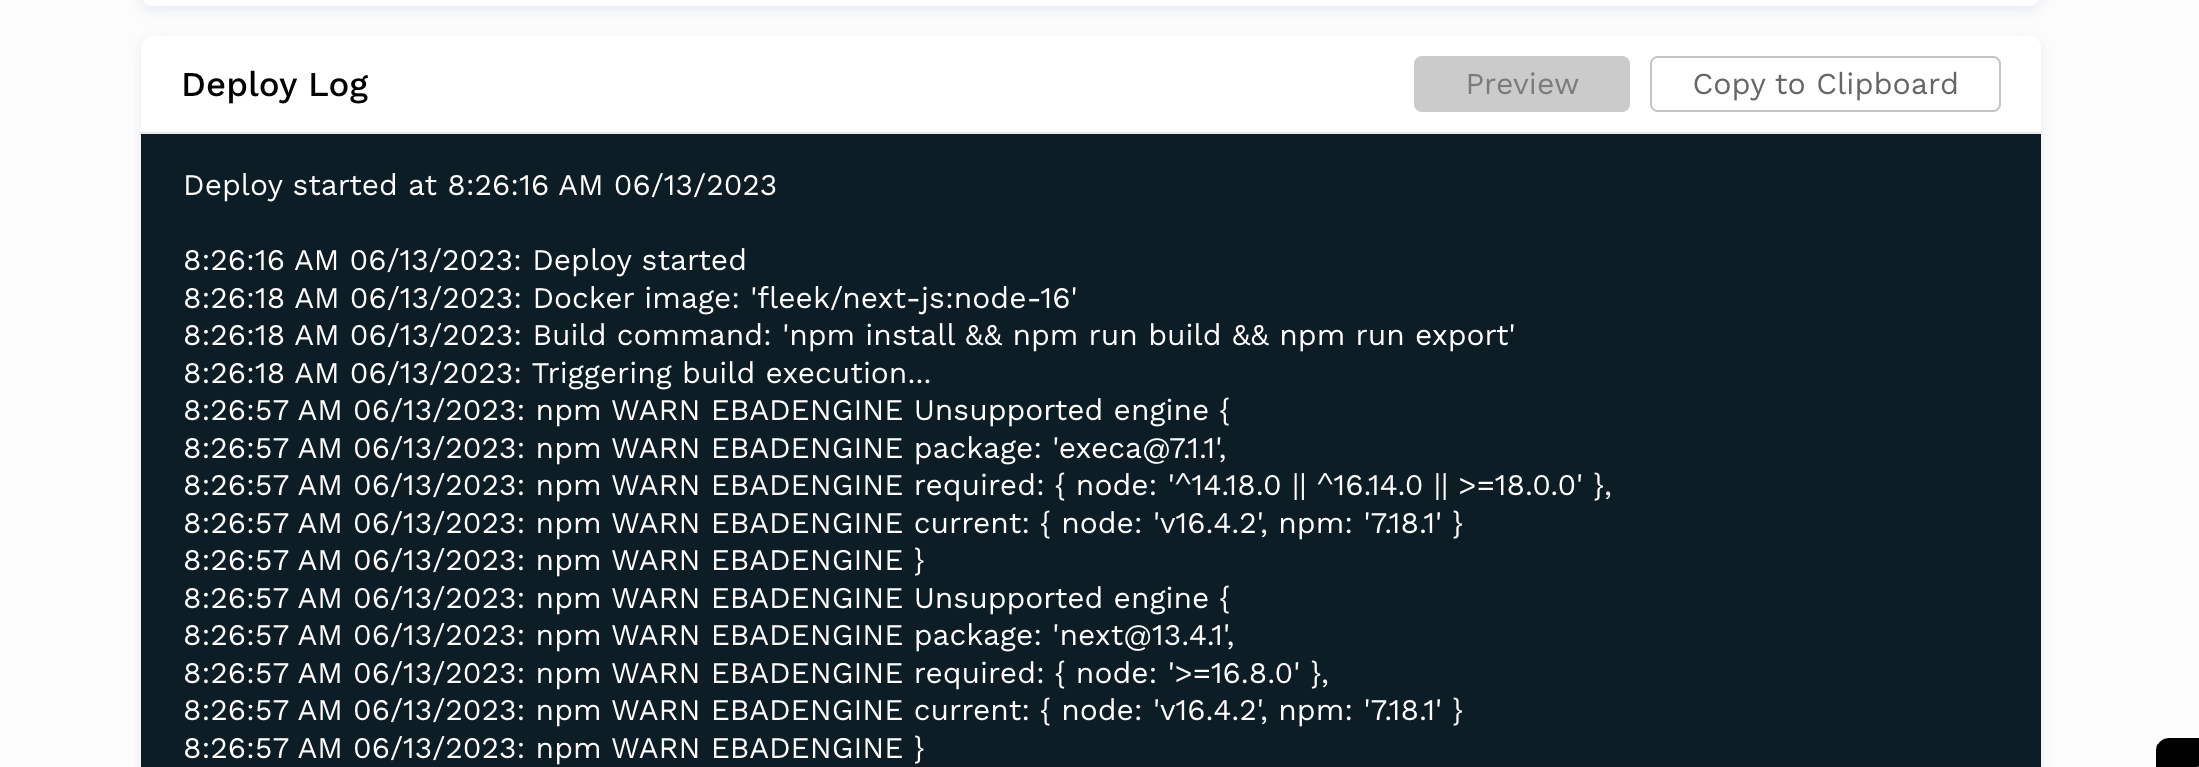
如果出现 npm WARN EBADENGINE 不支持的引擎,如下图所示:
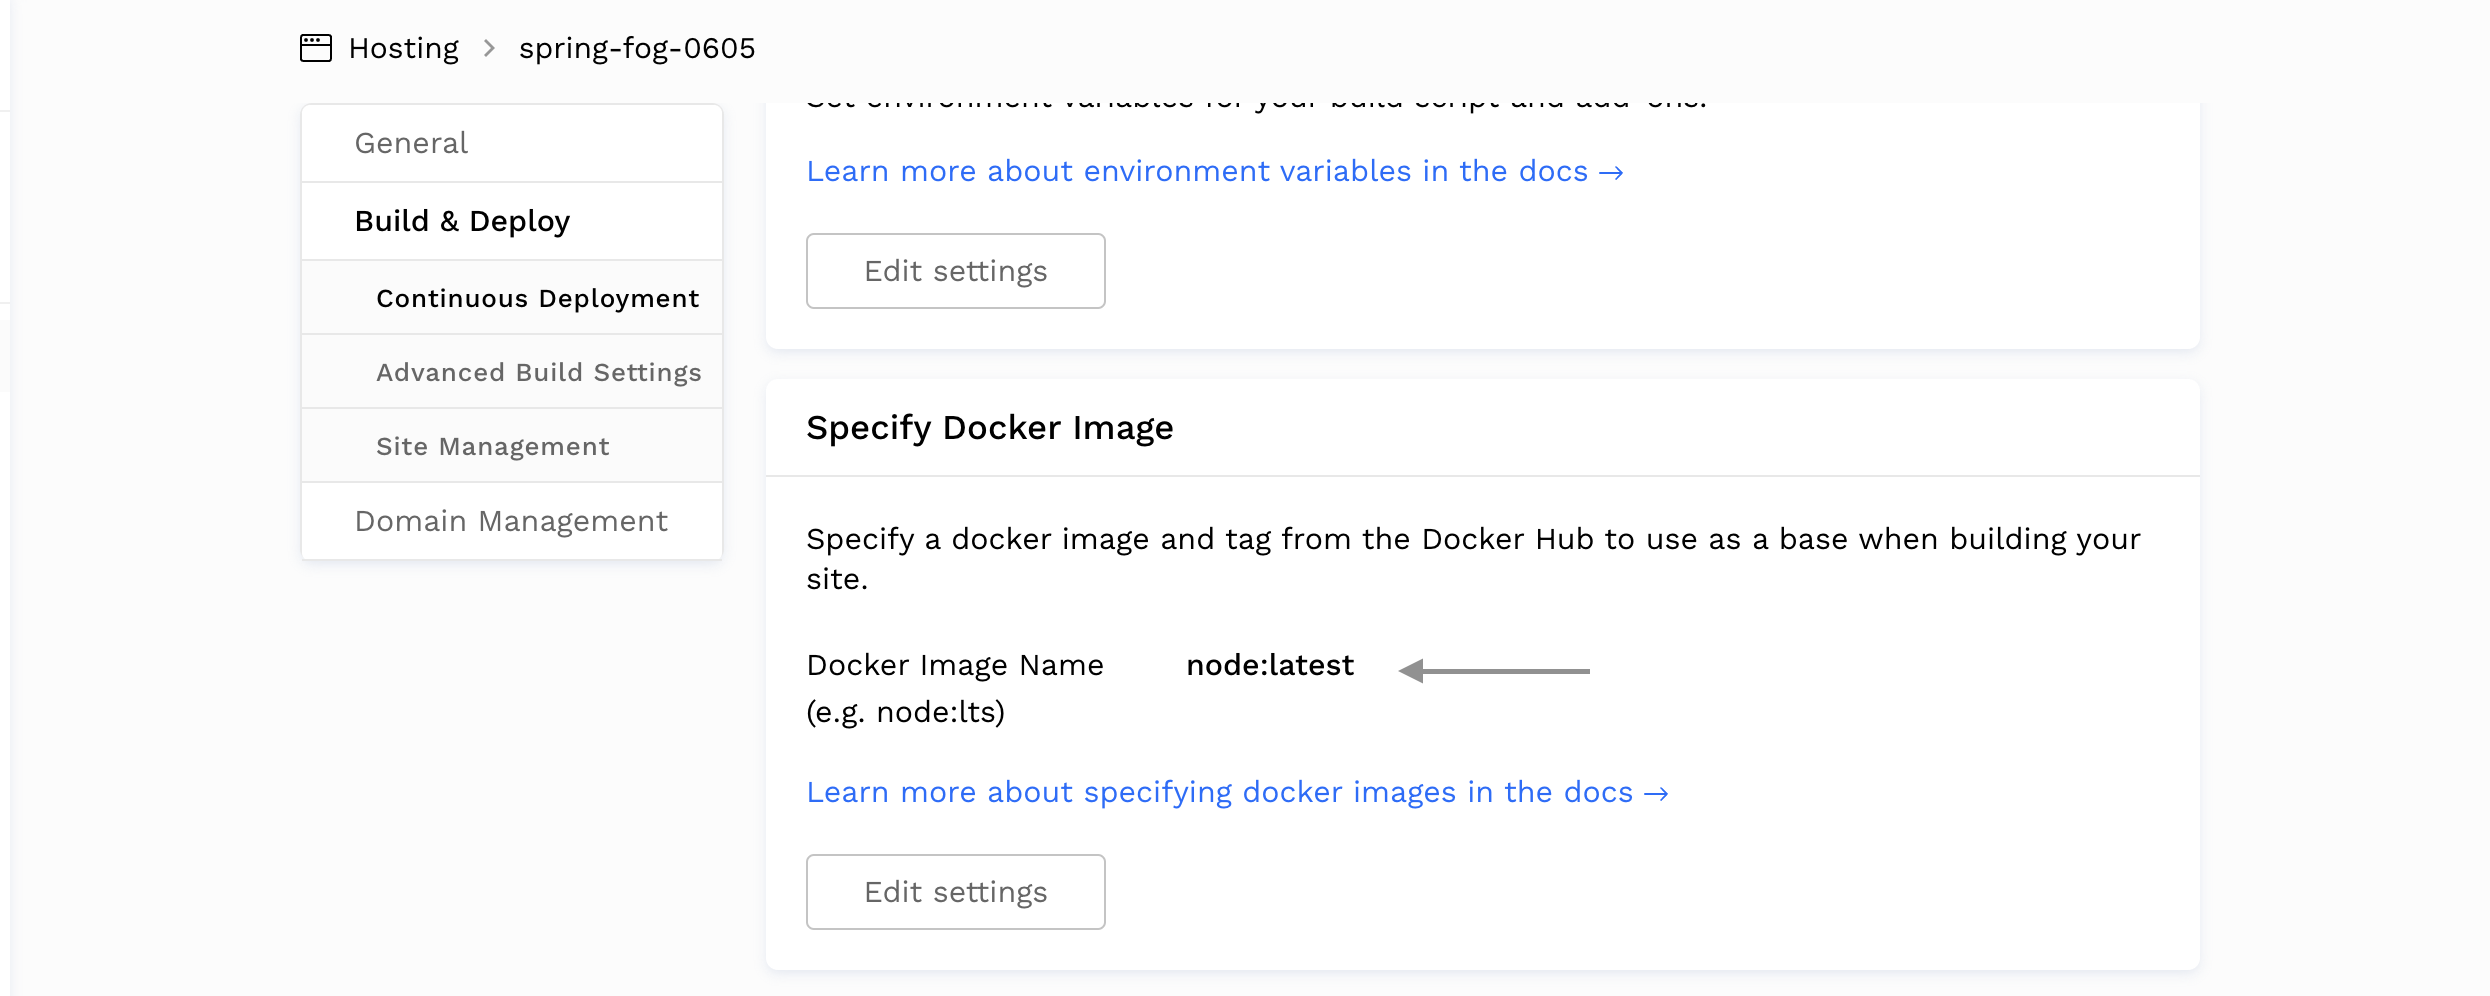
前往部署选项卡中的部署设置,将Docker 镜像名称更改为节点:最新,如下图所示:
- 现在,您的网站应能轻松构建并部署到 IPFS。
- 点击生成的链接查看您的网站。

瞧 我们在 IPFS 上部署并托管了 BMC dApp。
7. 结论
如果您已经走到这一步,那么恭喜您! 在本教程中,您将学会如何使用 Solidity、NextJs、Web3Onboard 和 Fleek 创建一个全栈的 Buy Me A Coffee dApp。 这是在去中心化平台上创建去中心化应用程序的第一步。
在此基础上,您还可以在前台探索一些其他选项,比如除了静态发送 1 KAIA 咖啡外,还可以添加一个新的输入字段,用于输入要发送的咖啡量。 您可以访问 github 上的完整代码库,也可以使用 link 测试网站。
如果您想了解更多信息,请访问 Kaia 文档、Web3Onboard 文档 和 Fleek 文档。 如果您有任何问题,请访问 Kaia 论坛。