This page uses machine translation from English, which may contain errors or unclear language. For the most accurate information, please see the original English version. Some content may be in the original English due to frequent updates. Help us improve this page's translation by joining our effort on Crowdin. (Crowdin translation page, Contributing guide)
Bắt đầu nhanh
Điều kiện tiên quyết
Trước khi bắt đầu, hãy đảm bảo bạn có:
- Unity Hub được cài đặt trên máy tính của bạn - đây là nơi chúng ta sẽ xây dựng giao diện dApp của mình
- Kiến thức cơ bản về C# và JavaScript - không có gì quá cầu kỳ, chỉ là những kiến thức cơ bản
- Tài khoản LINE Developer - bạn có thể dễ dàng tạo một tài khoản bằng email của mình
- Kiểm tra Kaia từ Vòi nước Kaia
- Nhận được ID máy khách Mini Dapp SDK từ nhóm Dapp Portal.
- Bạn cần quen thuộc với các khái niệm về Web3 - nếu hiểu về ví và mã thông báo thì bạn đã sẵn sàng.
Thiết lập môi trường Unity của bạn
Hãy thiết lập môi trường phát triển của bạn. Chúng ta sẽ bắt đầu bằng cách thiết lập Unity.
Bước 1: Cài đặt và xác minh phiên bản Unity
Để bắt đầu, hãy đảm bảo rằng tất cả chúng ta đều sử dụng cùng một phiên bản Unity để tránh mọi vấn đề về khả năng tương thích:
- Cài đặt Unity Hub nếu bạn chưa cài đặt.
- Cài đặt Unity Editor phiên bản 2022.3.50f1 cụ thể.
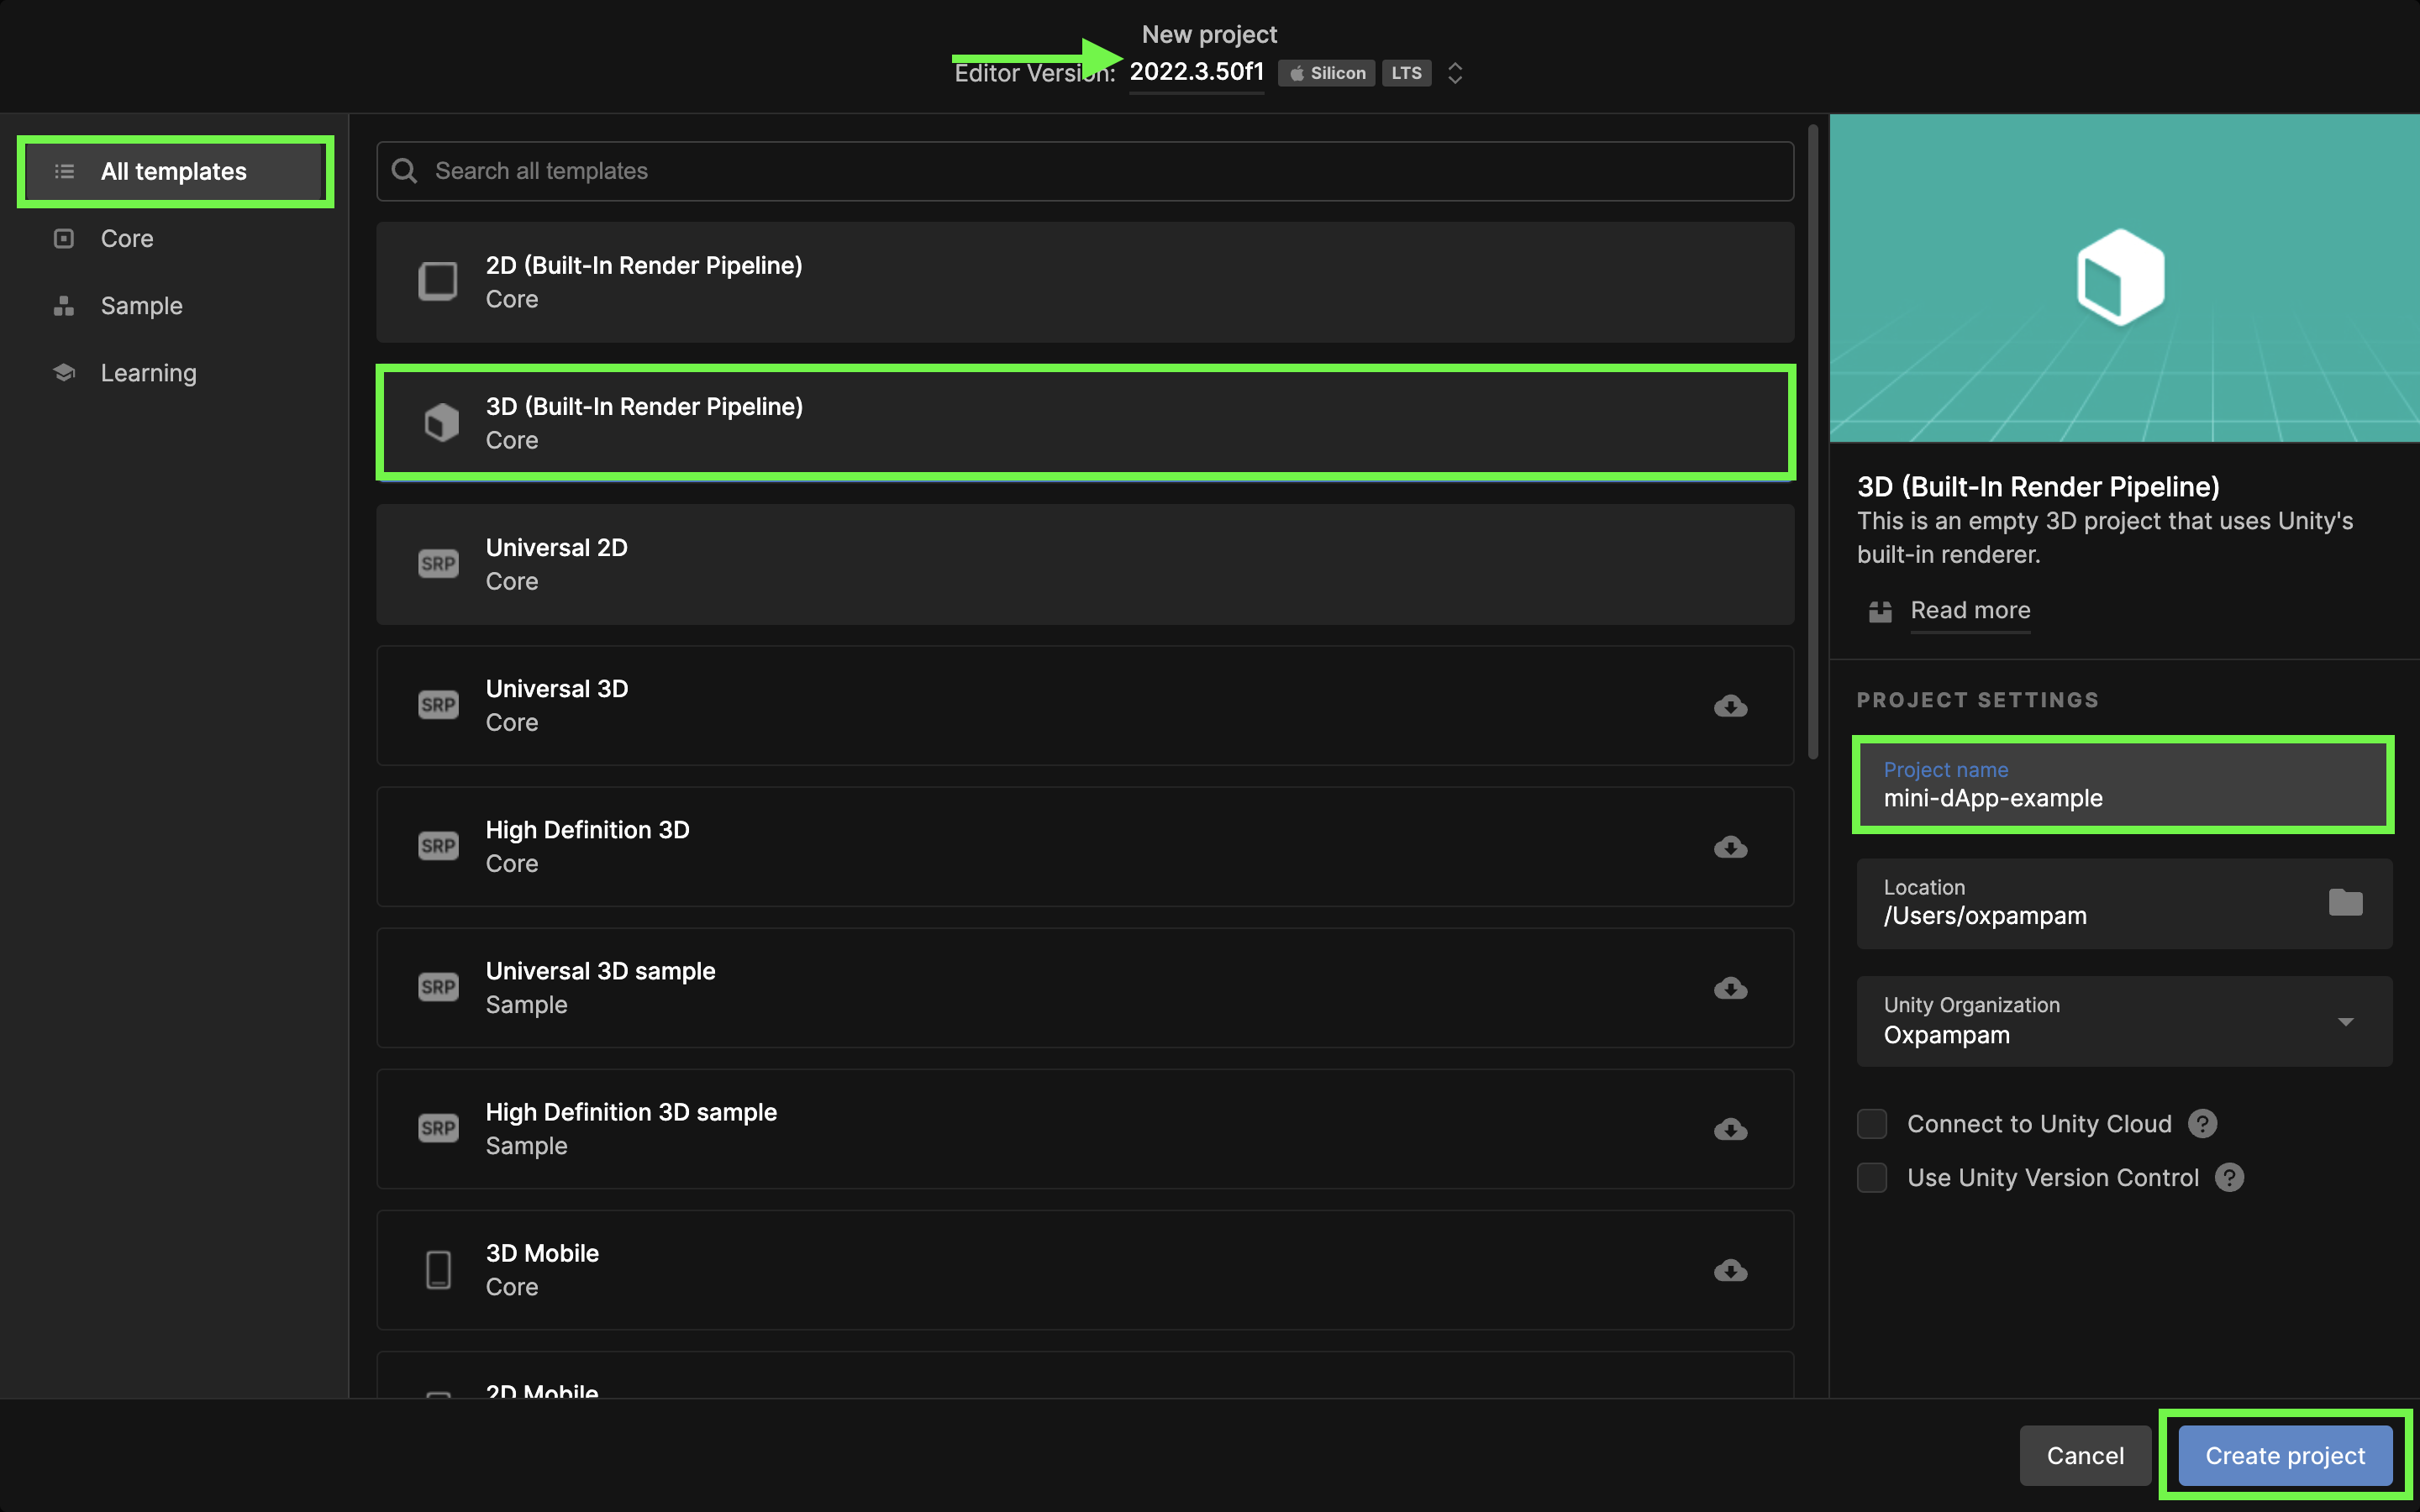
Bước 2: Tạo dự án Unity mới của bạn
- Mở Unity Hub và đi tới tab Dự án.
- Nhấp vào nút "Dự án mới" hấp dẫn ở góc trên bên phải.
- Trong phần "Tất cả mẫu", hãy chọn mẫu 3D (Đường ống kết xuất tích hợp).
- Đặt tên có ý nghĩa cho dự án của bạn (ví dụ: mini-dApp-example).
- Chọn vị trí thuận tiện cho các tập tin dự án của bạn.
- Nhấp vào Tạo dự án.