Connect Remix to Kaia
Overview
Remix is a browser-based IDE (Integrated Development Environment) for developing Solidity contracts. In this guide, you will learn how to:
- Create and Upload a pre-built smart contract on Remix IDE.
- Compile the smart contract.
- Connect to Kaia Plugin for Remix IDE
- Set up deployment environment
- Import account
- Connect Kaia to Remix using Kaia Wallet
- Connect Kaia to Remix using MetaMask
- Deploy the smart contract.
This will cover connecting Remix with Kaia. If you want to know more about how to use Remix, please refer to Remix docs or Remix IDE.
Creating a file on Remix
Để bắt đầu xây dựng hợp đồng thông minh, hãy nhấp vào biểu tượng Tạo tệp mới trong thư mục hợp đồng trong tab Trình khám phá tệp và đặt tên là KaiaGreeter.sol
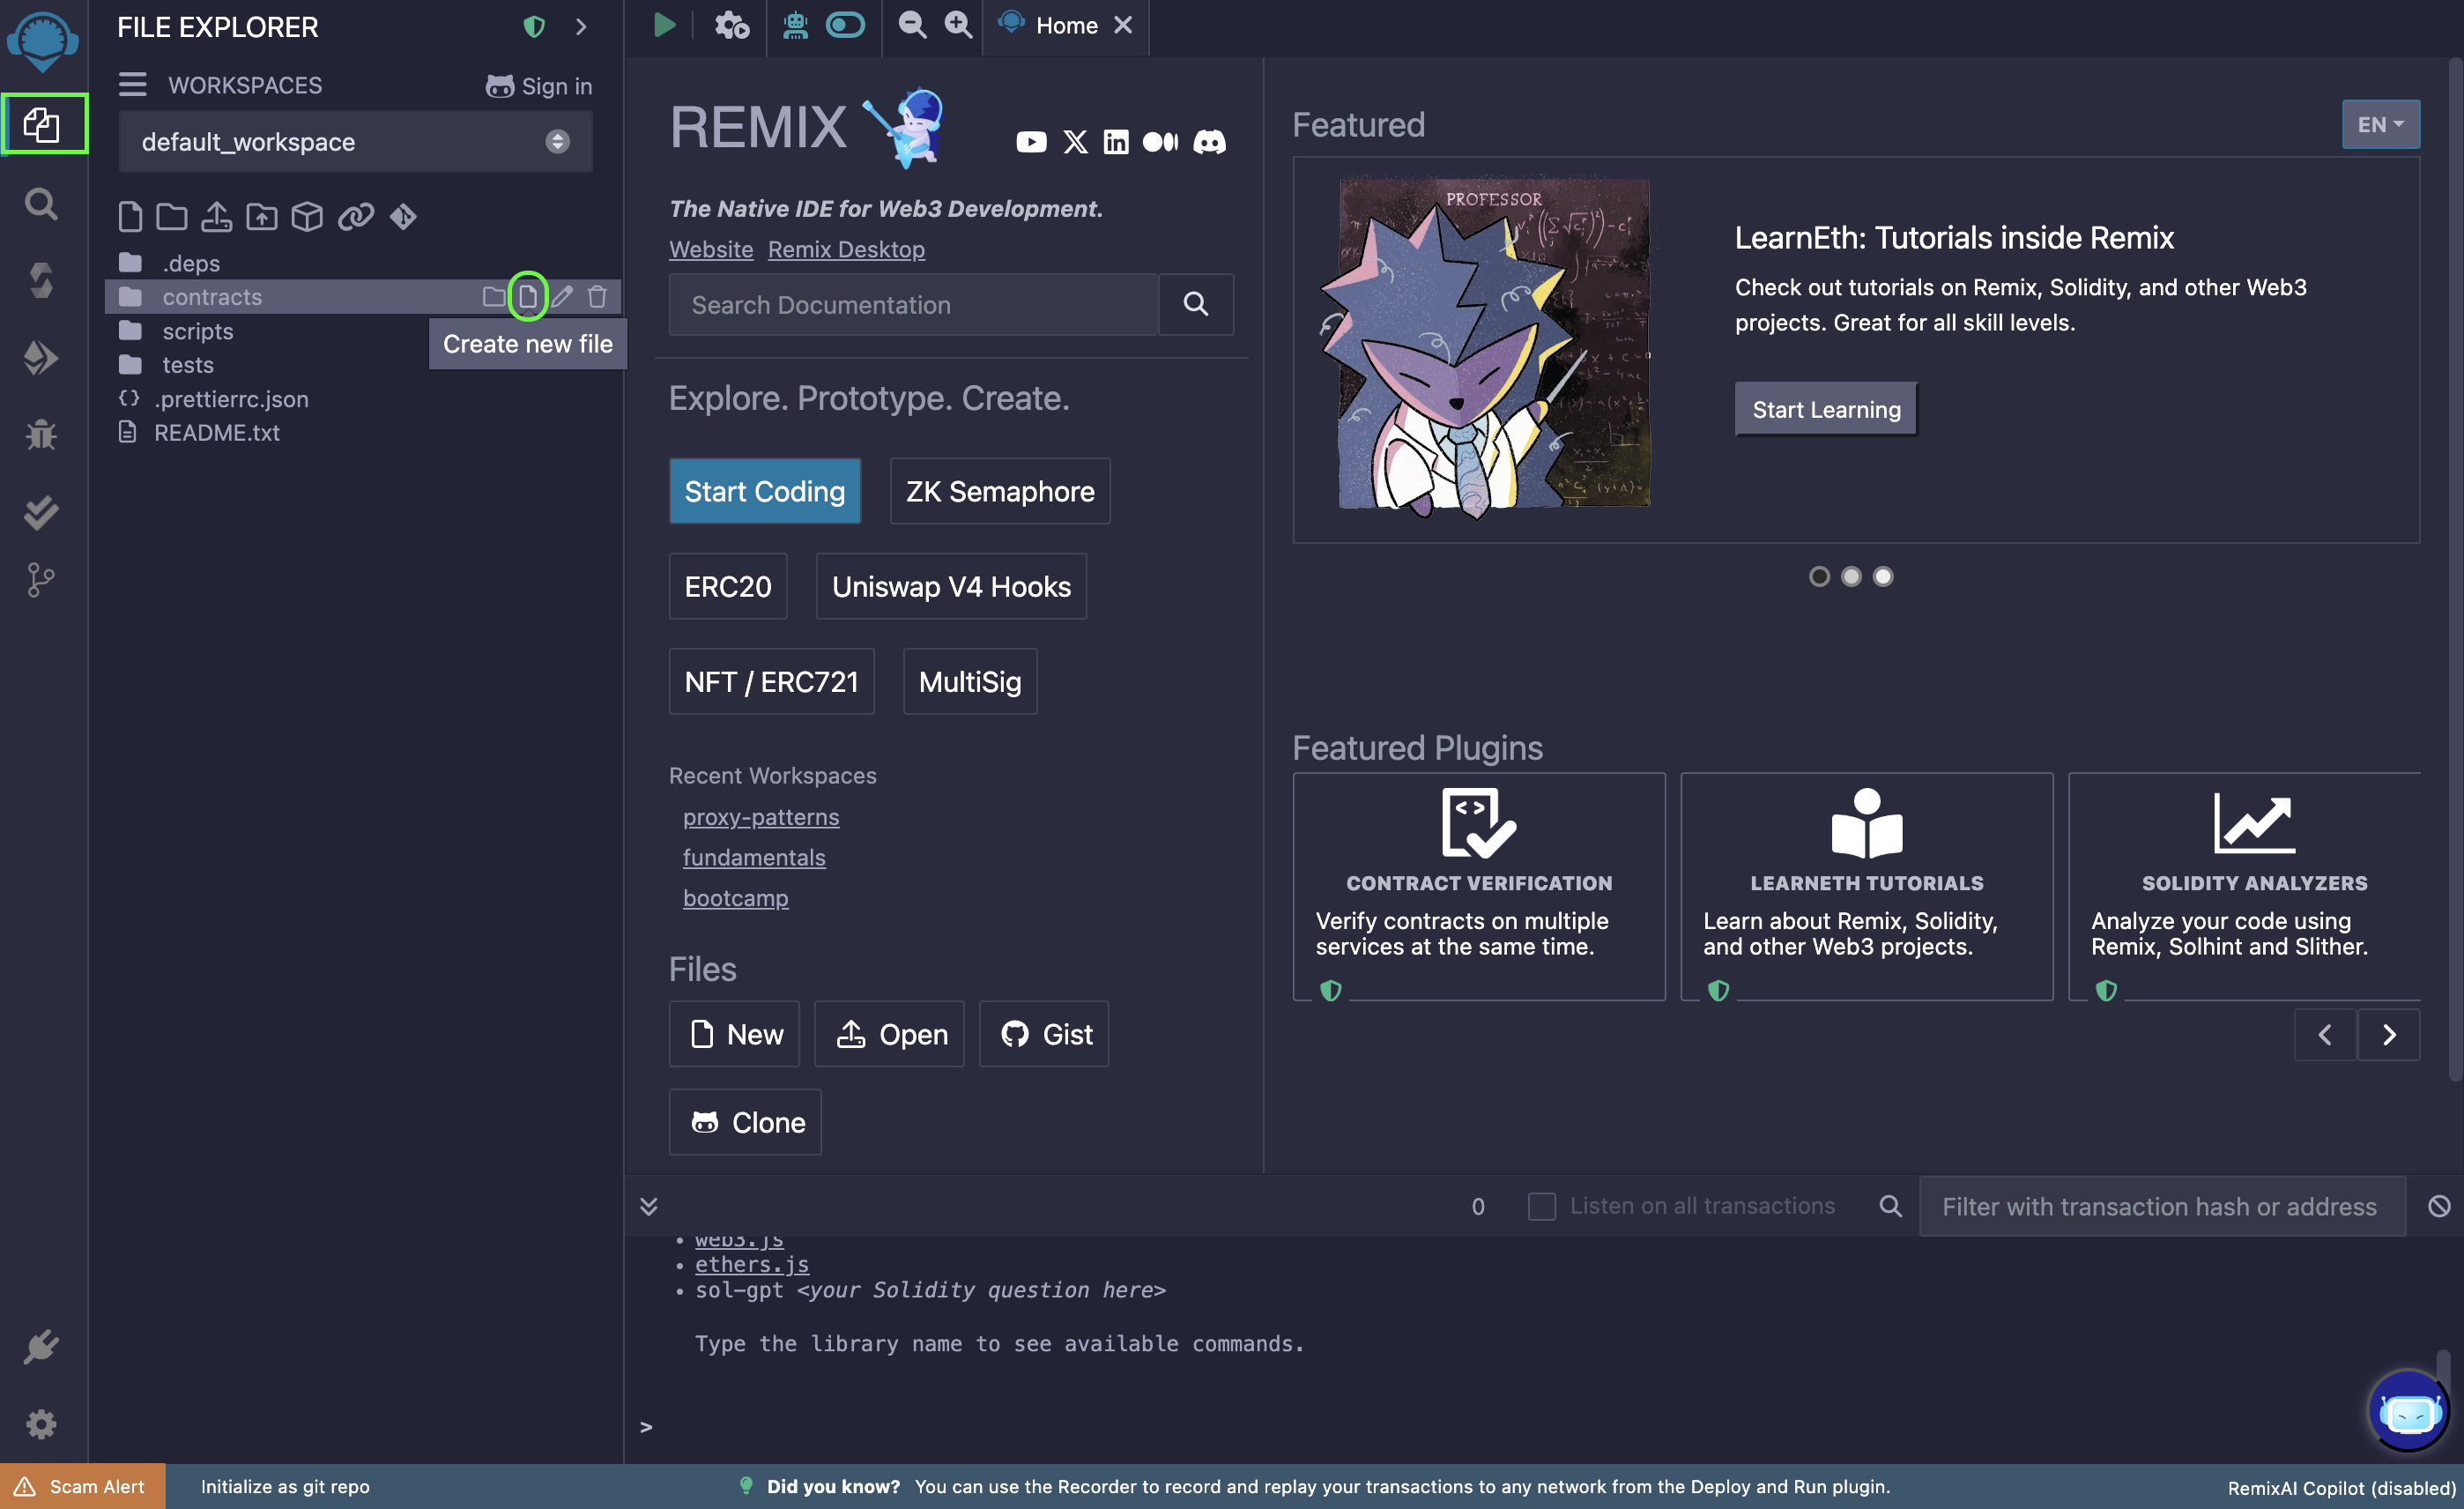
Tiếp theo là sao chép và dán mã hợp đồng thông minh được cung cấp bên dưới vào tệp KaiaGreeter.sol mới tạo.
// SPDX-License-Identifier: KHÔNG CÓ GIẤY PHÉPpragma solidity ^0.8.0;import "hardhat/console.sol";contract KaiaGreeter { uint256 totalGreetings; constructor() { console.log("Yo yo, Welcome to Kaia"); } function greet() public { totalGreetings += 1; console.log(msg.sender, "chào kaia!"); } hàm getTotalGreetings() chế độ xem công khai trả về (uint256) { console.log("Chúng ta có tổng cộng %d đợt sóng!", totalGreetings); trả về totalGreetings; }}
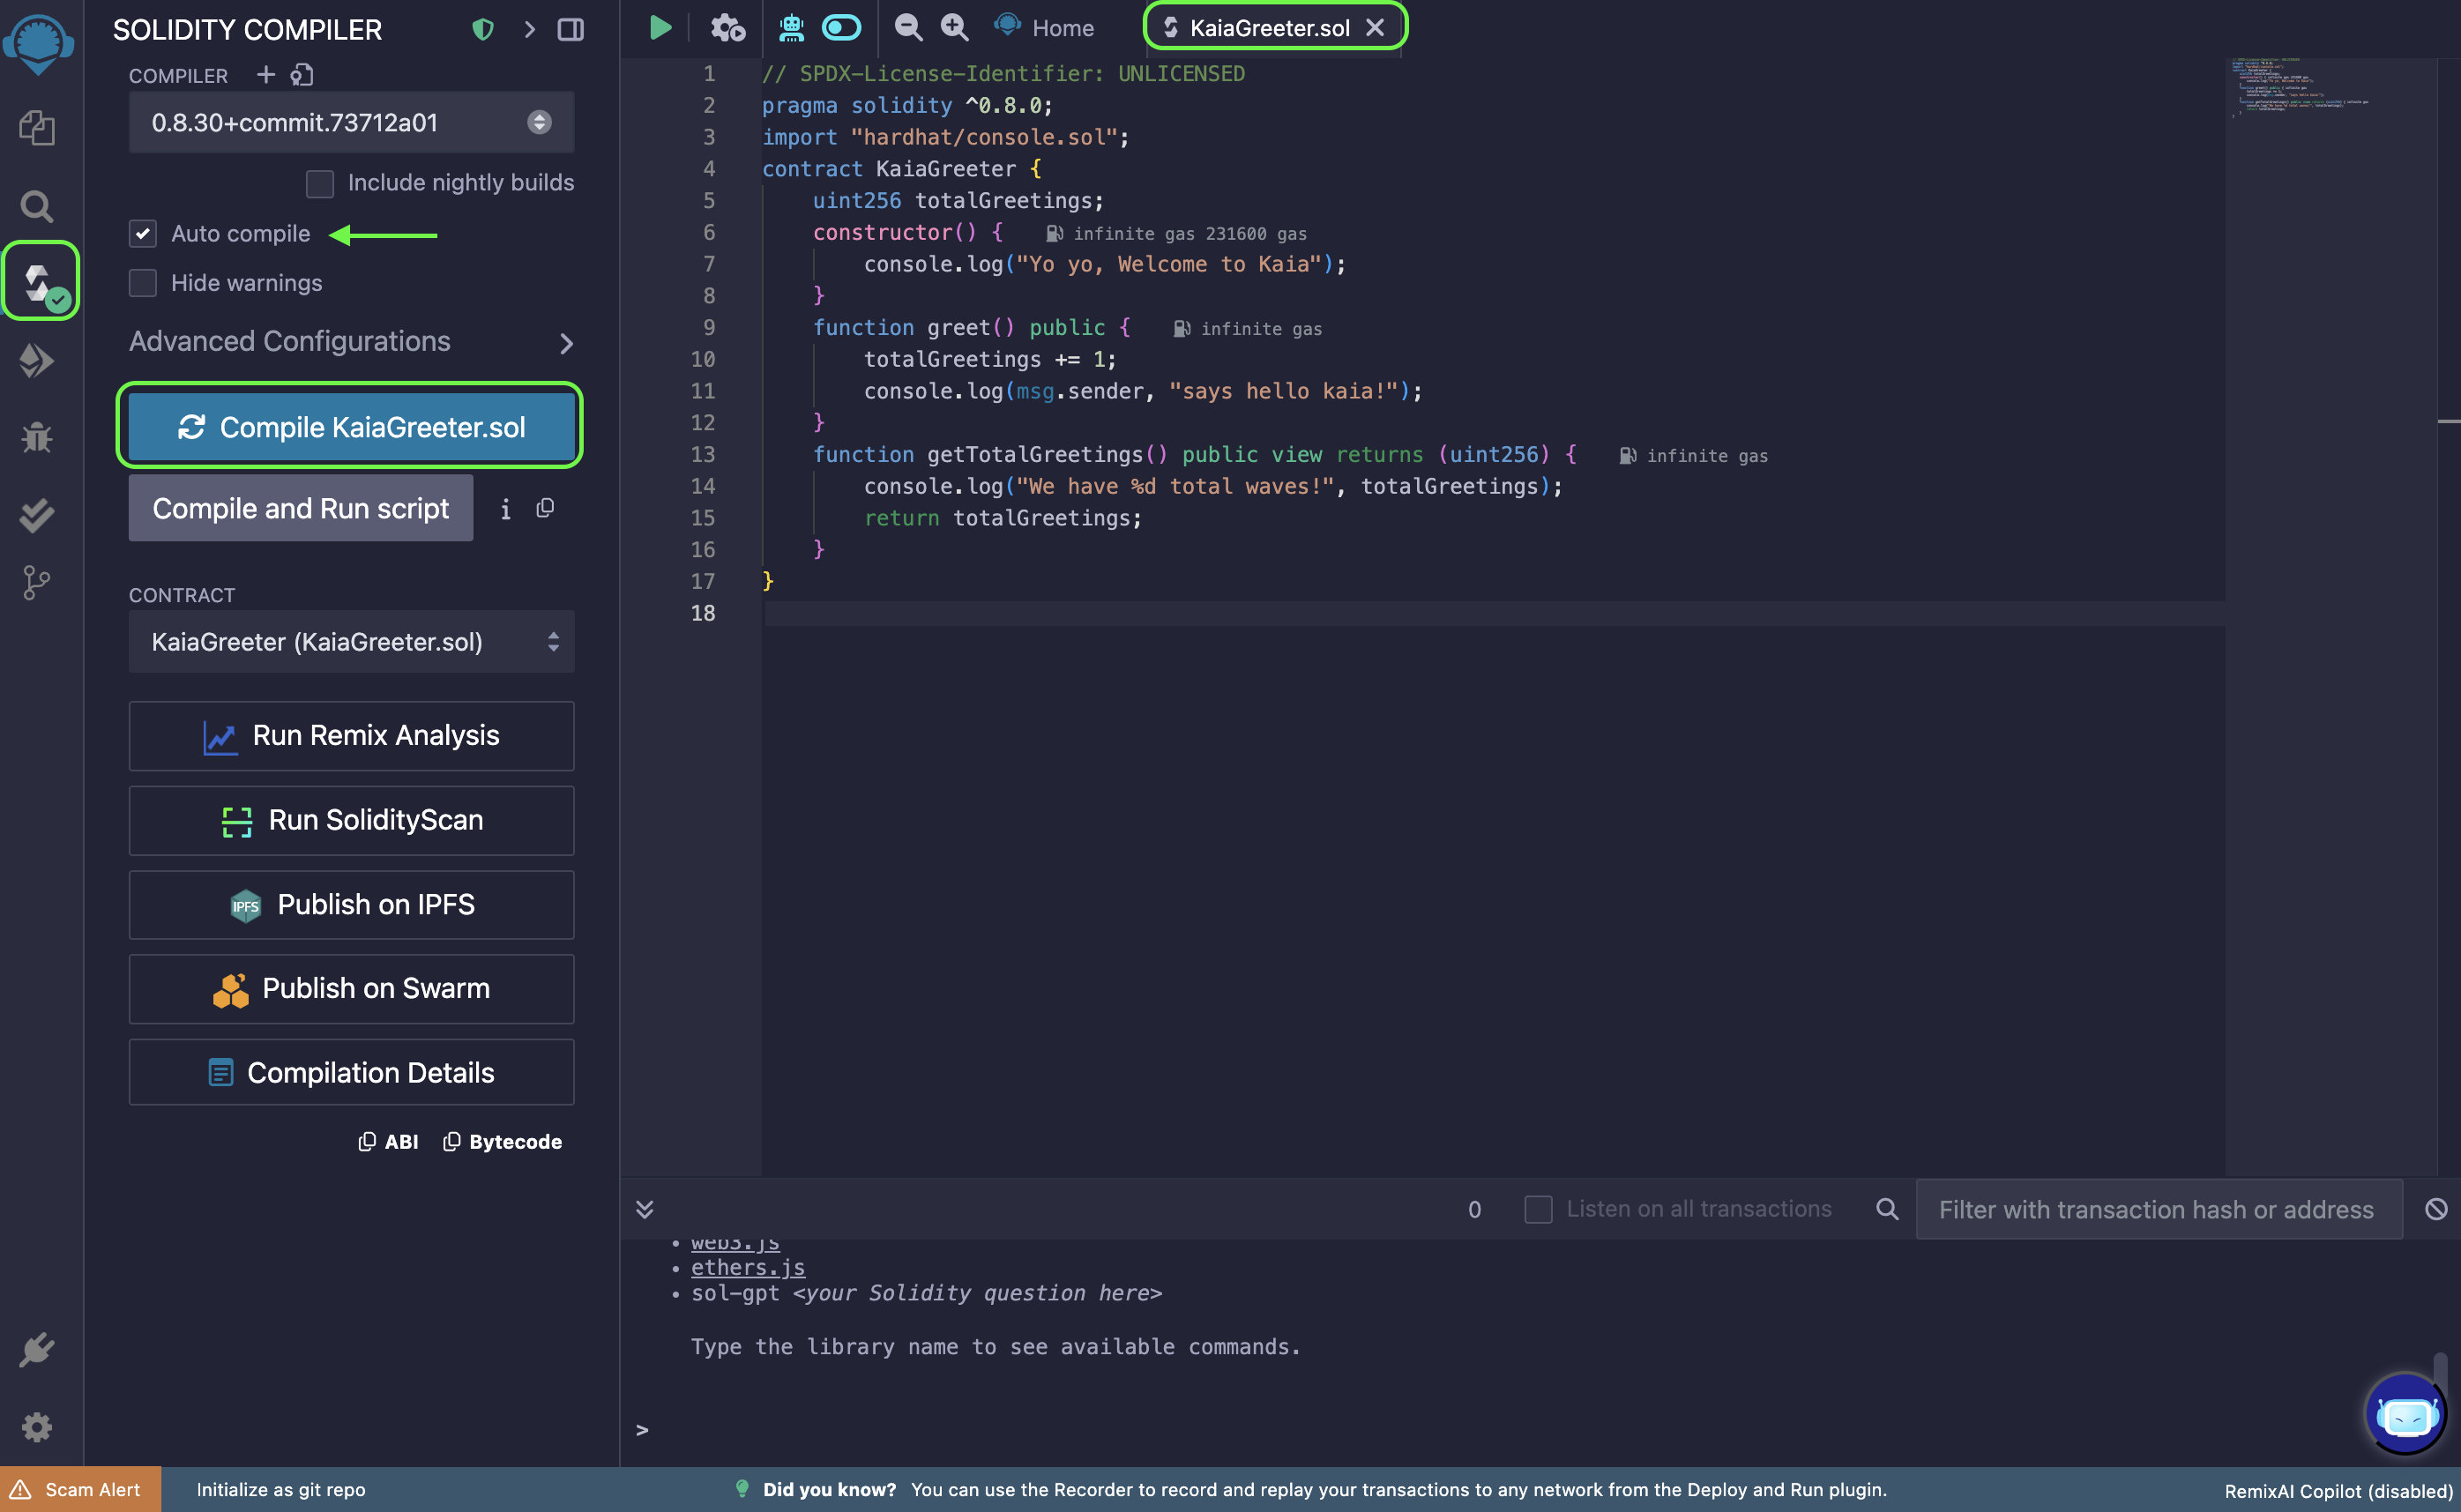
Compile smart contract
To compile your contract, do the following:
- Go to the Solidity Compiler tab
- Chọn phiên bản trình biên dịch là 0.8.30
- Bật tùy chọn Tự động biên dịch.
- Nhấp vào nút Biên dịch KaiaGreeter.sol để biên dịch hợp đồng
KaiaGreeter.sol. - After successful compilation, it will show a green tick mark on the Compiler tab button
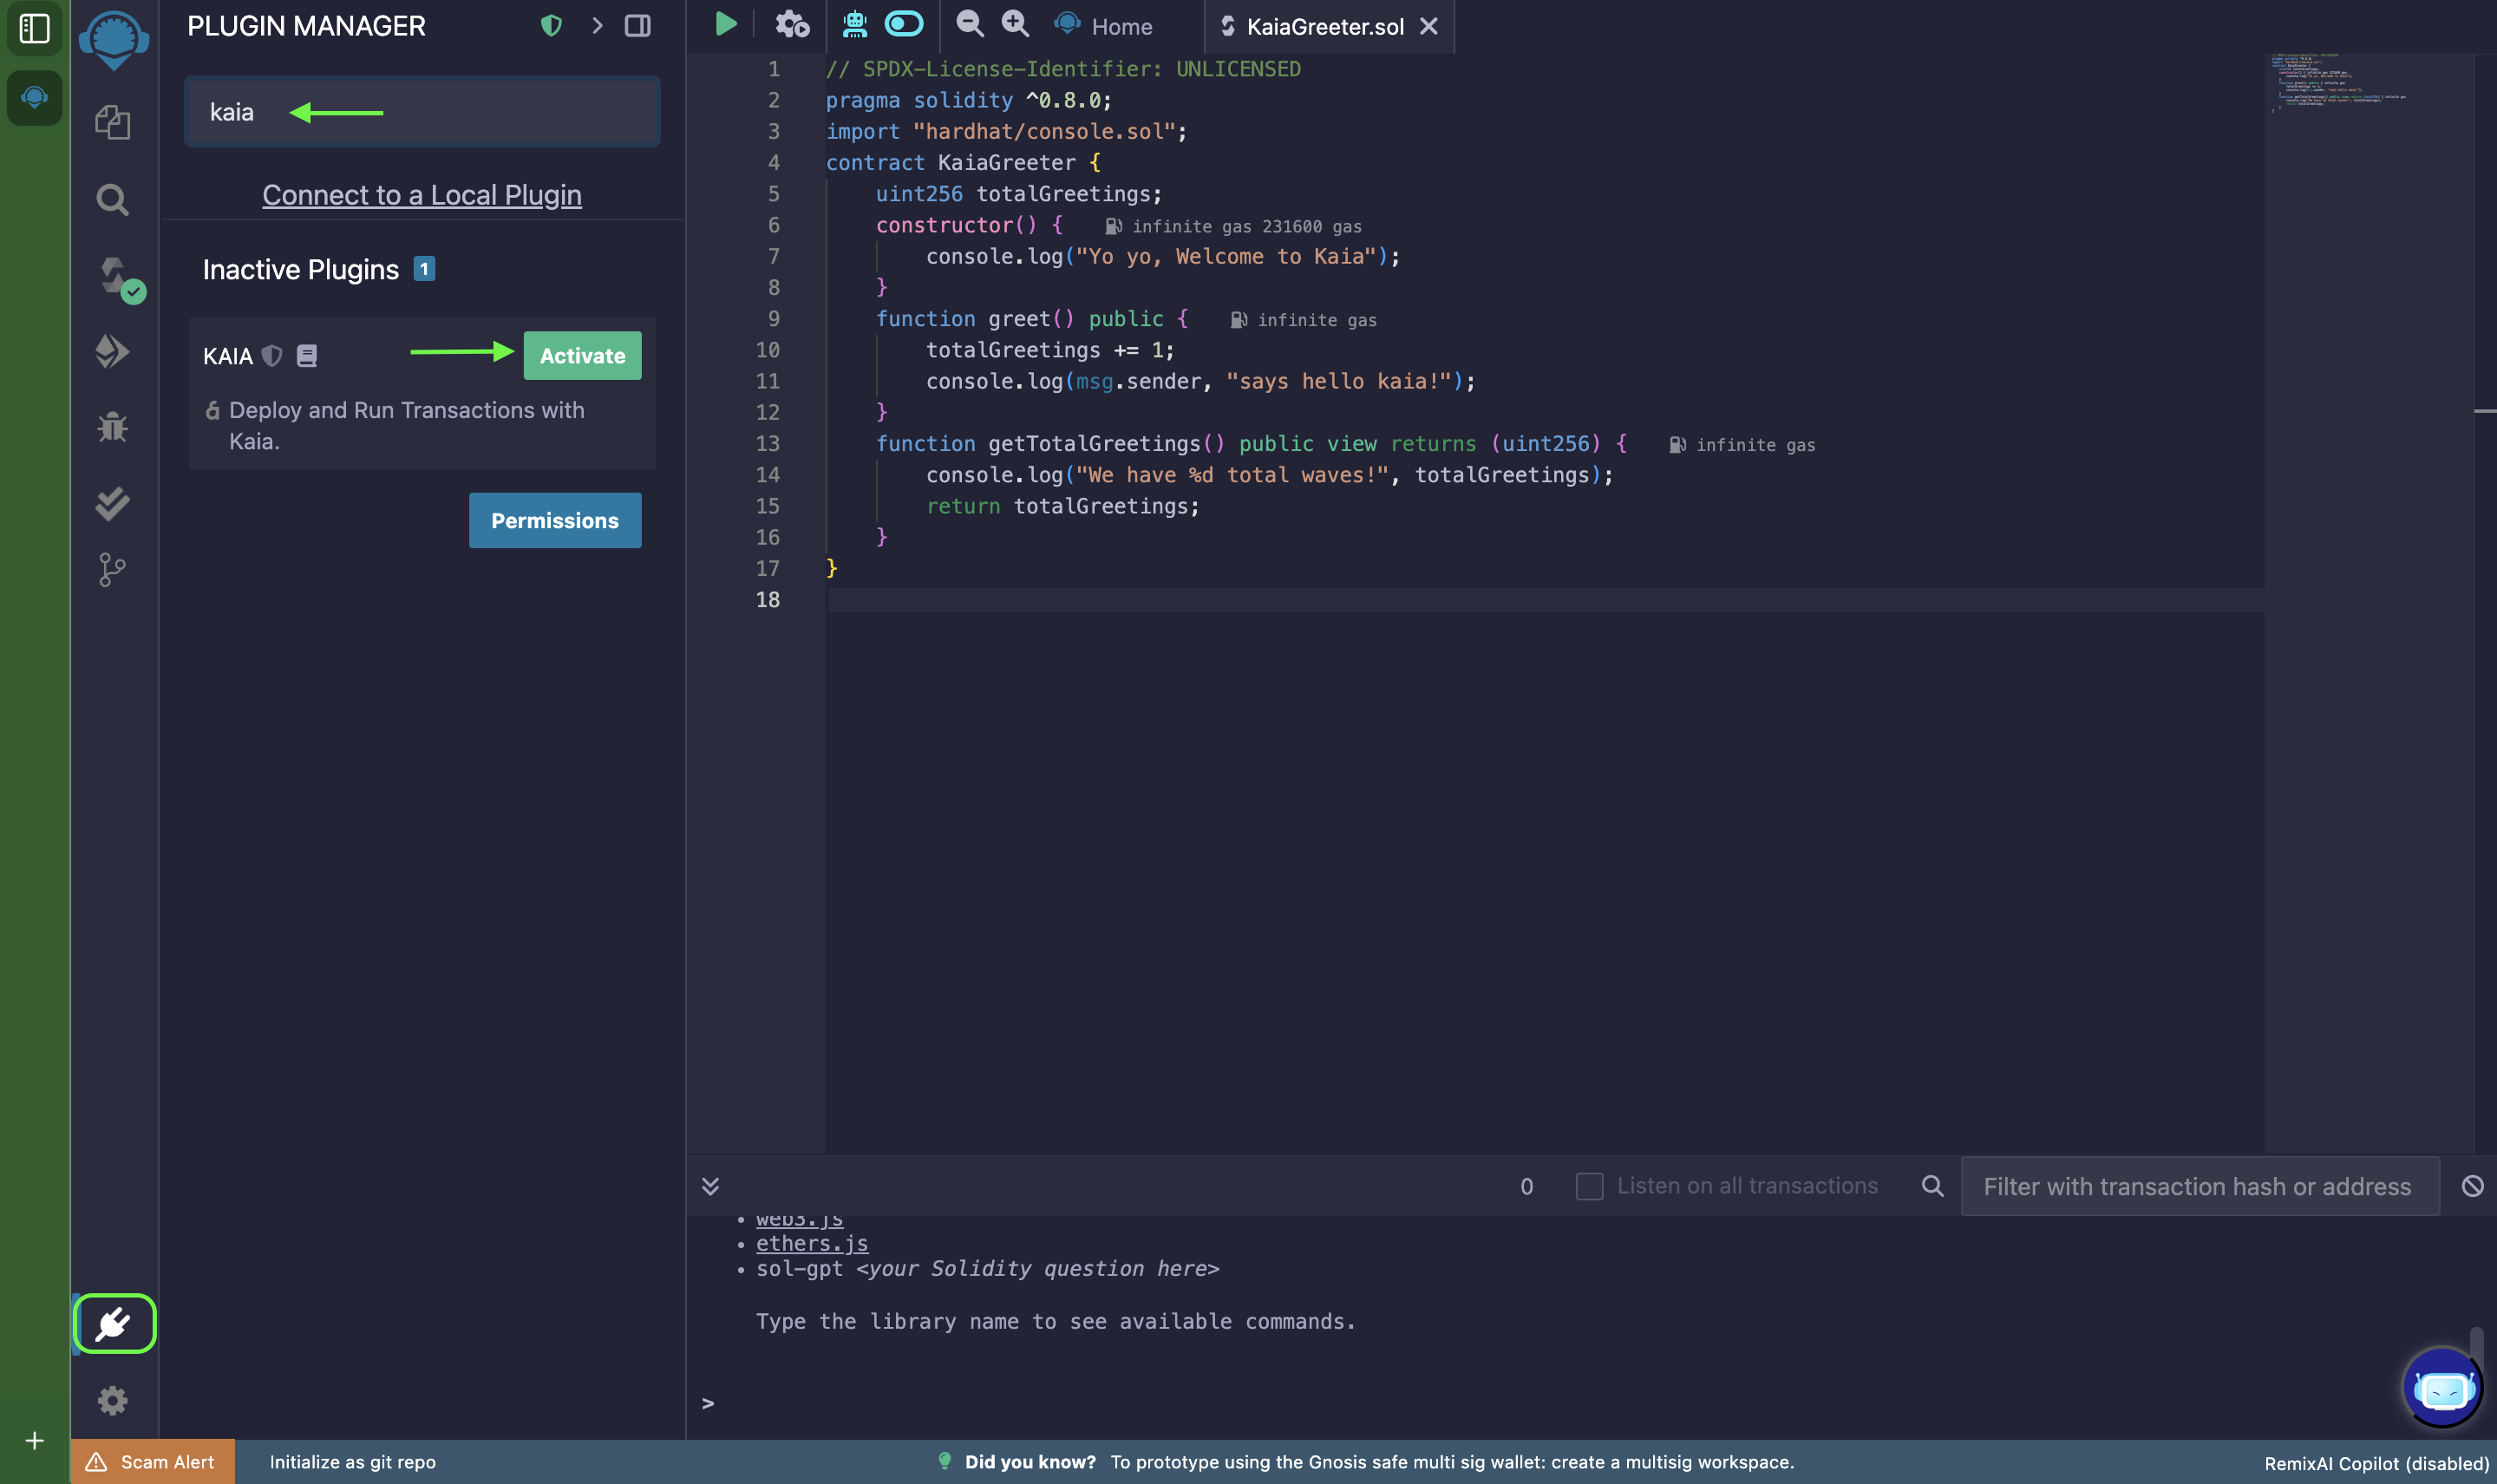
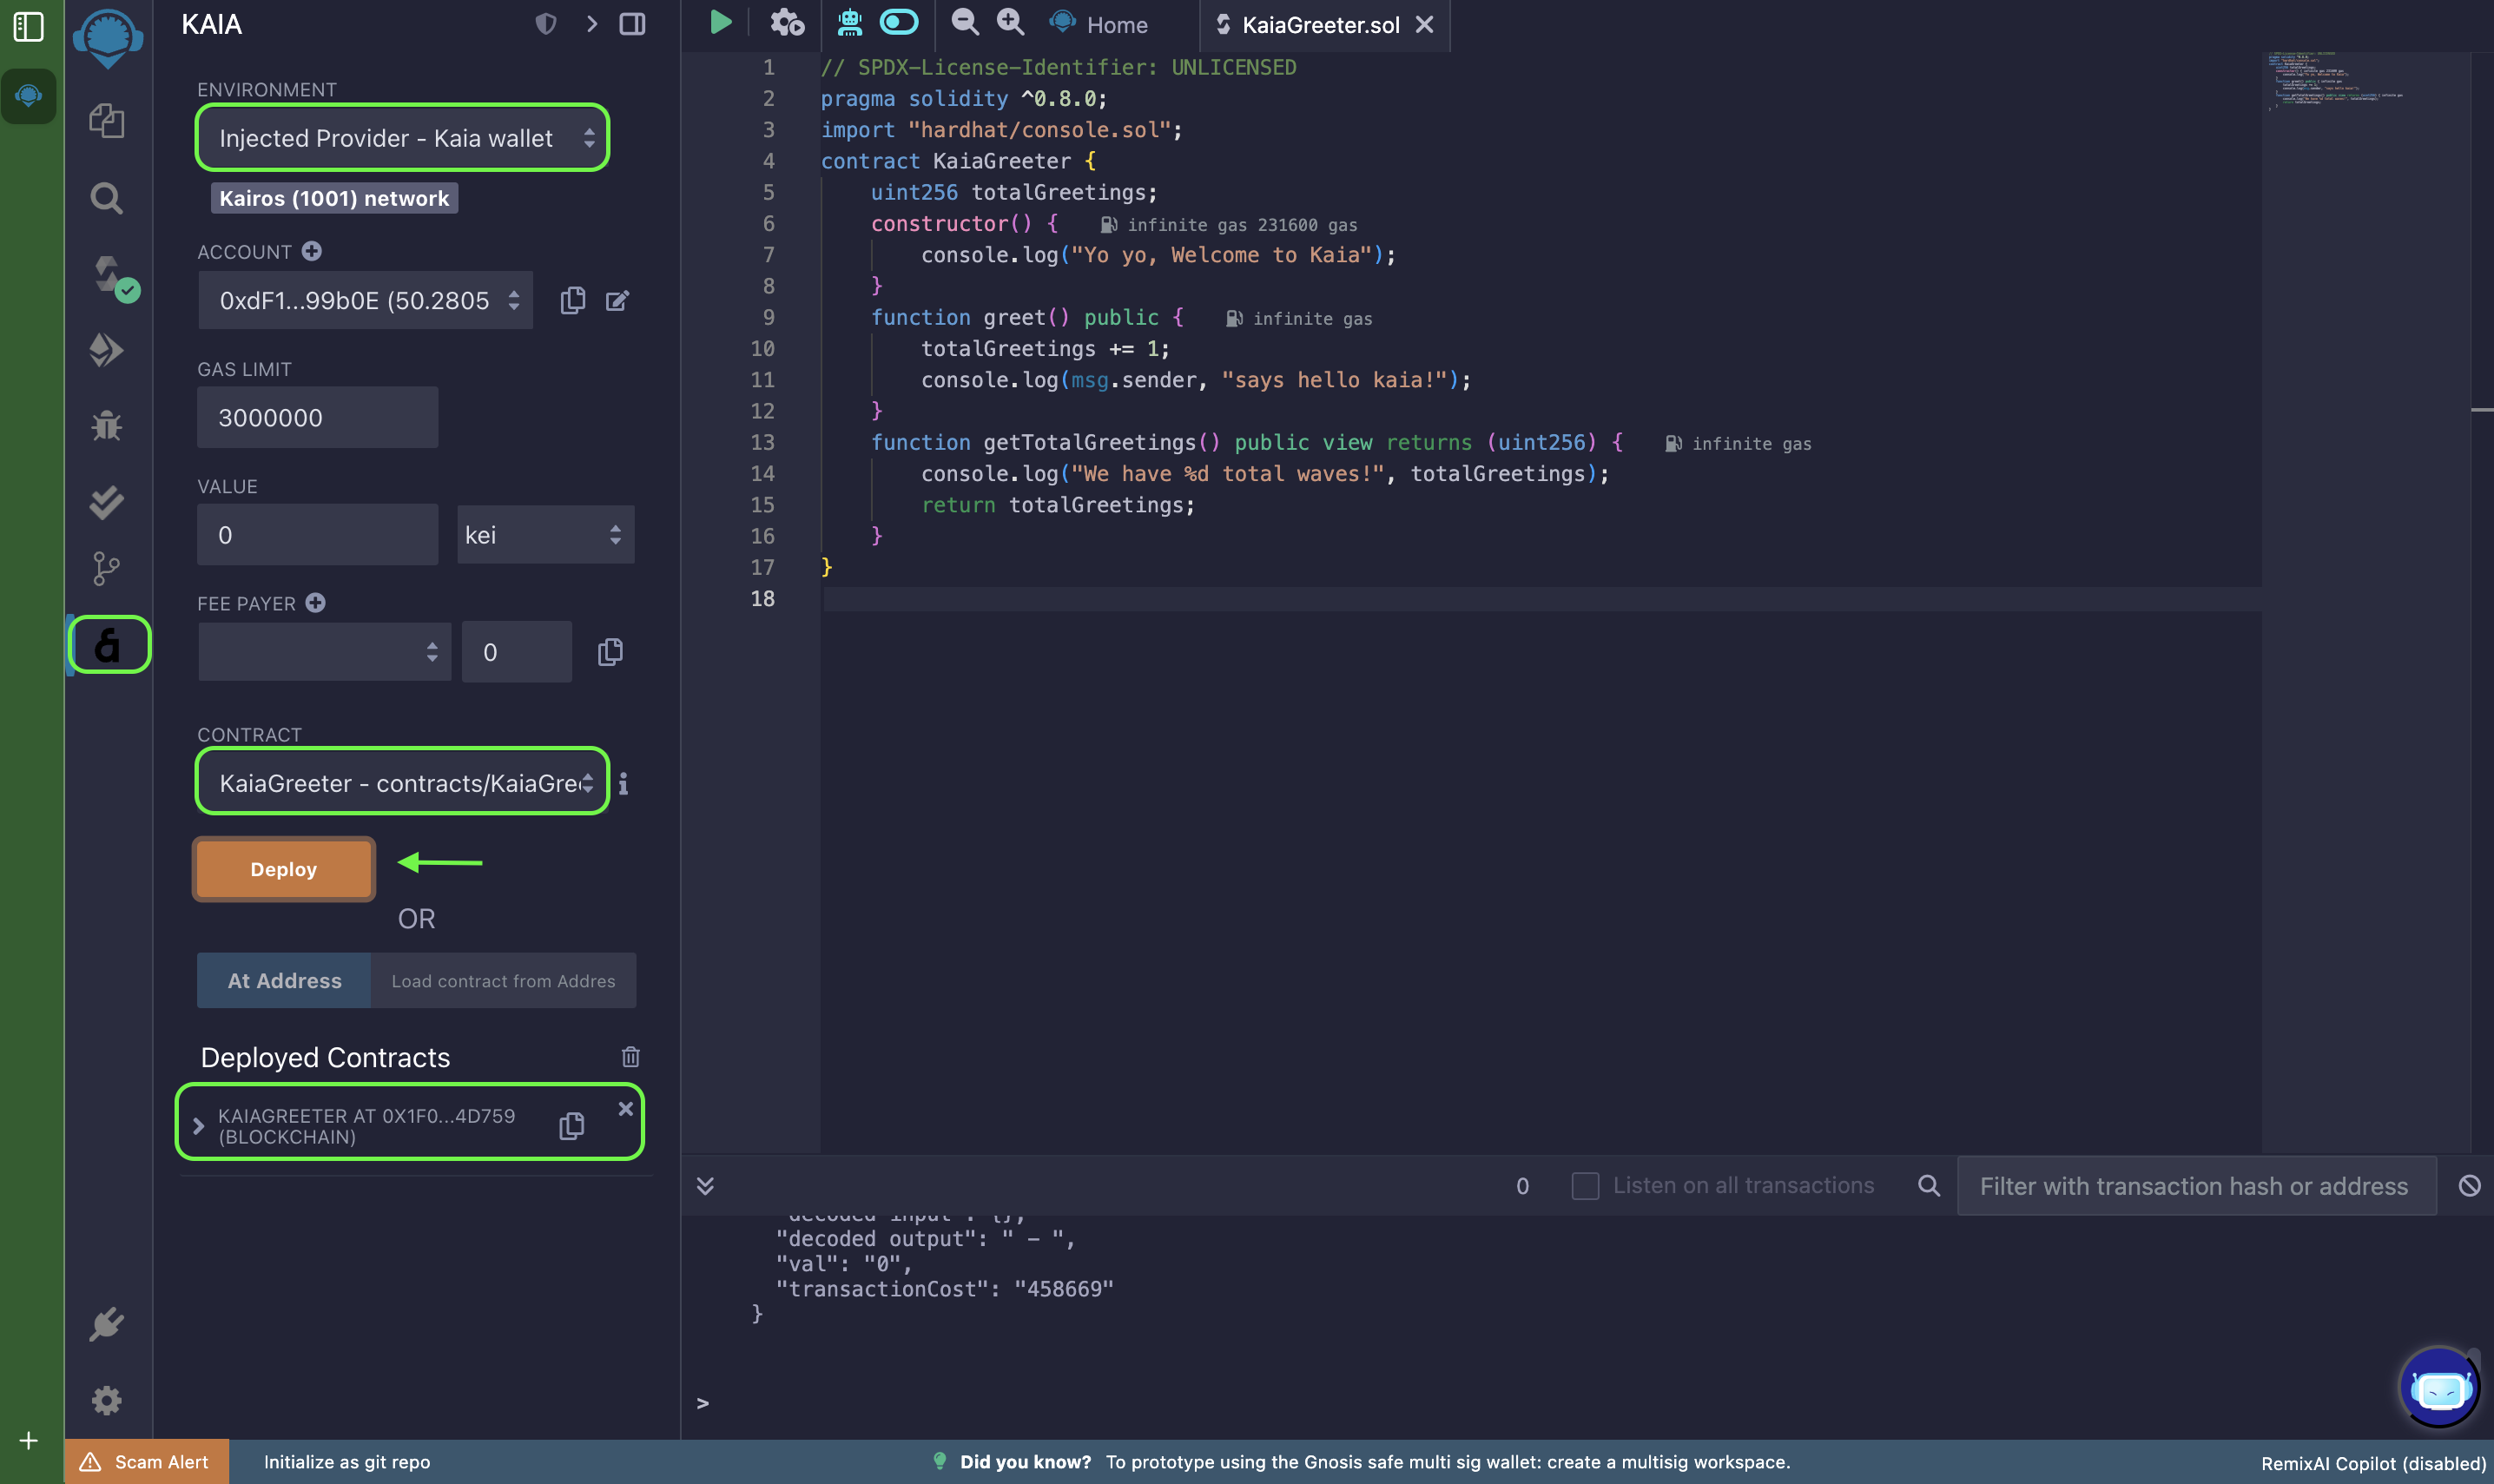
Connect to Kaia Plugin on Remix IDE
To connect to Kaia plugin on Remix IDE, you can either use this Kaia Plugin for Remix or follow this step:
- Navigate to the Plugin manager tab
- Nhập Kaia vào trường tìm kiếm
- Kích hoạt plugin Kaia. Nếu tab Kaia xuất hiện, bạn đã sẵn sàng tương tác với Kaia.
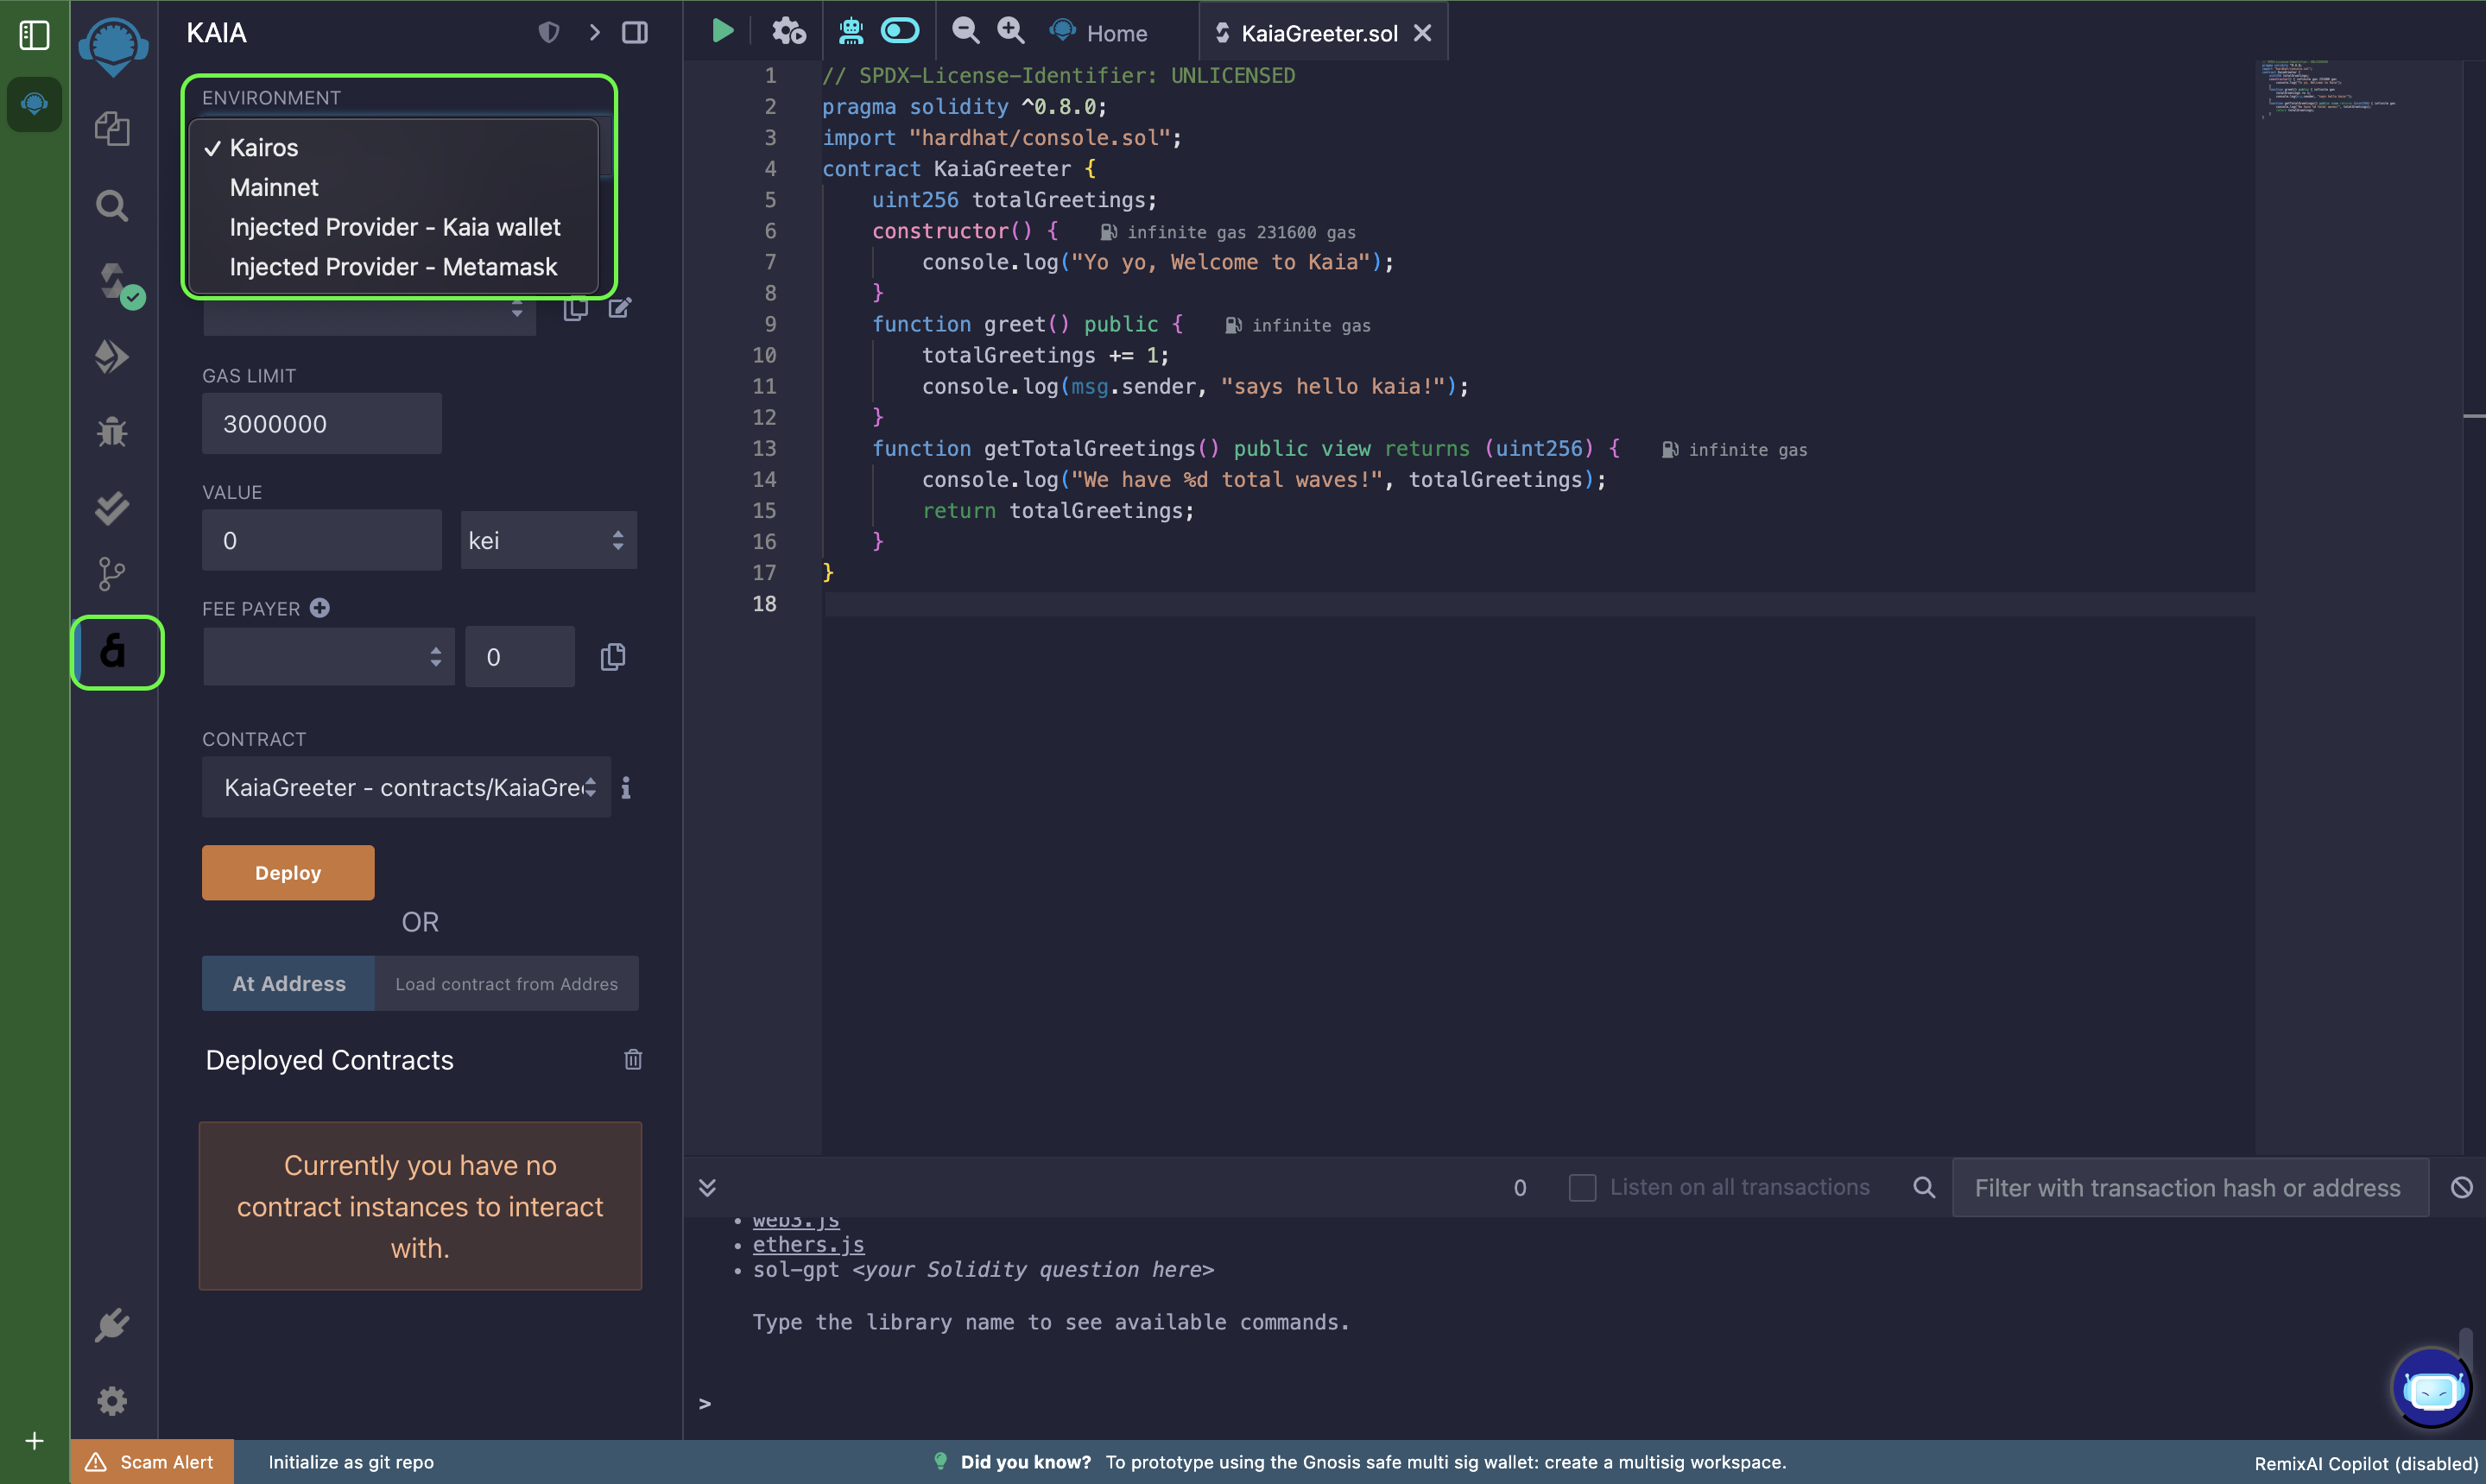
Setting up deployment environment
- Nhấp vào plugin Kaia.
- Select the appropriate [Environment].
- You can select Kairos, Mainnet, Injected Provider - Kaia Wallet, Injected Provider - MetaMask
- [Kairos]: Connects to the Kairos network
- [Mainnet]: Connects to the Mainnet
- [Injected Provider - Kaia Wallet]: Connects to Kaia Wallet
- [Injected Provider - MetaMask ]: Connects to Metamask
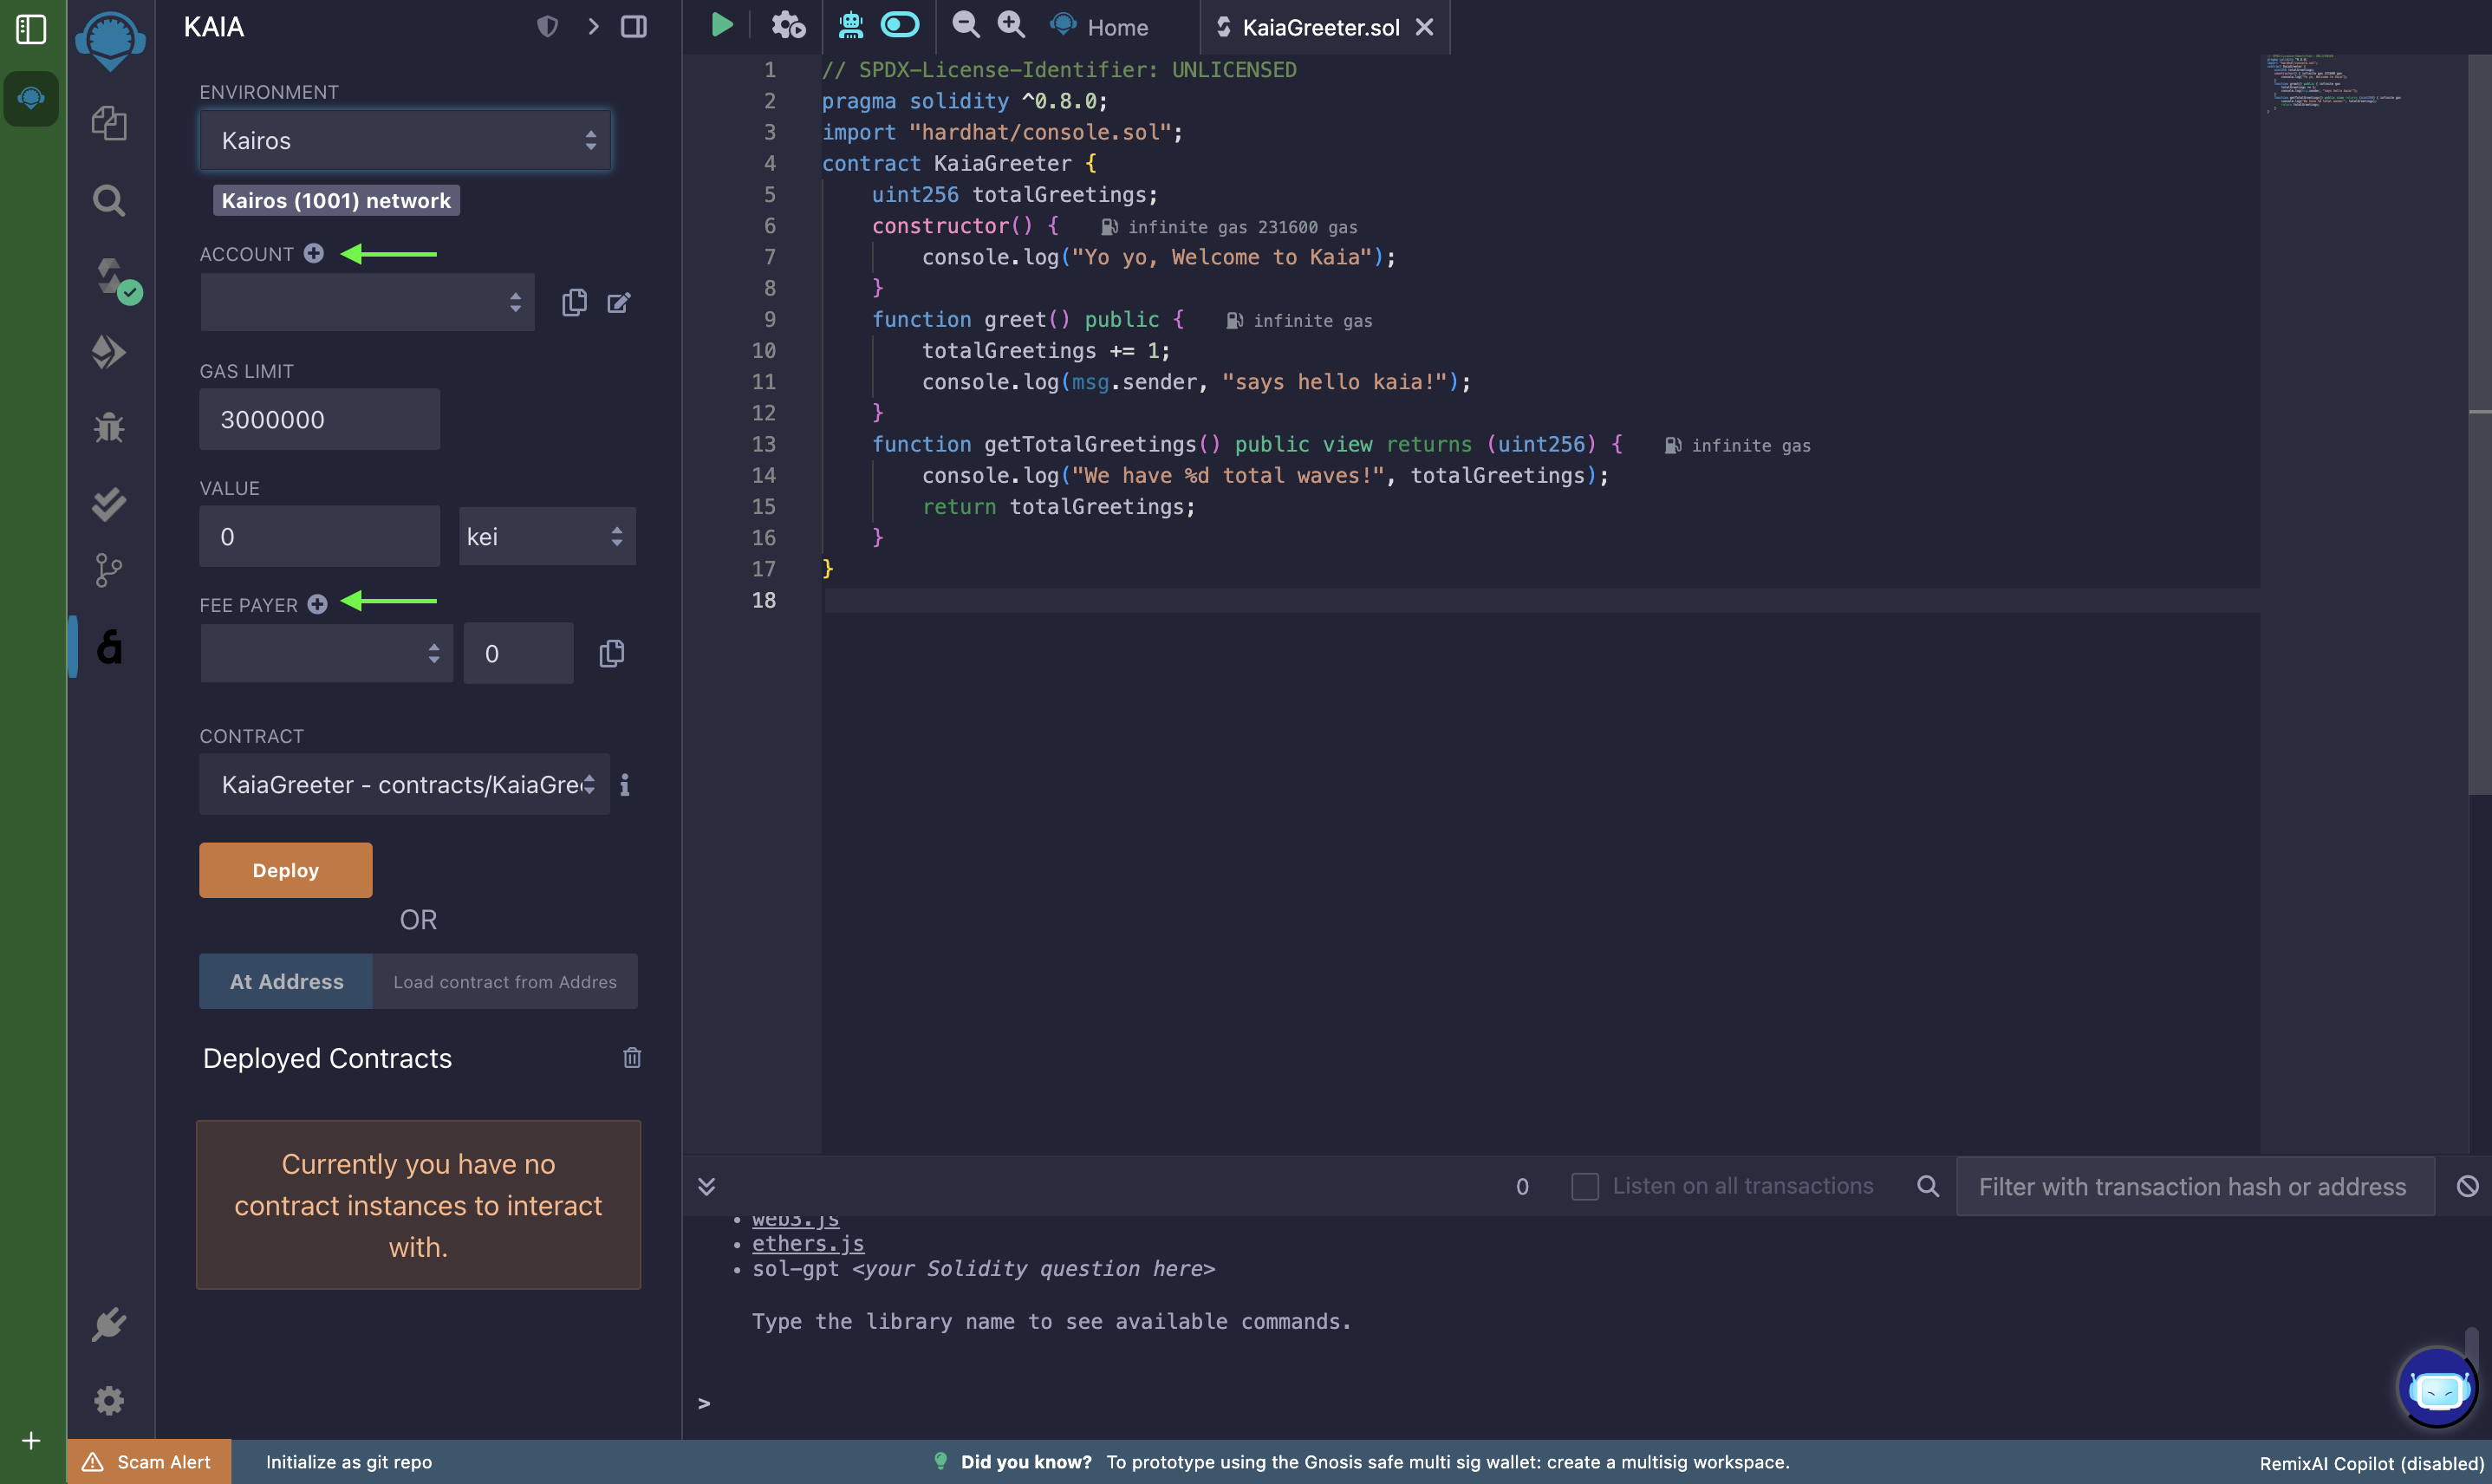
Import account
You can export private key or Keystore from any compatible wallet to use here.
- Click plus button next to the ACCOUNT.
- Sau đó nhập khóa riêng hoặc kho khóa của bạn.
- You can also import keys for the feePayer. It only supports private key.
Connecting Kaia to Remix using Kaia Wallet
- Select [Injected Provider - Kaia Wallet] on the Remix Environment menu.
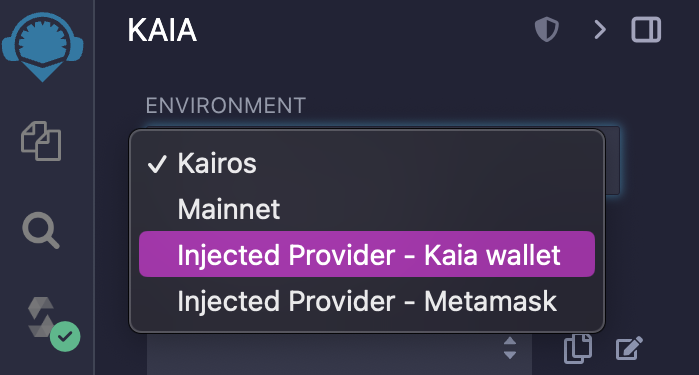
- When you see the Kaia Wallet pop-up, click [Connect].
- Once you are successfully connected to the Network, you will see the Chain ID and Account of the connected network.
Connecting Kaia - Remix using MetaMask
- Connect Kaia with MetaMask by referring to the Connecting to MetaMask.
- Select [Injected Provider - MetaMask] on the Remix Environment menu.
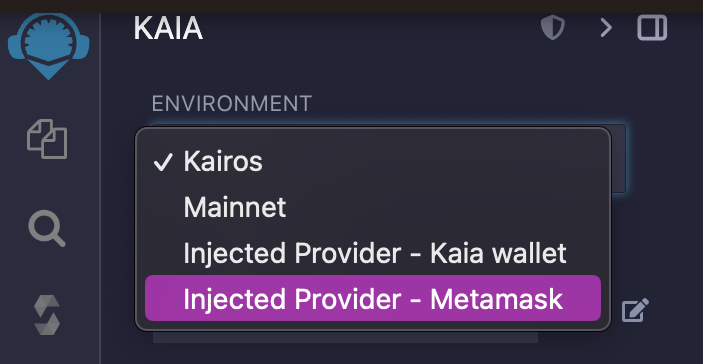
- When you see the MetaMask pop-up, select the account by clicking it.
- Once you are successfully connected to the Network, you will see the Chain ID and Account of the connected network.
Deploying the smart contract
Trong phần này, chúng tôi sẽ triển khai hợp đồng KaiaGreeter.sol bằng Kaia Wallet. Having compiled the contract in the Compile Section, follow the deployment process below:
- Đặt MÔI TRƯỜNG triển khai của bạn thành [Nhà cung cấp được tiêm - Ví Kaia]. Make sure to confirm all the connection prompts to Remix.
- Select the contract you want to deploy in the CONTRACT field.
- Click on the Deploy button. This would generate a Kaia Wallet popup that requires transaction confirmation. Simply confirm the transaction!
- You can view the deployed contract on Kaiascan, and also test or debug it on Remix IDE.