이 페이지는 영문에서 기계 번역되었으므로 오역이나 어색한 표현이 있을 수 있습니다. 따라서 정확한 정보는 영어 원문을 참조하시기 바랍니다. 또한 잦은 업데이트로 인해 일부 콘텐츠는 영문이 그대로 남아있을 수 있습니다. Crowdin에서 이 페이지의 번역을 개선하는 데 동참하여 도움을 주세요. (Crowdin translation page, Contributing guide)
NFT 잠금
팀 파이낸스의 NFT 잠금 기능을 사용하면 크리에이터가 개인 또는 팀에 할당된 NFT를 시간 잠금 스마트 컨트랙트 보관소로 전송하여 설정된 기간 동안 안전하게 잠글 수 있습니다.
팀 파이낸스 NFT 잠금을 사용하면 프로젝트는 헌신을 보여주고, 신뢰를 구축하며, 사기 위험을 줄여 궁극적으로 커뮤니티와 투자자 간의 신뢰를 증진할 수 있습니다.
시작하기
이 튜토리얼에서는 팀 파이낸스로 NFT를 잠그는 방법을 알아보세요. 시작해보자!
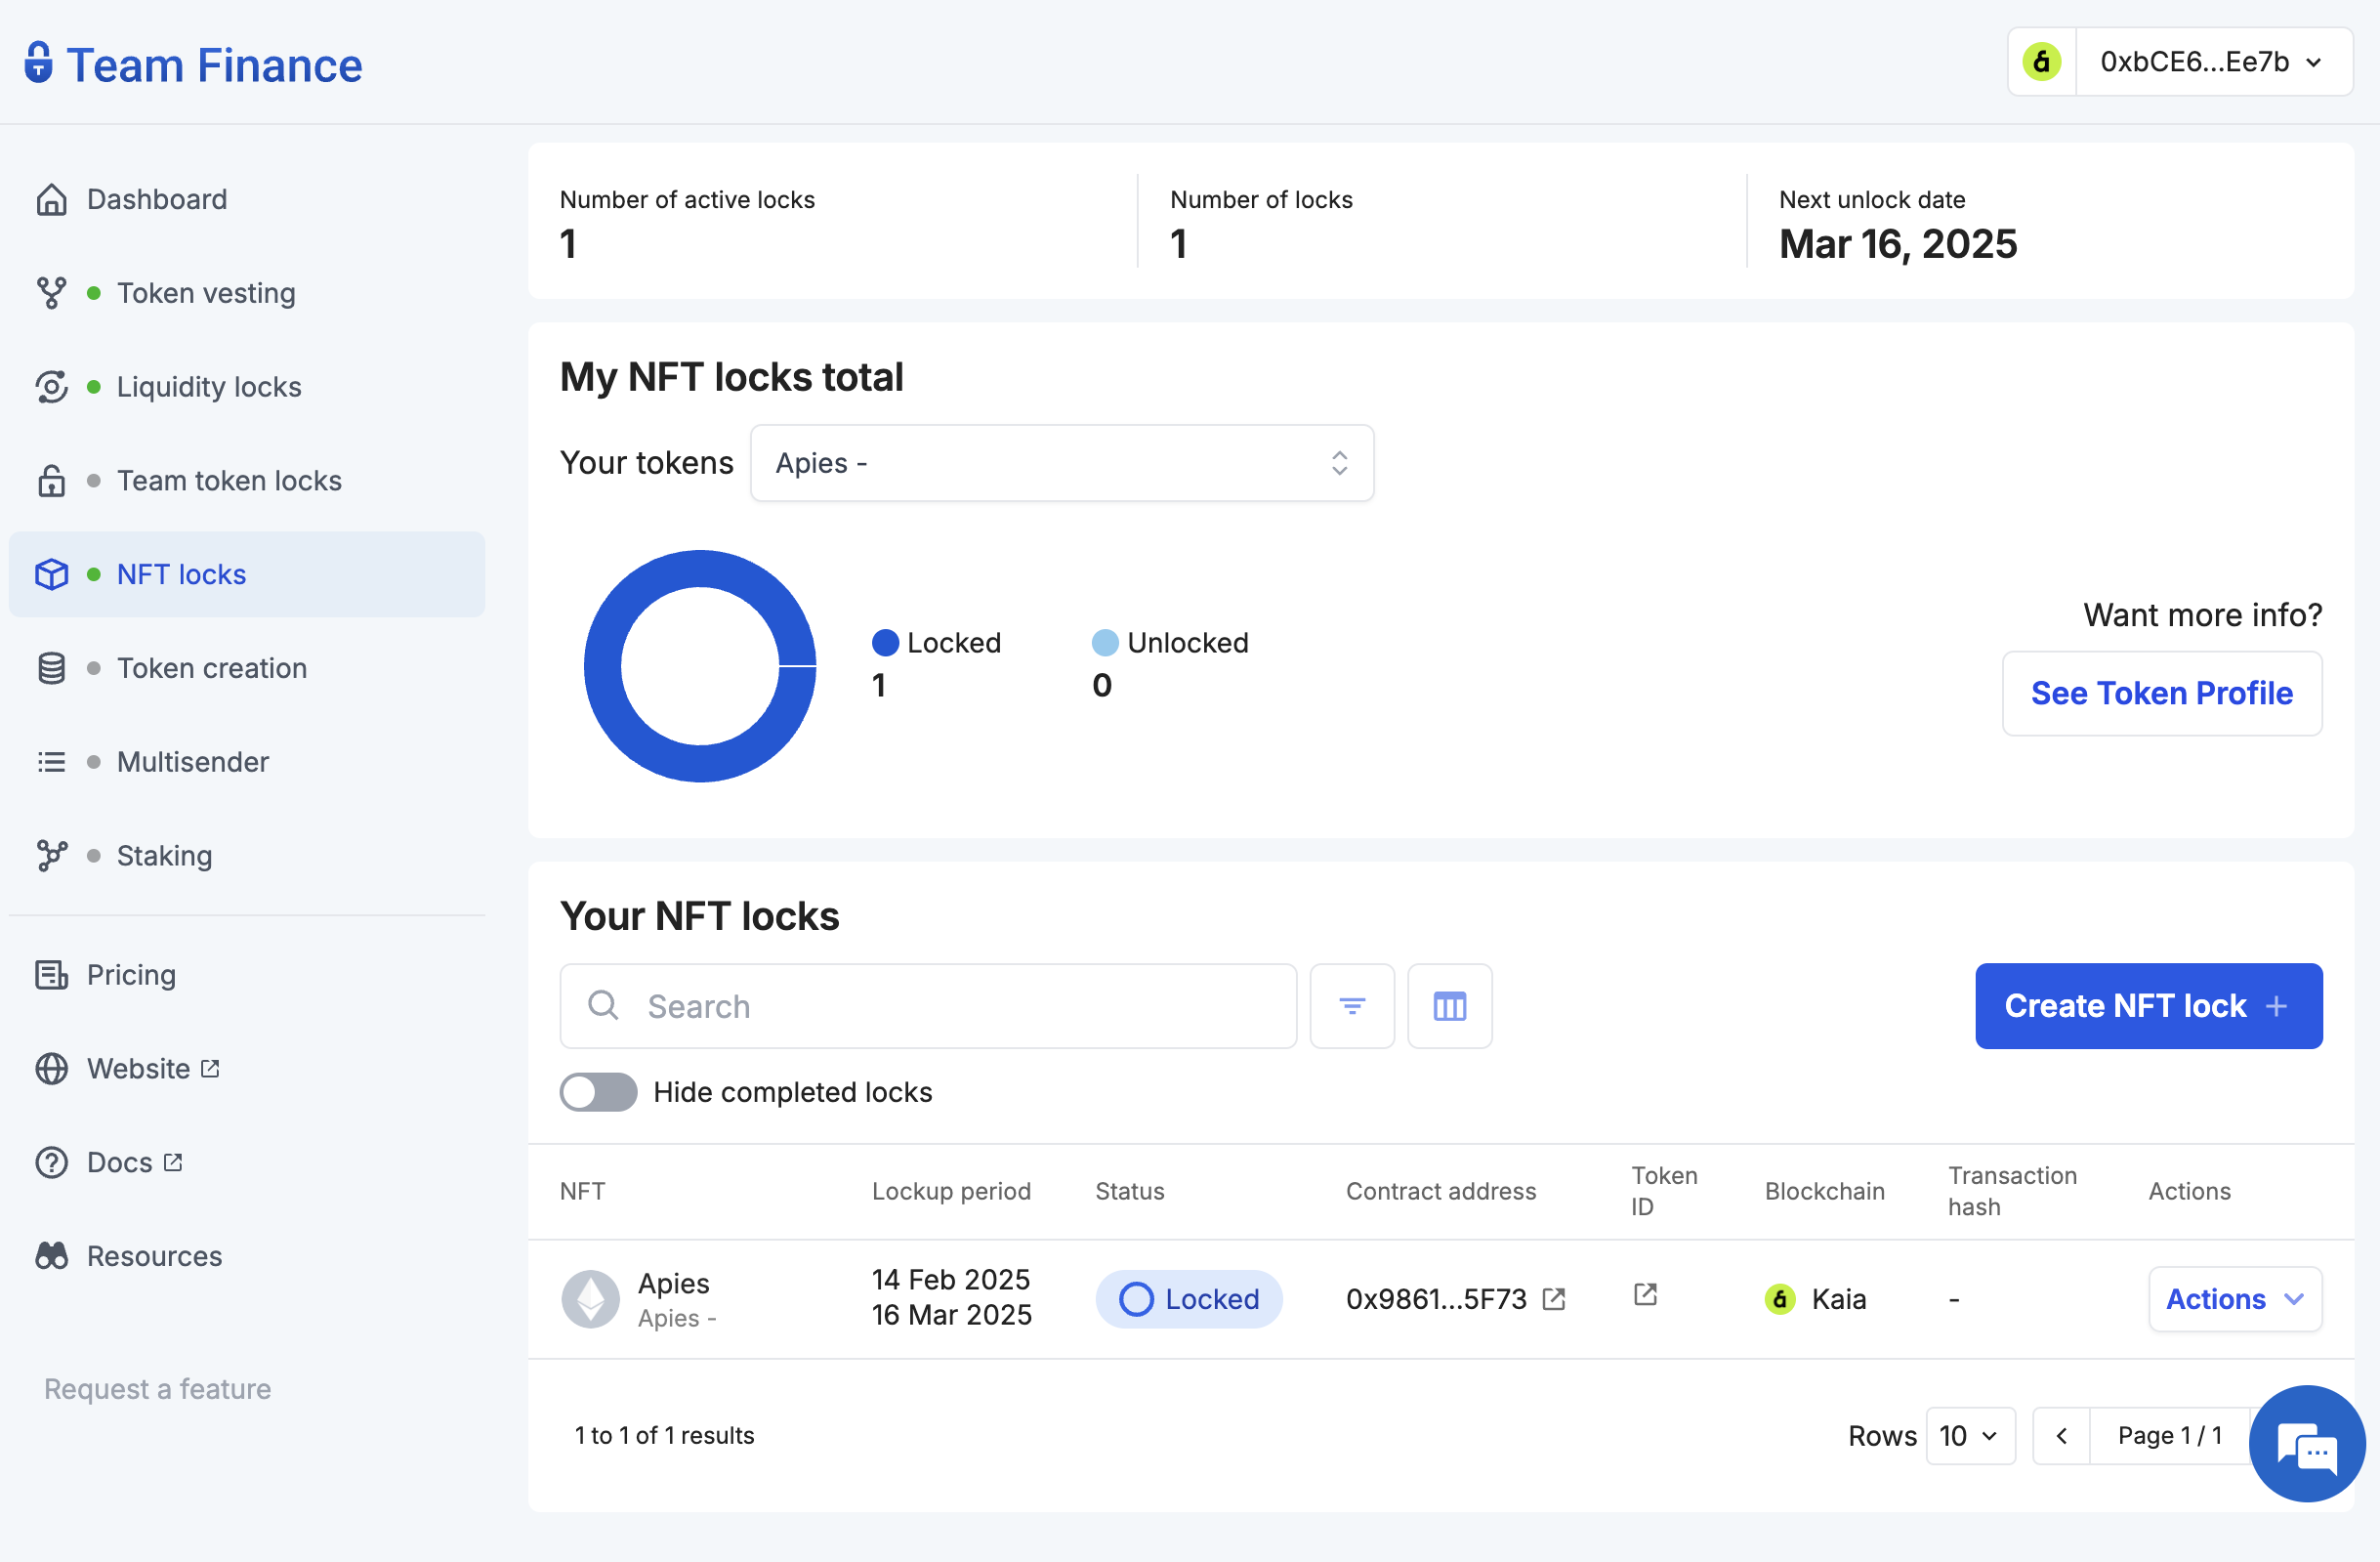
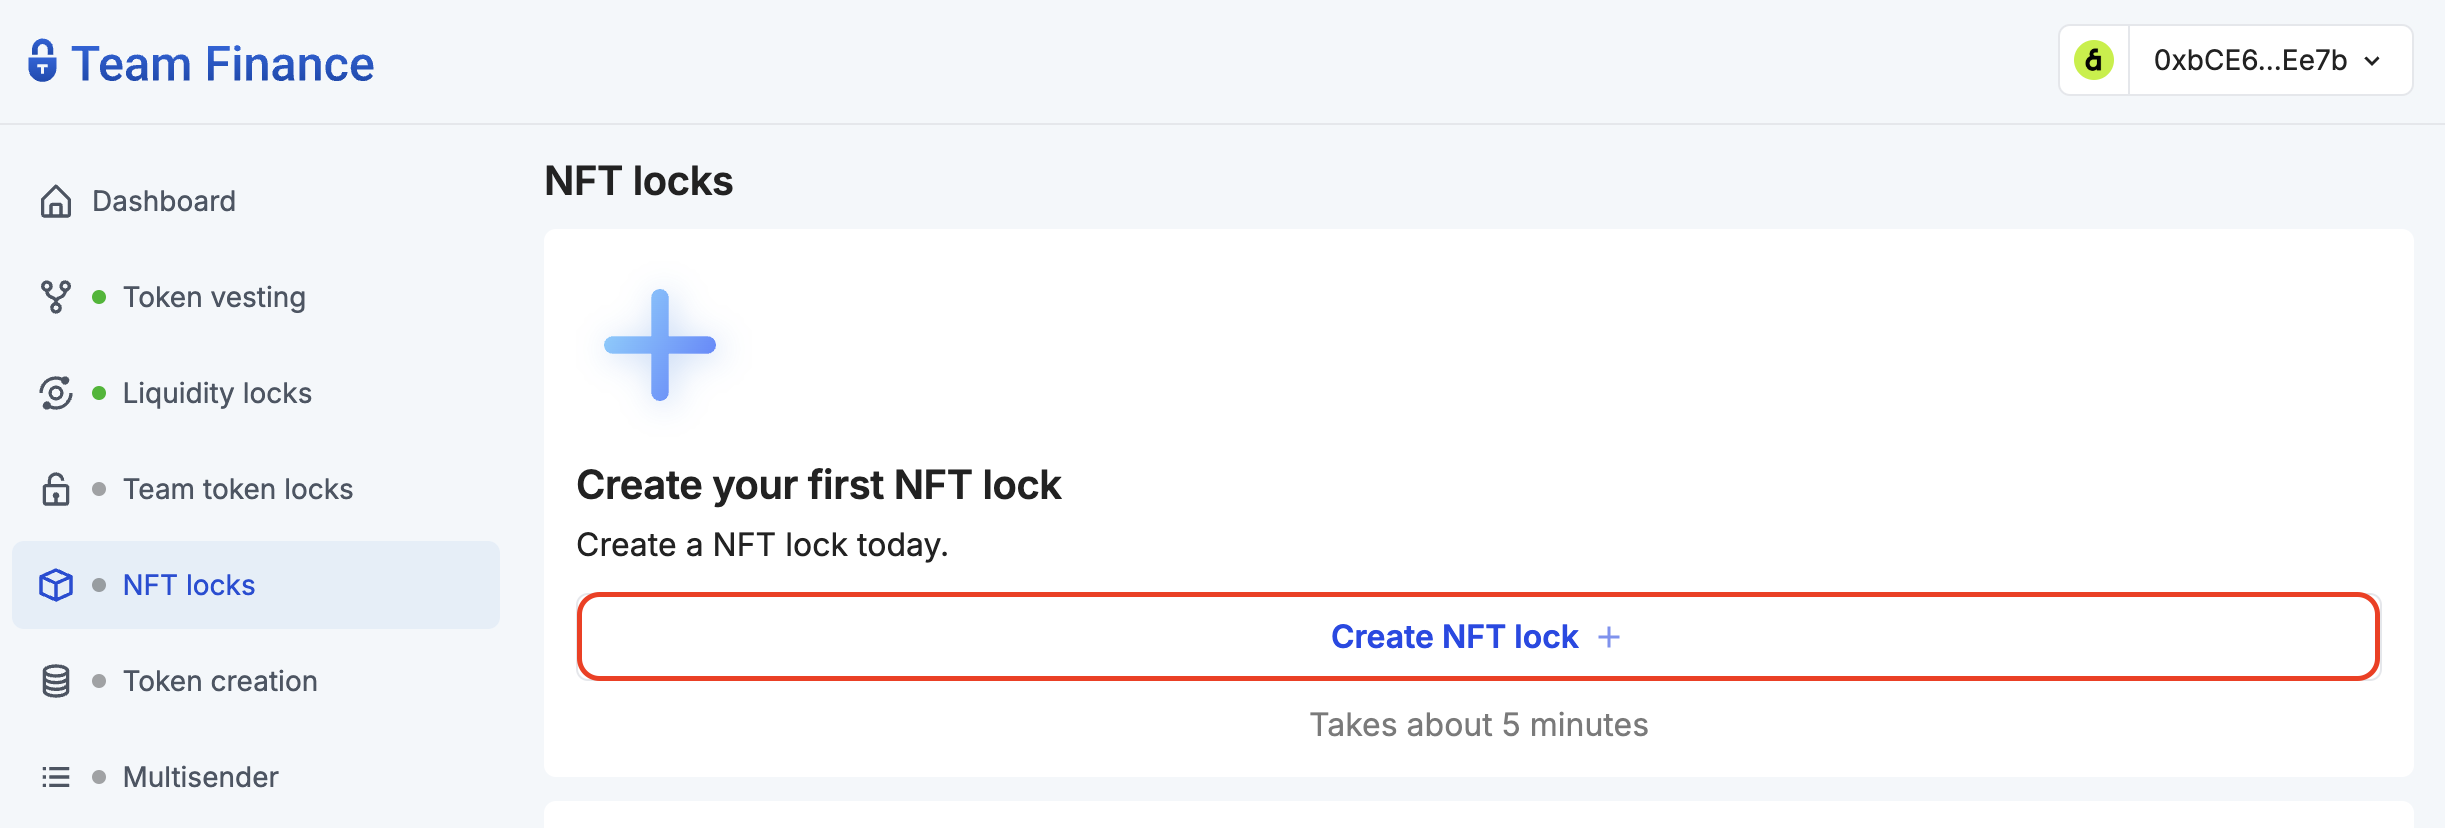
- 팀 재무 NFT 잠금 탭으로 이동하여 NFT 잠금 만들기를 클릭합니다.
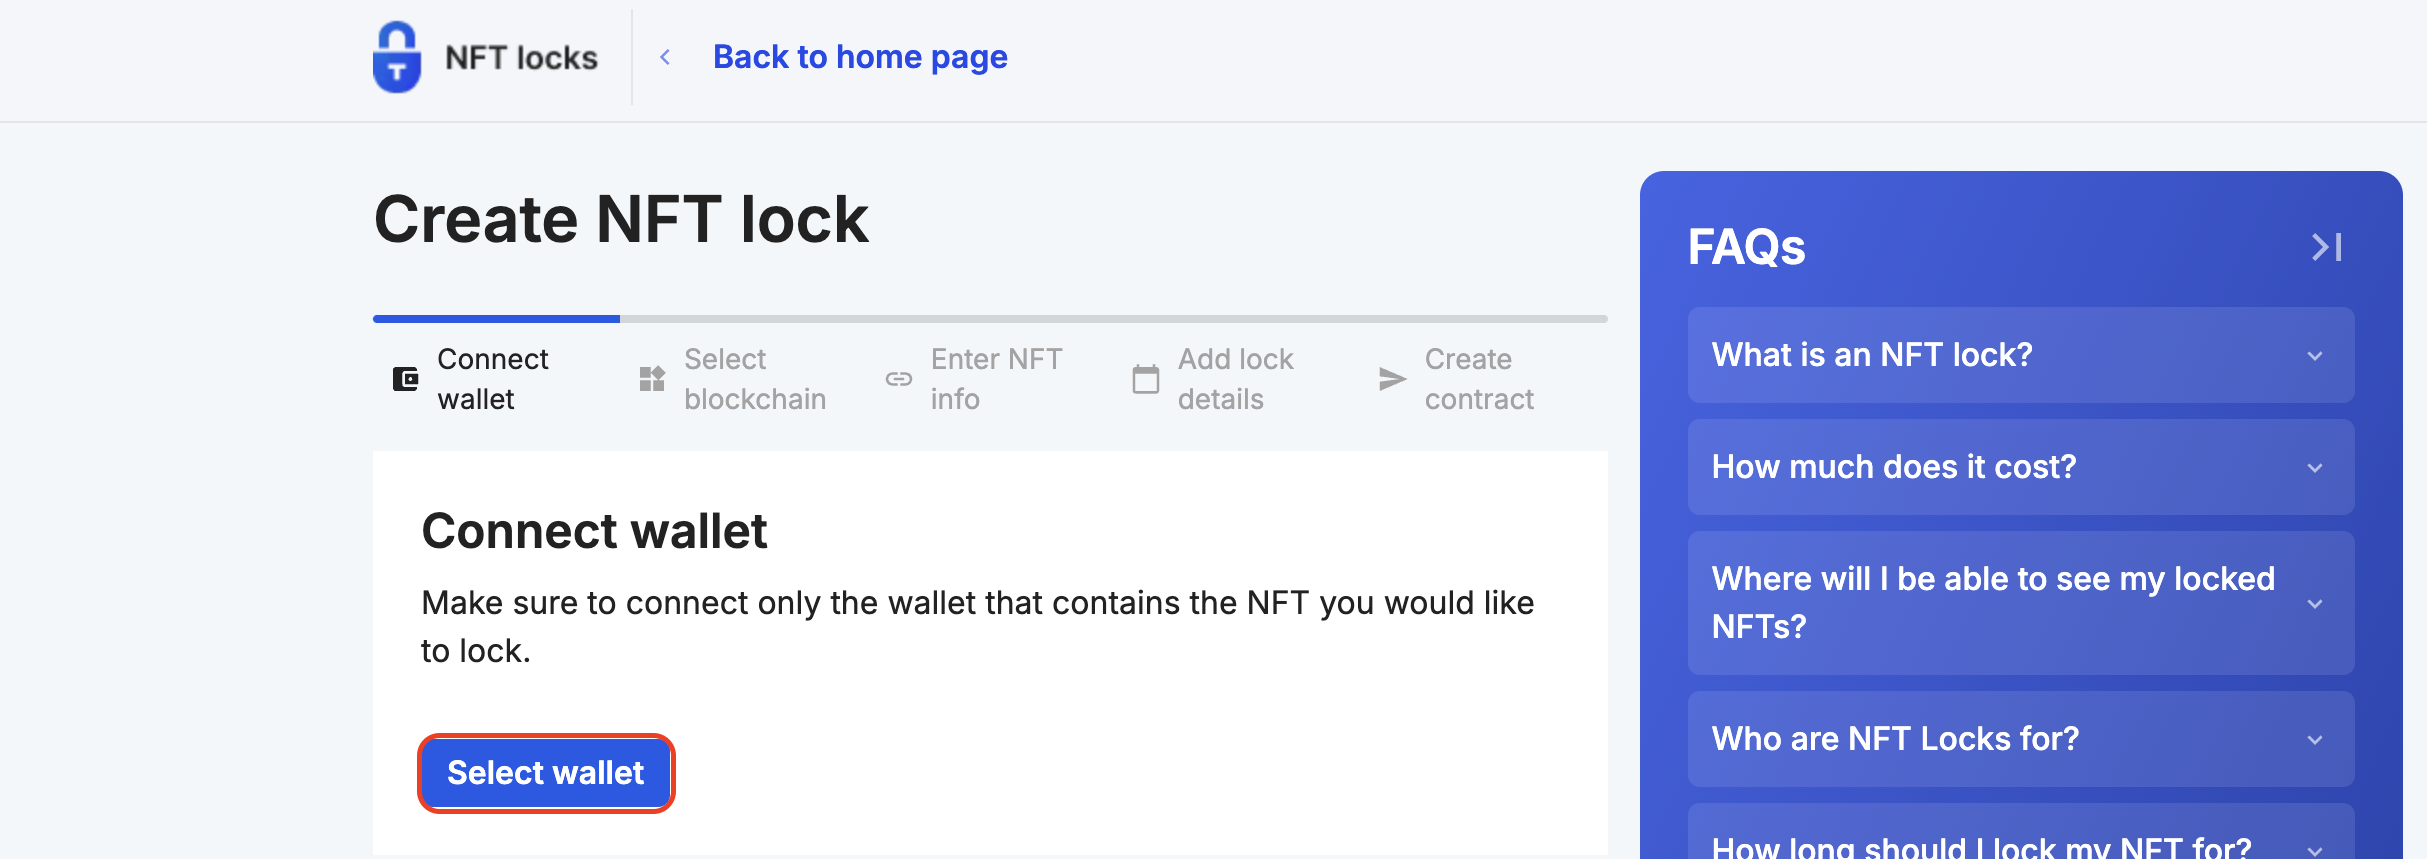
- 지갑을 지갑 선택을 클릭하고 계속을 클릭하여 팀 재무에 지갑을 연결합니다.
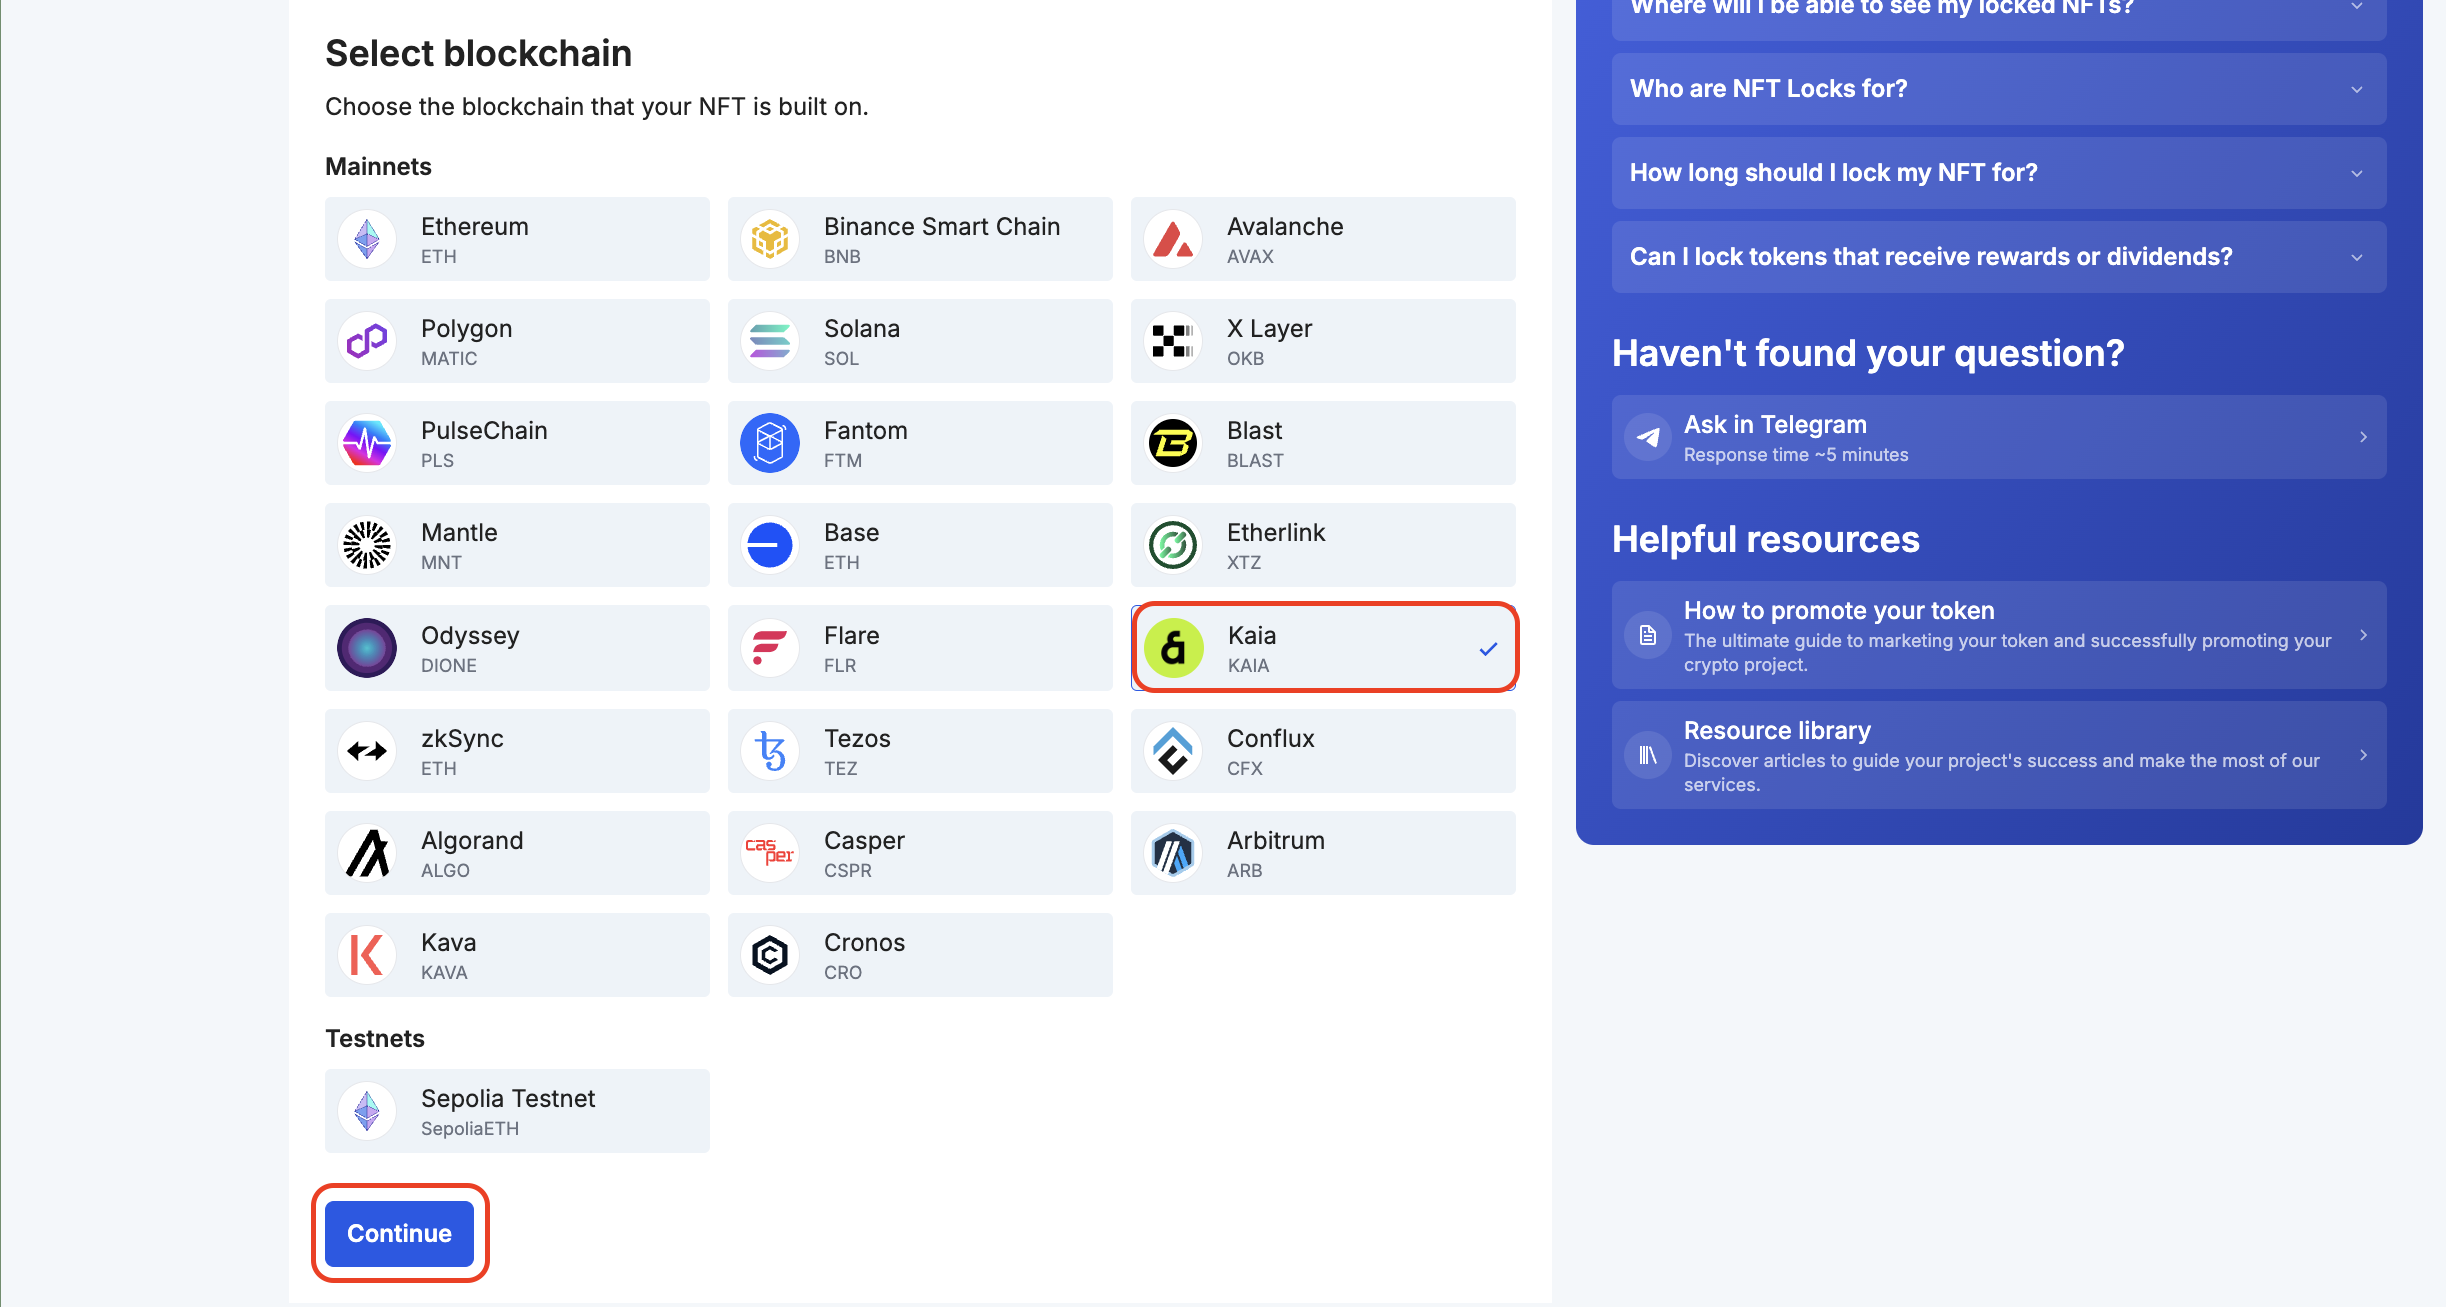
- 블록체인 네트워크 아래에서 Kaia를 선택하고 계속하기를 클릭합니다.
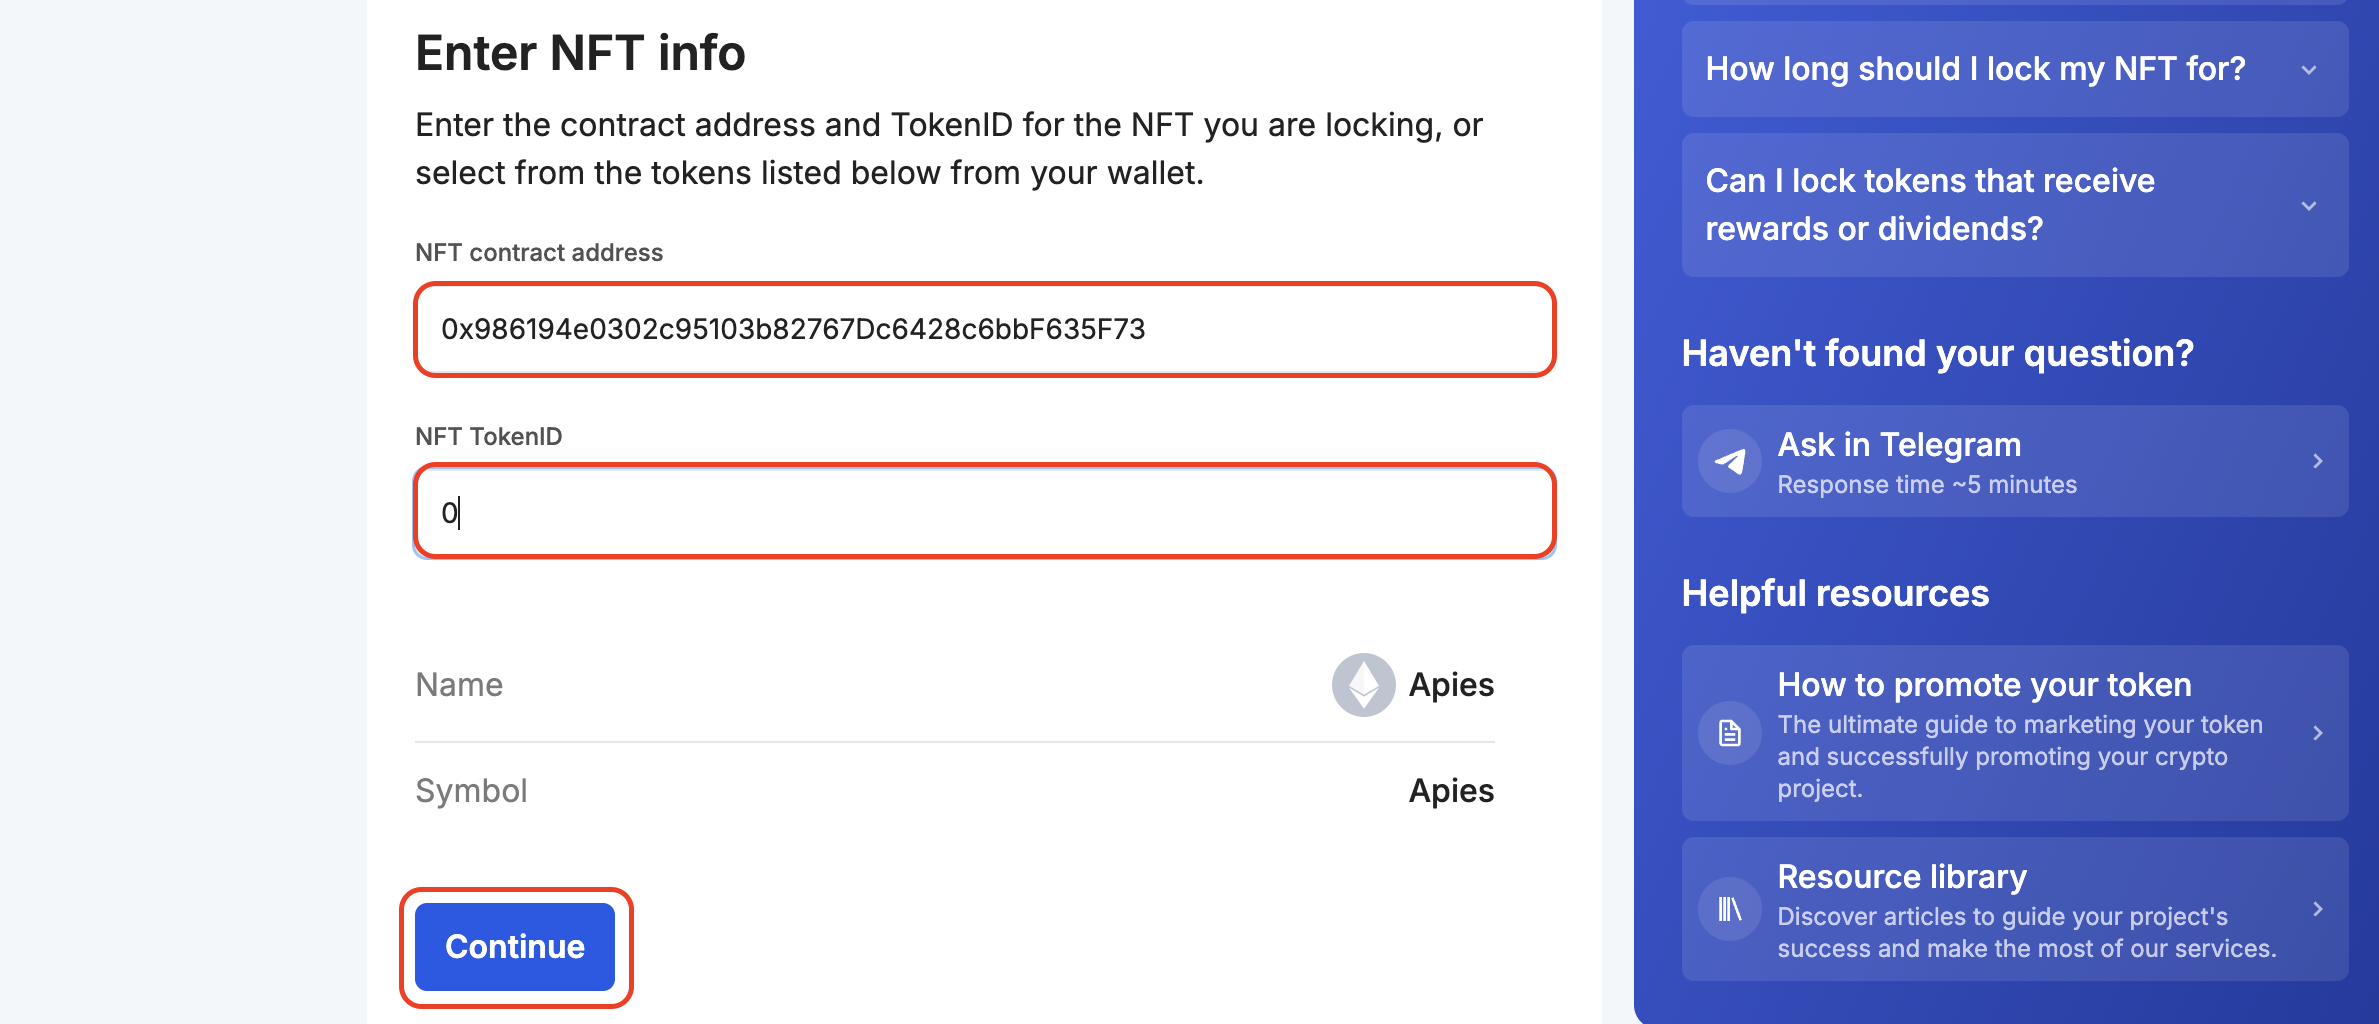
- 잠그려는 NFT의 **NFT 정보(컨트랙트 주소와 토큰 아이디)**를 입력하고 계속하기를 클릭합니다.
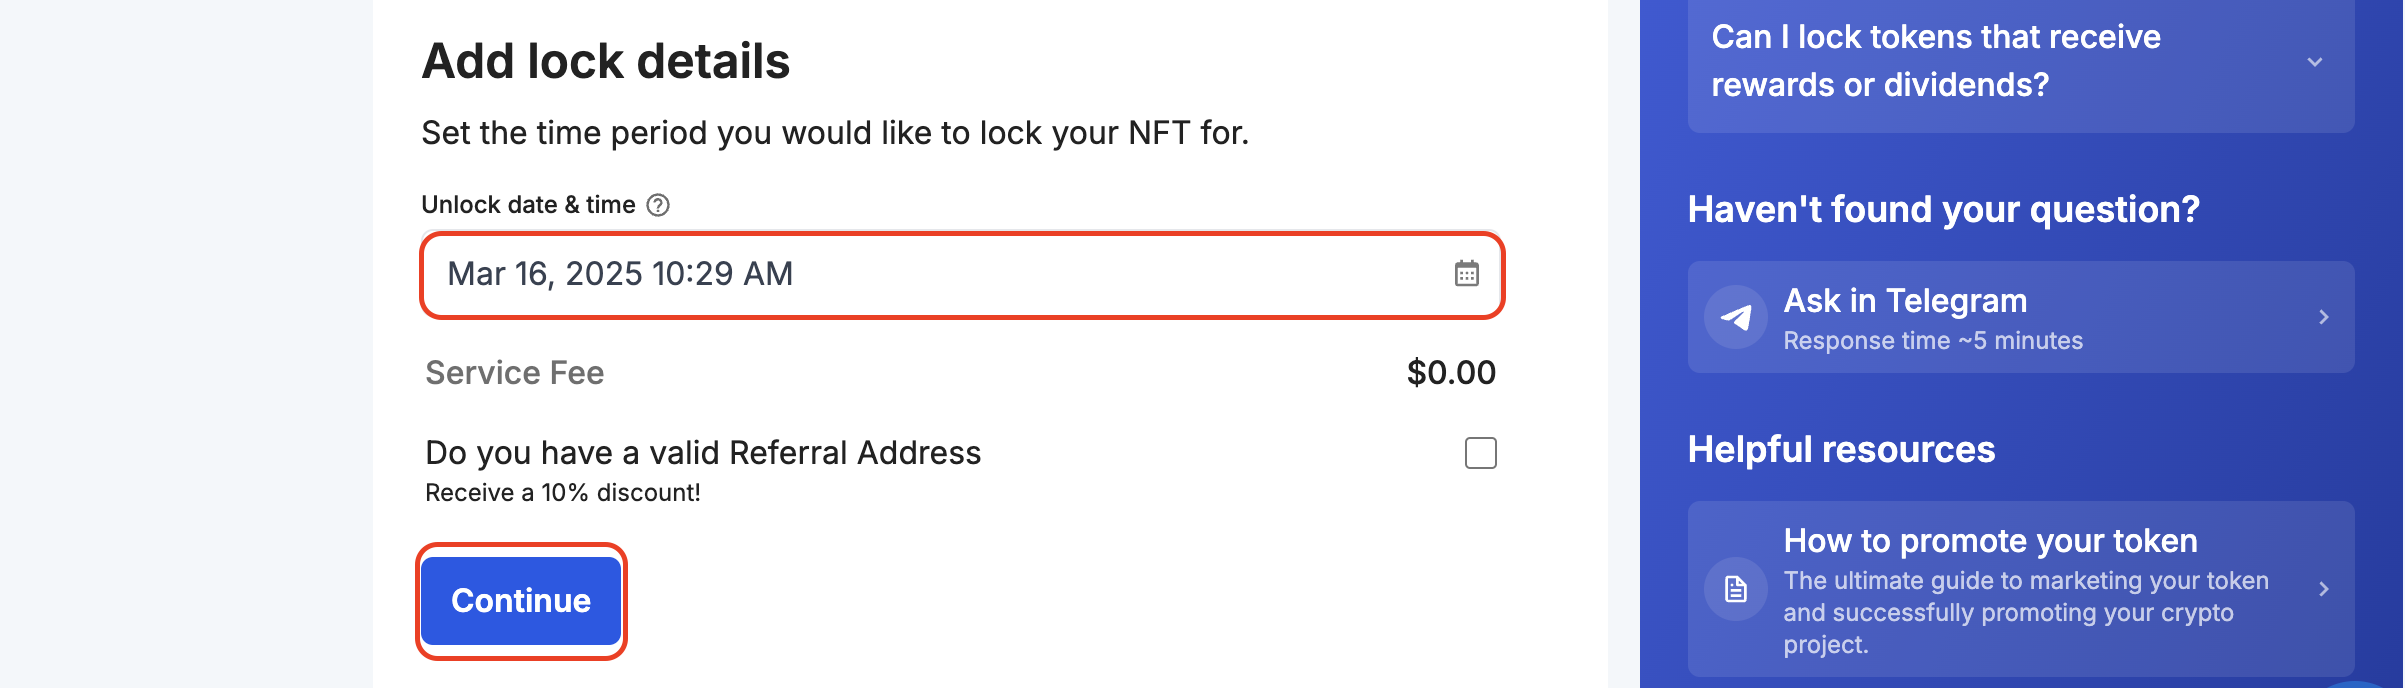
- NFT를 잠글 기간�을 설정합니다.
- 권한 부여**를 클릭하여 NFT 토큰을 잠글 수 있는 권한을 부여하세요.

그러면 인증 거래에 서명하라는 메시지가 표시됩니다.
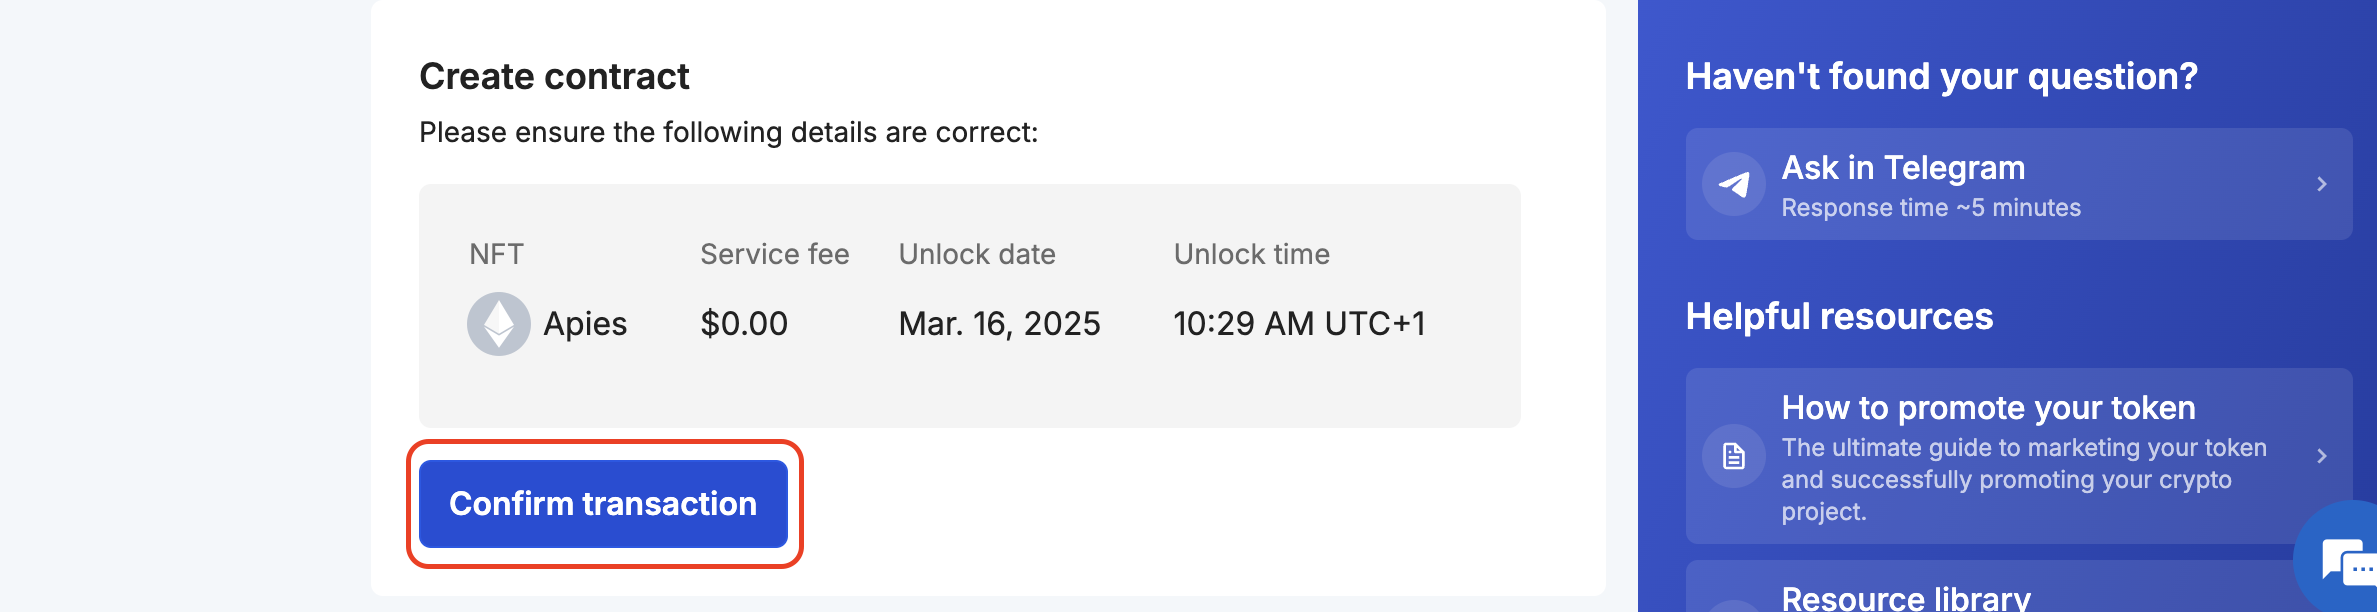
- NFT 잠금 정보를 확인한 다음 거래 확인을 클릭합니다. 지갑에 거래에 서명하여 프로세스를 완료하라는 메시지가 표시됩니다.
- 확인이 완료되면 거래 상태를 보여주는 페이지로 다시 연결됩니다. 거래가 확정될 때까지 페이지에서 다른 곳으로 이동하지 마세요.

- 축하합니다! 팀 파이낸스를 사용하여 NFT 잠금을 성공적으로 만들었습니다. 대시보드에서 잠금에 대한 세부 정보를 확인하고 진행 상황을 추적할 수 있습니다.