このページは英語からの機械翻訳を使用しており、誤りや不明瞭な表現が含まれている可能性があります。最も正確な情報については、オリジナルの英語版をご覧ください。頻繁な更新のため、一部のコンテンツはオリジナルの英語になっている可能性があります。Crowdinでの取り組みに参加して、このページの翻訳改善にご協力ください。 (Crowdin translation page, Contributing guide)
Web3の統合
このセクションでは、Unityプロジェクトにweb3を統合するためのパーツを作成します。
KIP7スマートコントラクトの作成とデプロイ
まず、Kaiaコントラクト・ウィザードを使ってスマート・コントラクトを生成する。
ステップ1:カイア契約ウィザードの使用
- カイア契約ウィザードに移動します。
- KIP7(ERC20に似たカイアのトークン規格)を選択する。
- トークンを設定します:
- 名前ExampleTestToken (または他の何か!)
- シンボルET(あなたのトークンのティッカー)
- プレミント100(初期トークン供給)
- 特徴チェック ✅ 造幣可能
このガイドでは、onlyOwner修飾子を持たないようにmint関数を調整します。 そのためには、ownable.solのインポートとOwnableの継承を削除しなければならない。 手を加えたコードは次のようになるはずだ:
// SPDX-License-Identifier: MITpragma solidity ^0.8.4;import "@kaiachain/contracts/KIP/token/KIP7/KIP7.sol";contract ExampleTokens is KIP7 { constructor() KIP7("ExampleTokens", "ET") { _mint(msg.sender, 100 * 10 ** decimals()); } function supportsInterface(bytes4 interfaceId) public view virtual override returns (bool) { return super.supportsInterface(interfaceId); } function mint(uint256 amount) public { _mint(msg.sender, amount); }}
インフォメーション
onlyOwner修飾子を削除し、オリジナルのデプロイメント者やコントラクトの所有者以外の誰でもミント関数を呼び出せるようにした。
ステップ2:Remix IDEを使ったデプロイ
- 上記のコードをRemix IDE上で新規作成したファイル
ET.solにコピー&ペーストする。 - リミックスIDEで:
- 契約書をコンパイルする**ボタンをクリックする。
- プラグインマネージャーでKaiaプラグインを有効にする。
- Kaia PluginタブのEnvironmentで、Injected Provider - Kaia Walletを選択します。
- Contract**ドロップダウンで契約(ExampleTokens)を検索します。
- Deploy**をクリックしてトークンを起動します!
- カイア�ウォレットがポップアップしたら:
- 配備の詳細を確認する。
- 確認」をクリックすると、Kaia Kairos Testnetにデプロイされます。
important
展開された契約アドレスをコピーして保存する。 チュートリアルの後半で必要になる。
Unity-Web3ブリッジの構築
それでは、UnityとWeb3の機能の重要な接続を作成します。 そこで、Unityアプリケーションにブロックチェーン機能を導入します!
その1:プラグインブリッジ(kaiaPlugin.jslib)の作成
まず、UnityとWeb3をつなぐJavaScriptのブリッジを作ります:
- プラグインディレクトリを作成します:
Assets/└── Plugins/ └── WebGL/ └── KaiaPlugin.jslib // We'll create this file
-
なぜ.jslibなのか? UnityのC#とブラウザのJavaScriptをつなぐトランスレーターのようなものだ!
-
プラグインは3つのコア機能を処理する:
- ConnectWallet() - カイアウォレット接続を処理する
- GetTokenBalance() - トークンの残高をチェックする
- MintTokens() - トークンの鋳造を管理する
このファイルをVS Codeで開き、Appendix AにあるKaiaPlugin.jslibのソースコードを貼り付ける:
パート2:C#マネージャー(Web3Manager.cs)の作成
次に、Web3のすべての操作を管理するC#スクリプトを作成します:
- scriptsディレクトリを作成します:
Assets/└── Scripts/ └── Web3/ └── Web3Manager.cs // We'll create this file
インフォメーション
**Web3Managerは何をするのか?
- Web3の全業務のメインコンダクターとして活動。
- JavaScriptプラグインとの通信を管理します。
- ブロックチェーンのイベントに基づいてUI要素を更新する。
- すべてのウォレットとトークンの操作を処理します。
- ウォレットに接続
とミント`ボタンをそれぞれの機能で接続する。
- このファイルを VS Code で開き、
Web3Manager.csのソースコードを Appendix B に貼り付ける。
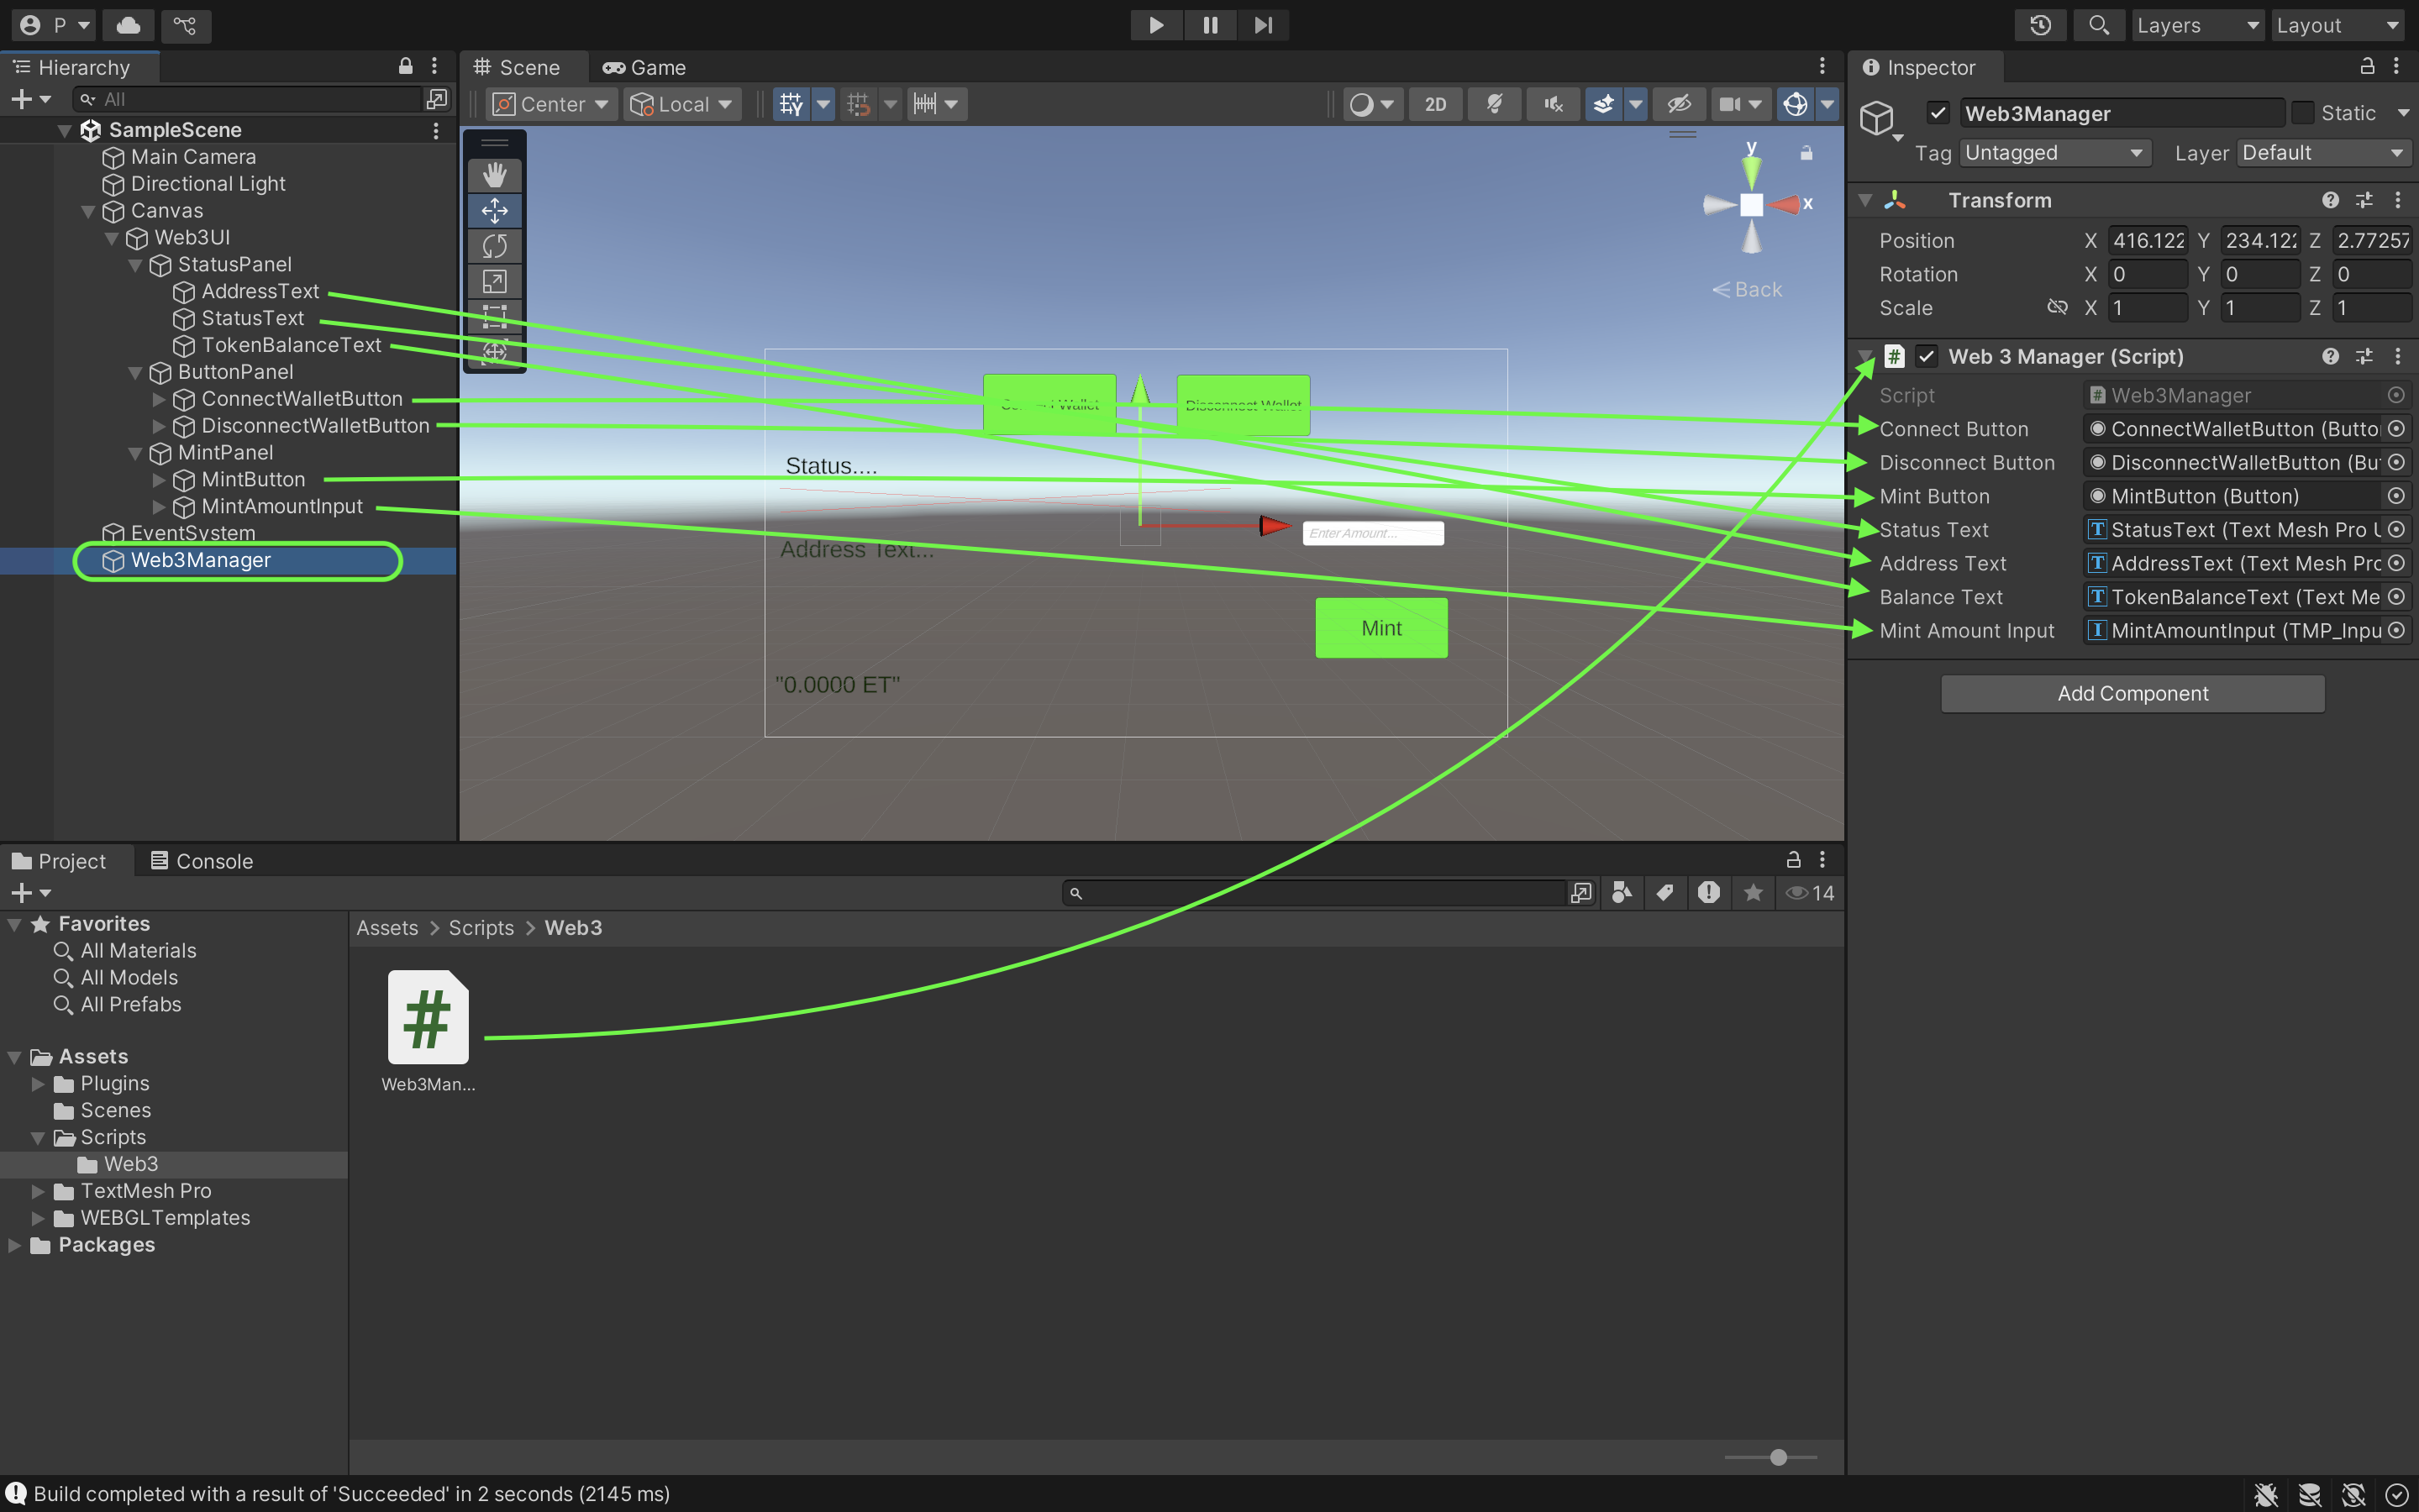
Part 3: Web3Manager GameObjectの設定
最後に、Unityですべてをまとめよう:
- Manager オブジェクトを作成します:
- 階層ウィンドウ(ルートレベル)で右クリックします。
- 空のオブジェクトを作成」を選択する。
- 名前を "Web3Manager "とする。
- 台本を添付してください:
- Web3Manager GameObjectを選択する。
- Inspector]で、[Add Component]をクリックします。
- Web3Manager "を検索して選択します。
- UI要素を接続する:
- Web3Managerを選択した状態で、インスペクタを見ます。
- UI要素を階層から対応するフィールドにドラッグ&ドロップします:
- ステータステキスト
- アドレステキスト
- トークン・バランス・テキスト
- 接続、切断、ミントボタン
- 入力フィールド