Goldsky

Introduction
Goldsky is a high-performance data indexer designed to simplify the extraction, transformation, and loading (ETL) of on-chain data. It enables developers to build and ship real-time analytics and blockchain-integrated applications faster.
Goldsky offers two core products:
- Subgraphs: Flexible, TypeScript-powered indexing with GraphQL APIs, webhook support, and more.
- Mirror: Stream live blockchain data directly into your database or message queue with a single YAML config.
Kaia Mainnet and Testnet are both supported by Goldsky
What You'll Learn
By the end of this guide, you will:
- Understand how Goldsky’s low-code subgraphs (Instant Subgraphs) work
- Configure and deploy a subgraph using the Goldsky CLI
- Index the Transfer event from the USDT contract on Kaia Mainnet
- Access and test your subgraph endpoint via GraphQL
Prerequisites
Before you begin, ensure you have the following:
1. Install Goldsky CLI
- Follow the installation instructions for your operating system.
- Windows users: Ensure Node.js and npm are installed before installing the CLI.
2. Create a Goldsky Account
- Sign up at Goldsky.com if you don't already have an account.
3. Generate an API Key
- Navigate to Project Settings in your Goldsky dashboard.
- Create and copy your API key.
4. Authenticate the CLI
goldsky login
- Paste in your API key when prompted.
- Confirm CLI authentication by running:
goldsky
Getting Started
Goldsky supports three methods for deploying a subgraph:
- From Source Code – Deploy custom-built subgraphs from your local development environment.
- Migrate from Other Hosts – Move existing subgraphs from platforms like The Graph or Alchemy.
- Instant Subgraphs (Low-Code / No-Code) – Use a configuration file (low-code) or UI (no-code) to deploy subgraphs without writing traditional subgraph mapping code.
In this guide, we’ll use the low-code approach to deploy a subgraph that indexes the Transfer event from the USDT contract on Kaia Mainnet.
Set up and deployment
The low-code approach allows us to create configuration files manually, however we still don’t need to write traditional subgraph mapping code - Goldsky generates it from our configuration.
So for this section you will only be needing the :
- Contract address of USDT on Kaia
- ABI (Application Binary Interface) of the contract
- Start block (block at which contract was deployed)
Retrieving the USDT Contract ABI
-
Visit Kaiascan to find the USDT contract address.
-
Click the Contract tab and locate the Contract ABI section.
Note: USDT is a proxy contract. Be sure to retrieve the implementation contract ABI.
-
Copy and paste the Contract ABI and save it as abi.json in your working directory.
-
Record the contract’s deployment block number.
Creating the Configuration File
The next step is to create the Instant Subgraph configuration file (e.g. usdt-demo-config.json).
This file consists of five key sections:
- Config version number
- Config name
- ABIs
- Chains
- Contract instances
Version Number
This is the version number of Goldsky’s configuration file format and not the version number of your subgraph. Refer to this reference for up to date version number.
Config name
This is a name of your choice that helps you understand what this config is for. It is only used for internal debugging. For this guide, we’ll use usdt-demo
ABIs, chains, and contract instances
These three sections are interconnected.
-
Name your ABI and enter the path to the ABI file you saved earlier (relative to where this config file is located). In this case,
usdtabiandabi.json. -
Write out the contract instance, referencing the ABI you named earlier, address it’s deployed at, chain it’s on, the start block.
Example: usdt-demo-config.json
{ "version": "1", "name": "usdt-demo", "abis": { "usdtabi": { "path": "./abi.json" } }, "instances": [ { "abi": "usdtabi", "address": "0xd077a400968890eacc75cdc901f0356c943e4fdb", "startBlock": 30801565, "chain": "kaia" } ]}
This configuration supports a variety of use cases, including indexing multiple contracts with different ABIs, the same contract deployed across multiple chains, or multiple contracts with unique ABIs on different networks.
Deploying the Subgraph
With your configuration file ready, it’s time to deploy the subgraph.
Deploy the subgraph using the command: goldsky subgraph deploy name/version --from-abi <path-to-config-file>, then pass in the path to the config file you created.
Example:
goldsky subgraph deploy usdt-demo/1.0 --from-abi usdt-demo-config.json

Goldsky automatically generates the required subgraph code, deploys it on your behalf, and provides a query endpoint for immediate use.
Opening the endpoint launches a web-based GraphQL explorer, where you can inspect the schema and compose queries to integrate into your application.
Querying Your Subgraph
Congratulations! You've successfully deployed your subgraph.
Before querying, you may need to wait for your indexer to fully sync, depending on the startBlock value defined in your configuration file. You can monitor sync progress directly in your Goldsky dashboard.
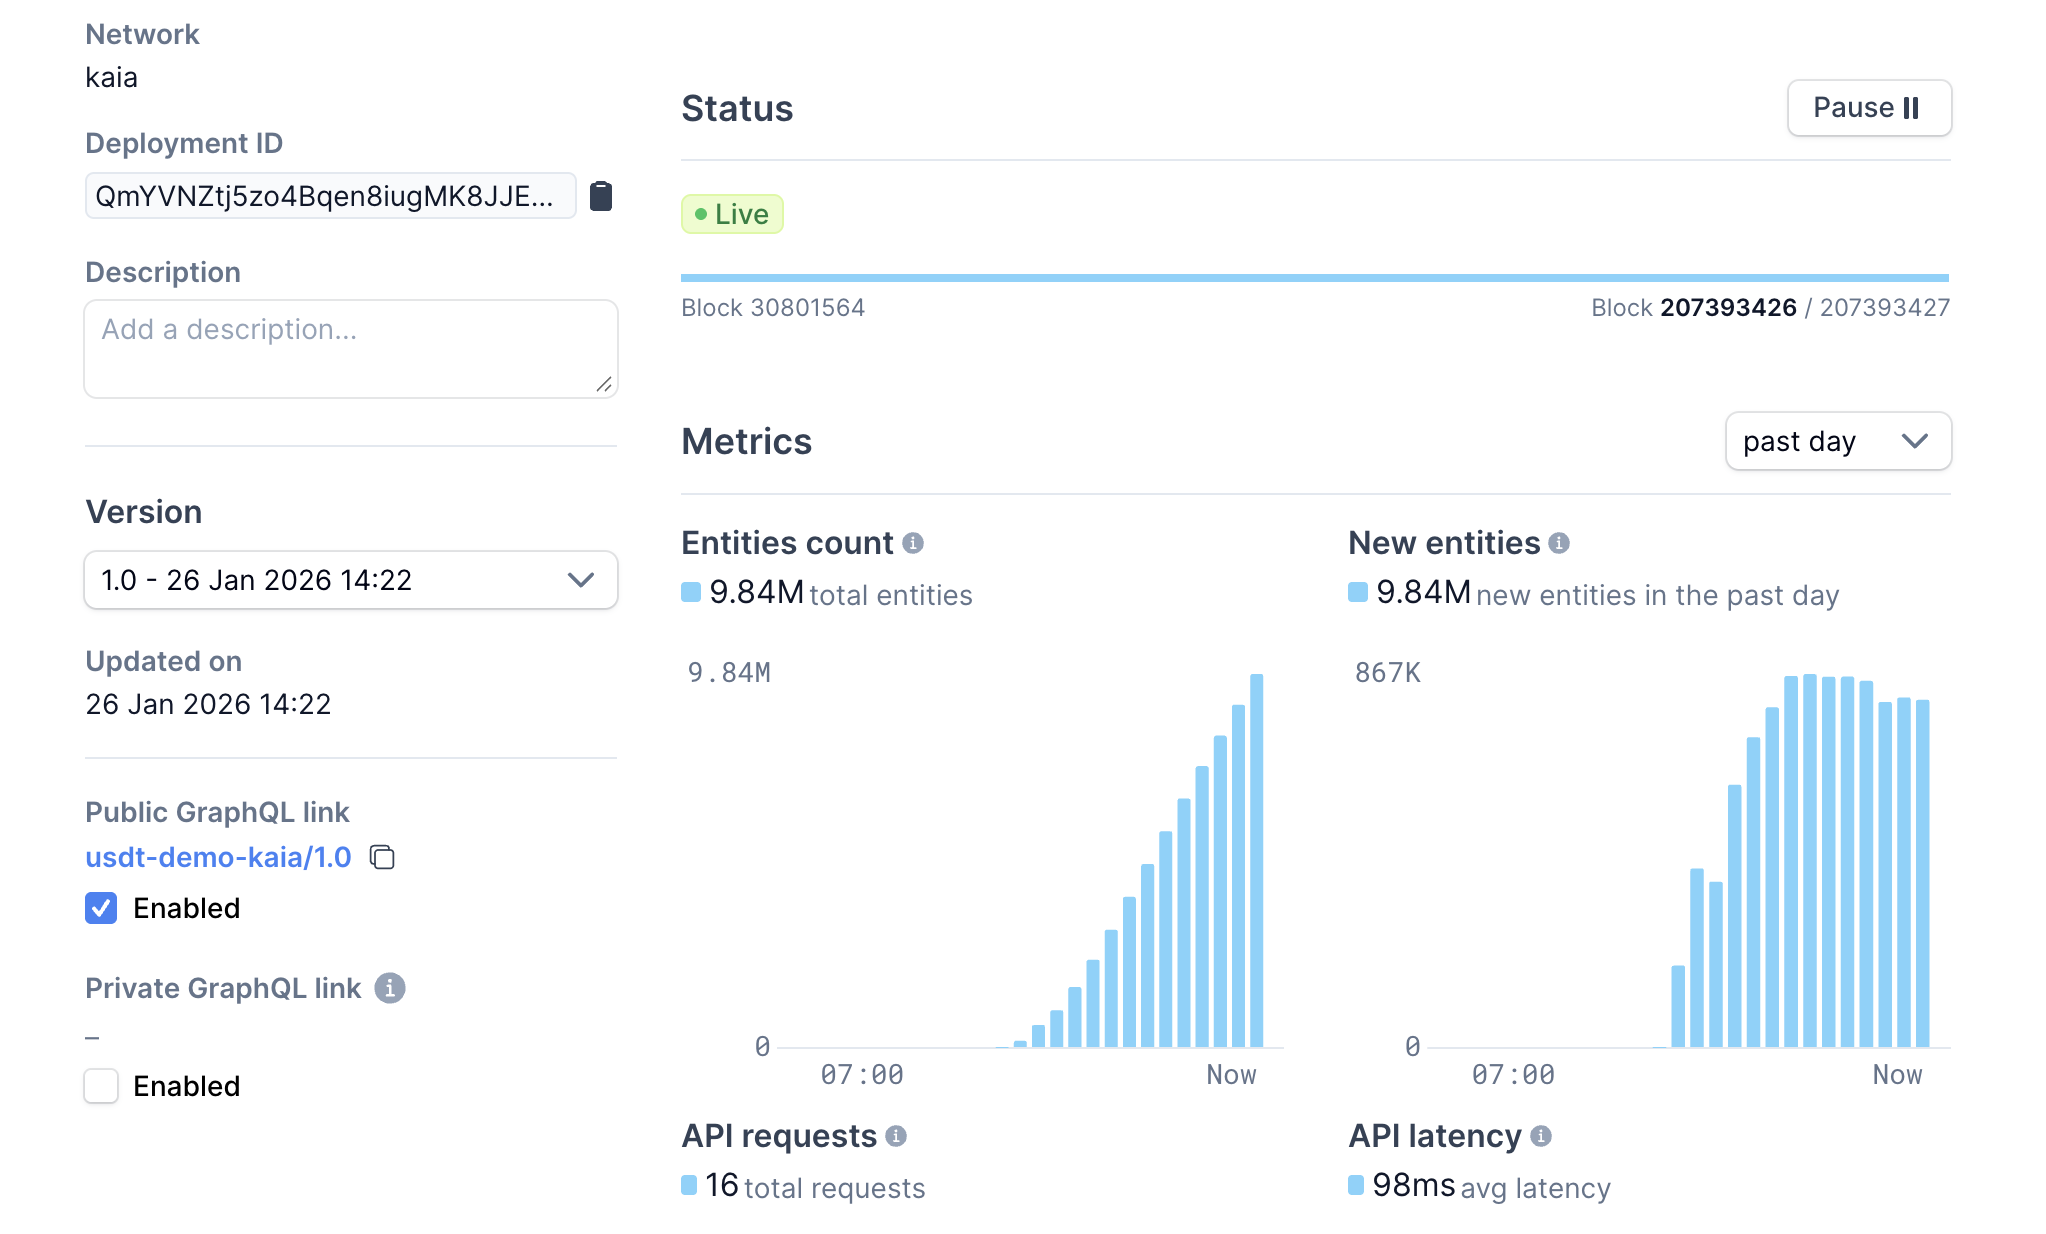
Once the sync is complete, you can query your subgraph using the public endpoint provided by Goldsky:
https://api.goldsky.com/api/public/project_cmkv4p7xa8ix401vc3f32g20g/subgraphs/usdt-demo-kaia/1.0/gn
Use the web-based GraphQL explorer linked from your Goldsky dashboard to browse the schema and test queries interactively
Example Query: Fetching USDT Transfers.
This GraphQL query retrieves the first 10 USDT Transfer events on Kaia Mainnet, sorted by value in descending order:
{ transfers(first: 10, orderBy: value, orderDirection: desc) { from id to value }}
Sample response:
{ "data": { "transfers": [ { "from": "0x0000000000000000000000000000000000000000", "id": "0x3618973a943060e7bd57eb8c49c8770af93241710c891195a311ace77366a26b-4", "to": "0x5754284f345afc66a98fbb0a0afe71e0f007b949", "value": "100000000000000" }, { "from": "0x5754284f345afc66a98fbb0a0afe71e0f007b949", "id": "0x249852a124700338df1d93d272d9a88d41d3c6526fefb7bb76dce27d3c6e6617-2", "to": "0x77134cbc06cb00b66f4c7e623d5fdbf6777635ec", "value": "20000000000000" } // ... ] }}
Sample Code: Querying via JavaScript (Axios)
Here’s a simple example of how to send the same query using axios in Node.js:
const axios = require('axios');const graphqlQuery = ` { transfers(first: 10, orderBy: value, orderDirection: desc) { from id to value } }`;const queryUrl = 'https://api.goldsky.com/api/public/project_cmkv4p7xa8ix401vc3f32g20g/subgraphs/usdt-demo-kaia/1.0/gn';axios.post(queryUrl, { query: graphqlQuery }) .then((response) => { const data = response.data.data; console.log(data); }) .catch((error) => { console.error('GraphQL query failed:', error); });