本頁面使用機器翻譯自英語,可能包含錯誤或不清楚的語言。如需最準確的信息,請參閱英文原文。由於更新頻繁,部分內容可能與英文原文有出入。請加入我們在 Crowdin 上的努力,幫助我們改進本頁面的翻譯。 (Crowdin translation page, Contributing guide)
Web3 整合
在本節中,我們將透過建立代幣合約、撰寫與其互動的腳本,以及利用 Mini Dapp SDK 進行錢包連線、代幣鑄造和餘額擷取,將 Web3 功能整合到我們的 Cocos Creator 專案中。 到最後,您的 dApp 將與區塊鏈進行無縫互動,在您的遊戲中實現流暢的 Web3 互動。
建立與部署 KIP7 智慧型契約
首先,我們會使用 Kaia Contract Wizard 來產生我們的智慧型契約。
步驟 1:使用 Kaia 契約精靈
- 導覽至 Kaia Contract Wizard。
- 選擇 KIP7 (Kaia 的代幣標準,類似 ERC20)。
- 配置您的令牌:
- 名稱:ExampleTestToken (或其他名稱!)
- 代號:ET (您的代幣代號)
- Premint:100 (初始代幣供應)
- 功能:檢查 ✅ 可鑄造
在本指南中,我們將調整 mint 函式,使其沒有 onlyOwner 修改器。 要做到這一點,我們必須移除 ownable.sol 的匯入,以及 Ownable 的繼承。 調整後的程式碼應該是這樣的:
// SPDX-License-Identifier: MITpragma solidity ^0.8.4;import "@kaiachain/contracts/KIP/token/KIP7/KIP7.sol";contract ExampleTokens is KIP7 { constructor() KIP7("ExampleTokens", "ET") { _mint(msg.sender, 100 * 10 ** decimals()); } function supportsInterface(bytes4 interfaceId) public view virtual override returns (bool) { return super.supportsInterface(interfaceId); } function mint(uint256 amount) public { _mint(msg.sender, amount); }}
信息
我們移除了 onlyOwner 修改器,允許除原始部署者或契約擁有者之外的任何人呼叫 mint 函式。
步驟 2:透過 Remix IDE 部署
- 複製並貼上上述程式碼到 Remix IDE 新建立的檔案 ET.sol。
- 在 Remix IDE 中:
- 按一下 ** 編譯合約** 按鈕。
- 在外掛程式管理員中啟動 Kaia 外掛程式。
- 在 Kaia 外掛索引標籤的「環境」下,選擇 注入提供者 - Kaia Wallet。
- 在 Contract 下拉式選單中找到您的合約 (ExampleTokens)。
- 按一下 ** 部署** 以啟動您的令牌!
- 當您的 Kaia Wallet 彈出時:
- 檢視部署詳細資訊。
- 按一下「確認」以部署到 Kaia Kairos Testnet。
備註
複製並儲存已部署的合約位址。 您在稍後的教學中會用到它。
建立指令碼檔案
為了整合 Web3 功能,我們需要建立腳本檔來處理區塊鏈互動和 UI 管理。
1. 建立腳本資料夾
- 導覽到專案的 assets 資料夾。
- 按一下滑鼠右鍵,然後選取 ** 建立 → 資料夾**。
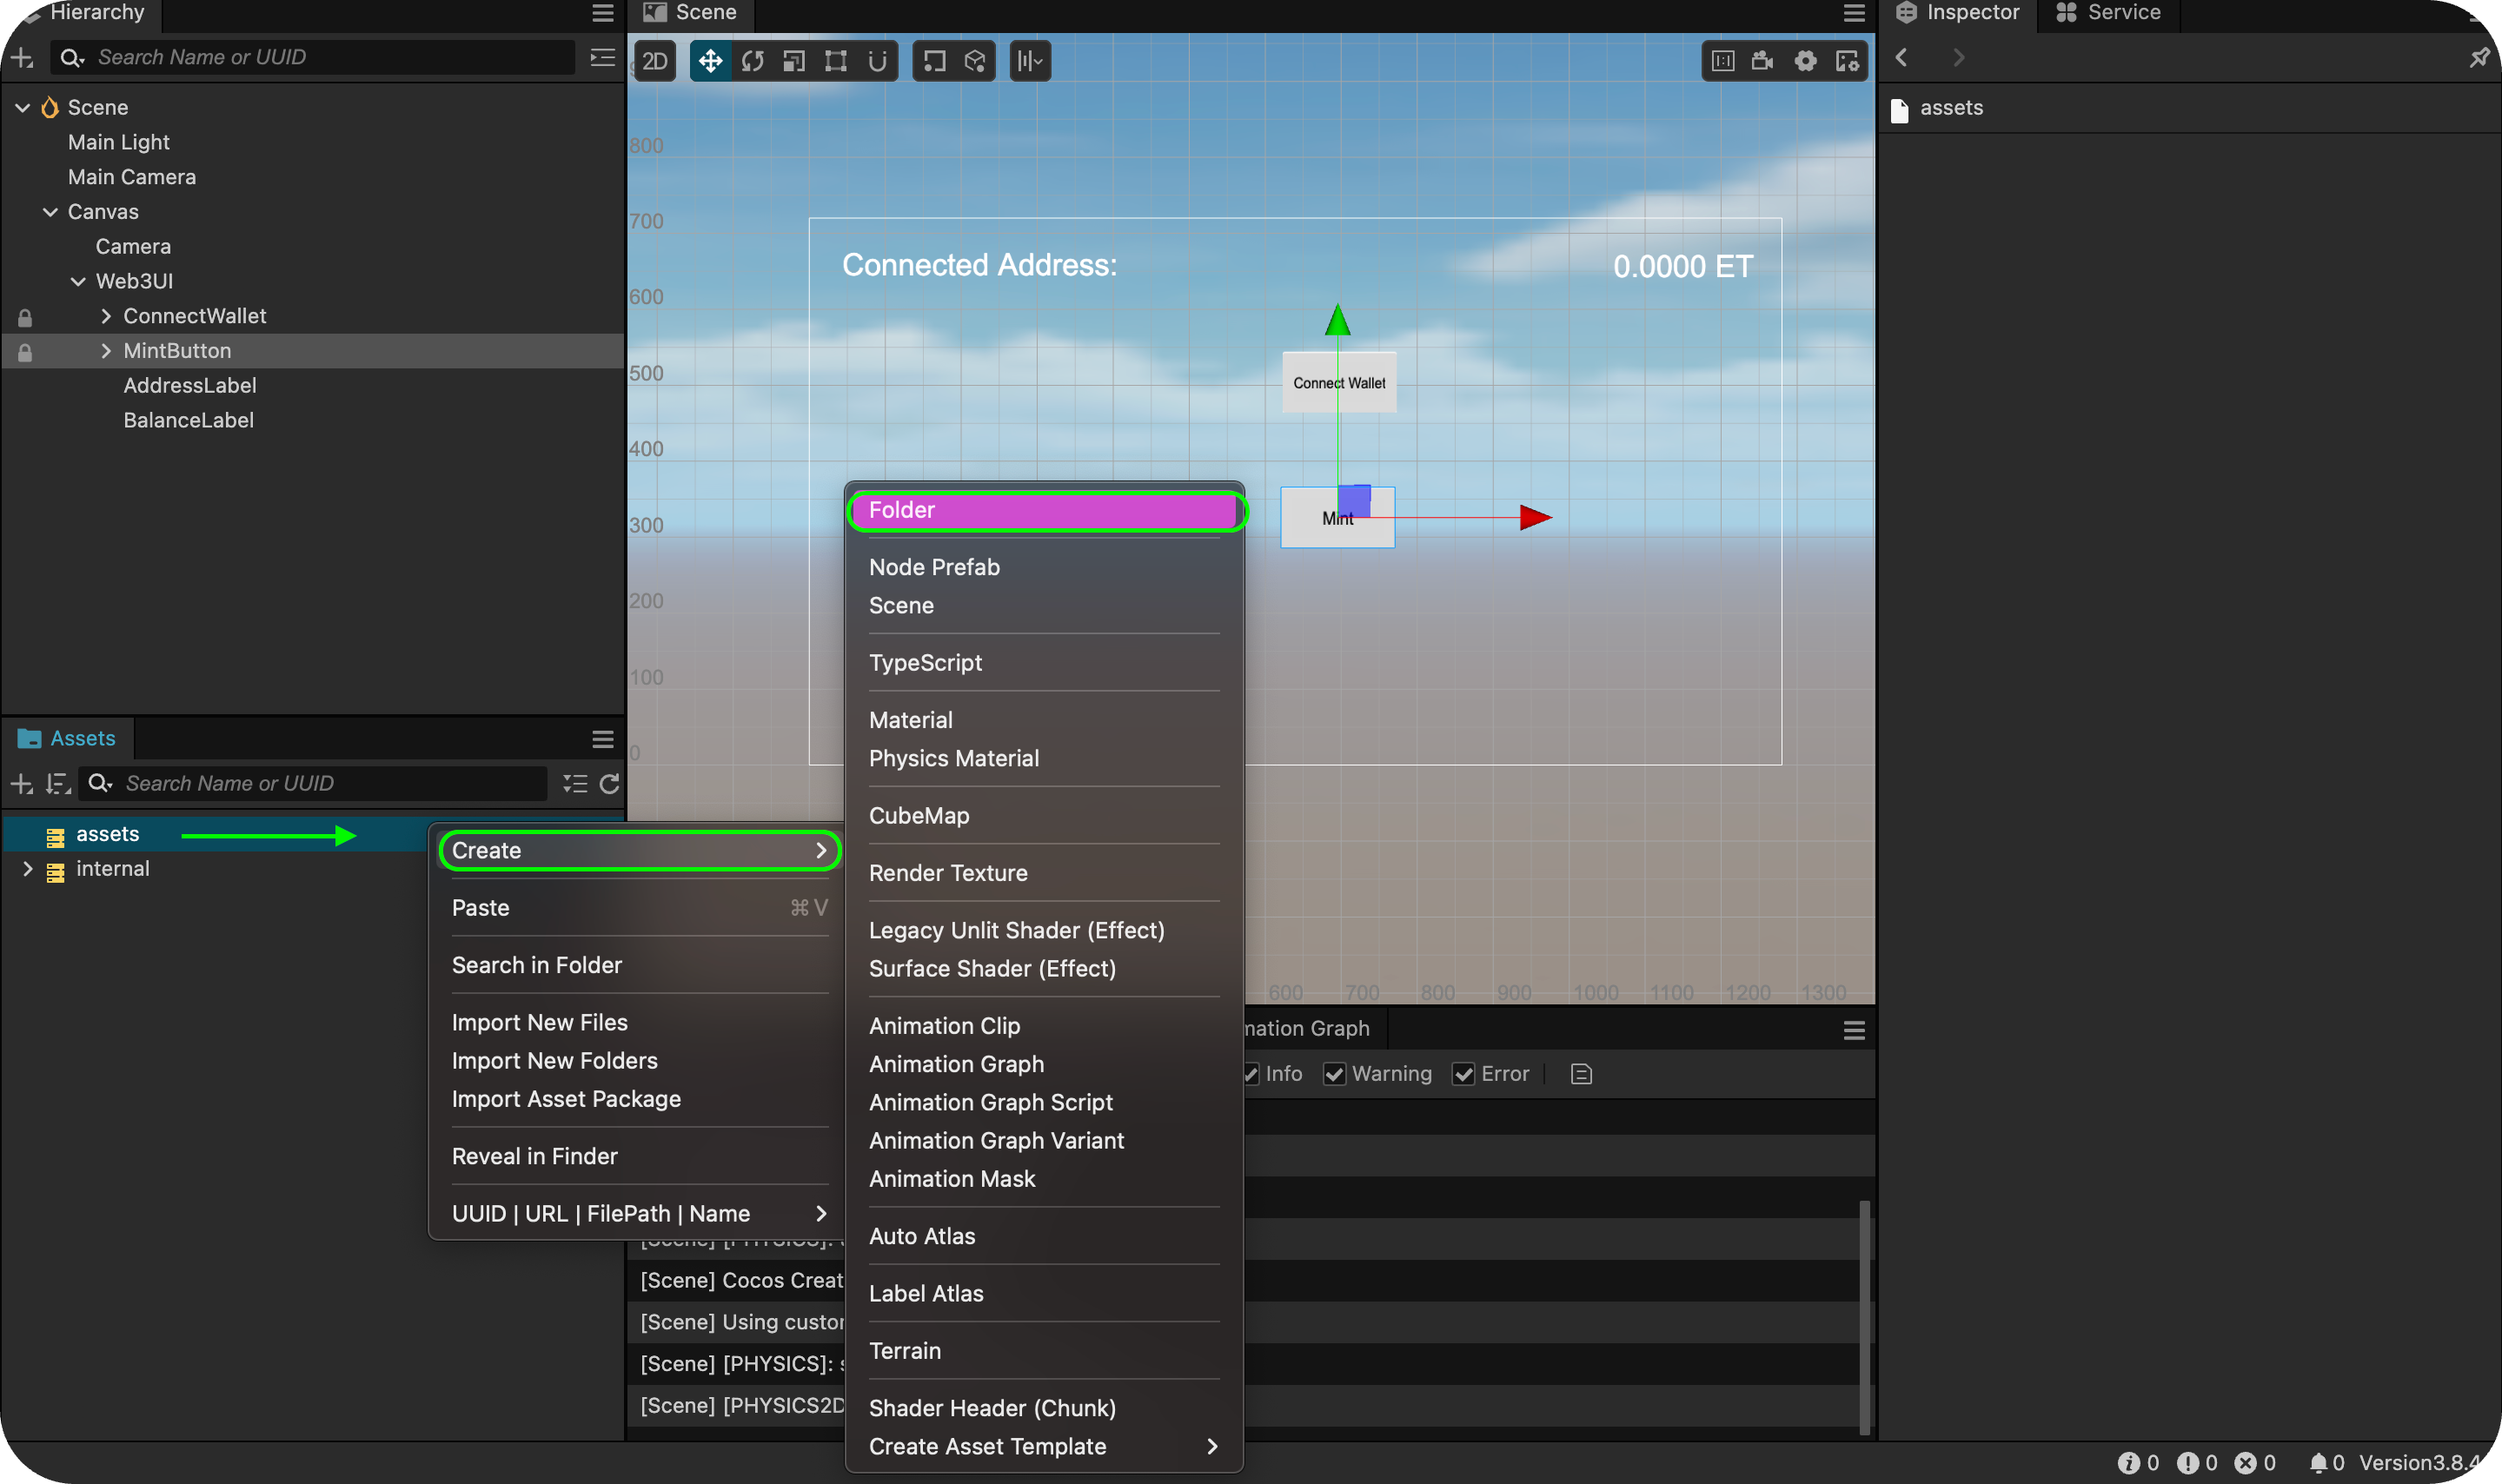
- 將其命名為 腳本。
2. 建立 Web3 Script 檔案
在 scripts 資料夾內,建立兩個 TypeScript 檔案:
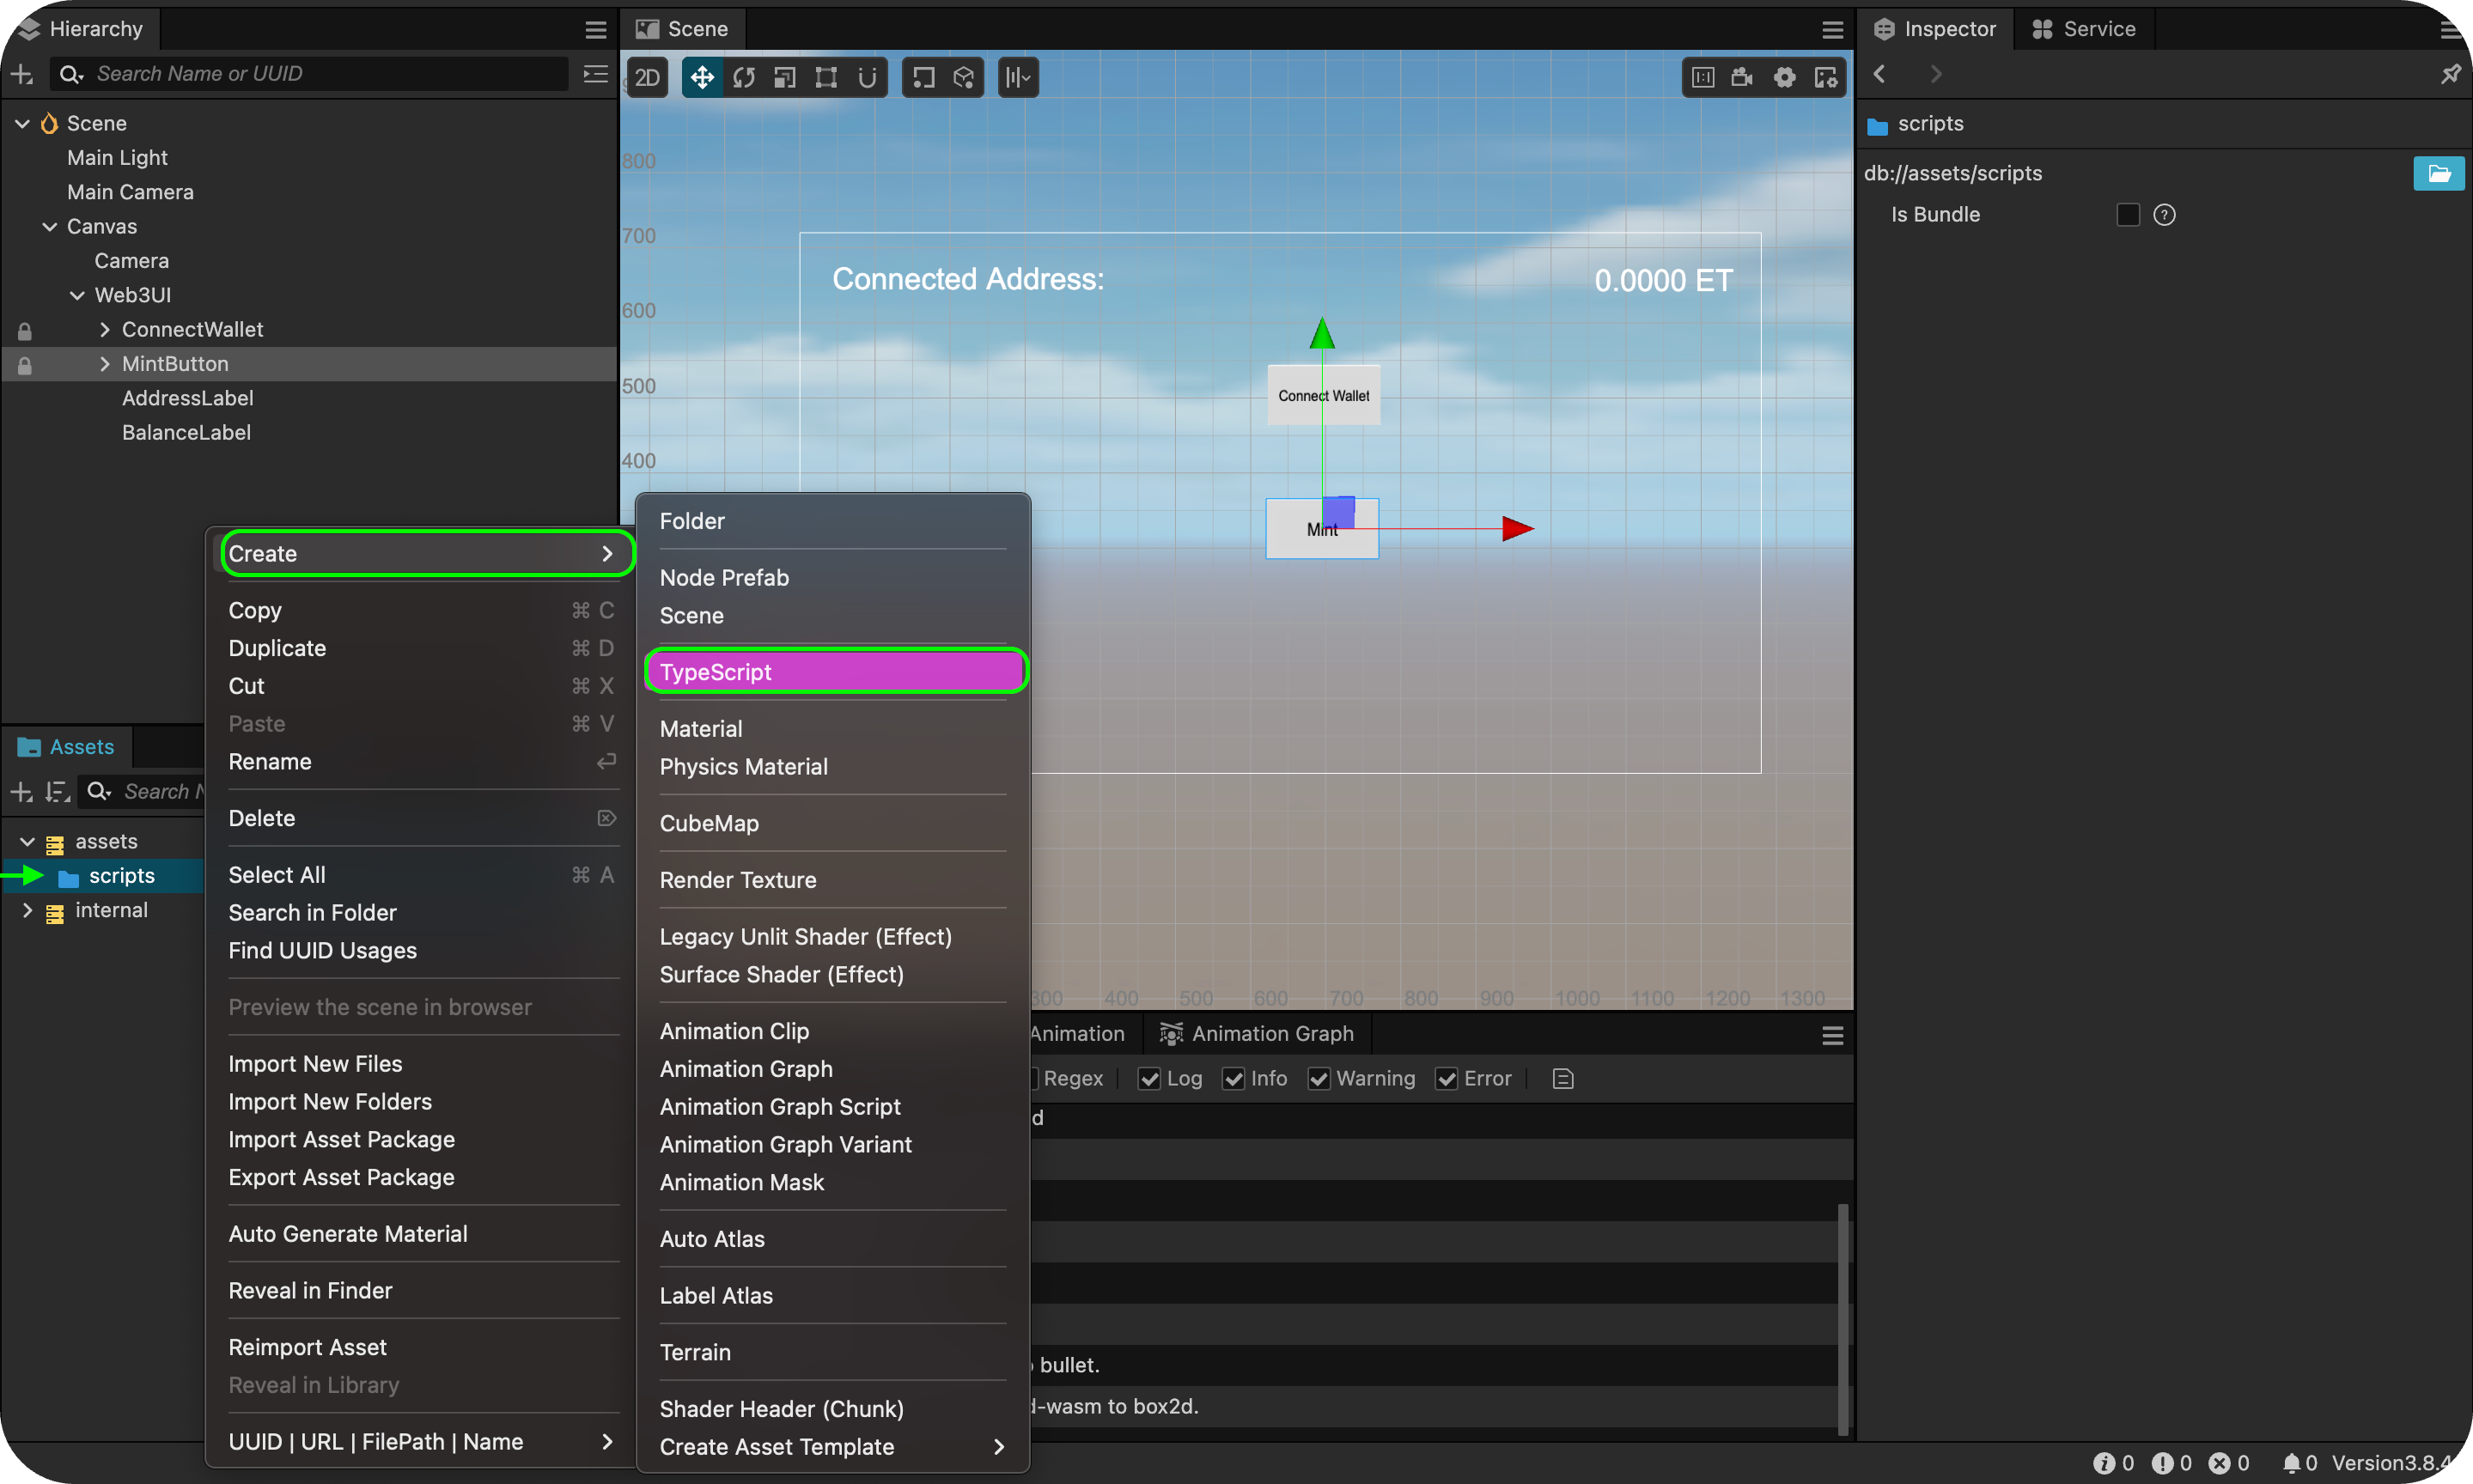
- Web3Manager.ts - 處理區塊鏈互動。
- UIManager.ts - 管理 UI 元素和使用者互動。
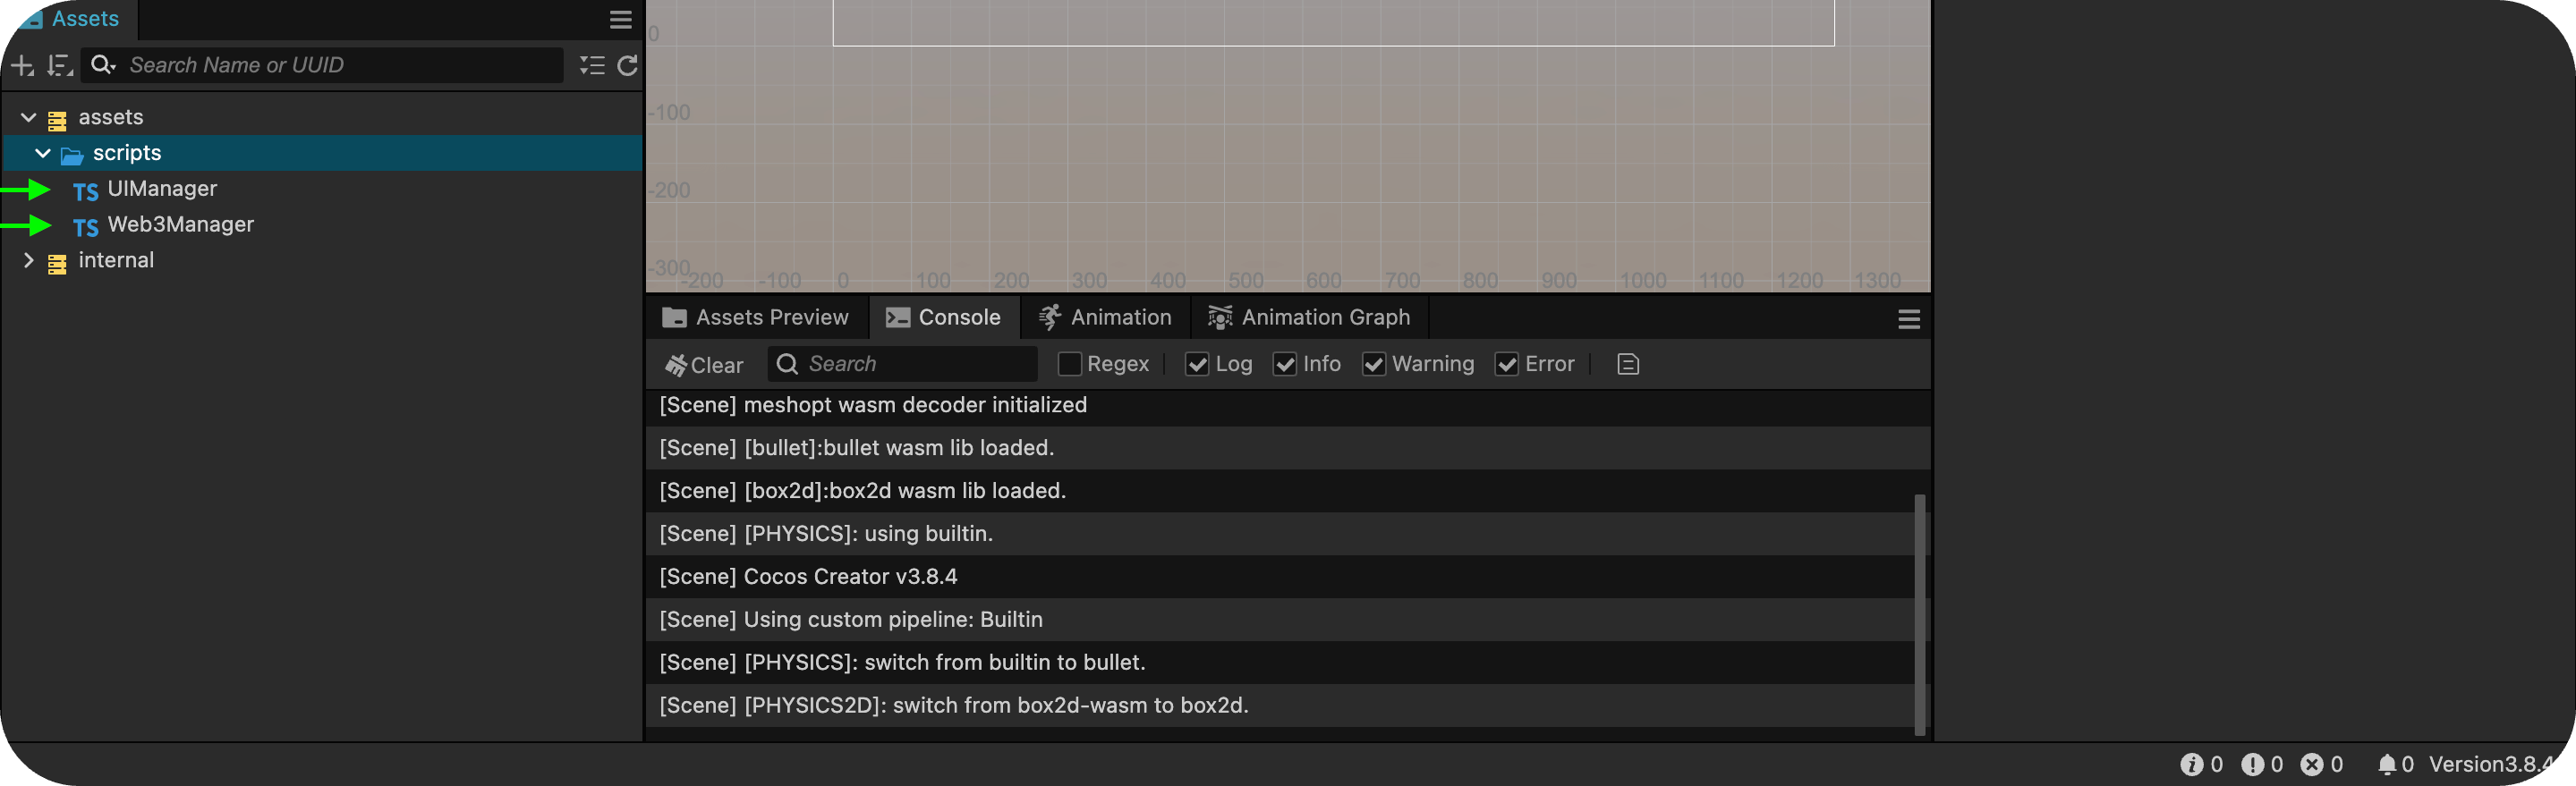
現在您的專案結構應該是這樣的:
assets/ scripts/ Web3Manager.ts UIManager.ts
Web3Manager.ts - 處理區塊鏈互動
Web3Manager 指令碼負責所有區塊鏈相關功能。
** 主要特色**
- SDK 初始化 - 設定 Mini Dapp SDK。
- 錢包連線 - 允許使用者連接他們的錢包。
- 代幣鑄造 - 啟用代幣鑄造功能。
- 餘額擷取 - 擷取使用者的代幣餘額。
代碼實施:
import { _decorator, Component, Node, director, EventTarget, sys } from 'cc'const { ccclass, property } = _decorator// Global event bus for Web3 eventsexport const web3Events = new EventTarget()@ccclass('Web3Manager')export class Web3Manager extends Component { private static instance: Web3Manager = null private sdk: any = null private connectedAddress: string = '' // Configuration private readonly CONTRACT_ADDRESS = '0xbe9b8eB864F7E363ee834054e4391fb9b4e69B90' // REPLACE CONTRACT ADDRESS private readonly CHAIN_ID = '1001' private readonly CLIENT_ID = 'PASTE CLIENT ID' onLoad() { if (Web3Manager.instance === null) { Web3Manager.instance = this director.addPersistRootNode(this.node) this.initializeSDK() this.tryRestoreSession() } else { this.node.destroy() } } private async initializeSDK(): Promise<boolean> { try { // @ts-ignore this.sdk = await window.DappPortalSDK.init({ clientId: this.CLIENT_ID, chainId: this.CHAIN_ID, }) console.log('SDK initialized successfully') web3Events.emit('sdkInitialized') return true } catch (error) { console.error('SDK initialization error:', error) web3Events.emit('sdkInitError', error.message) return false } } private async tryRestoreSession() { const savedAddress = sys.localStorage.getItem('connectedAddress') if (savedAddress) { this.connectedAddress = savedAddress web3Events.emit('walletConnected', this.connectedAddress) this.getBalance() } } public async connectWallet(): Promise<void> { try { if (!this.sdk) { const initialized = await this.initializeSDK() if (!initialized) return } const provider = this.sdk.getWalletProvider() const accounts = await provider.request({ method: 'kaia_requestAccounts', }) if (accounts && accounts.length > 0) { this.connectedAddress = accounts[0] sys.localStorage.setItem('connectedAddress', this.connectedAddress) web3Events.emit('walletConnected', this.connectedAddress) this.getBalance() } } catch (error) { console.error('Wallet connection error:', error) web3Events.emit('walletError', error.message) } } public async mintToken(amount: number): Promise<void> { try { if (!this.connectedAddress) { throw new Error('Wallet not connected') } const provider = this.sdk.getWalletProvider() const mintSignature = '0xa0712d68' // @ts-ignore const amountHex = amount.toString(16).padStart(64, '0') const data = mintSignature + amountHex const tx = { from: this.connectedAddress, to: this.CONTRACT_ADDRESS, value: '0x0', data: data, gas: '0x4C4B40', } const txHash = await provider.request({ method: 'kaia_sendTransaction', params: [tx], }) // After getting txHash, immediately update balance web3Events.emit('mintSuccess', txHash) await this.getBalance() // Get updated balance right after minting } catch (error) { console.error('Minting error:', error) web3Events.emit('mintError', error.message) } } public async getBalance(): Promise<void> { try { if (!this.connectedAddress) { throw new Error('Wallet not connected') } const provider = this.sdk.getWalletProvider() const balanceSignature = '0x70a08231' // @ts-ignore const addressParam = this.connectedAddress.substring(2).padStart(64, '0') const data = balanceSignature + addressParam const result = await provider.request({ method: 'kaia_call', params: [ { from: this.connectedAddress, to: this.CONTRACT_ADDRESS, data: data, }, 'latest', ], }) const balance = parseInt(result, 16) web3Events.emit('balanceReceived', balance.toString()) } catch (error) { console.error('Balance fetch error:', error) web3Events.emit('balanceError', error.message) } } public getConnectedAddress(): string { return this.connectedAddress || '' }}
** 主要功能**
- initializeSDK() - 初始化 Mini Dapp SDK。
- connectWallet() - 處理錢包連線。
- mintToken(amount) - 鑄造代幣。
- getBalance() - 擷取代幣餘額。
執行腳本之前,請確保您
- 取代 Web3Manager.ts 中的 YOUR_CLIENT_ID。
- 如有需要,請更新 CONTRACT_ADDRESS。
- 更新 CHAIN_ID 為正確的網路。
UIManager.ts - 處理 UI 互動
UIManager 指令碼管理所有 UI 元件和使用者互動。
** 代碼實施:**
import { _decorator, Component, Node, Label, Button } from 'cc'import { Web3Manager, web3Events } from './Web3Manager'const { ccclass, property } = _decorator@ccclass('UIManager')export class UIManager extends Component { @property(Label) addressLabel: Label = null @property(Label) balanceLabel: Label = null @property(Button) connectButton: Button = null @property(Button) mintButton: Button = null private web3Manager: Web3Manager = null start() { this.web3Manager = this.getComponent(Web3Manager) this.updateUIState(false) this.setupEventListeners() this.setupButtonHandlers() } private setupEventListeners() { web3Events.on('sdkInitialized', this.onSDKInitialized, this) web3Events.on('walletConnected', this.onWalletConnected, this) web3Events.on('balanceReceived', this.onBalanceReceived, this) web3Events.on('mintSuccess', this.onMintSuccess, this) web3Events.on('walletError', this.onError, this) web3Events.on('mintError', this.onError, this) web3Events.on('balanceError', this.onError, this) } private setupButtonHandlers() { this.connectButton.node.on('click', this.onConnectClick, this) this.mintButton.node.on('click', this.onMintClick, this) } onDestroy() { web3Events.off('sdkInitialized', this.onSDKInitialized, this) web3Events.off('walletConnected', this.onWalletConnected, this) web3Events.off('balanceReceived', this.onBalanceReceived, this) web3Events.off('mintSuccess', this.onMintSuccess, this) web3Events.off('walletError', this.onError, this) web3Events.off('mintError', this.onError, this) web3Events.off('balanceError', this.onError, this) } private updateUIState(isConnected: boolean) { if (this.connectButton) { this.connectButton.node.active = !isConnected } if (this.mintButton) { this.mintButton.interactable = isConnected } if (this.addressLabel) { this.addressLabel.node.active = isConnected } if (this.balanceLabel) { this.balanceLabel.node.active = isConnected } } async onConnectClick() { await this.web3Manager.connectWallet() } async onMintClick() { await this.web3Manager.mintToken(1) // Mint 1 token as example } onSDKInitialized() { console.log('SDK initialized') } onWalletConnected(address: string) { this.updateUIState(true) if (this.addressLabel) { this.addressLabel.string = `Connected: ${address.substring( 0, 6 )}...${address.substring(address.length - 4)}` } } onBalanceReceived(balance: string) { if (this.balanceLabel) { this.balanceLabel.string = `Balance: ${balance}` console.log('Balance updated:', balance) // Add this to debug } } onMintSuccess(txHash: string) { console.log(`Mint successful! TX: ${txHash}`) // The balance update will happen automatically because we called getBalance() in mintToken } onError(error: string) { console.error('Error:', error) }}
將指令碼附加到節點和連接 UI 元件
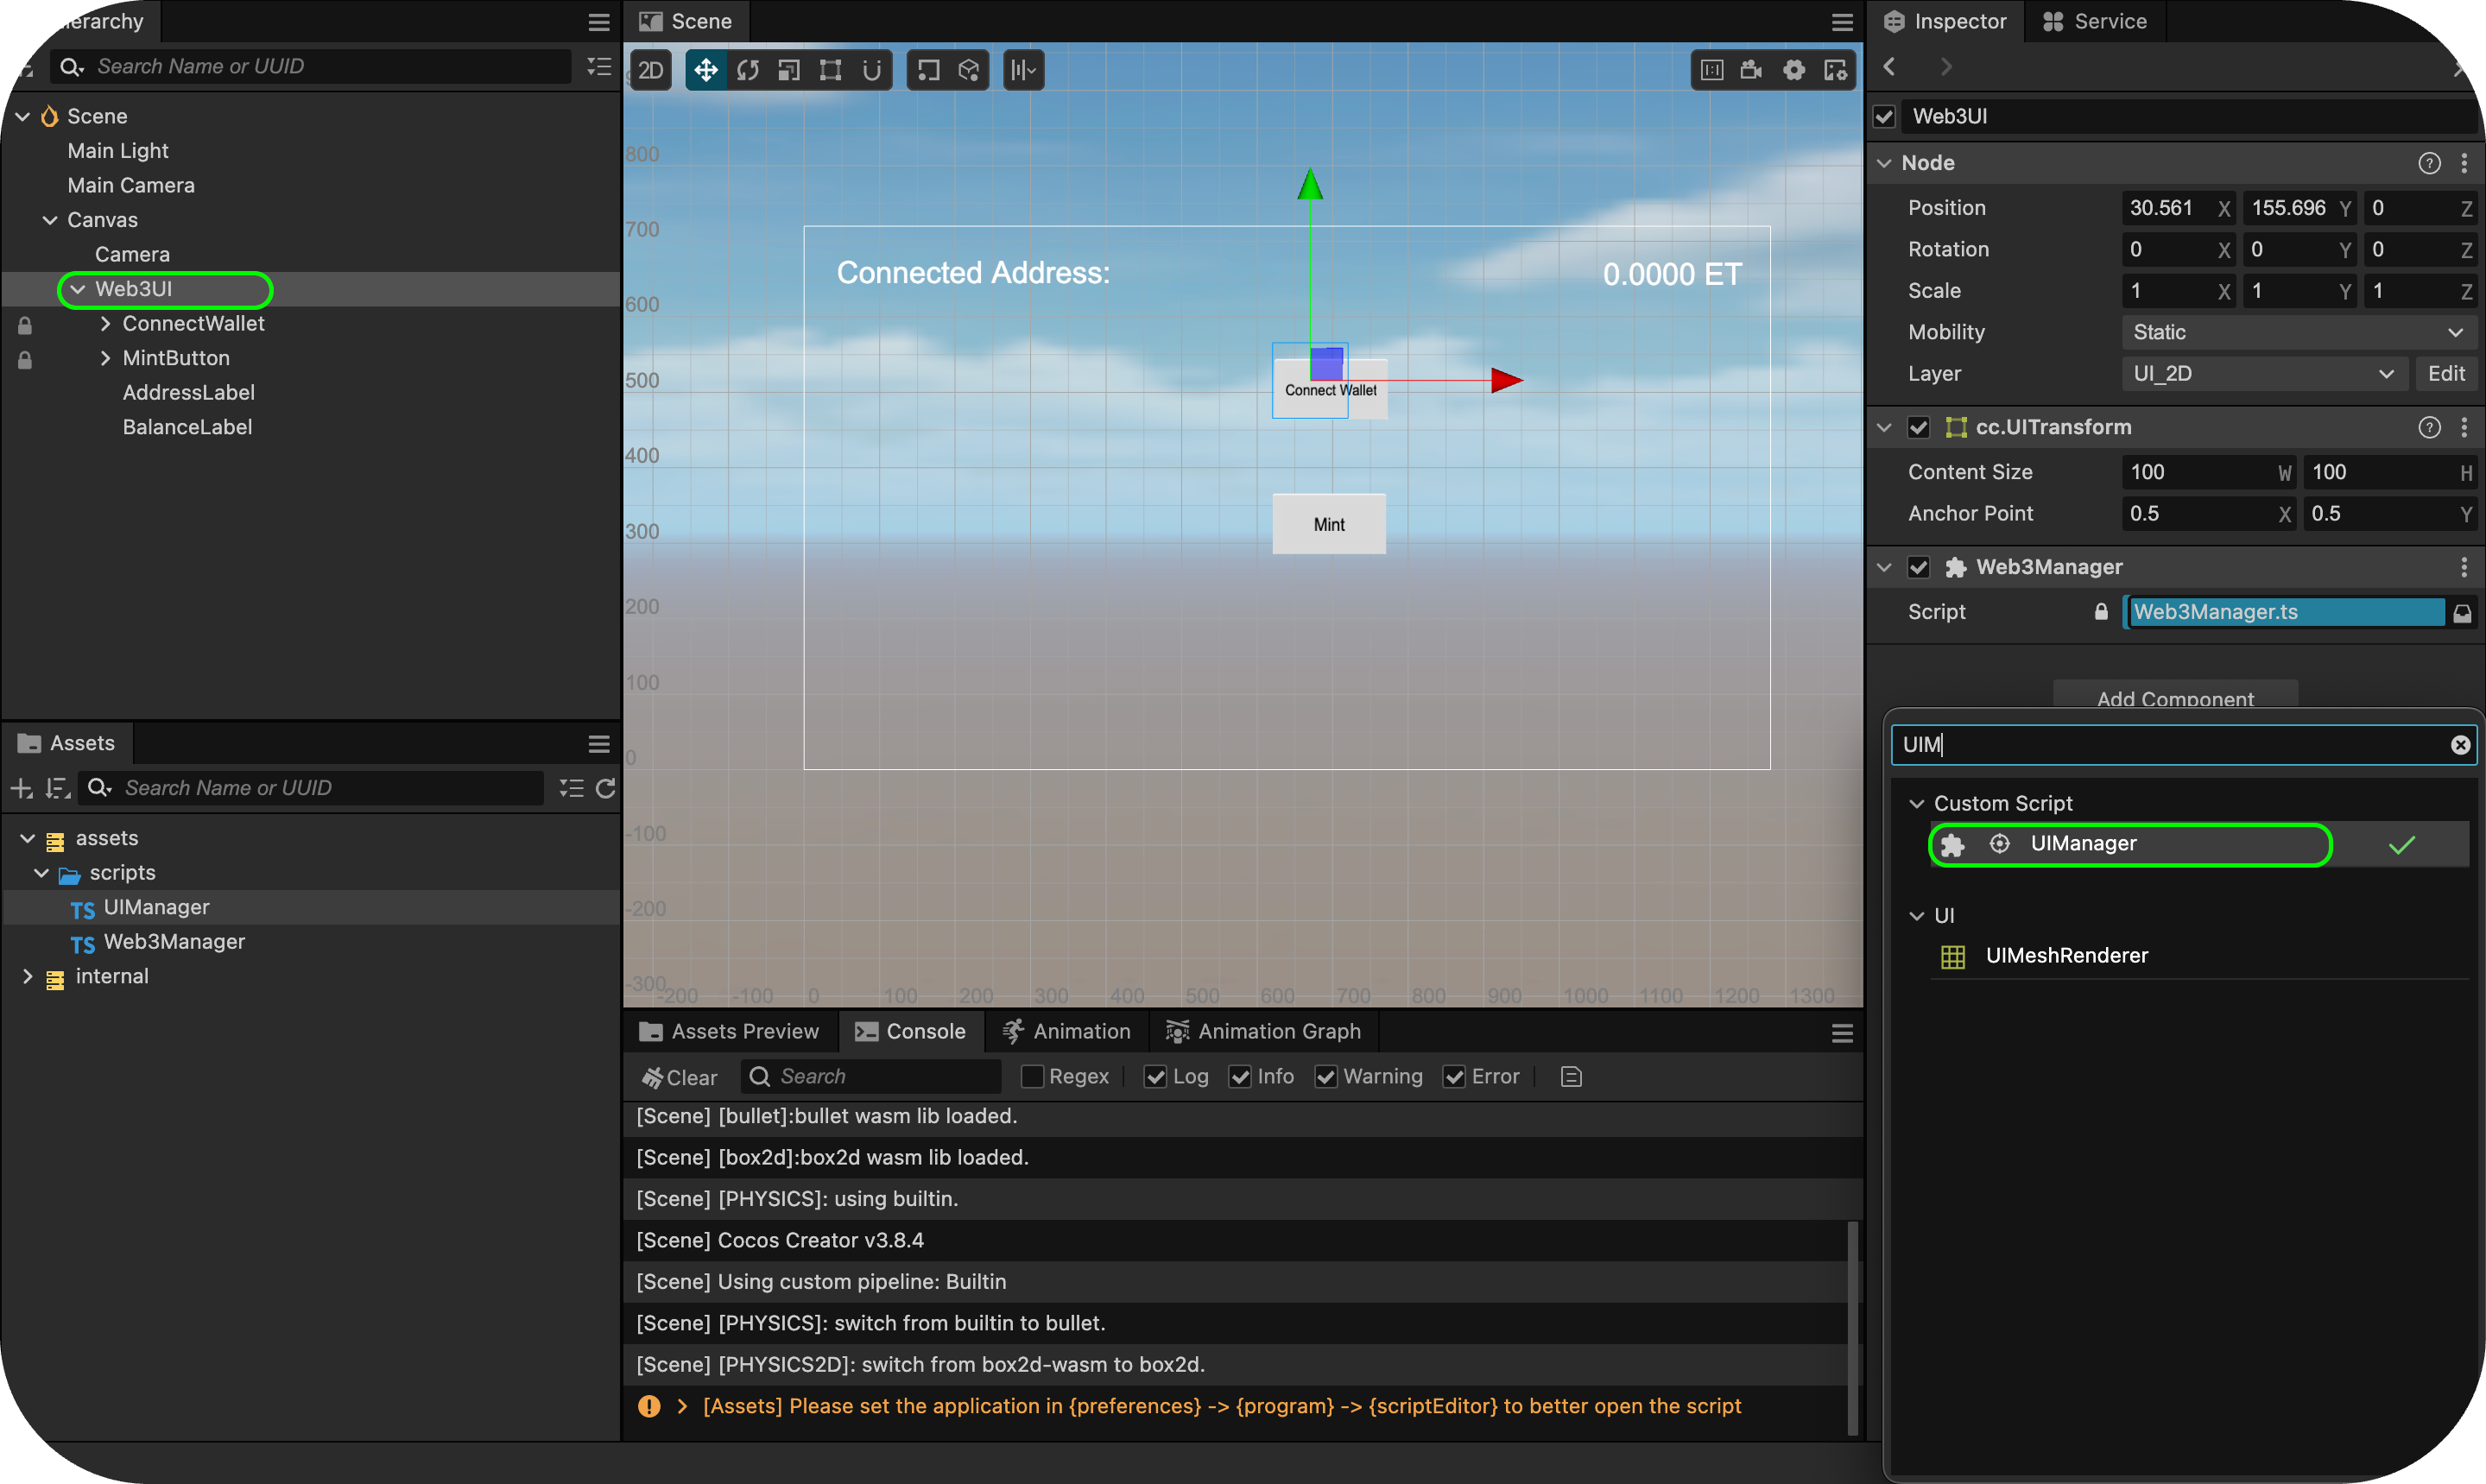
1. 將腳本附加到 Web3UI 節點
- 選取 Web3UI 節點。
- 在 Inspector 中,按一下 Add Component。
- 搜尋並選擇 Web3Manager。
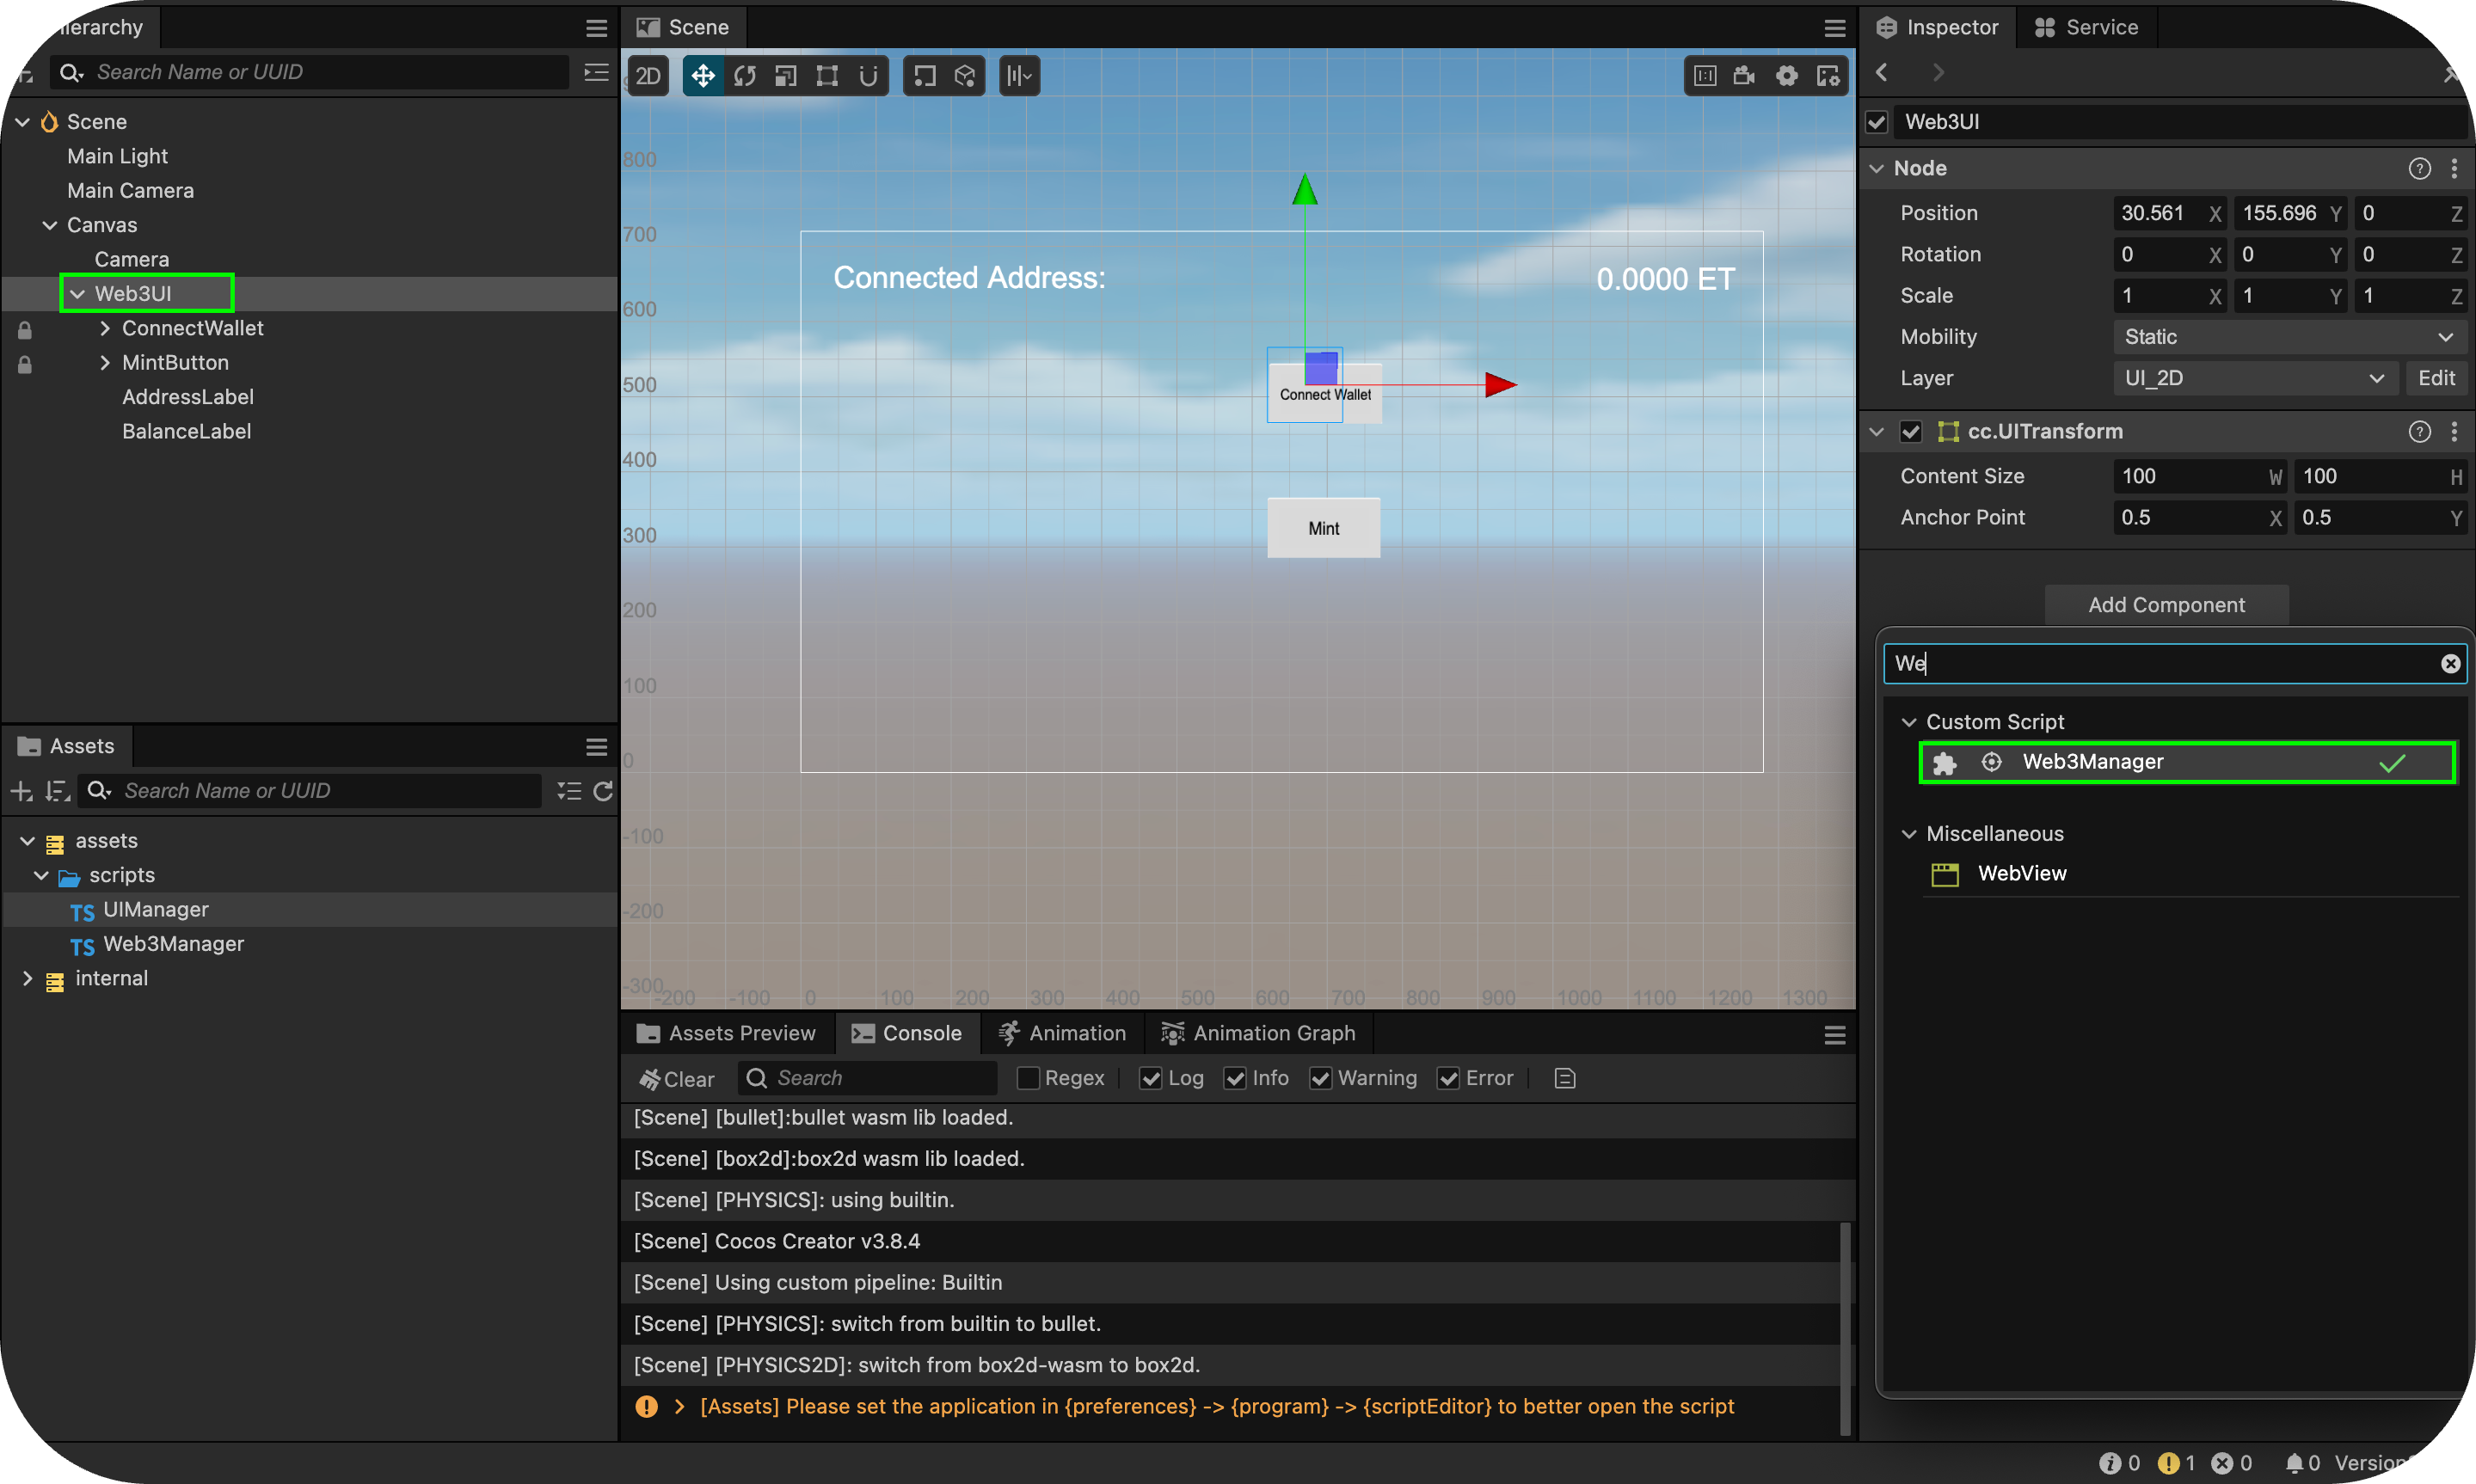
- 重複上述步驟新增 UIManager。
2. 連接 UI 元件
- 選取 Web3UI 後,前往 Inspector。
- 將對應的 UI 元素從 Hierarchy 拖放到各自的欄位中:
- 地址標籤
- 結餘標籤
- 連接錢包按鈕
- 薄荷鈕扣
