このページは英語からの機械翻訳を使用しており、誤りや不明瞭な表現が含まれている可能性があります。最も正確な情報については、オリジナルの英語版をご覧ください。頻繁な更新のため、一部のコンテンツはオリジナルの英語になっている可能性があります。Crowdinでの取り組みに参加して、このページの翻訳改善にご協力ください。 (Crowdin translation page, Contributing guide)
NFTロック
Team FinanceのNFTロック機能により、クリエイターは個人またはチームに割り当てられたNFTを、時間ロックされたスマートコントラクト保管庫に転送することで、設定された期間安全にロックすることができます。
チームファイナンスのNFTロックを利用することで、プロジェクトはコミットメントを示し、信頼性を築き、詐欺のリスクを減らすことができます。
はじめに
このチュートリアルでは、Team FinanceでNFTをロックする方法を学びます。 始めよう!
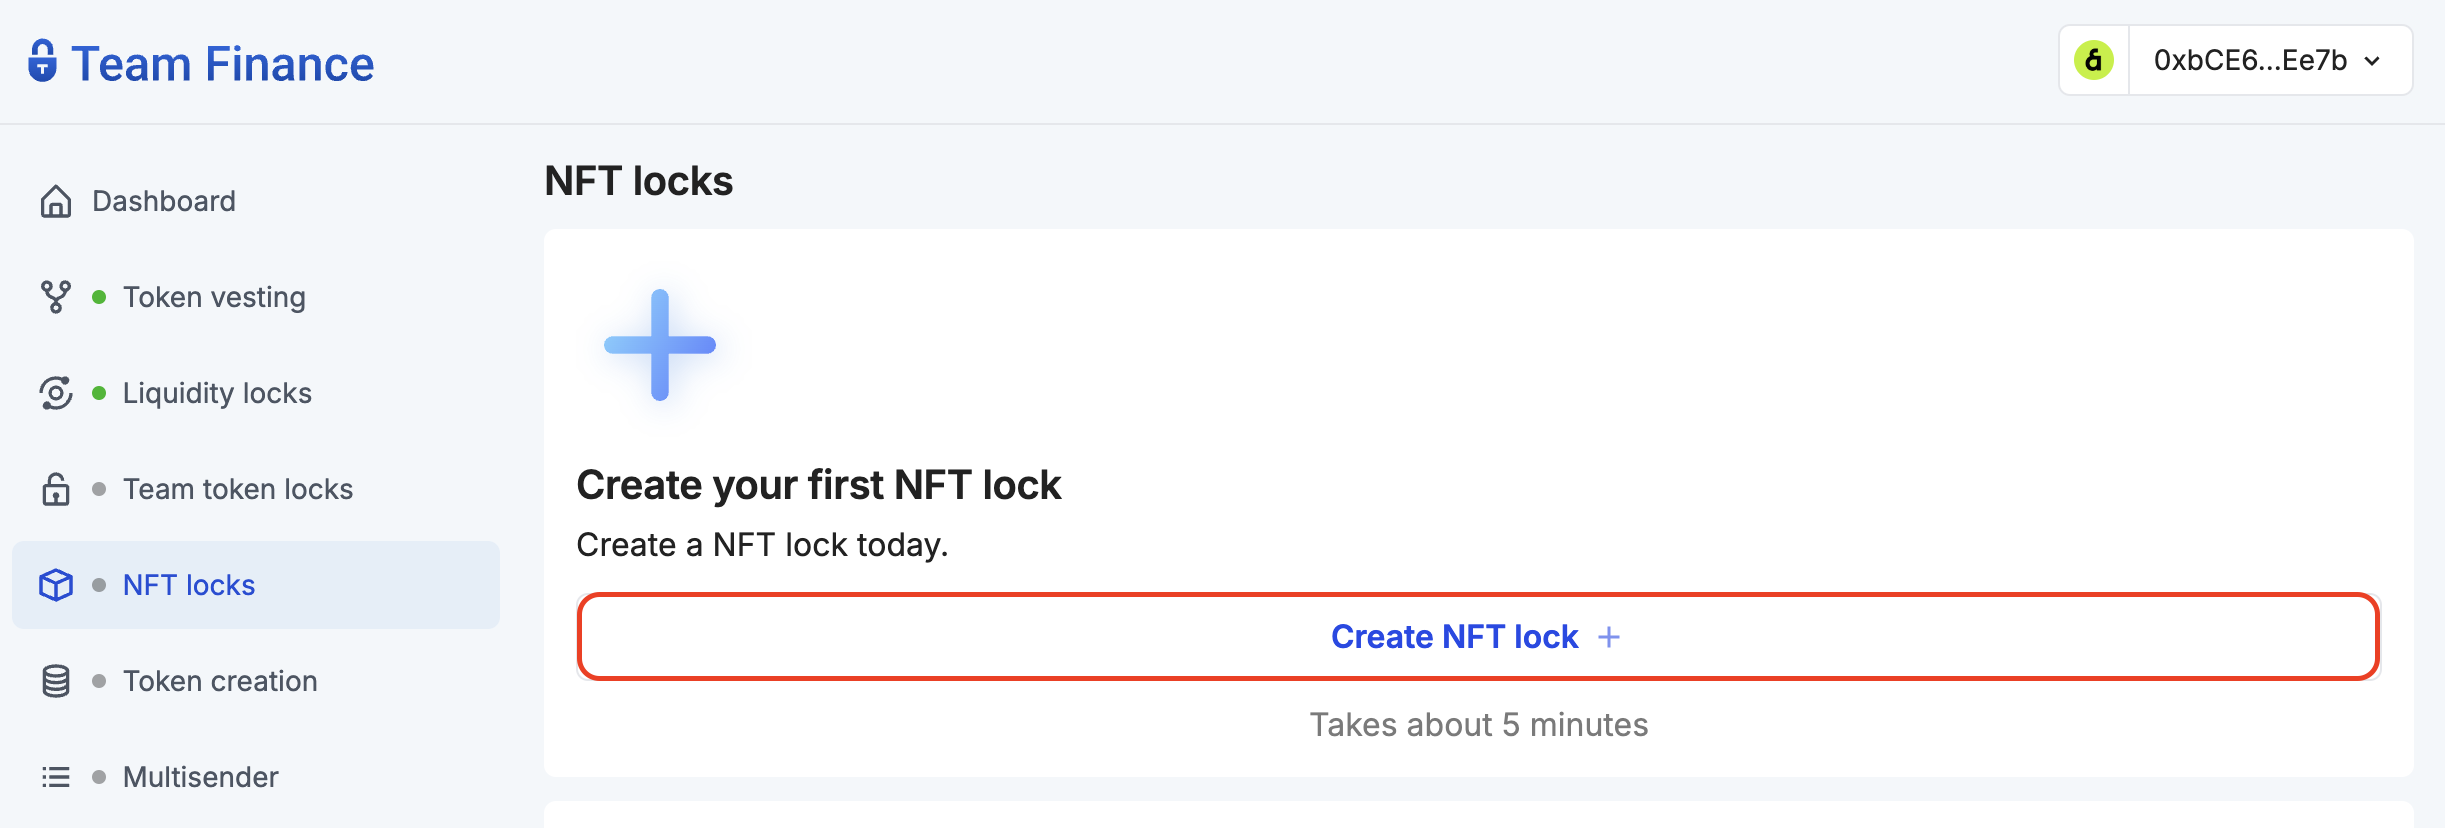
- Team Finance NFT locks タブに移動し、Create NFT lock をクリックします。
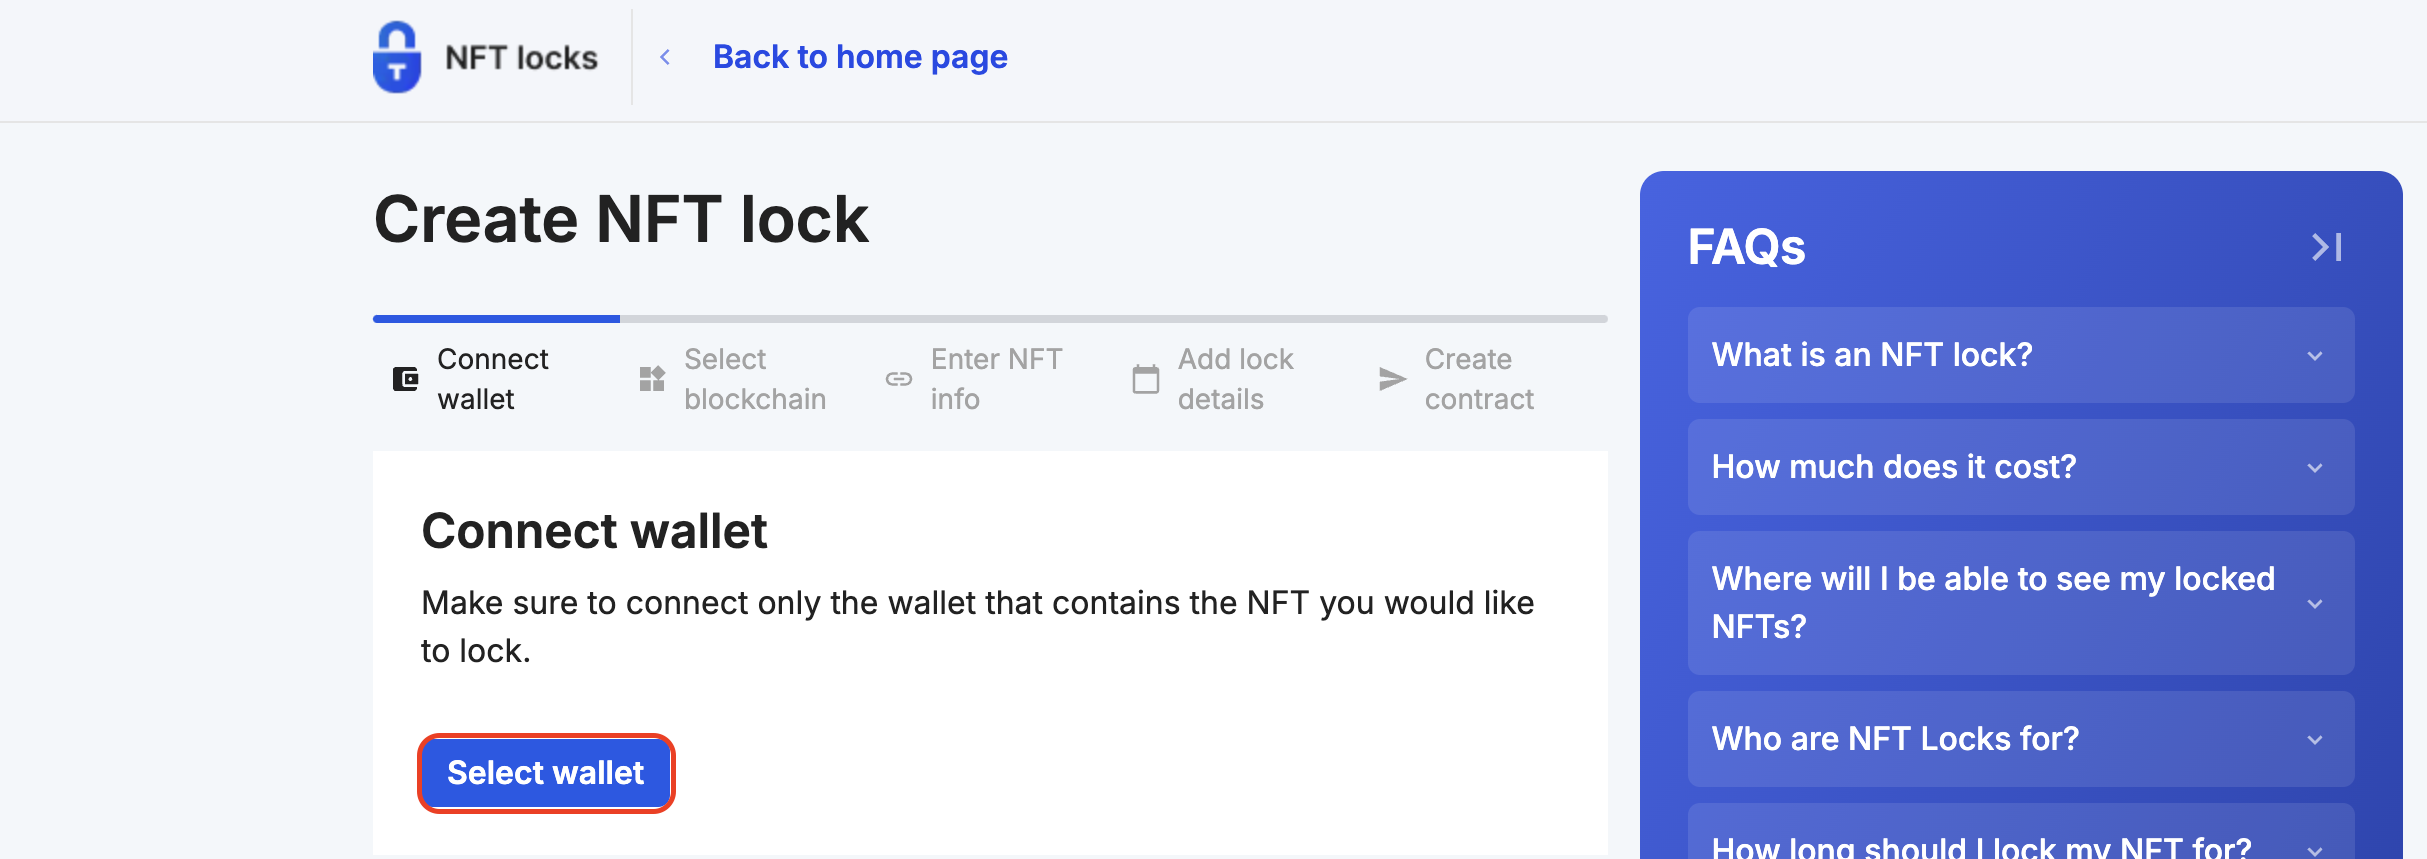
- ウォレットを選択**し、続行をクリックして、ウォレットをチームファイナンスに接続します。
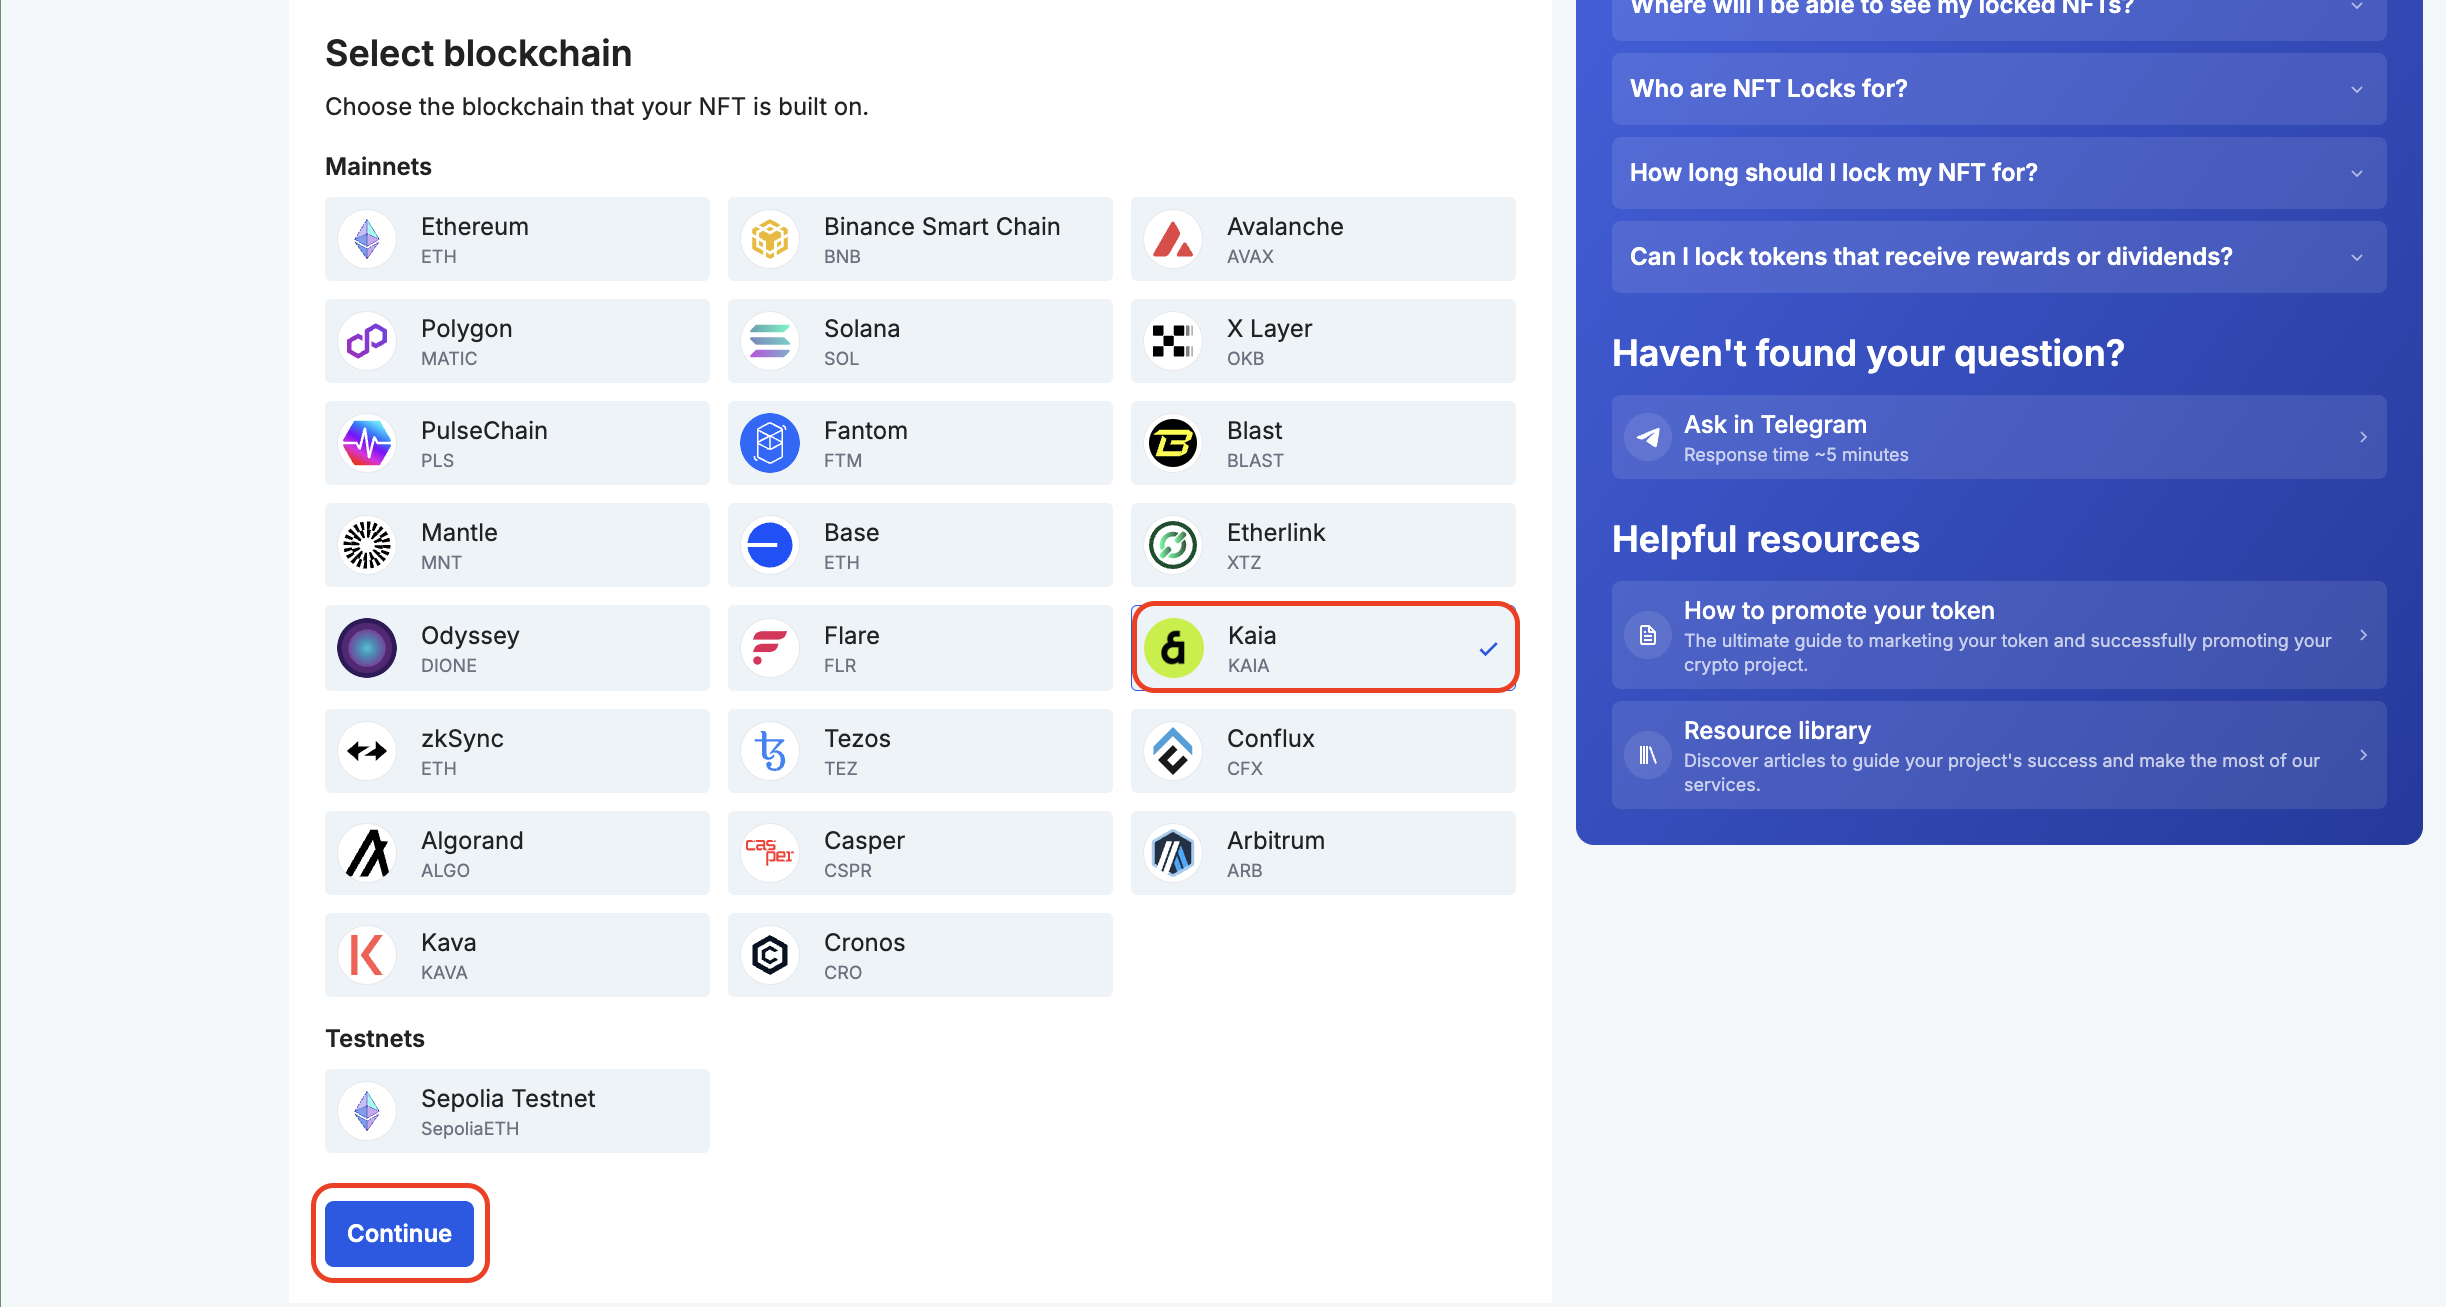
- ブロックチェーン・ネットワークでKaiaを選択し、Continueをクリックする。
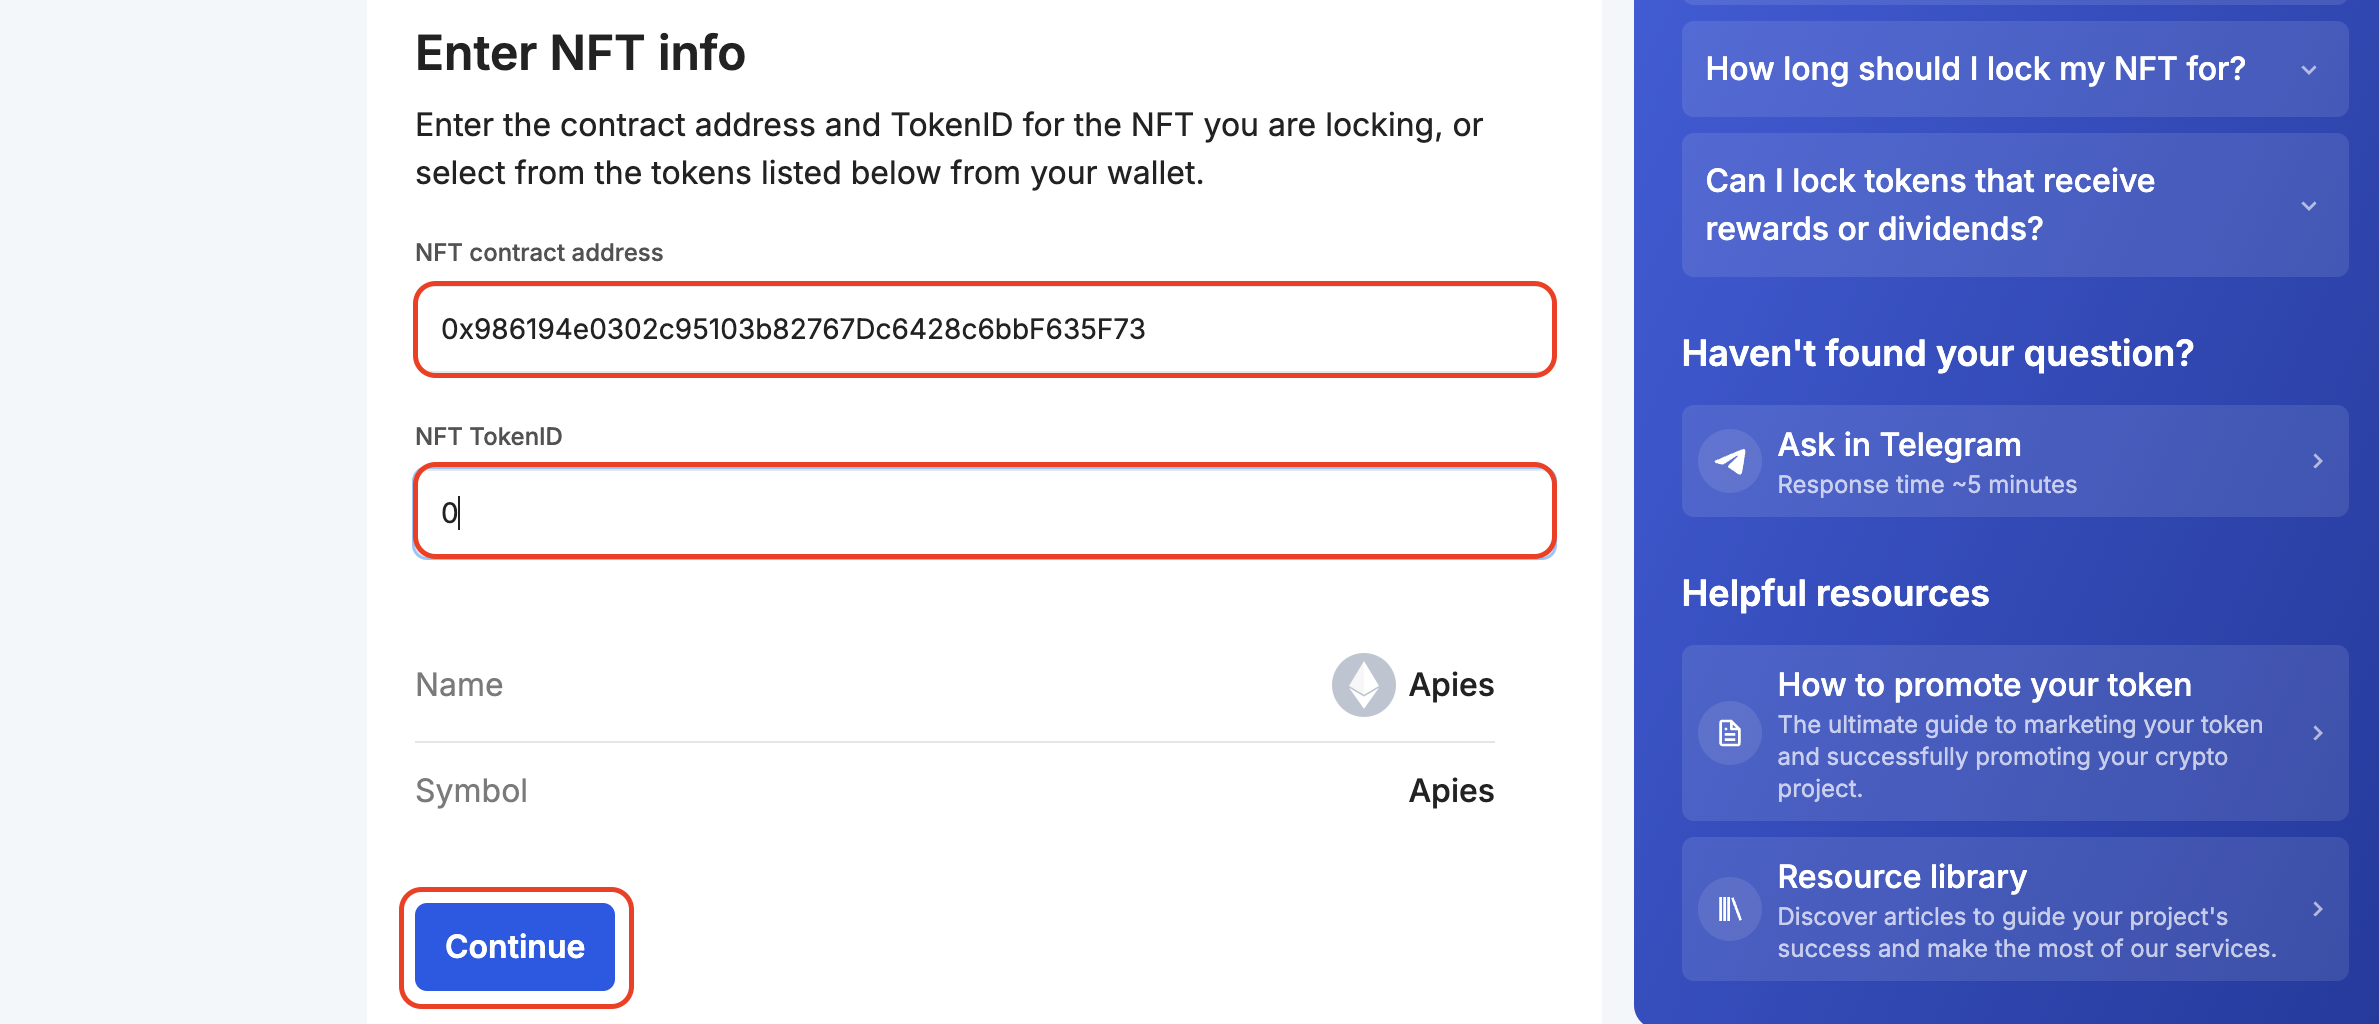
- ロックするNFTの情報(契約アドレスとtokenid)***を入力し、Continueをクリックします。
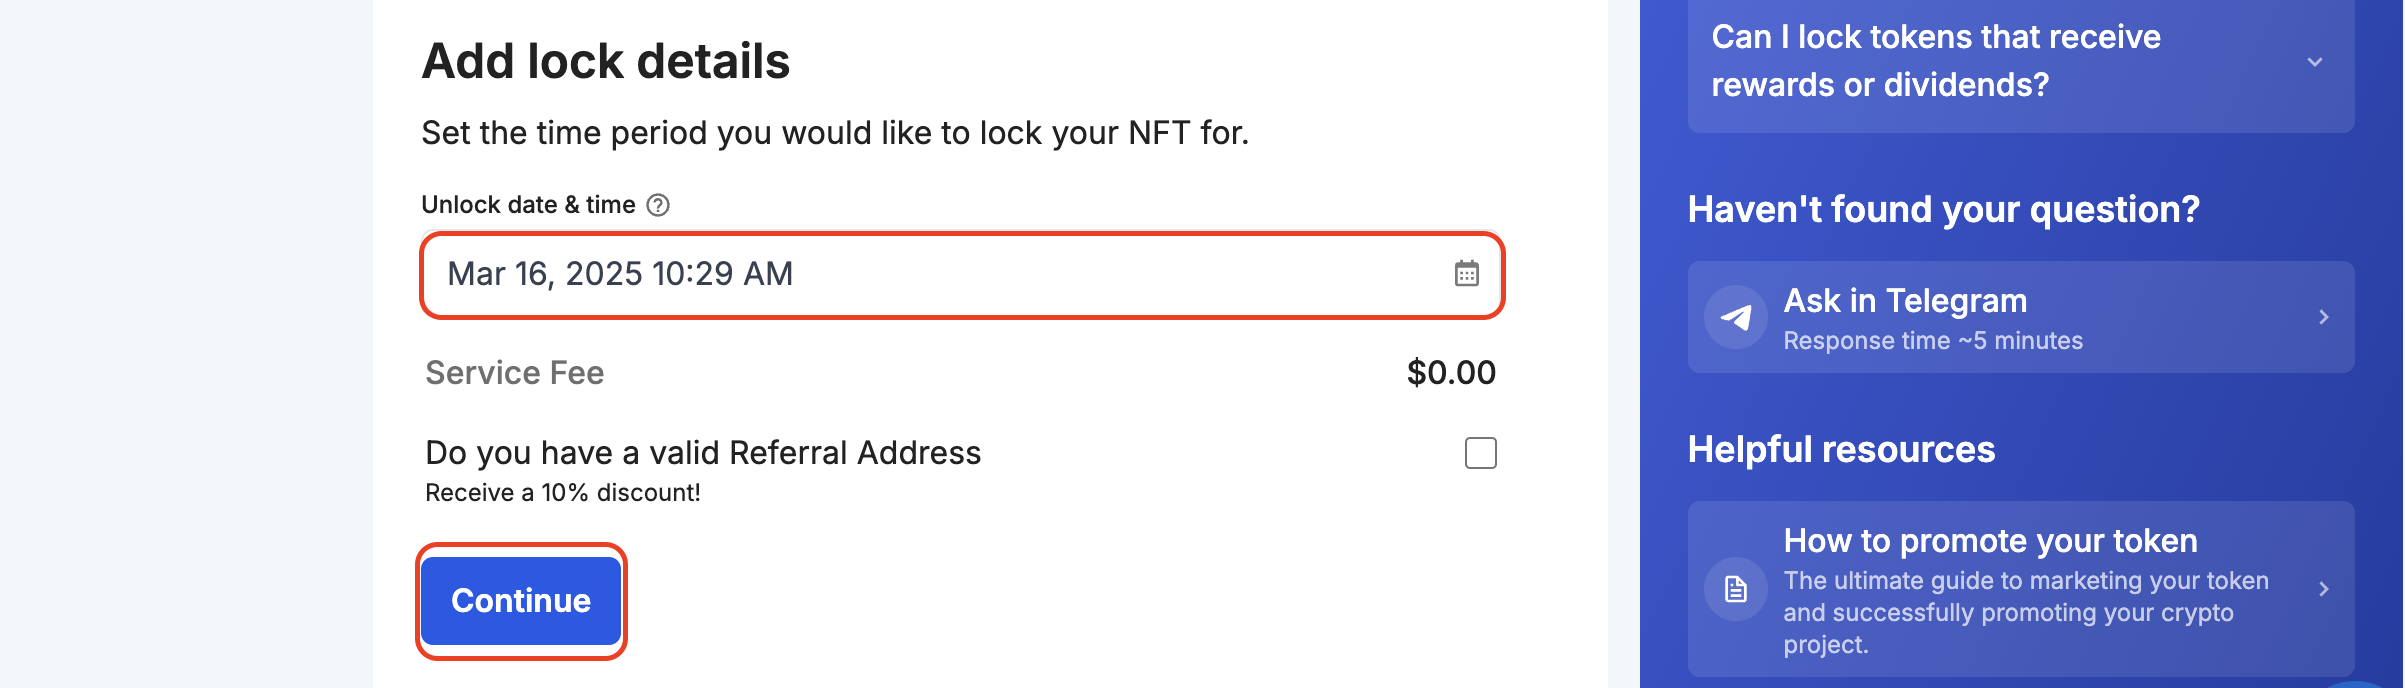
- NFTをロックする期間を設定します。
- 許可を与える**をクリックして、NFT トークンをロックする権限を与えます。

これにより、承認トランザクションに署名するよう促される。
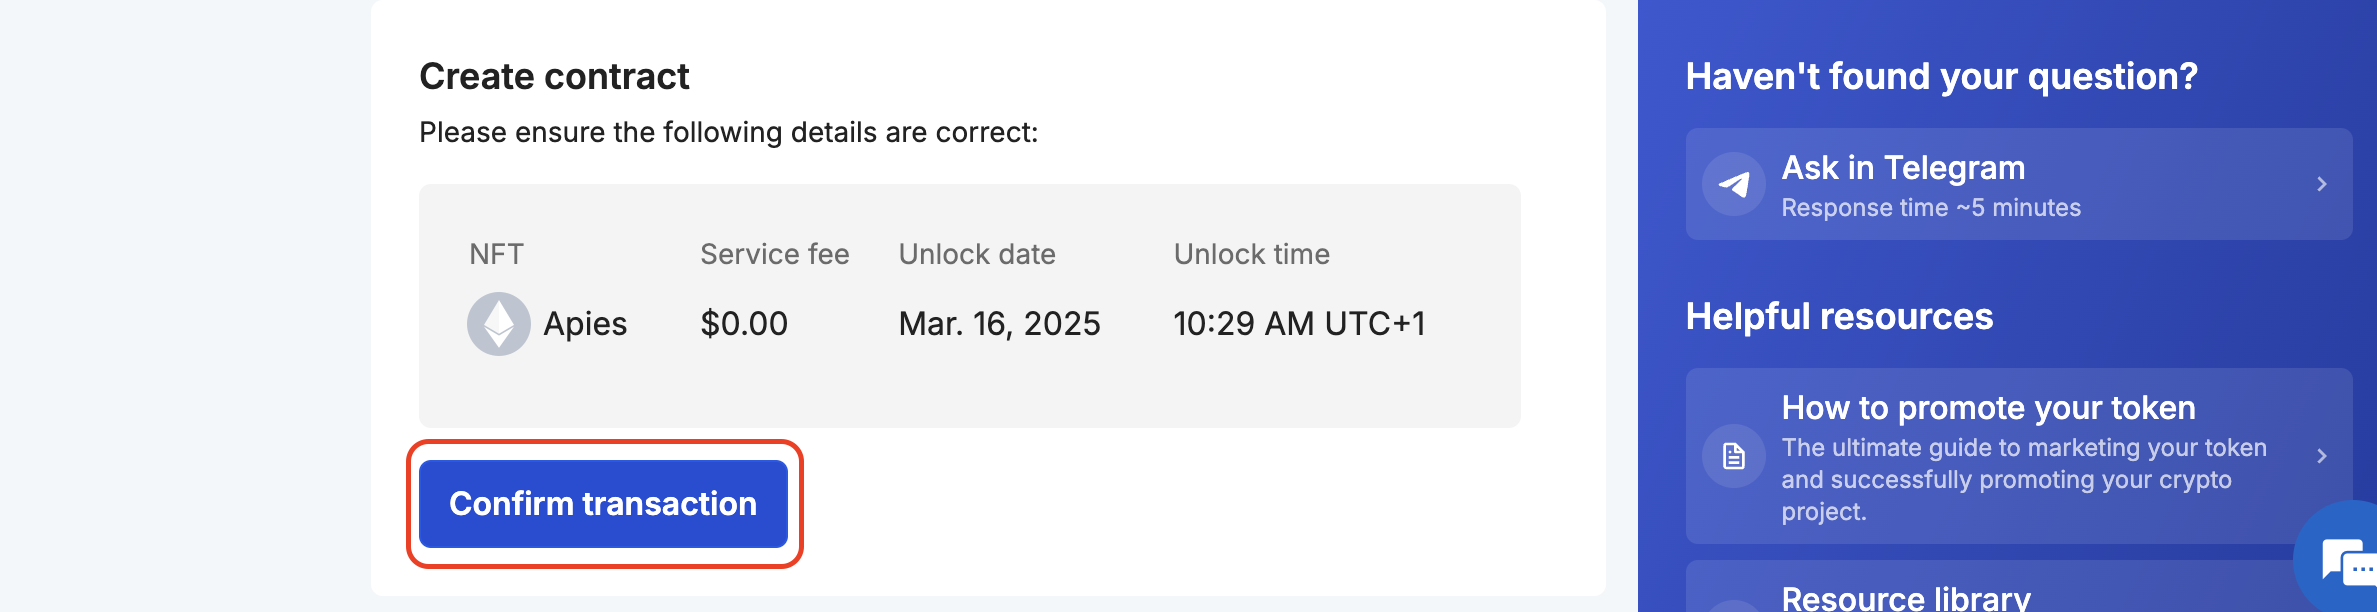
- NFTロックの詳細を確認し、Confirm transactionをクリックします。 あなたの財布は、プロセスを完了するために取引に署名するよう求められます。
- 確認後、取引状況を表示するページに移動します。 お取引が確認されるまで、ページからの移動はご遠慮ください。
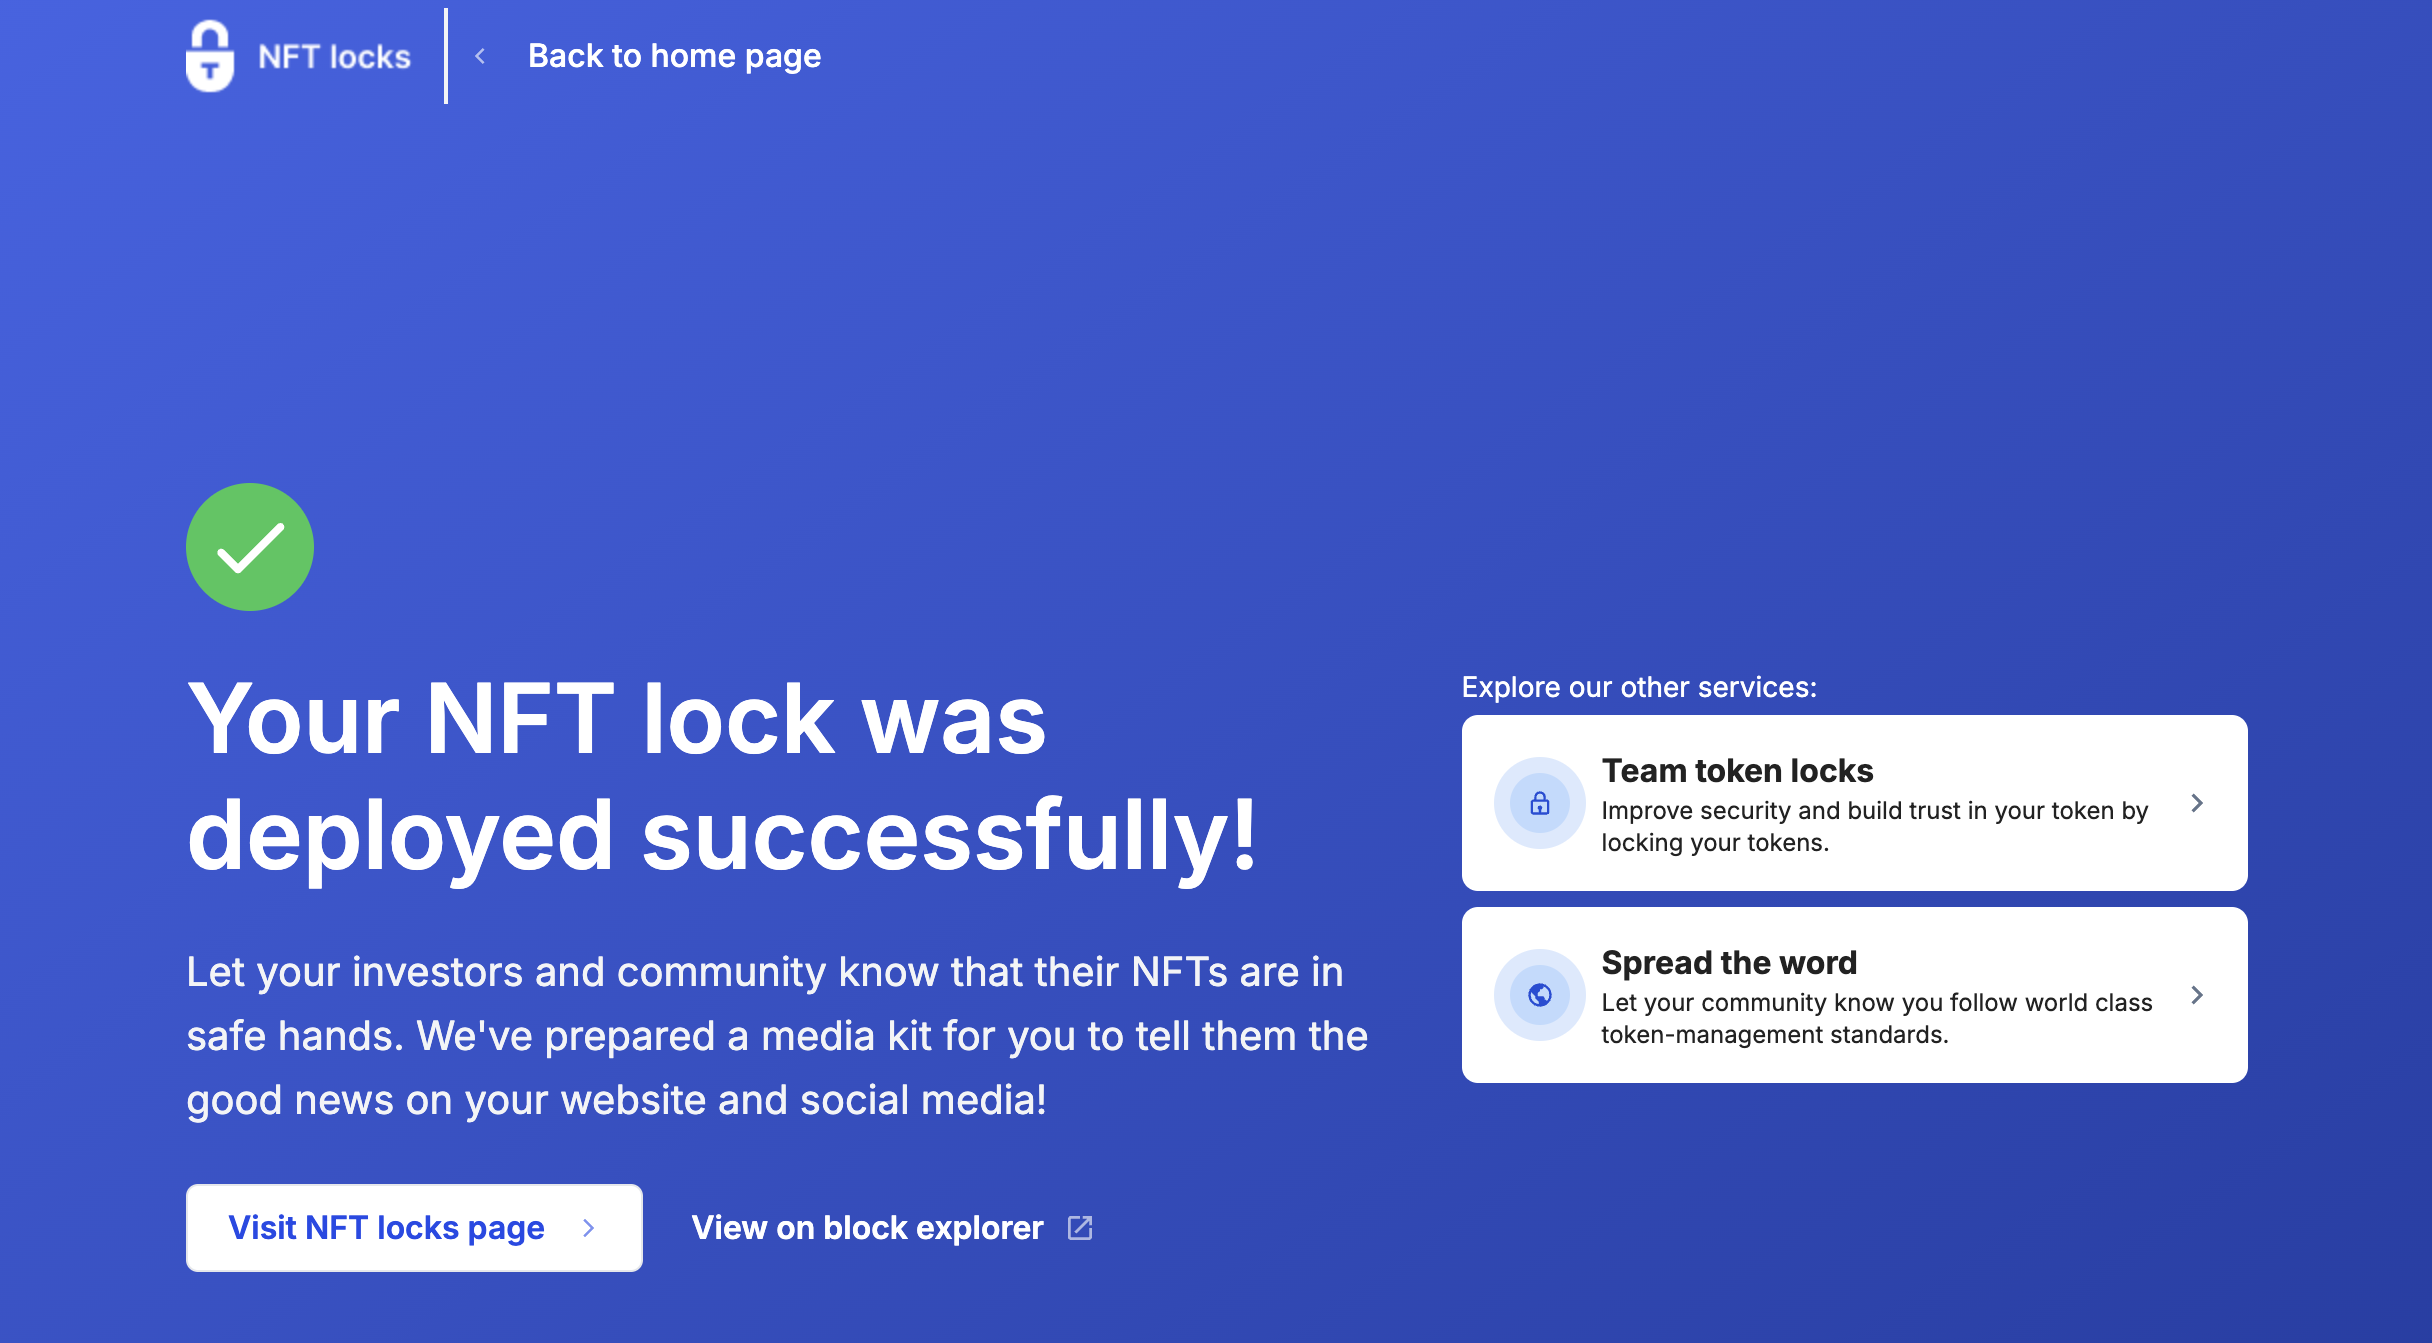
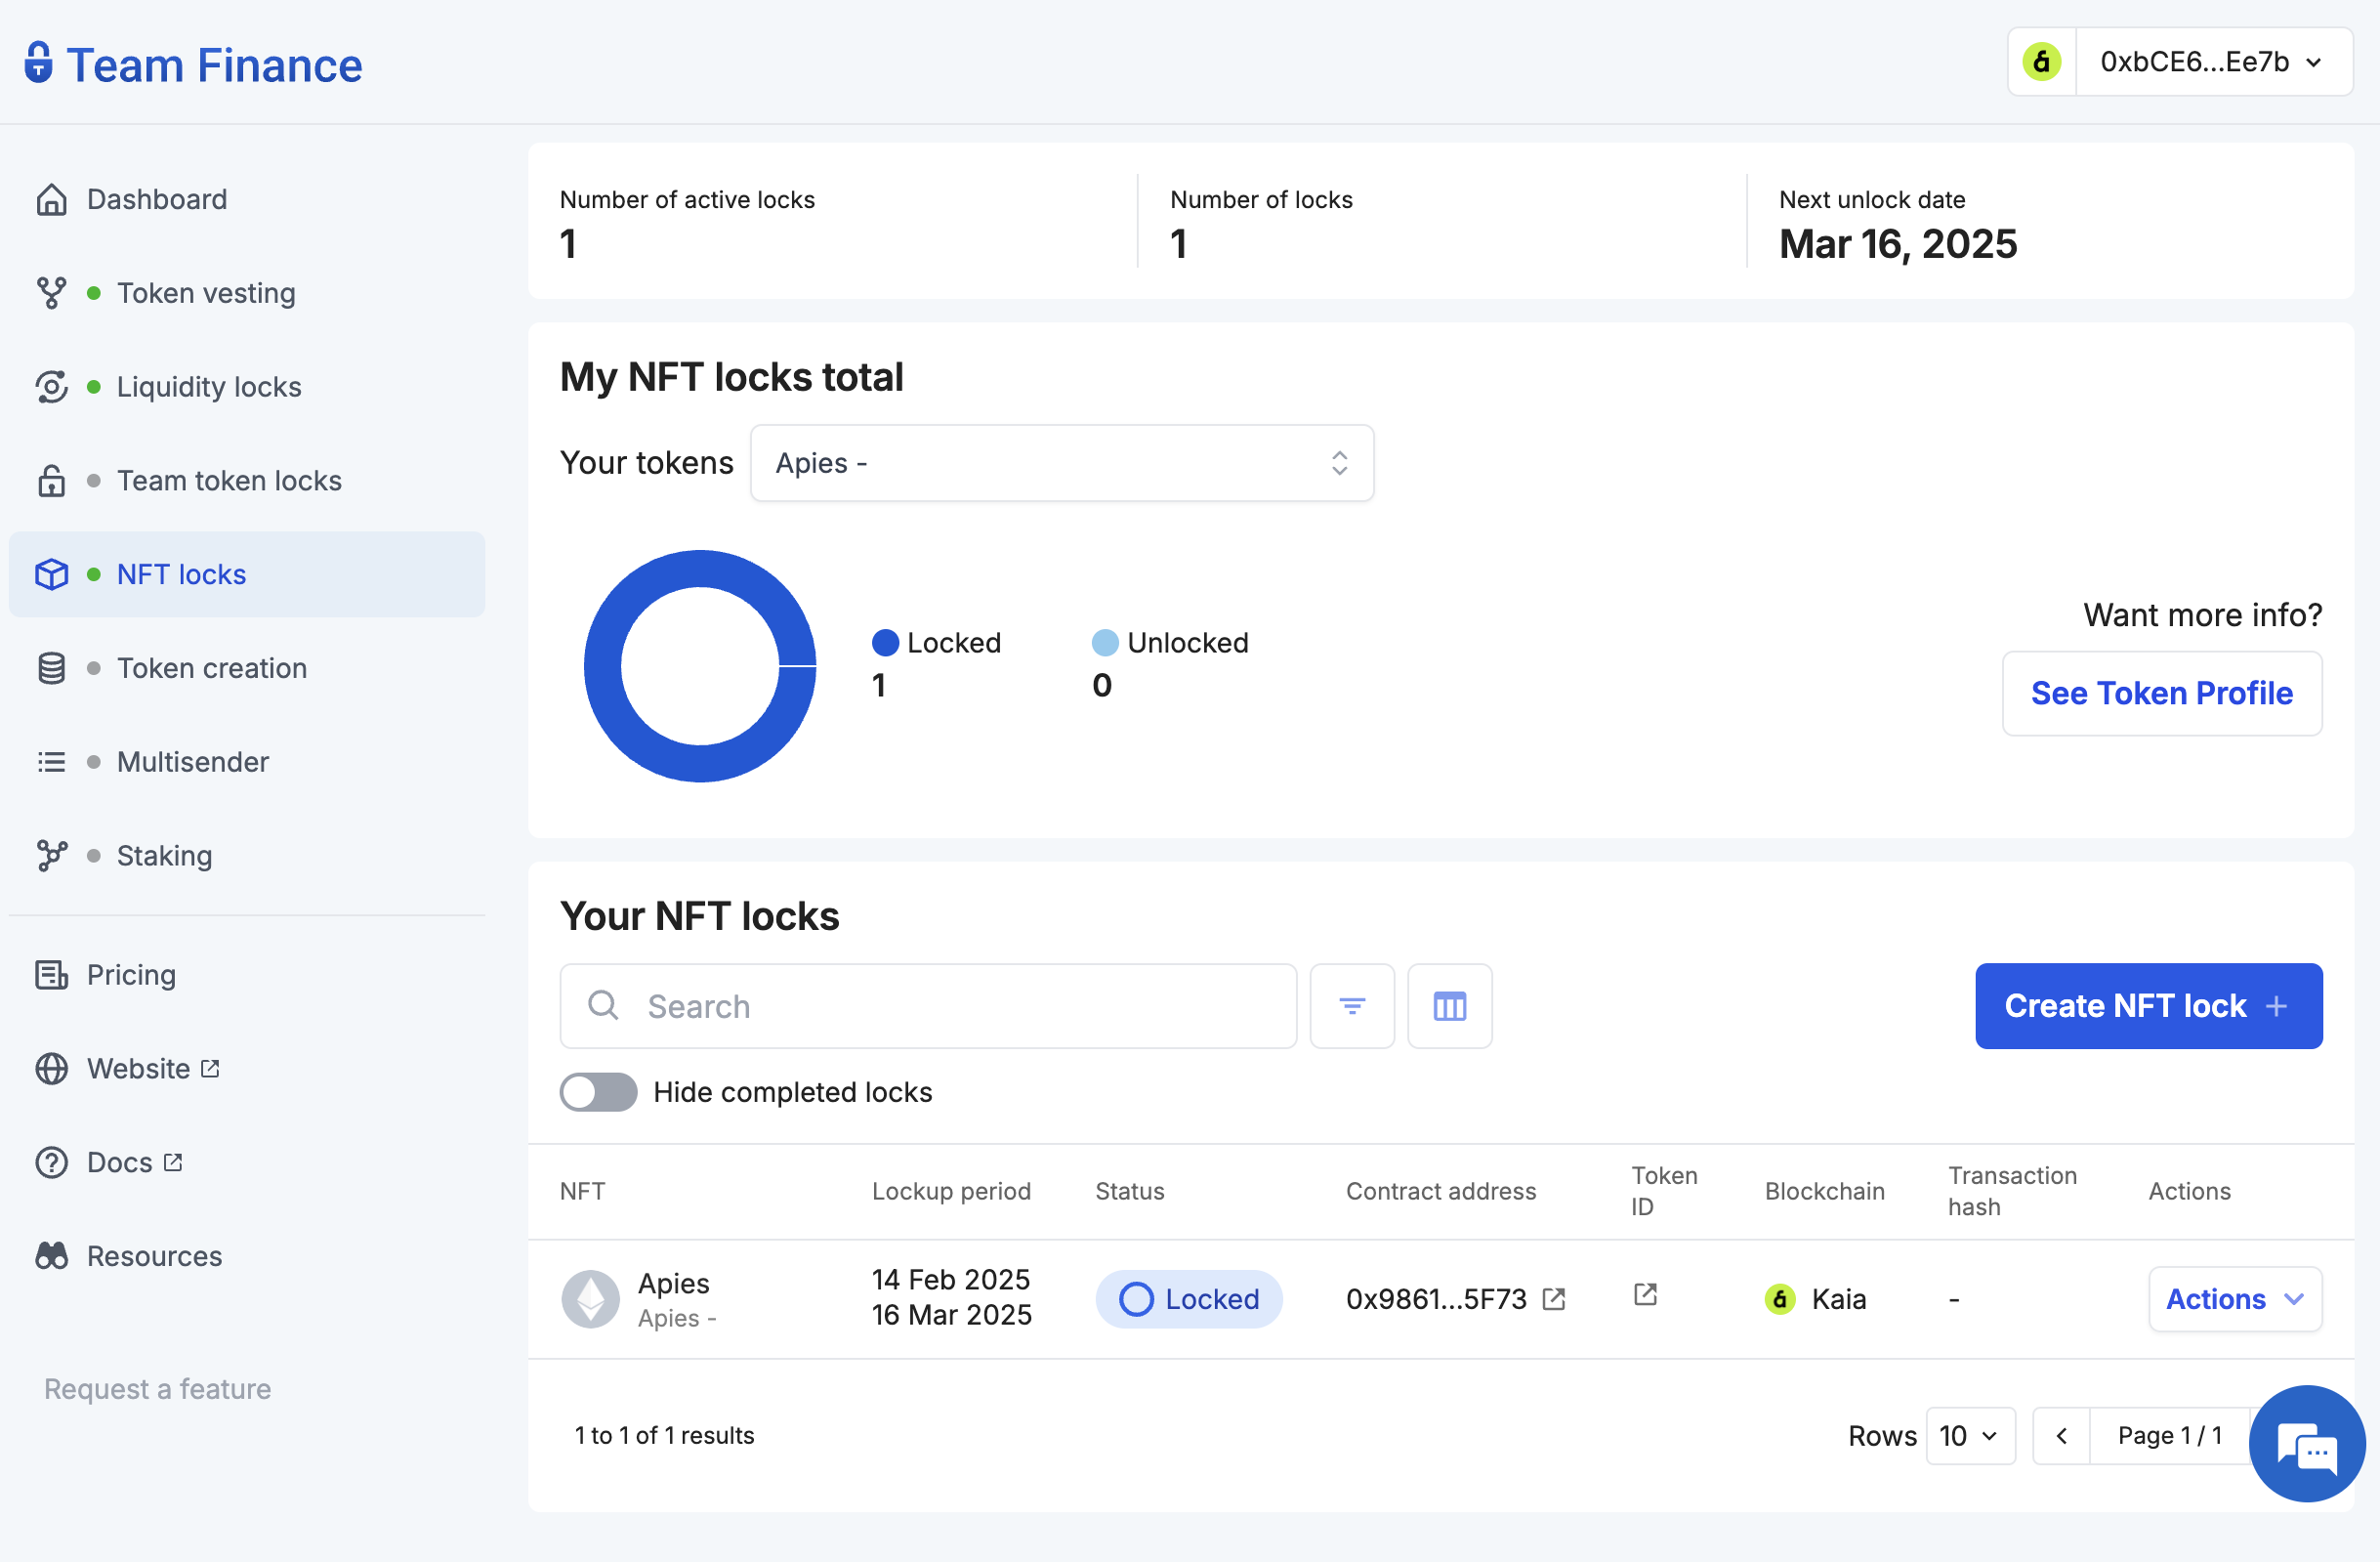
- おめでとう! Team Finance を使用して NFT ロックを作成しました。 ダッシュボードでロックの詳細や進捗状況を確認することができます。